Fix: Could Not Initialize Graphics Device Windows 11
Play with the different compatibility settings
5 min. read
Published on
Read our disclosure page to find out how can you help Windows Report sustain the editorial team. Read more

You may encounter the could not initialize graphics device error on your Windows 11 device when you try to launch a graphic-intensive game or any other app that uses significant GPU resources.
The causes usually revolve around your GPU so it could be outdated, missing, incompatible or corrupt drivers, incorrect graphic settings or your GPU is failing. When this happens, you’ll notice some display issues and an overall degraded performance from your PC.
How do I fix the could not initialize graphics device error in Windows 11?
1. Reinstall DirectX12 and re-enable DirectDraw and Direct3D
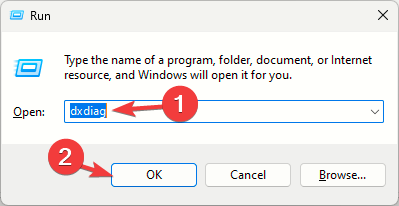
- Press Windows + R to open the Run window.
- Type dxdiag and click OK to open DirectX Diagnostic Tool.
- Go to the System tab and check the DirectX Version; it should be DirectX 12.
- If not, you need to update it; visit the Microsoft official page for DirectX.
- Select your preferred language and click Download.
- A file will be downloaded, double-click it, and initiate the installation of DirectX12.
- Follow the on-screen instructions to complete the process.
- Press the Windows key + R, type dxdiag, and click OK.
- Click the No button when prompted to check if you want to check if your driver is signed.
- Next, click the Display tab at the top and check if DirectDraw Acceleration and Direct3D Acceleration are enabled.
- Next, press the Windows key, type turn windows, and select Turn Windows features on or off.
- Check the Legacy Components box and press the + sign next to it to expand it.
- Finally, check the box next to Direct3D and click the OK button.
2. Address graphics card issues
2.1 Update video card driver
- Press the Windows key + X and select Device Manager.
- Double-click the Display adapters option to expand it and right-click the device there.
- Now, select Update driver.
- Finally, click Search automatically for drivers and install any available updates.
2.2 Disable graphics card
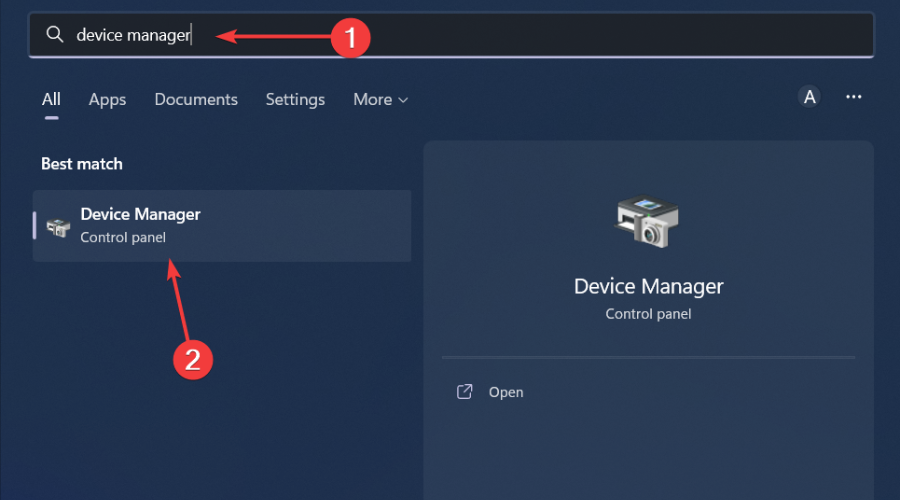
- Click the Search icon, type Device Manager in the search bar, and click Open.
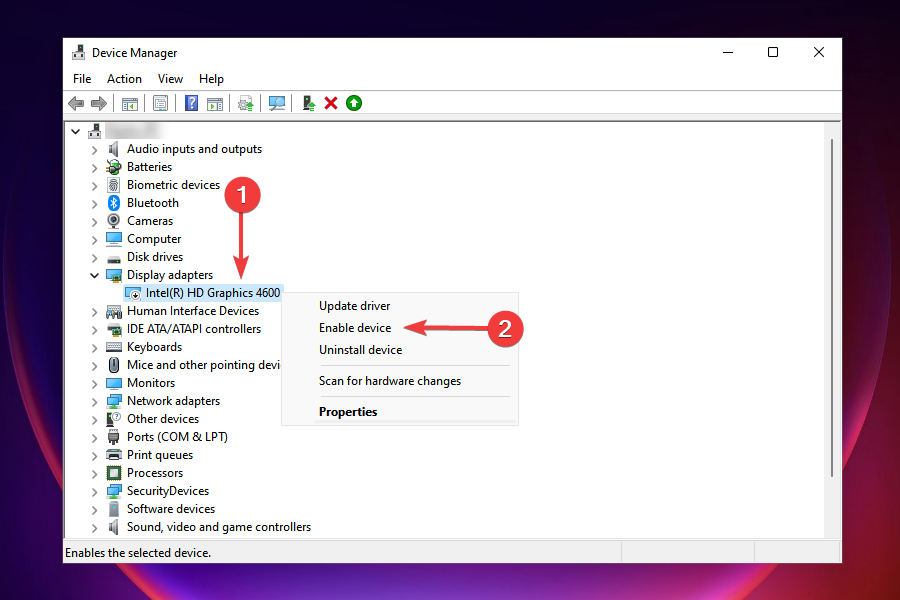
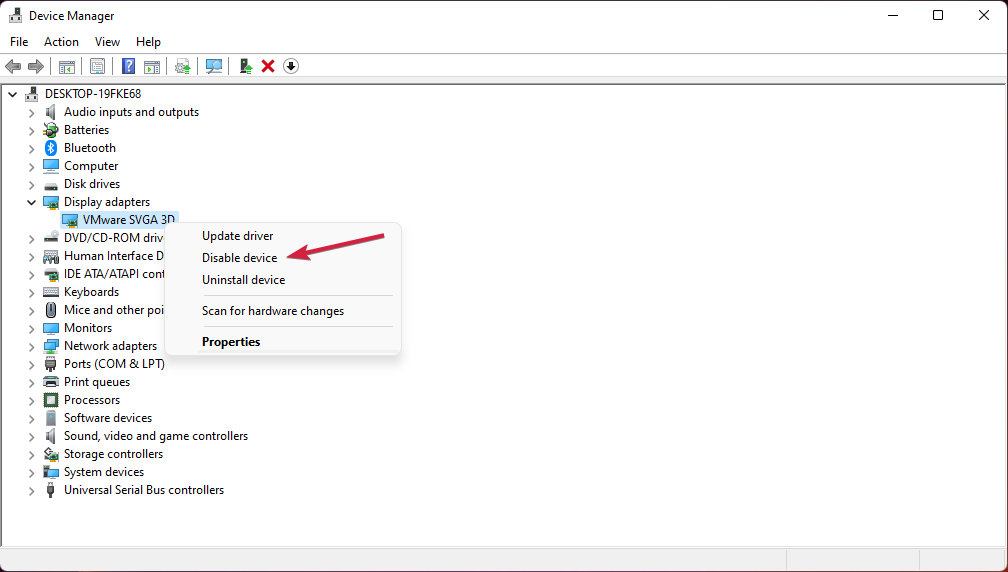
- Navigate to Display adapters to expand, right-click on your graphics card and select Disable.
- Restart your PC then repeat steps 1 to 2 only this time, select Enable device.
2.3 Reinstall the device driver
- Hit the Windows key, type Device Manager in the search bar, and click Open.
- Navigate to Display adapters to expand, right-click on your graphics card and select Uninstall device.
- Click on Uninstall in the next pop-up box.
- Restart your device, and your drivers will automatically be installed.
3. Lower your resolution settings
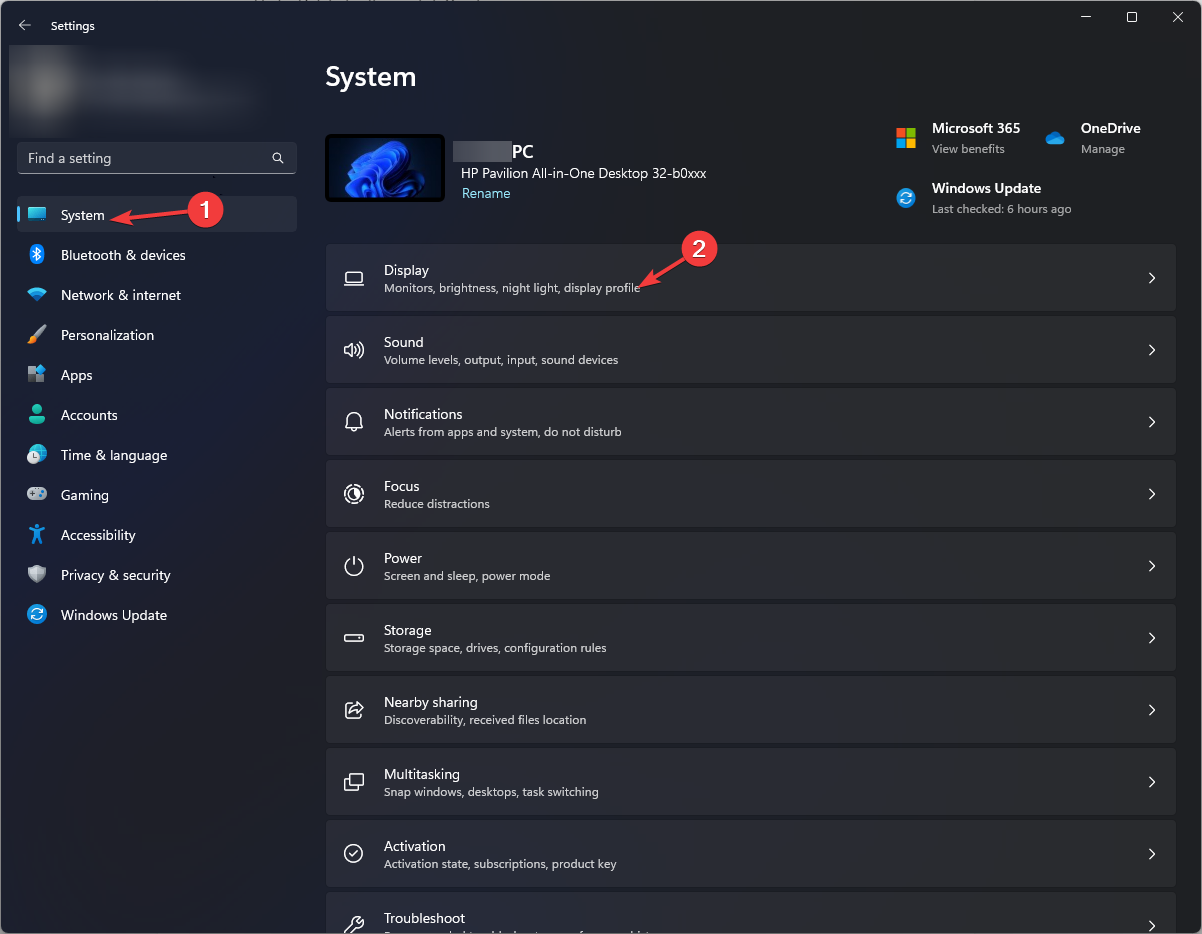
- Hit the Start menu icon and select Settings.
- Click on System then select Display.
- Navigate to the Scale & layout section then under Display resolution, click on the drop-down menu and pick a lower resolution setting than your current one.
- You may need to restart your PC for the changes to take effect.
If the could not initialize graphics device error occurs on a particular game, you can also try adjusting the in-game resolution settings and see if there are any improvements.
4. Try different compatibility settings
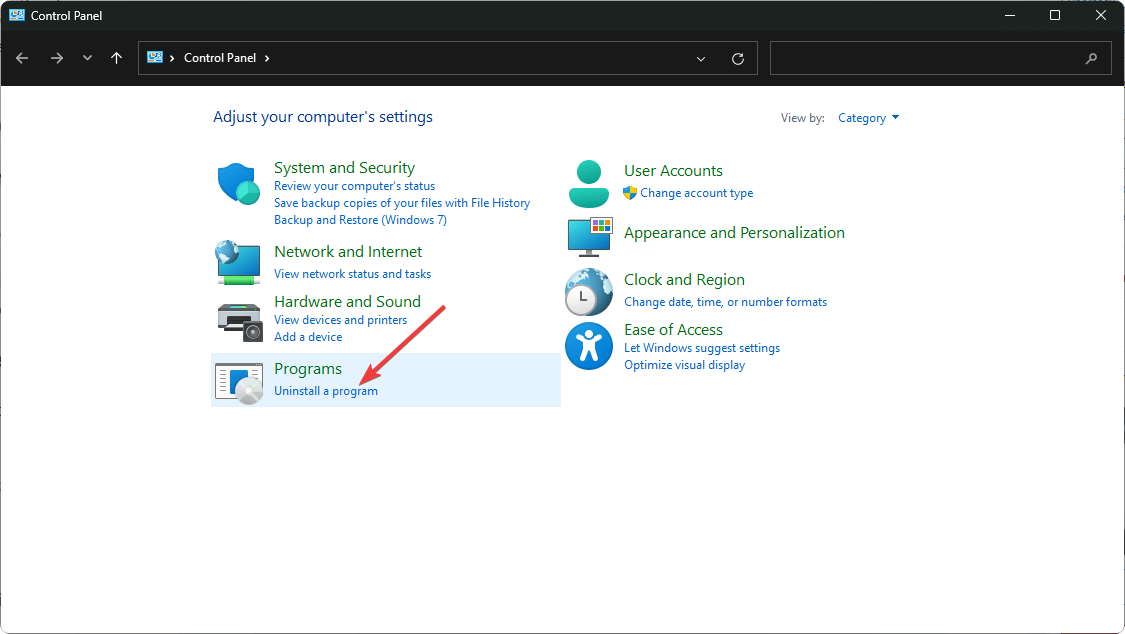
- Click on the Start Menu icon, type Control Panel on the search bar, and click Open.
- Select Uninstall a Program under Programs.
- Find the problematic app, click on it, and select Uninstall.
- Confirm uninstallation in the next pop-up.
- Install the app again from the official website.
- Locate the .exe file of the problematic app usually in one of the following paths depending on your version of Windows:
C:\Program Files (x86)orC:\Program Files - Scroll down until you find the program you’re looking for.
- Right-click on the .exe file of the program and select Properties.
- Navigate to the Compatibility tab, check the Run this program in Compatibility mode option, and select Windows 8 from the drop-down menu. Also, uncheck
- Allow the program to finish installing, then check whether the error persists.
5. Enable hardware acceleration
- Hit the Windows key and select Settings.
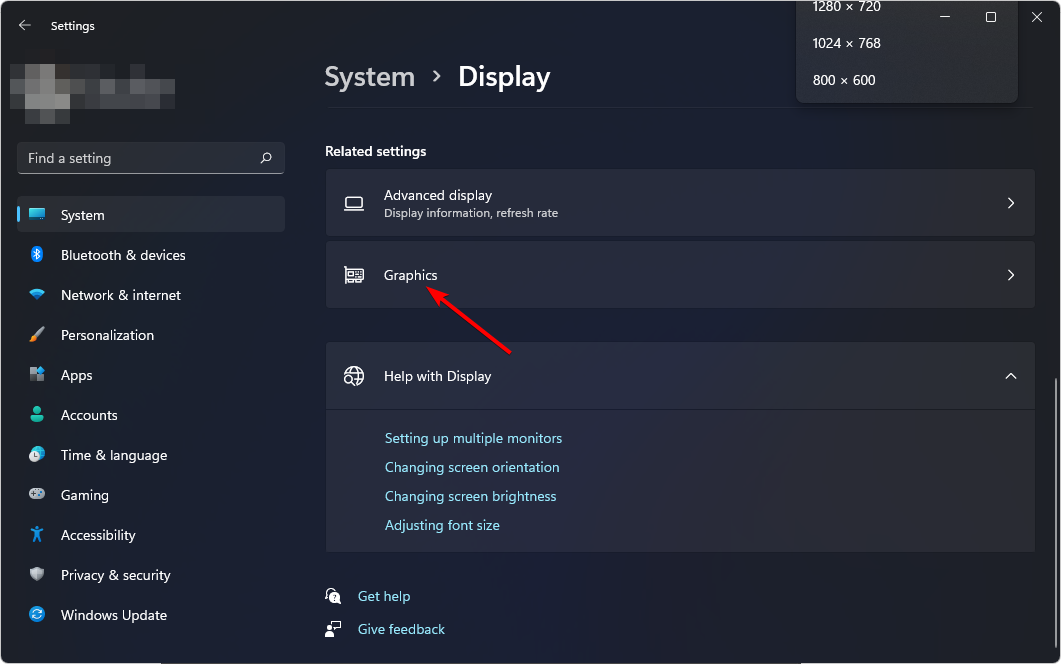
- Click on System on the left pane, then Display on the right pane.
- Scroll down and select Graphics.
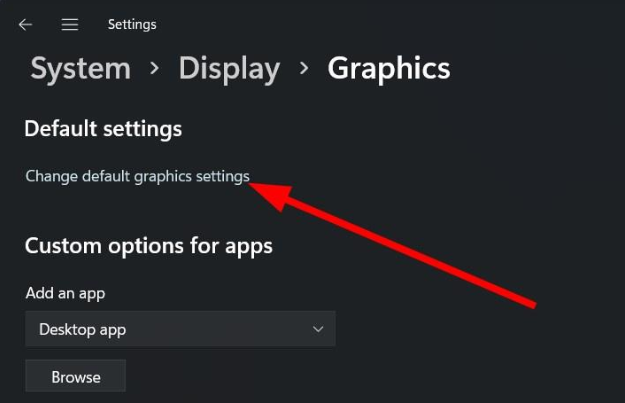
- Select the Change default graphics settings option.
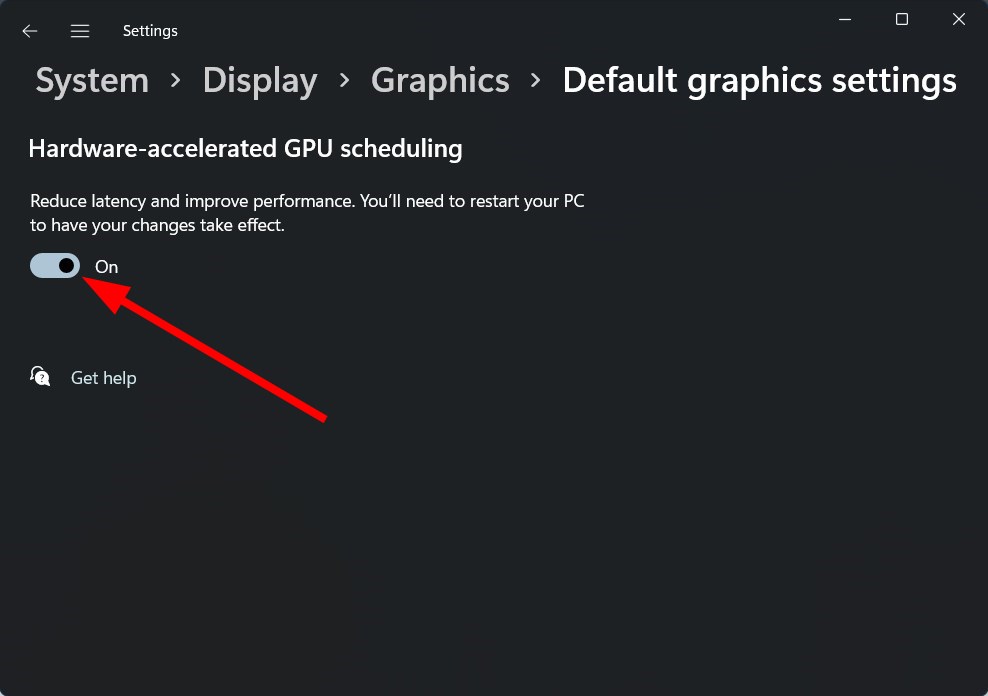
- Now, toggle on the Hardware-accelerated GPU scheduling option.
6. Disable your integrated GPU
- Click on the Start Menu icon, type Device Manager in the search bar, and click Open.
- Navigate to Display adapters to expand, right-click on your graphics card, and select Disable device.
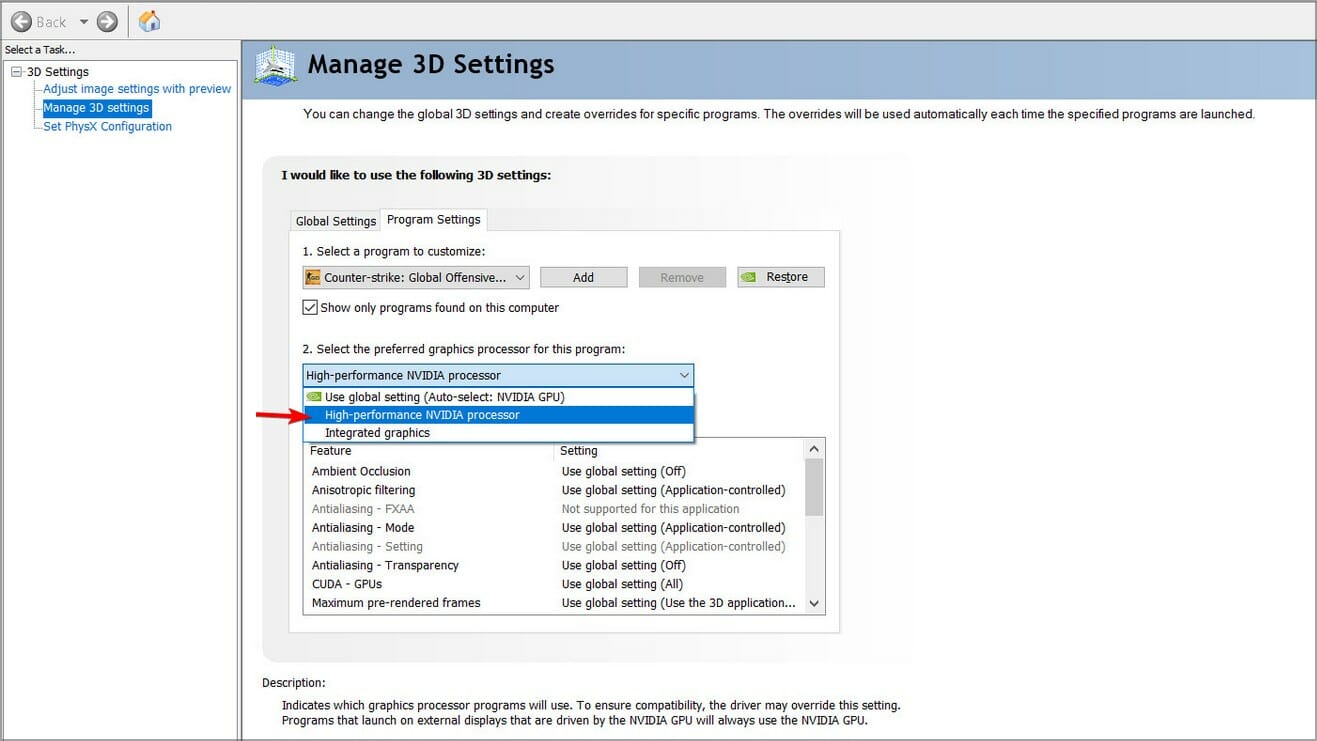
- Next, launch your dedicated graphics card control panel (In this case, Nvidia Control Panel).
- Select Manage 3D settings from the navigation pane on the left.
- Choose a High-performance NVIDIA processor from the Preferred graphics processor dropdown menu.
Whenever your PC fails to detect your GPU, there’s a miscommunication when apps attempt to use the GPU.
And if your secondary graphics card cannot be detected, the fallback will be on your integrated one which in most cases, cannot handle graphics-intensive tasks and will result in more errors.
This error is not unique to your graphics card. You might also encounter a similar situation when you insert a drive and get a can’t initialize disk or cannot initialize device driver for this hardware error so check out our guide on how to fix it.
That’s all we had for this article but if you have any other solutions you’d like to share, drop them in the comment section below.












User forum
0 messages