DCOM Error 1084: What is It & How to Fix It?
Reinstalling the graphics driver can do the trick
4 min. read
Updated on
Read our disclosure page to find out how can you help Windows Report sustain the editorial team. Read more
Key notes
- The error could have come up due to malware infection, conflicting software, or corrupt system files.
- This guide will cover all the methods required to fix the error quickly.
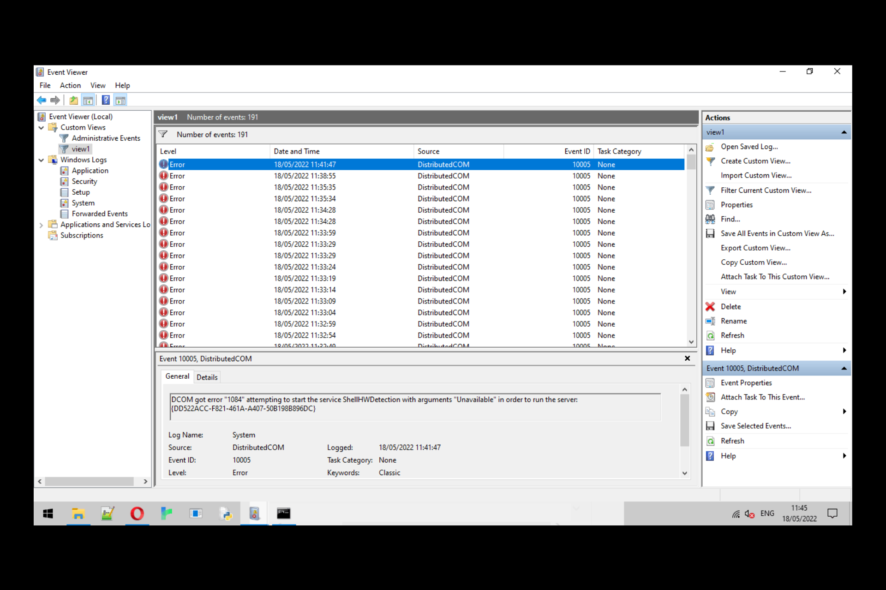
DCOM error 1084 occurs in Windows when there is a problem with the DCOM (Distributed Component Object Model) service.
The DCOM service allows software components to communicate with each other on a network. In this guide, we will discuss all the expert-tested methods to fix the error right after examining the causes for the same.
What causes the DCOM error 1084 on Windows 11?
There could be various reasons why this DCOM error occurs; some of the common ones are:
- Malware infection – If your computer is infected with malware or viruses, it could damage the DCOM service, hence the error. You need to run a malware scan to remove malware infection.
- Misconfigured system settings – If your computer system settings are not configured properly, it could cause issues with the DCOM service; hence, you see this error.
- Damaged Windows system files – If your Windows system files are corrupted or missing, it could cause errors, including this one. You need to run the system file checker scan to repair the files.
- Third-party software interference – If two third-party software are conflicting, it could cause issues with the DCOM service. It would be best to uninstall the problematic software to fix the problem.
- Registry errors – If the registry files are missing or corrupted, you might face this DCOM service error. You might need to run a registry cleaner app to fix the problem.
What can I do to fix the DCOM error 1084 on Windows 11?
Before engaging in advanced troubleshooting steps, you should consider performing the following checks:
1. Use the Services app to check the status of the DCOM services
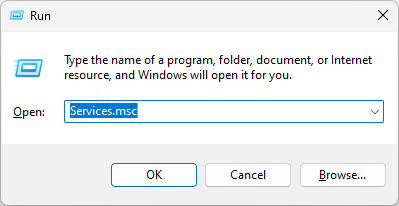
- Press Windows + R to open the Run dialog box.
- Type services.msc and press Enter to open the Services app.
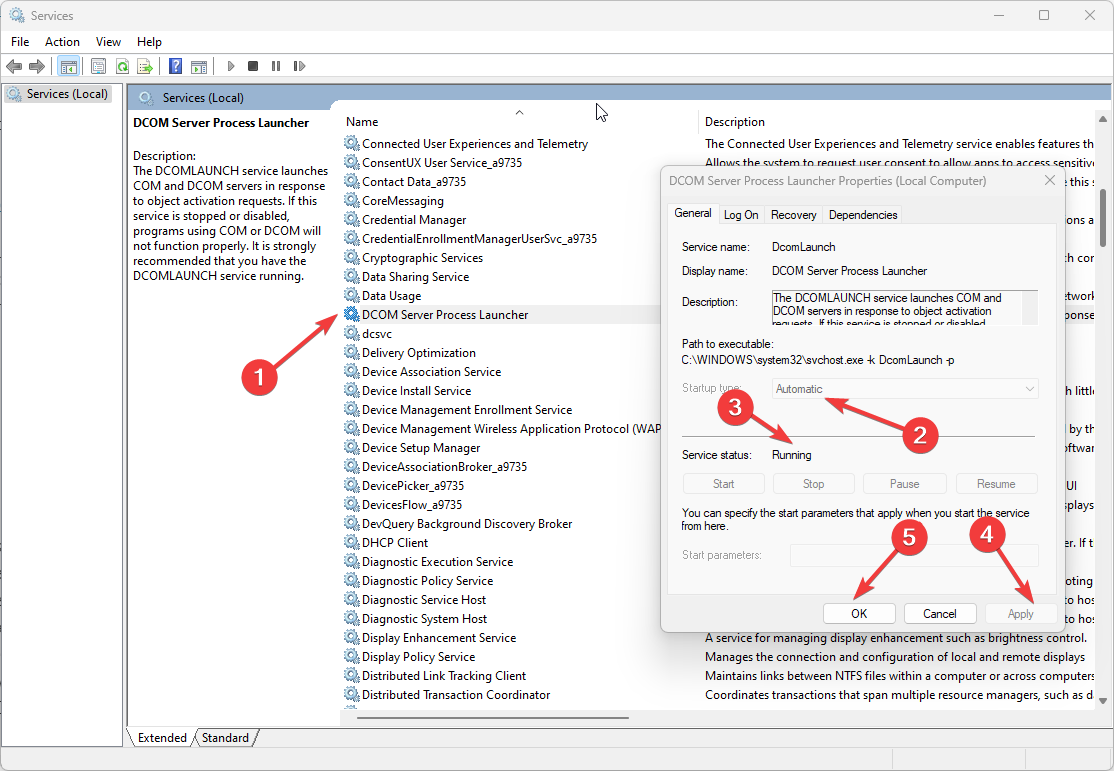
- Go to DCOM Service Process Launcher and double-click it to open Properties.
- On the Properties window, select Startup type as Automatic and click the Start button under the Service status to ensure the service is running.
- Click Apply and OK to save the changes.
- Now locate these three services: Background Tasks Infrastructure Service, Local Session Manager, and Remote Procedure Call (RPC), and repeat the same process for them.
2. Reinstall the graphics driver
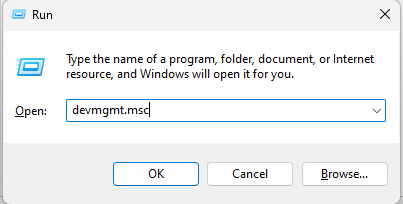
- Press Windows + R to open the Run window.
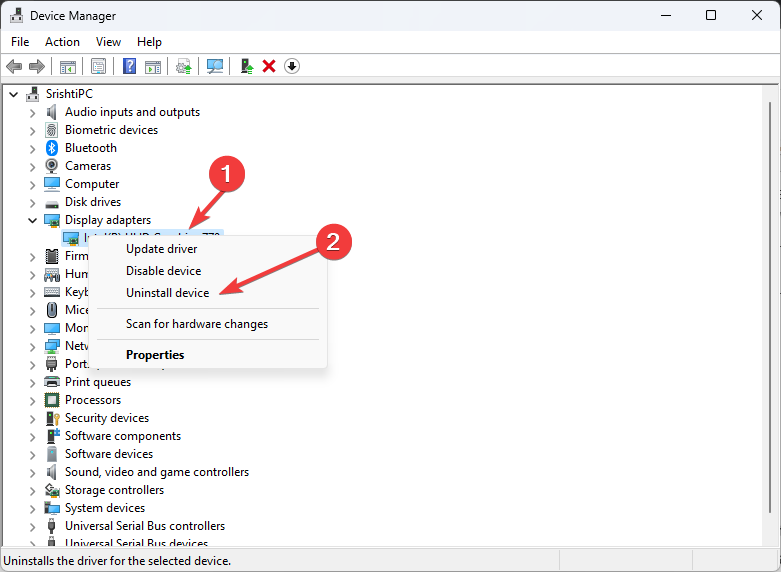
- Type devmgmt.msc and click OK to open Device Manager.
- Go to Display adapters and double-click it to expand.
- Locate, and right-click the graphics driver to select Uninstall driver.
- Restart your computer, and Windows will install the appropriate driver during Restart.
3. Repair the system files and Windows image
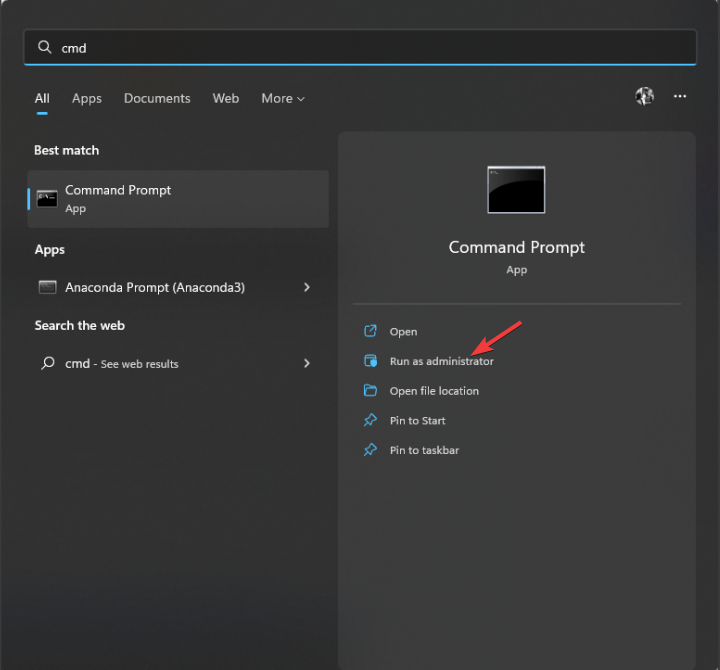
- Press the Windows key, type CMD, and click Run as administrator.
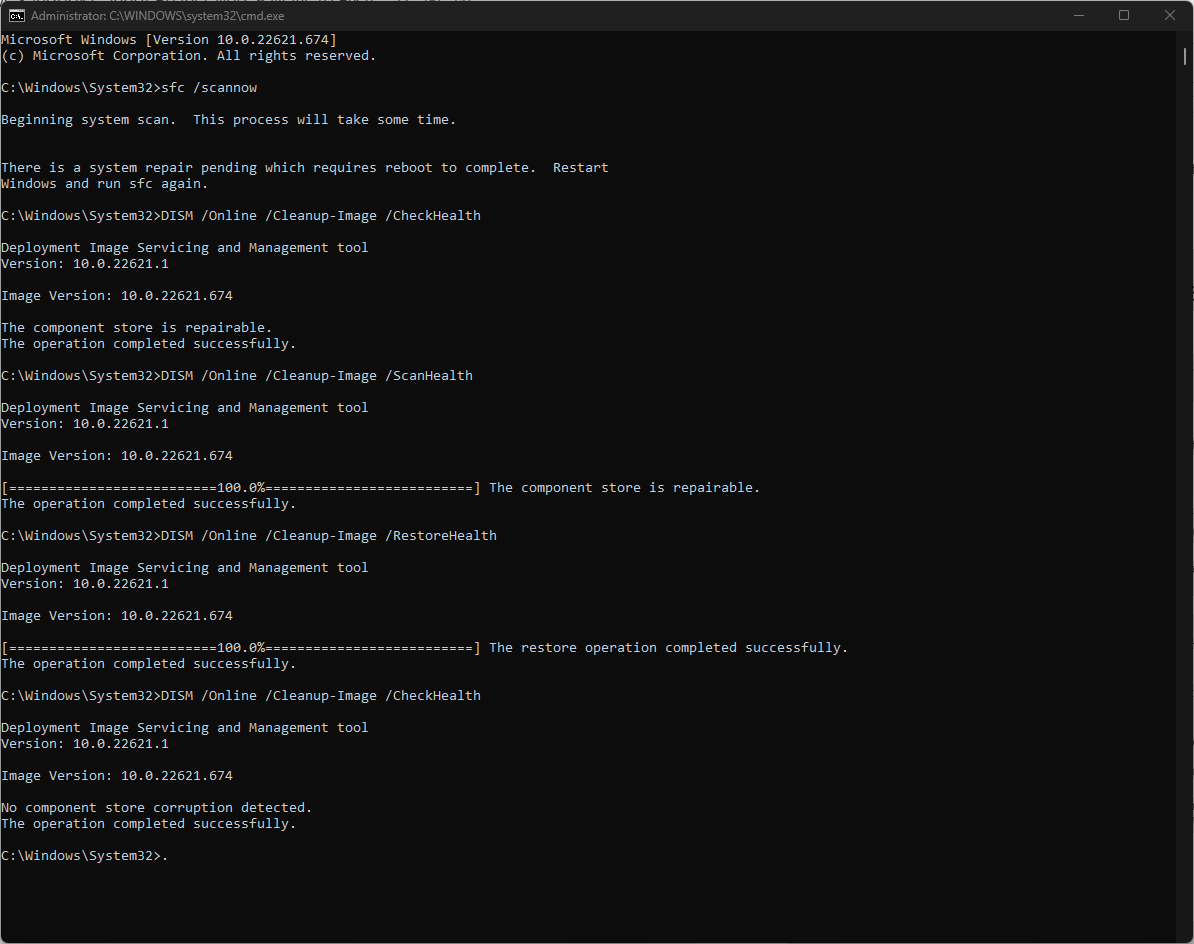
- Type the following command to scan & repair the system image and press Enter:
sfc/scannow - Copy and paste the following commands one by one to repair the Windows image, and press Enter after every command:
Dism /Online /Cleanup-Image /CheckHealthDism /Online /Cleanup-Image /ScanHealthDism /Online /Cleanup-Image /RestoreHealth - Restart your computer to let the changes take effect.
4. Restore your computer to the previous version
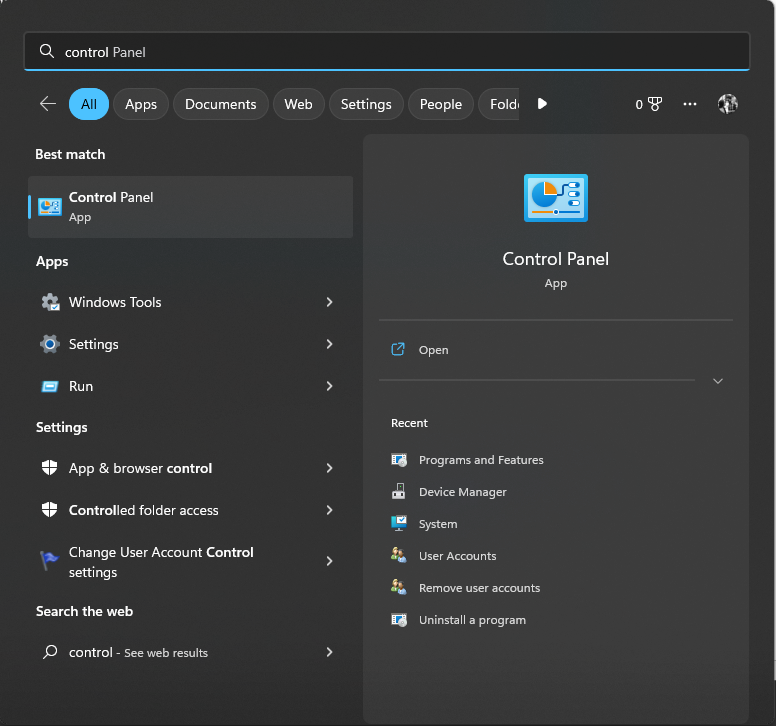
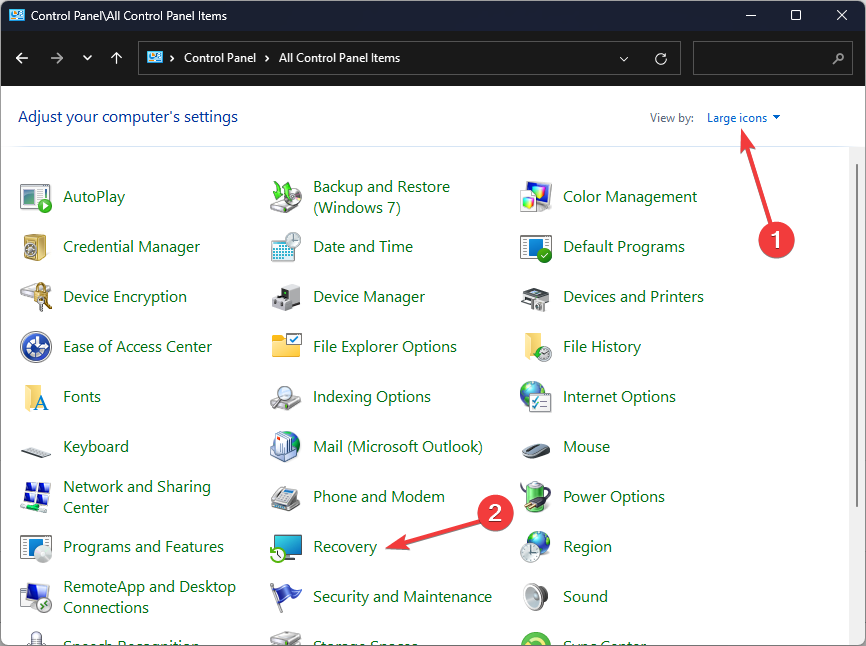
- Press the Windows key, type Control Panel, and click Open.
- Select Large icons from the drop-down next to Category, and click Recovery.
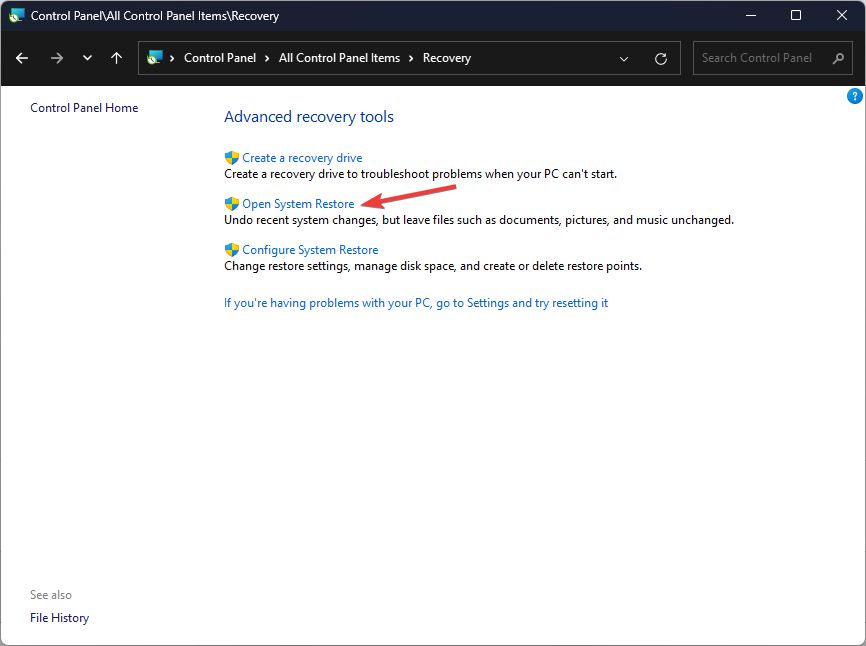
- Click Open System Restore.
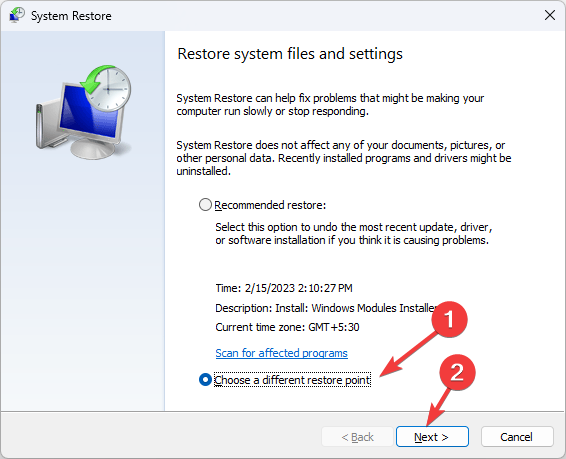
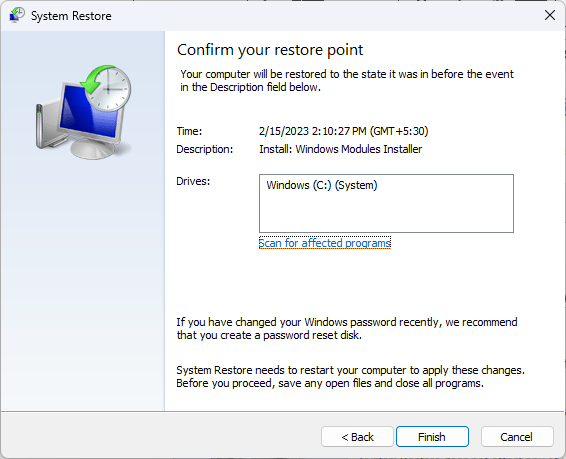
- Select Choose a different restore point in the System Restore window and click Next.
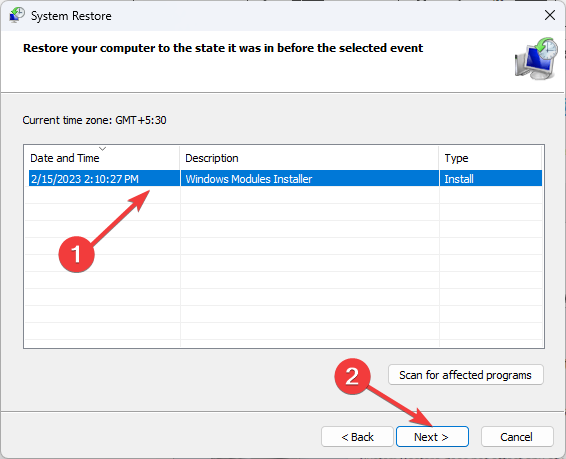
- Select the restore point and click Next.
- Click Finish to start the process of restoring your computer to the previous version.
5. Run your computer in safe mode
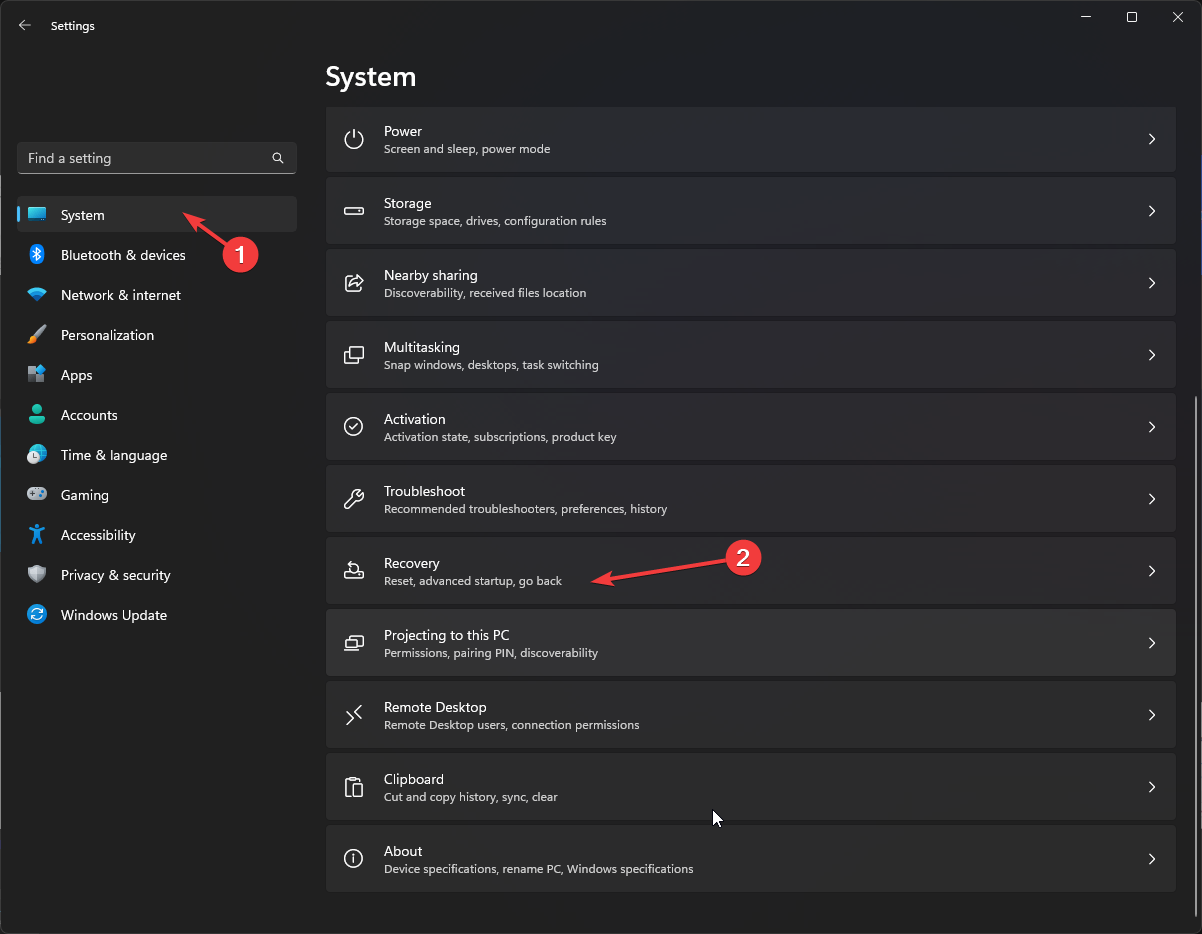
- Press Windows + I to open the Settings app.
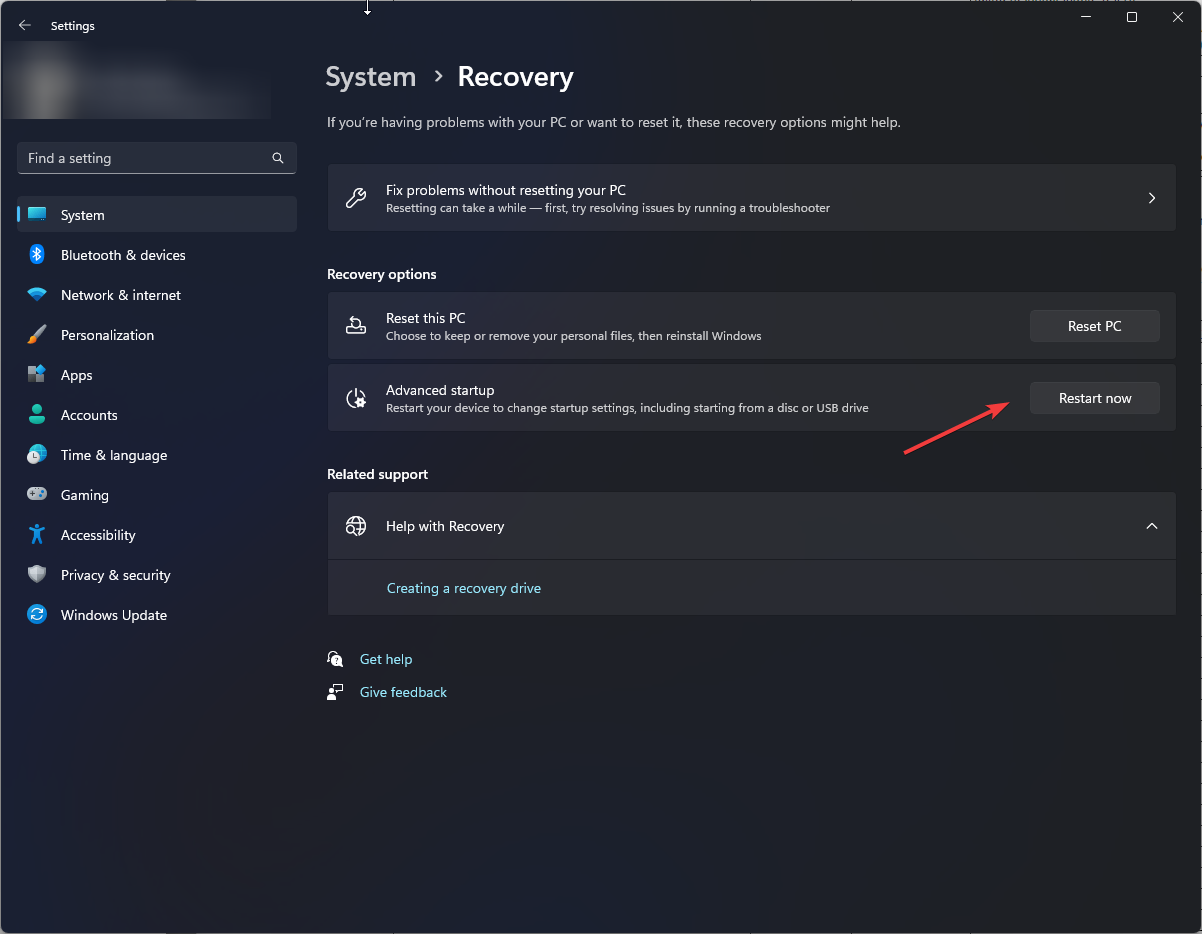
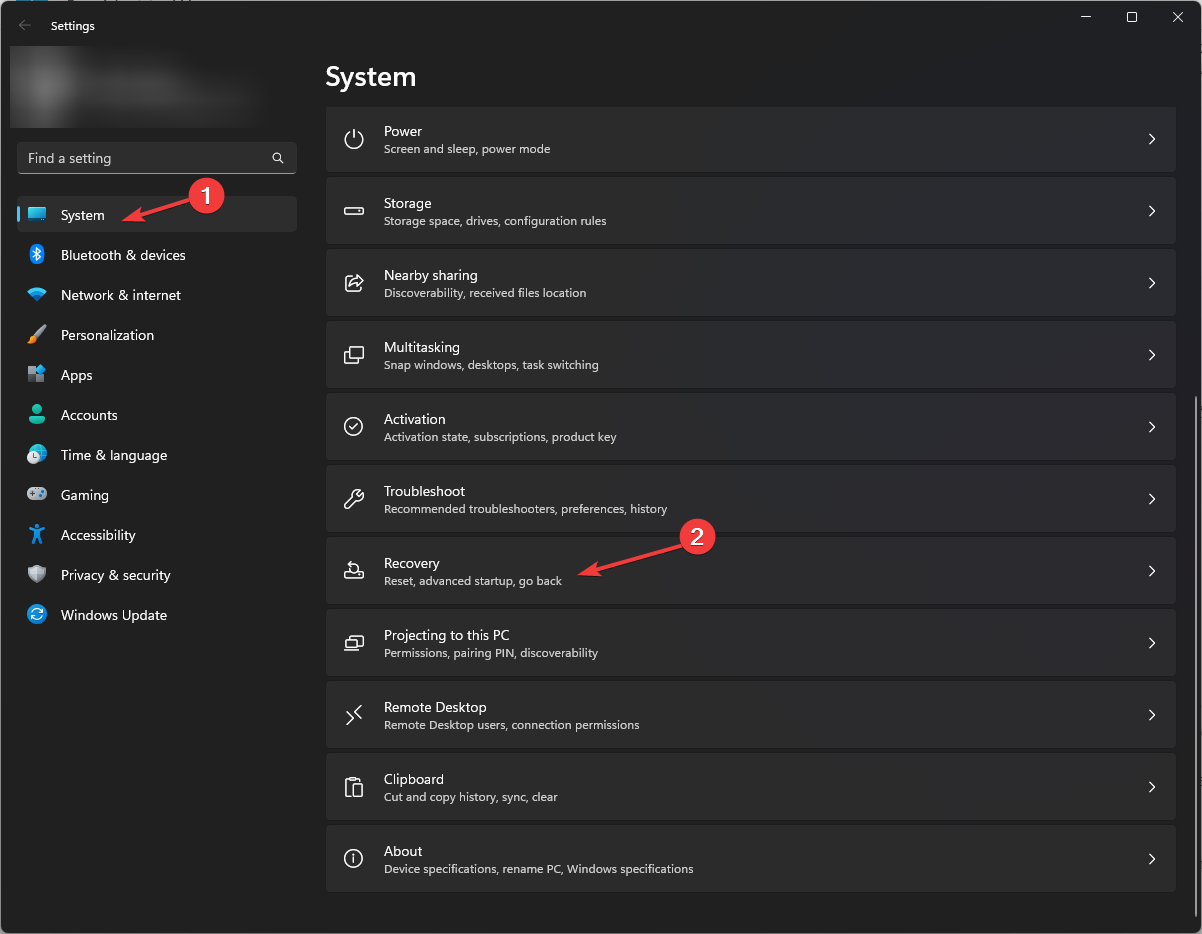
- Go to System, and click Recovery.
- Now next to Advanced startup, click Restart now.
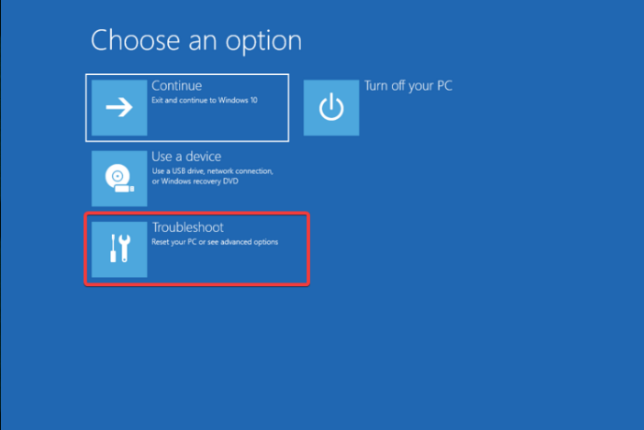
- From the Choose an option screen, click Troubleshoot.
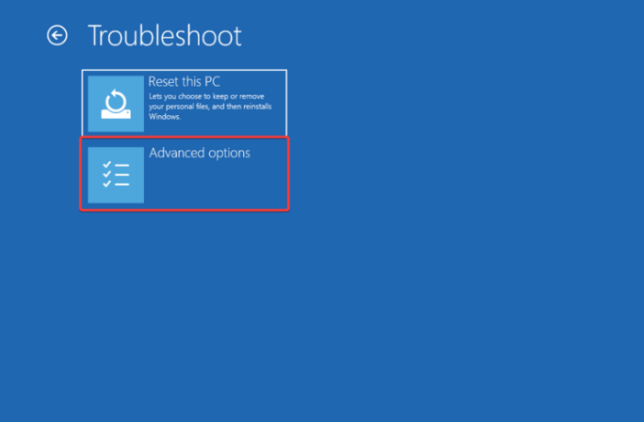
- On the Troubleshoot option, select Advanced options.
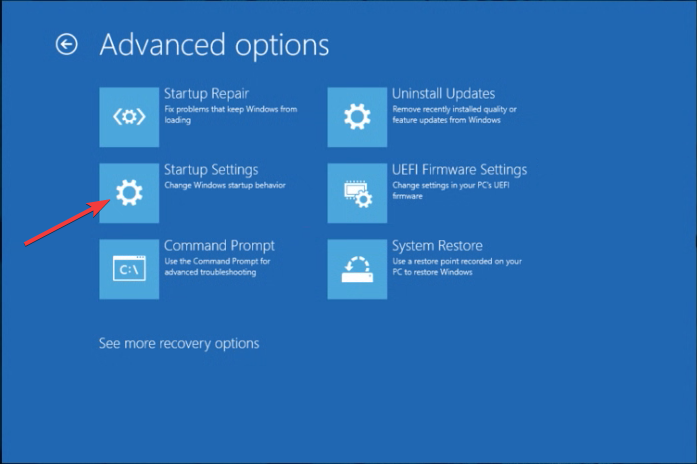
- On the Advanced options window, click Startup Settings.
- You will get a list; press F4 to boot your computer in Safe Boot mode.
- If the computer runs fine in safe mode, you need to check third-party software interfering with your computer.
6. Reset your PC
- Press Windows + I to open the Settings app.
- Go to System, and click Recovery.
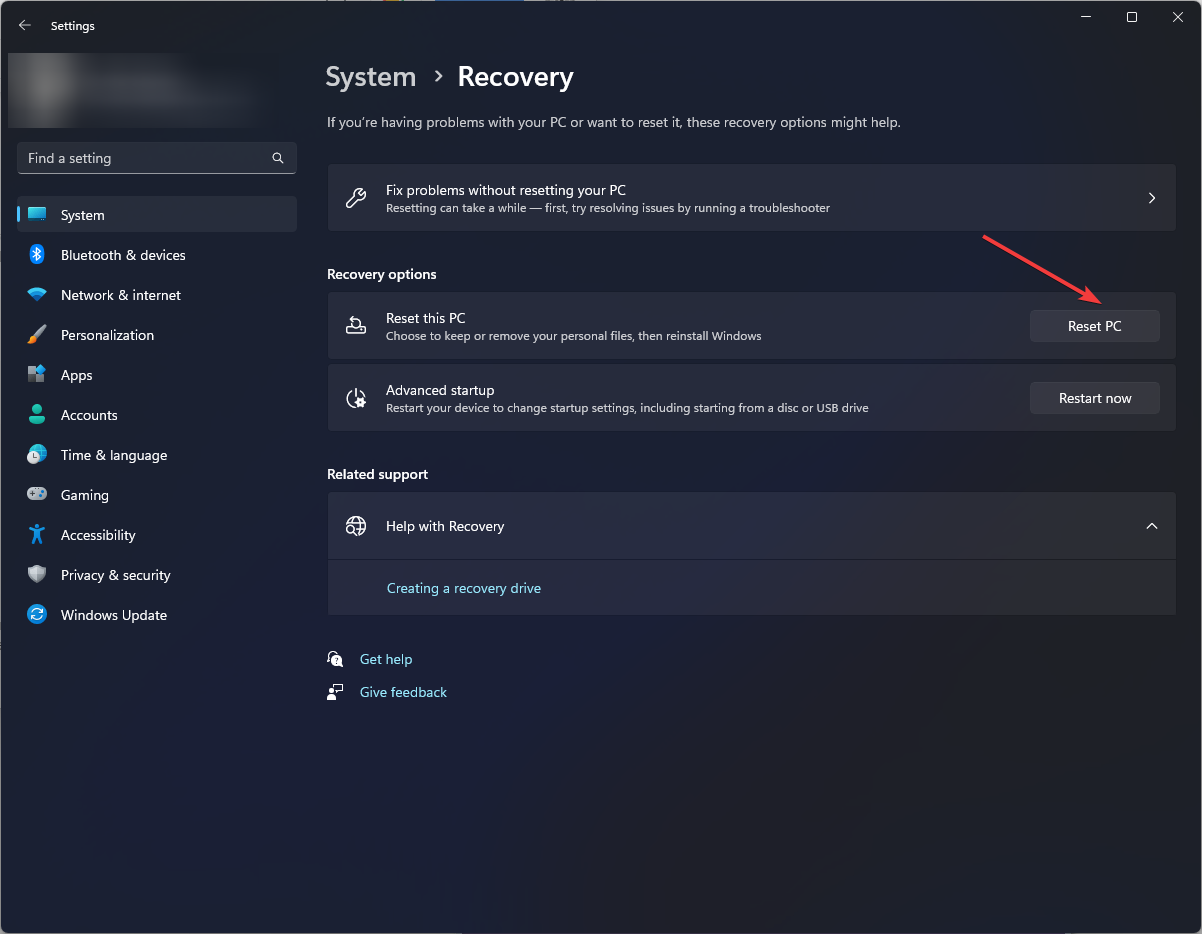
- Now next to Reset this PC, click Reset PC.
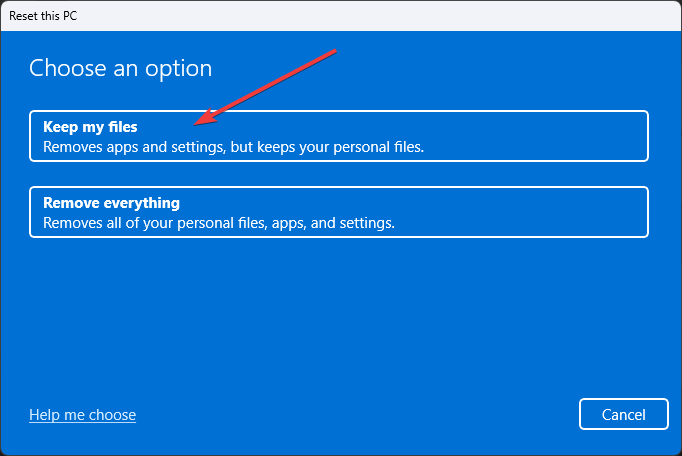
- From the Choose an option window, select Keep my files.
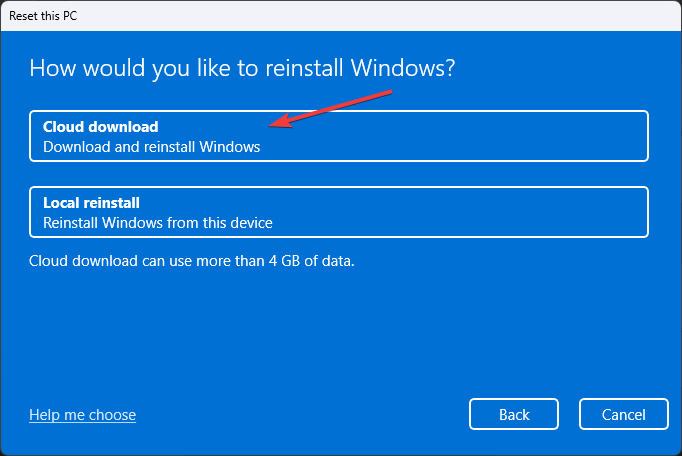
- On the How would you like to reinstall Windows screen, select Cloud download.
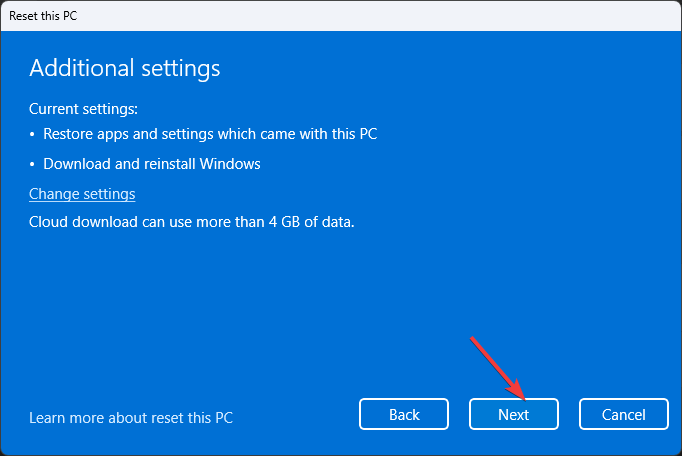
- Now on the Additional settings page, click Next.
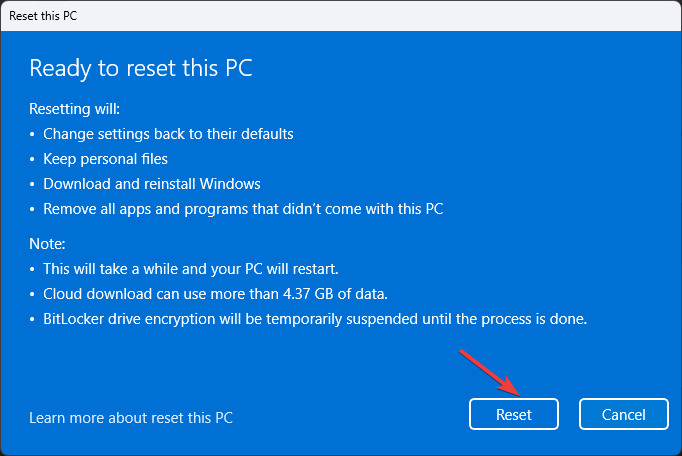
- On the Ready to reset this PC screen, click Reset. Now, please wait for the process to complete.
So, these are methods that you can follow to fix the DCOM error 1084 on Windows 11 or 10. Try them and let us know what worked in the comments section below.




User forum
0 messages