How to Disable Keyboard Keys in Windows 10 Quickly
Everything you need to disable any key on your keyboard
2 min. read
Updated on
Read our disclosure page to find out how can you help Windows Report sustain the editorial team Read more
Key notes
- If a key is sticky or experiencing other issues, you might want to disable it on your keyboard.
- There are several dedicated software that helps you disable and enable any key with ease.

Is there a key on the keyboard you don’t need? For example, Caps Lock capitalizes all text when you enter login details.
So, if you don’t need that key or any other, this is how you can switch off keys in Windows 10.
How do I disable a key on my keyboard on Windows 10?
Use AutoHotkey
- Visit the official website to download AutoHotkey and install it on your PC.
- Check this AutoHotkey guide website to see if the key you want to disable is supported.
- If it is, press the Windows key, type Notepad, and select the corresponding option.
- Now, type the reference of the key you want to disable and add ::return to it. An example is capslock::return.
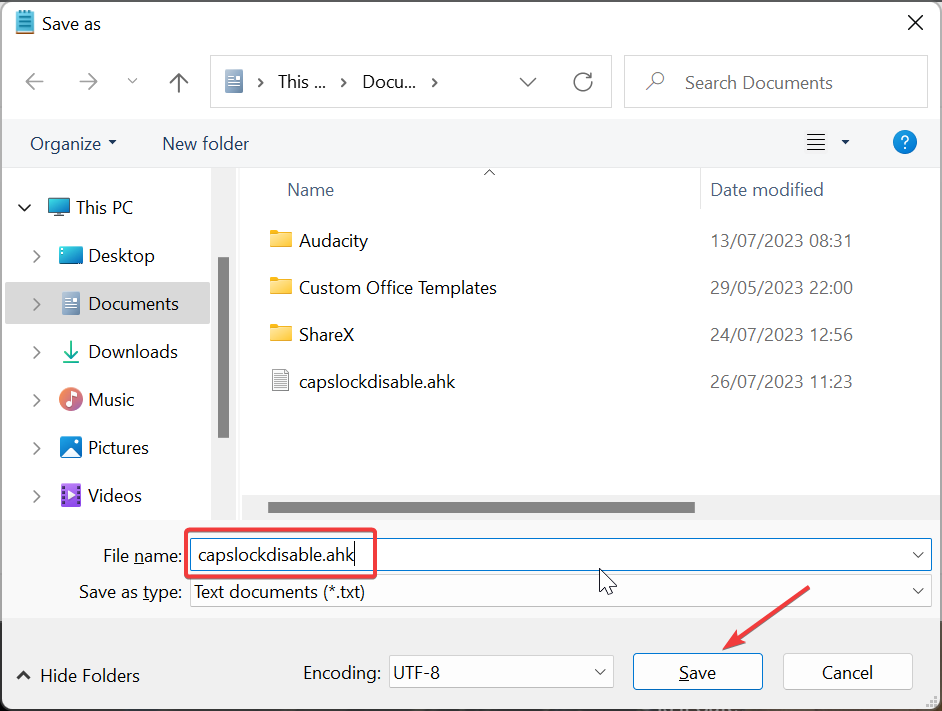
- Next, save the file with .ahk extension.
- Finally, double-click the newly created file, and the key will be disabled.
So that’s how to disable a keyboard key on Windows 10 with AutoHotkey. If you want to enable the key again, just right-click the AutoHotKey icon on your Taskbar and choose Suspend Hotkeys.
If you need a list of excellent keyboard mapping software for complete control of your keys, check our detailed guide.
Feel free to let us know if you were able to deactivate your keys in the comments below.


