4 Quick Ways to Disable Steam Auto Updates for Good
Steam keeps auto-updating and that can become disruptive
5 min. read
Updated on
Read our disclosure page to find out how can you help Windows Report sustain the editorial team Read more
Key notes
- To disable Steam Auto Updates, change the Auto update schedule and disable Steam's startup process.
- Apply the detailed instructions below to turn off the Steam updates.
![Disable Steam Auto Updates for good [Quick Guide]](https://cdn.windowsreport.com/wp-content/uploads/2022/01/Untitled-design-2022-01-19T142844.880-1-1-886x590.jpg)
Are you looking for the best ways to disable Steam Auto Updates for good? Make sure you read this guide completely because it was made especially for you.
Can you stop Steam from auto-updating? Steam auto-updates the games in the background whenever there is a network connection available but you can change its update schedule to fit your away time.
How can I disable Steam Auto Updates?
1. Change the update schedule
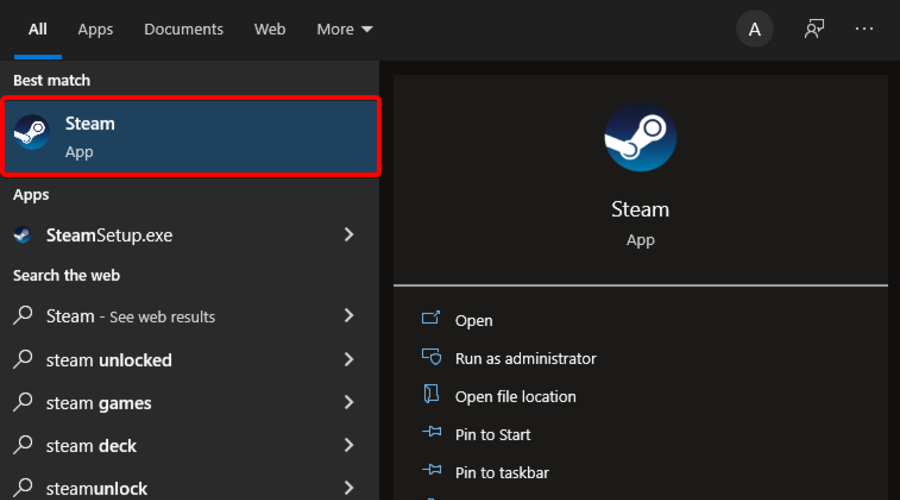
- Hit the Windows key, type Steam, then open the first result.
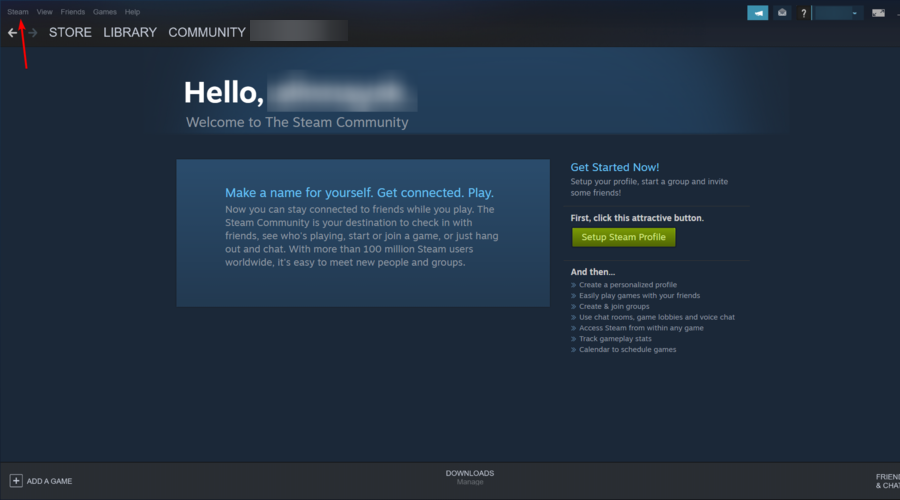
- From the upper-left corner of the window, click on Steam.
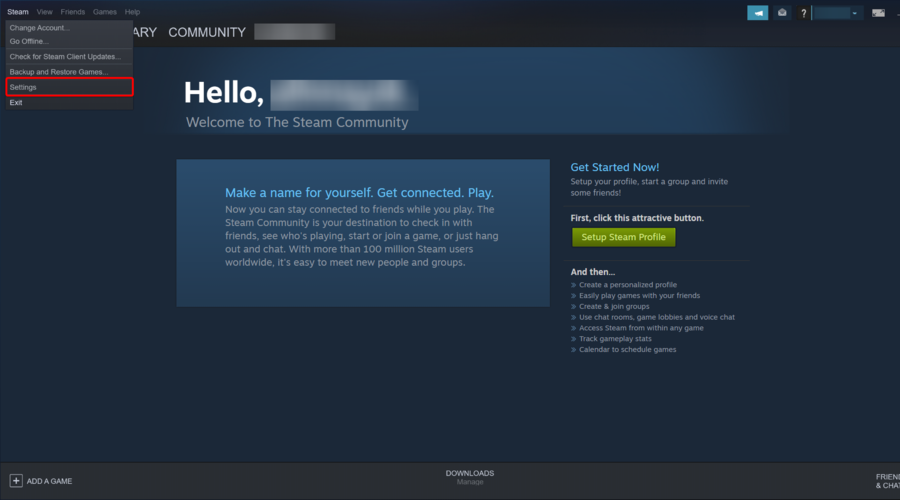
- Now, navigate to Settings.
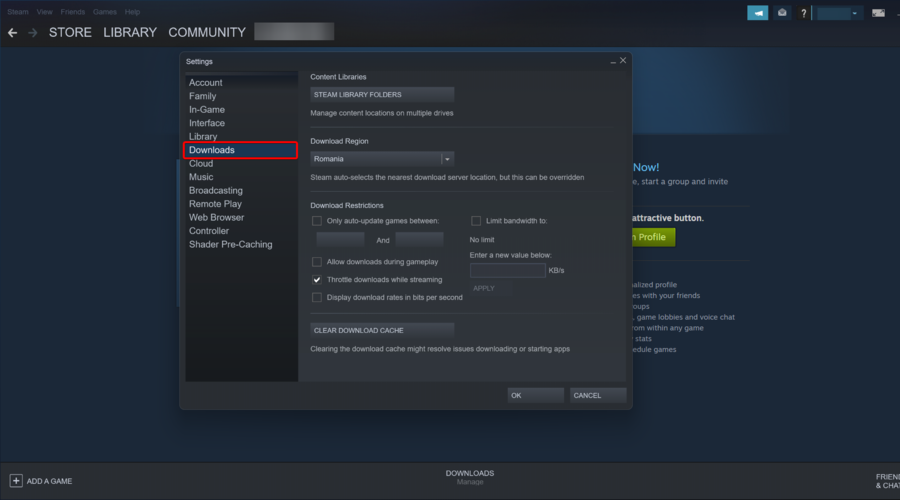
- In the left side-panel click on the Downloads tab.
- From the right section, under Download Restrictions, check the Only auto-update games between option.
- Now, insert a time frame that fits your needs the best.
- Click on OK to save the changes.
To avoid future problems with updates, you can set certain update schedules outside your working hours. A good time will be late at night when you don’t use your Windows 10 PC for anything.
We have to mention that this solution applies to future updates only. If a game is already scheduled with an update, then you won’t be able to play it until you’ll update it.
Additionally, you can also limit the bandwidth for downloading updates just in the case sometimes the background update is running while you use your Windows 10 computer.
To do that, just follow the steps above, and right next to Download Restrictions you will see a Limit bandwidth to the drop-down menu. Choose the lowest amount possible (usually 16kb/s).
2. Stop the Auto update on a single game
- Press on the Windows key, type Steam, then open the app.
- Go to Library.
- Right-click a certain game that you’re interested in and select Properties.
- A new window will appear. There, click on Updates tab.
- Under the Automatic updates click the drop-down menu
- Now you have 3 options: Always keep this game up-to date, Only update this game when I launch it, High Priority: Always auto-update this game before others. Select the Only update this game when I launch it option.
- Remember to disable your Internet connection every time before starting the respective game.
If you want to stop Steam from updating Skyrim or any other game, this is the way to go. It has been confirmed by many users and it is very effective.
If your internet connection is disabled, Steam won’t be able to connect to the servers and the auto-update process won’t start. You will be able to play the game without any interruptions.
Although the solution works like a charm, it will be a bit tedious if you have a lot of games in the Library. If you want to disable auto updates for all games on Steam, you’ll have to repeat these steps for all items on your list.
3. Disable Steam’s startup process
- Hit the Windows key, type Stream, then open it.
- From the upper-left corner of the window, click on Steam.
- Navigate to Settings.
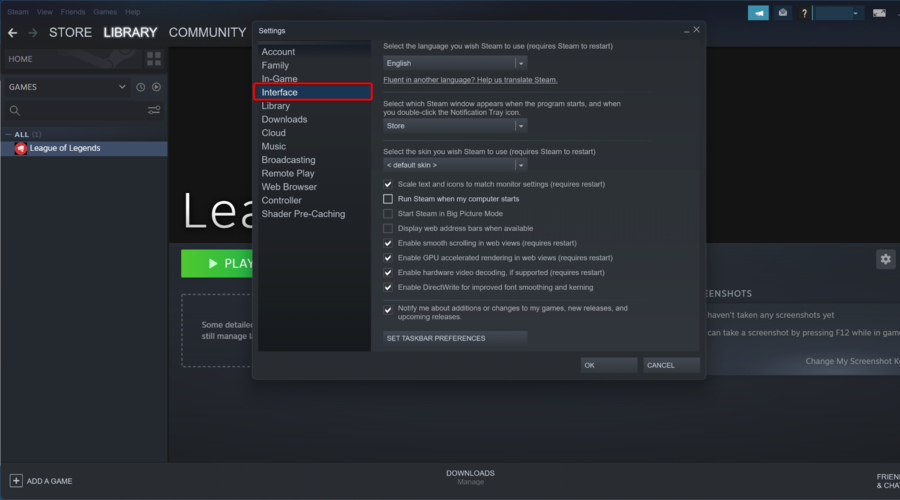
- In the left side-panel, choose Interface.
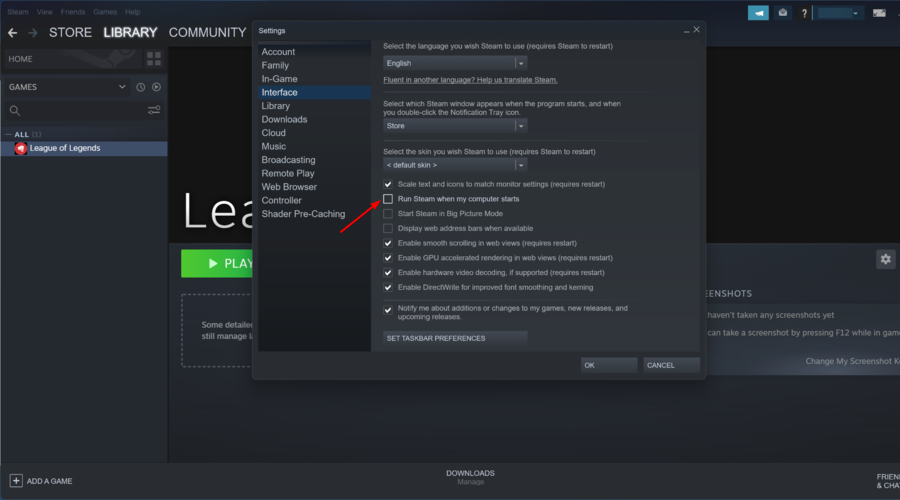
- Uncheck Run Steam when my computer starts.
- Look in the bottom of the Interface window, then click on OK.
By default, Steam processes start in the background when the Windows 10 PC starts. In this way, Steam is making sure that the auto-update runs all the time in the background and keeps your games up-to-date.
Now, Steam won’t automatically open when you start Windows 10 and the update process will only take place when you decide to open the app or a Steam game.
This is a useful method if Steam performs auto update immediately, so be sure to try it.
4. Disable automatic updates for the Steam Client
1. Add start attributes to the Steam shortcut
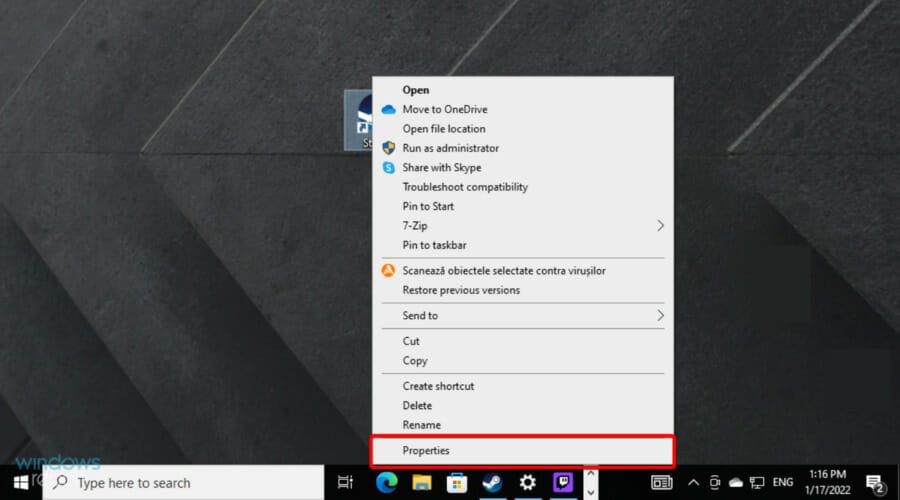
- Right-click on your Steam desktop icon, then select Properties.
- Go to the Target field.
- Add the following startup arguments after then path: -noverifyfiles -nobootstrapupdate -skipinitialbootstrap -norepairfiles -overridepackageurl
2. Block the Steam client from updating
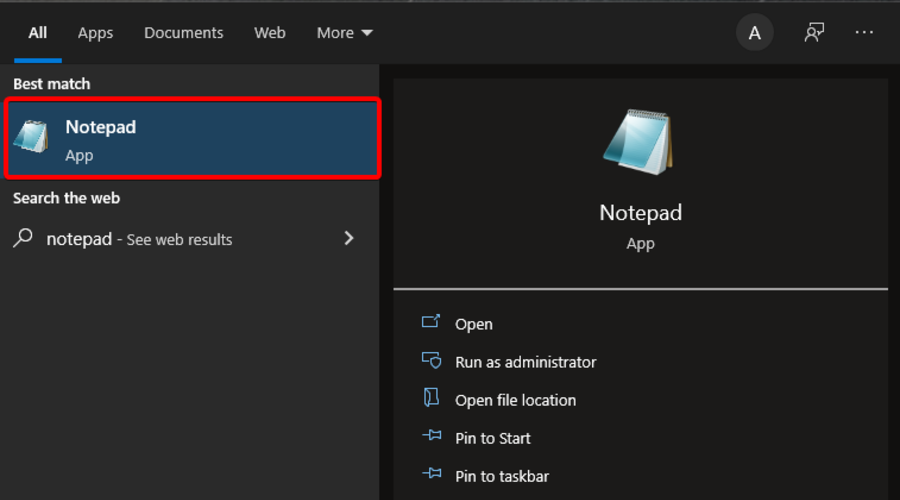
- Use the Windows key on your keyboard, then search for Notepad, and open it.
- Write down the following line:
BootStrapperInhibitAll=Enable - Save the file in the Steam installation folder as Steam.cfg.
If you ever wondered how to turn off Steam automatic updates, this is one way to do it. Whilst there are ways of prohibiting the Steam client from updating, you should know that this is highly discouraged.
By not updating your client to the latest version you are putting yourself at risk.
However, this might be something you need to do temporarily, for instance, if you are downloading a huge game and your download will take several days, you can’t shut down your system as the downloaded files will be lost.
Hibernation will keep the current state of your system and your download will resume.
Can you schedule Steam Updates?
Yes, you can schedule game updates on Steam. To do that, simply navigate to Settings and in Download section you should see the scheduling option. We covered the exact steps in solution 1, so be sure to check it out.
Unfortunately, you can’t disable Steam client auto update, or schedule it, and you’ll be forced to update the client as soon as you start it.
Automatic updates on Steam can be annoying, but we hope that this guide helped you solve this issue on your PC.
That being said, there are better ways of going about downloading large games, and we wrote what to do if Steam download is slow.
What’s your all-time favorite Steam game? Leave the answer in the comments section below along with any other questions you may have.


