How to Disable Shared Experiences on Windows 10 PCs
If you worry about privacy, you should keep this feature disabled
![]() 4 min. read
4 min. read
![]() Updated on
Updated on
Share this article

Improve this guide
Read our disclosure page to find out how can you help Windows Report sustain the editorial team Read more
Key notes
- The Shared Experiences feature on Windows 10 keeps your devices synced between them over Wi-Fi or Bluetooth.
- Not all users are fans of this feature and want to turn it off.
- We created a guide on how to disable the Windows 10 Shared Experiences feature using multiple different methods.

Windows 10 Shared Experiences is a way of keeping your PCs or laptops synced. It’s a pretty useful feature if you need to move from one machine to another while working on a task.
However, if you don’t need to move between machines, or if you are a network administrator and don’t want nearby machines to have this sharing capability, then you’ll probably want to turn off Windows 10 Shared Experiences.
Methods to turn off Shared Experiences in Windows 10
- Use the Settings app
- Change Group Policy settings
- Use the Registry Editor
1. Use the Settings app
Disabling Windows 10 Shared Experiences via Settings is the easiest and safest way to do it. You don’t need to make any Registry Changes or tweak Group Policy Settings, you simply use the built-in Settings on your device.
1. Click on the Start button on your taskbar or press the Windows key on your keyboard.
2. Choose Settings from the list of options that opened.
3. Navigate to the System section.
4. From there, go to Shared experiences.
6. In this tab, you can see the Nearby sharing option. It allows you to send and receive content with other people using the same Bluetooth or Wi-fi device.
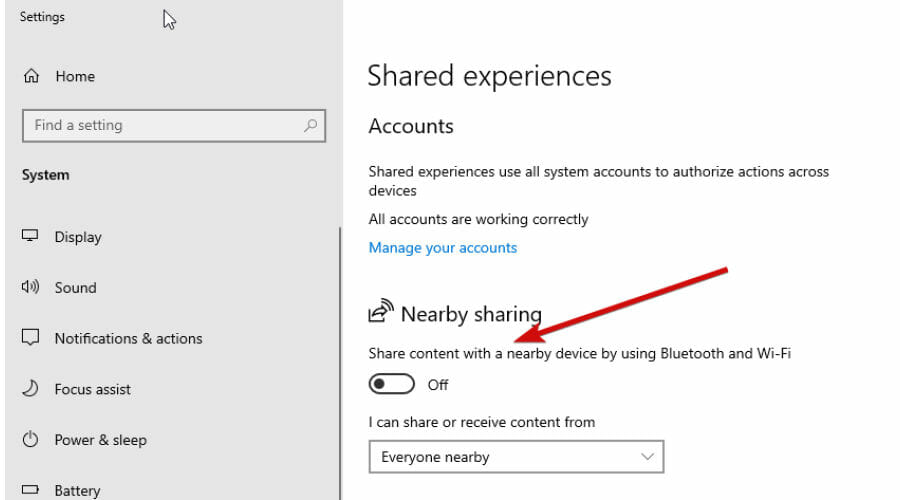
7. Toggle the setting off to disable this feature.
This is by far the easiest one to do and is probably the one that 99% of users will find the most suitable. Let’s now look at the other two more complicated methods.
2. Change Group Policy settings
First of all, if you are not sure what Group Policy is, then you probably should be using the option above. If you want to know what it is, this is what Microsoft says:
Group Policy enables policy-based administration using Microsoft Active Directory directory services. Group Policy uses directory services and security group membership to provide flexibility and support extensive configuration information. Policy settings are specified by an administrator. This is in contrast to profile settings, that are specified by a user. Policy settings are created using the Microsoft Management Console (MMC) snap-in for Group Policy.
If you would like a more detailed explanation of what Group Policy is, you can find it in Microsoft Support.
To disable Windows 10 Shared Experiences using this method, follow these steps:
- Press Windows key + R and type in gpedit.msc
- Then find Group Policy by following this path: Computer Configuration > Administrative Templates > System > Group Policy
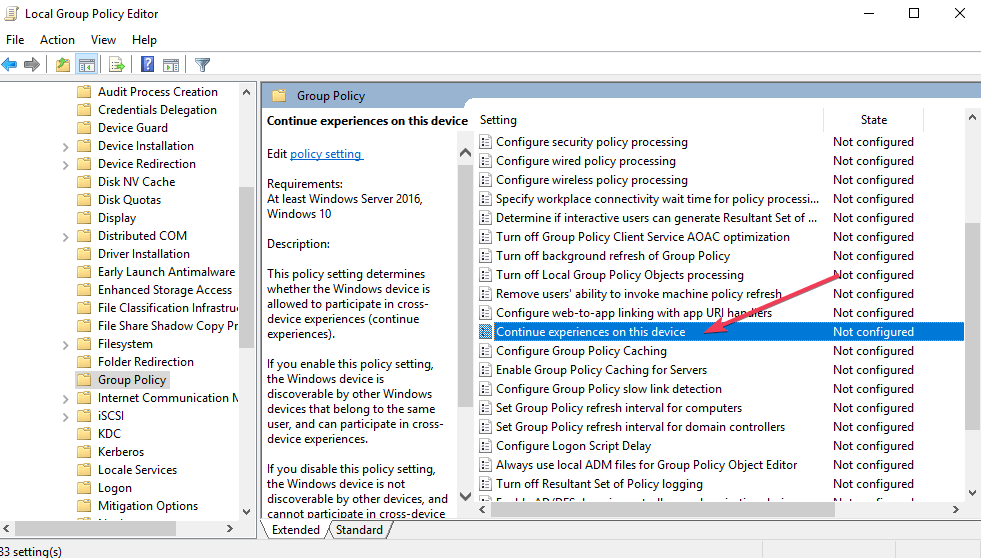
- Then double click Continue experiences on this device and choose the Disabled option.
— READ ALSO: Fix: ‘Your folder can’t be shared’ error in Windows 10
3. Use the Registry Editor
Before we continue, it goes without saying that you should use caution when changing the Registry Editor. Personally, I have never had a problem, but you never know your bad luck.
Unless you are sure that the first option above is not for you, I would avoid playing with the registry. If you are going to use this method, back up your entire PC.
First of all, press the Windows key + r, type in regedit, and click OK. You now need to follow the path below. By the way, you can just copy the path below, paste it into the address bar, and then press enter. That’ll save you a bit of time.
HKEY_LOCAL_MACHINE\SOFTWARE\Policies\MicrosoftWindows.
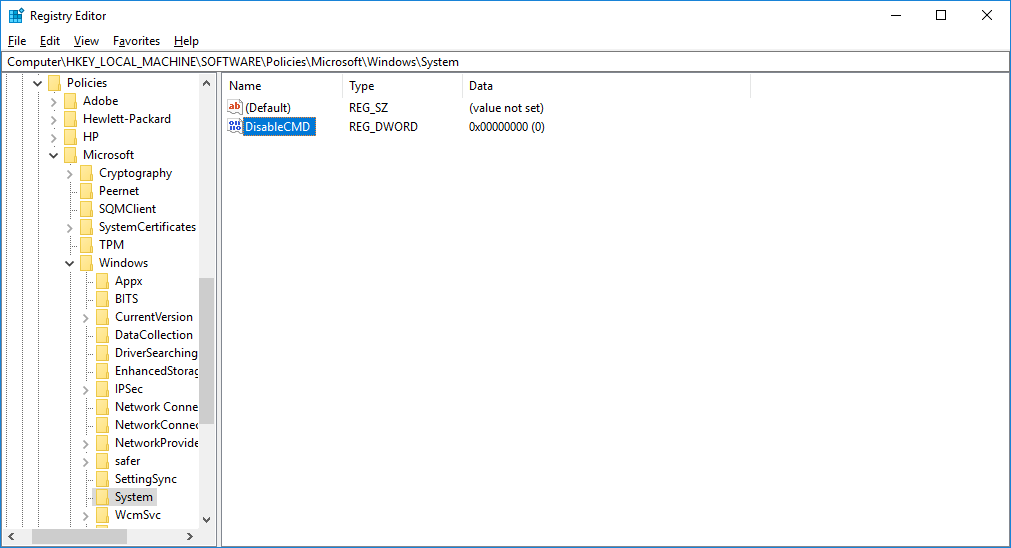
We need to work in a folder called System. You may already have a system folder, in which case, just right-click, select new, and then DWORD (32-bit) value. Check out the image below for more help.
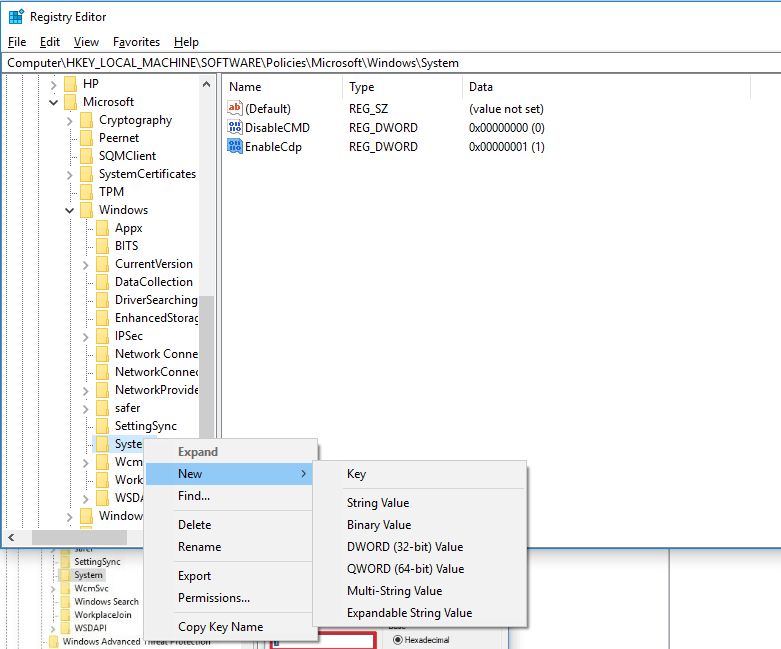
Name the new file EnableCdp. Now right-click again and click Modify. Give the file a value of one, click ok and you are done.
If you do not have a folder called System, you can create one by selecting Windows, and then right-clicking and selecting New Folder. Call it System, and then follow the method already described above.
And there you have it. Three easy ways to turn off Windows 10 Shared Experiences. Remember that using the Settings app is by the easiest and safest way to disable Shared Experiences. If you feel a rising panic every time you want to press Windows key + r, you probably should just use the app.
What do you think about Windows 10 Shared Experiences? Do you like it? More importantly, do you actually use it? Let us know by sharing your thoughts in the comments below.