Disable the Windows 11 Antimalware Service Executable
7 min. read
Updated on
Read our disclosure page to find out how can you help Windows Report sustain the editorial team. Read more
Key notes
- Disabling the Windows 11 Antimalware Service Executable should only be considered a temporary solution.
- Having this feature turned off without having antivirus software exposes your PC to a variety of online risks.
- Even though disabling this feature will improve your system's processing speed, we recommend a system upgrade for long-term results.
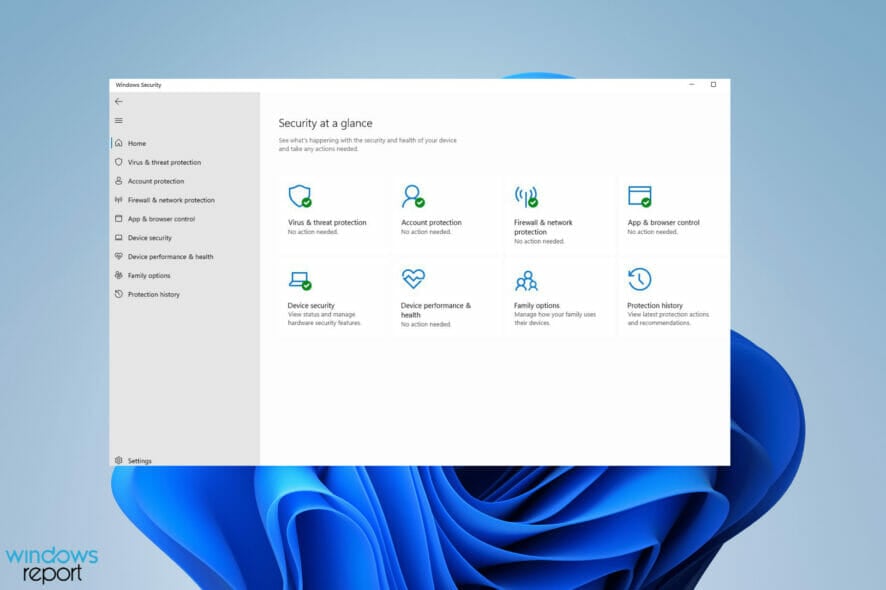
Antimalware Service Executable is the official name of the process Windows Defender uses to keep viruses and other kinds of malware away from your computer.
Windows Defender is an important piece of any Windows 11 system as it allows you to not worry about malware coming from the sites you visit or the files you download.
As soon as a threat appears, Windows Defender rushes in to defend you. Now, as good as Antimalware Service Executable can be, there are some issues with it. Namely, the process is a resource hog and eats up a lot of the CPU.
You could invest in a powerful eGPU for your computer, but this option would cost a lot more than tweaking your PC’s settings temporarily.
Because the Executable takes up a lot of system resources, this can cause other apps and the entire Windows 11 system to work very slowly and makes the overall experience frustrating to deal with.
That being said, if your PC is barely capable of running Windows 11, this temporary fix will not improve your OS speed considerably and will bother you continuously.
If that’s the case, be sure to check out some amazing Windows 11 laptops, or choose a powerful tablet setup that also offers great processing speeds without affecting your mobility.
If you’re not inclined to move around with your laptop or do work on road trips, then you could choose to invest in a powerful Windows 11 enabled desktop PC.
The extra space allows for extra power, and thus you will never have to deal with lagging actions while using your device.
Another big advantage if you’re inclined to choose a desktop setup is the fact that it can harbor a more powerful CPU, more storage space with great speeds, and even a better GPU setup which offers an amazing immersive experience no matter if playing games or watching your favorite shows.
Why does Antimalware Service Executable take so much resources?
Whenever you start a system scan, Antimalware Service Executable is activated and uses the CPU in this process. This causes the CPU to work overtime as it searches for any malware.
Even something as simple as a routine scan takes up a significant amount of the computer’s resources.
This won’t prevent you from using other apps while Windows Defender scans, but you’ll notice a significant drop in performance.
It is technically possible to delete the Antimalware Service Executable, but this isn’t recommended.
The process is the main driving force behind Windows Defender and deleting it can put your computer at risk of infection if you don’t have a backup antivirus app with great performance, we recommend to install ESET which is one the best currently available on the market. And even if you could, you probably won’t be able to do it since it’s a System process and Windows 11 won’t allow you to delete it.
The best thing you can do is disable Antimalware Service Executable, even if it’s temporary. This guide will show you the different methods you can use to disable Antimalware Service Executable, from the simplest method to the more complex ones.
How can I turn off Antimalware Service Executable?
1. Use the Settings app
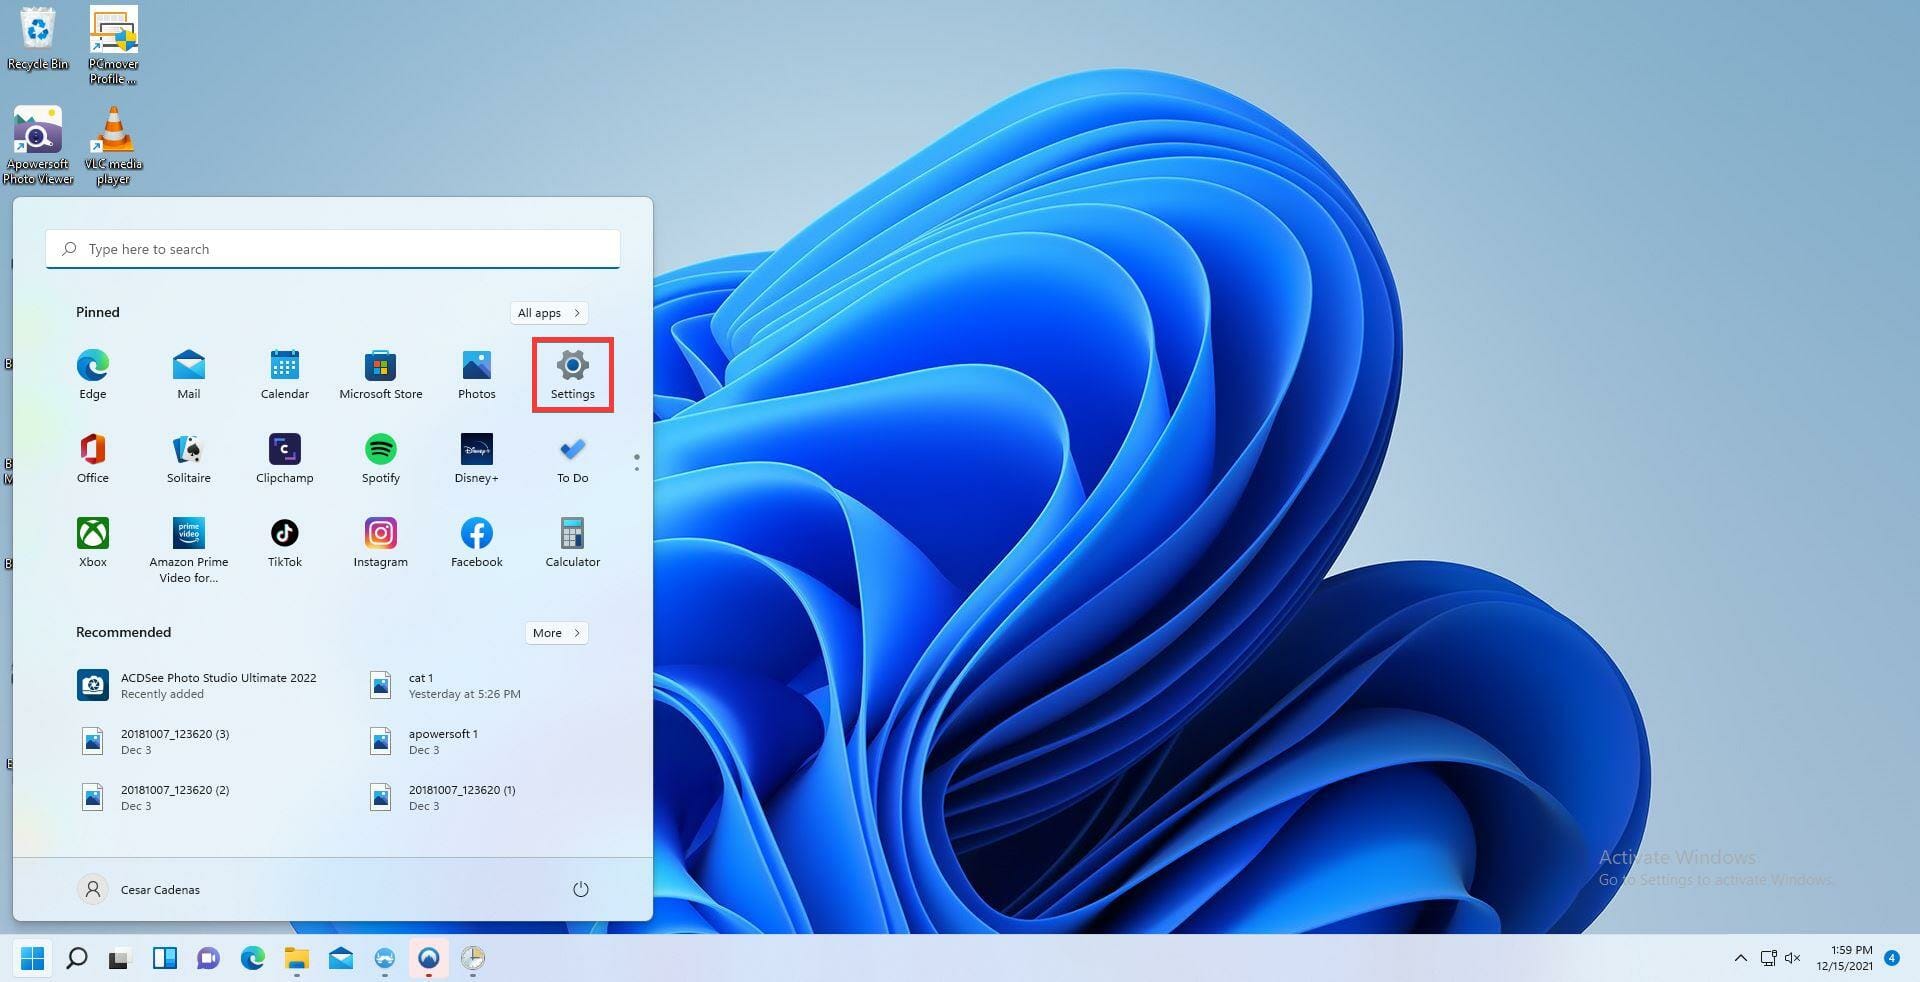
- Open the Windows Start menu by clicking on the Start menu icon in the taskbar.
- Click the Settings icon.
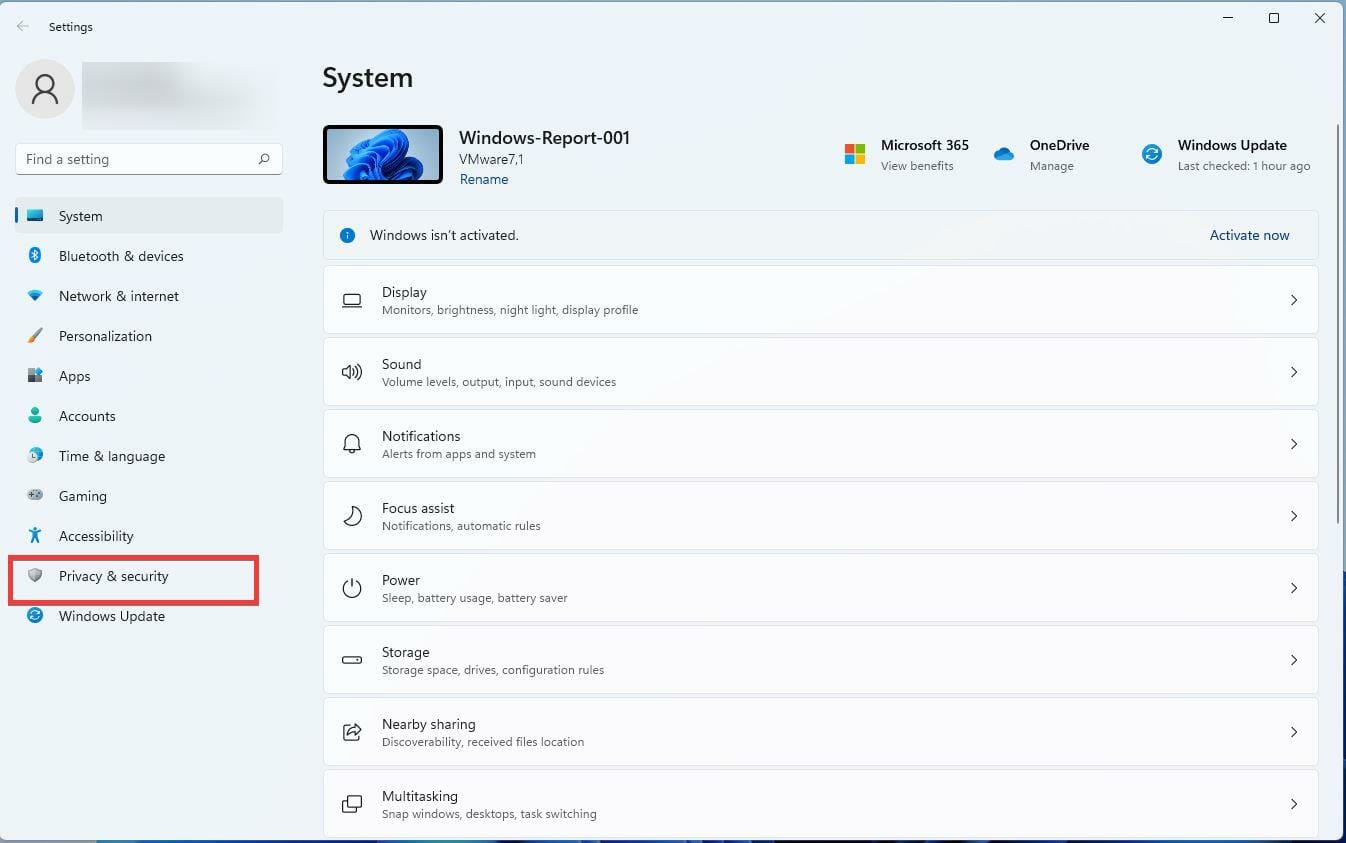
- Scroll down to the Privacy & Security tab.
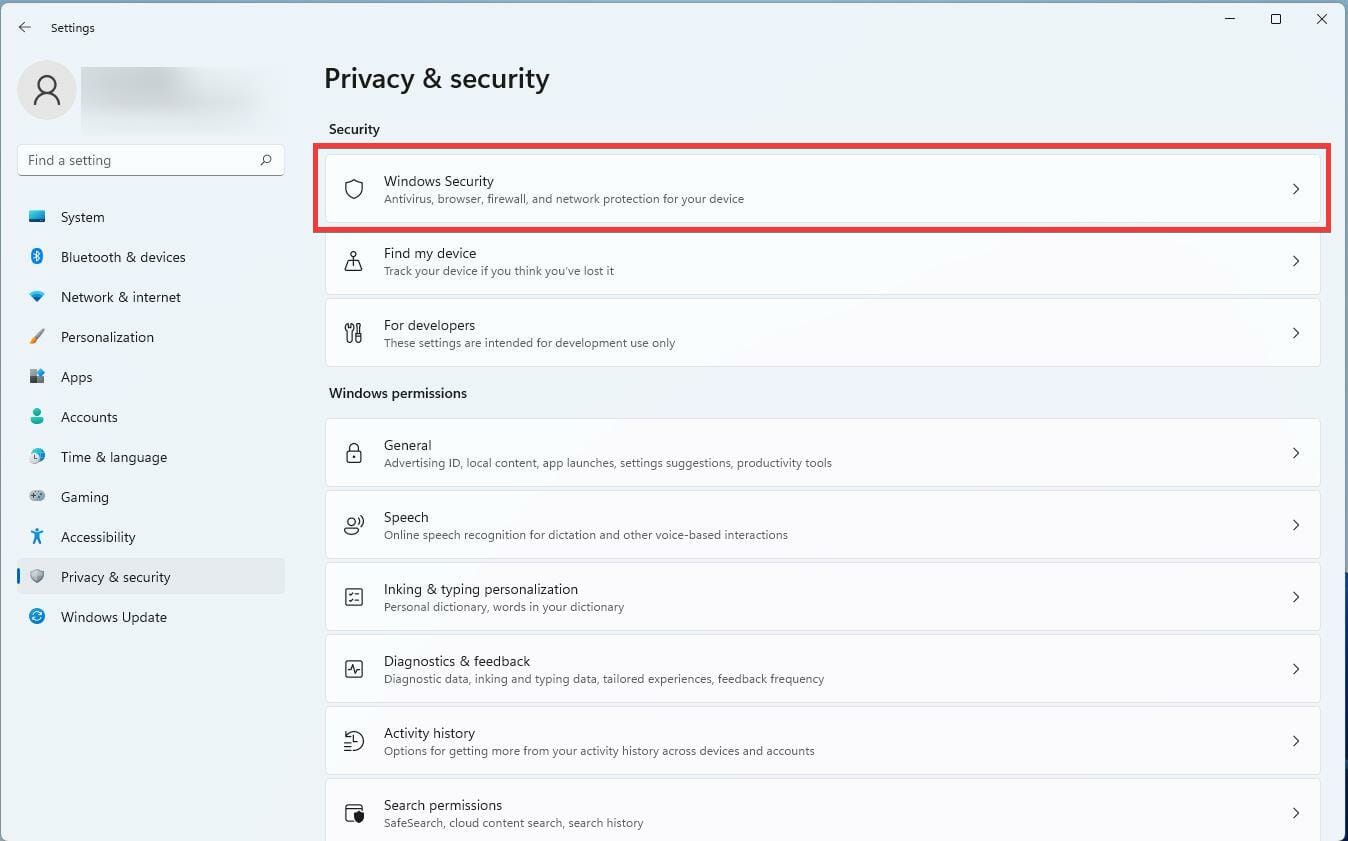
- Click Windows Security on the right.
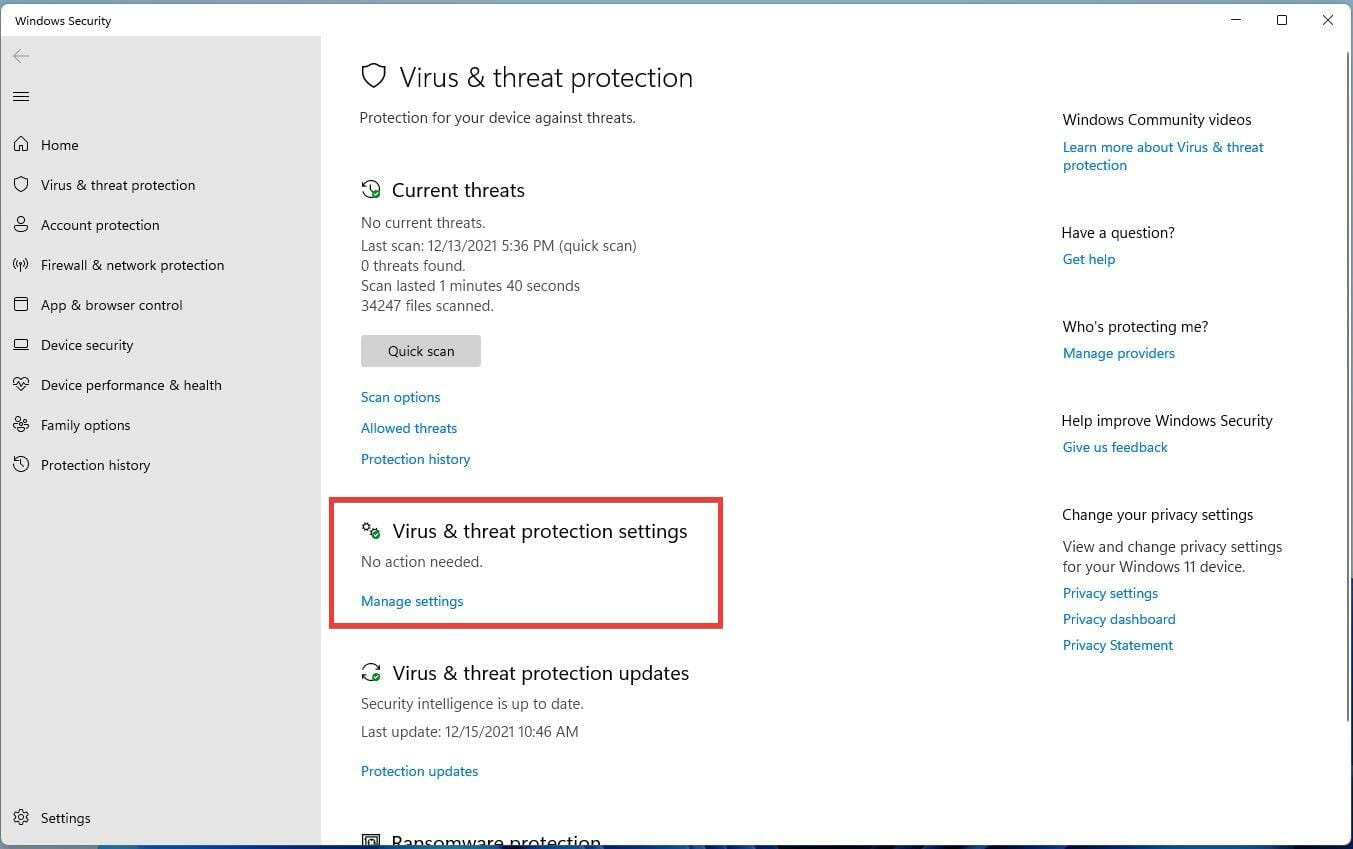
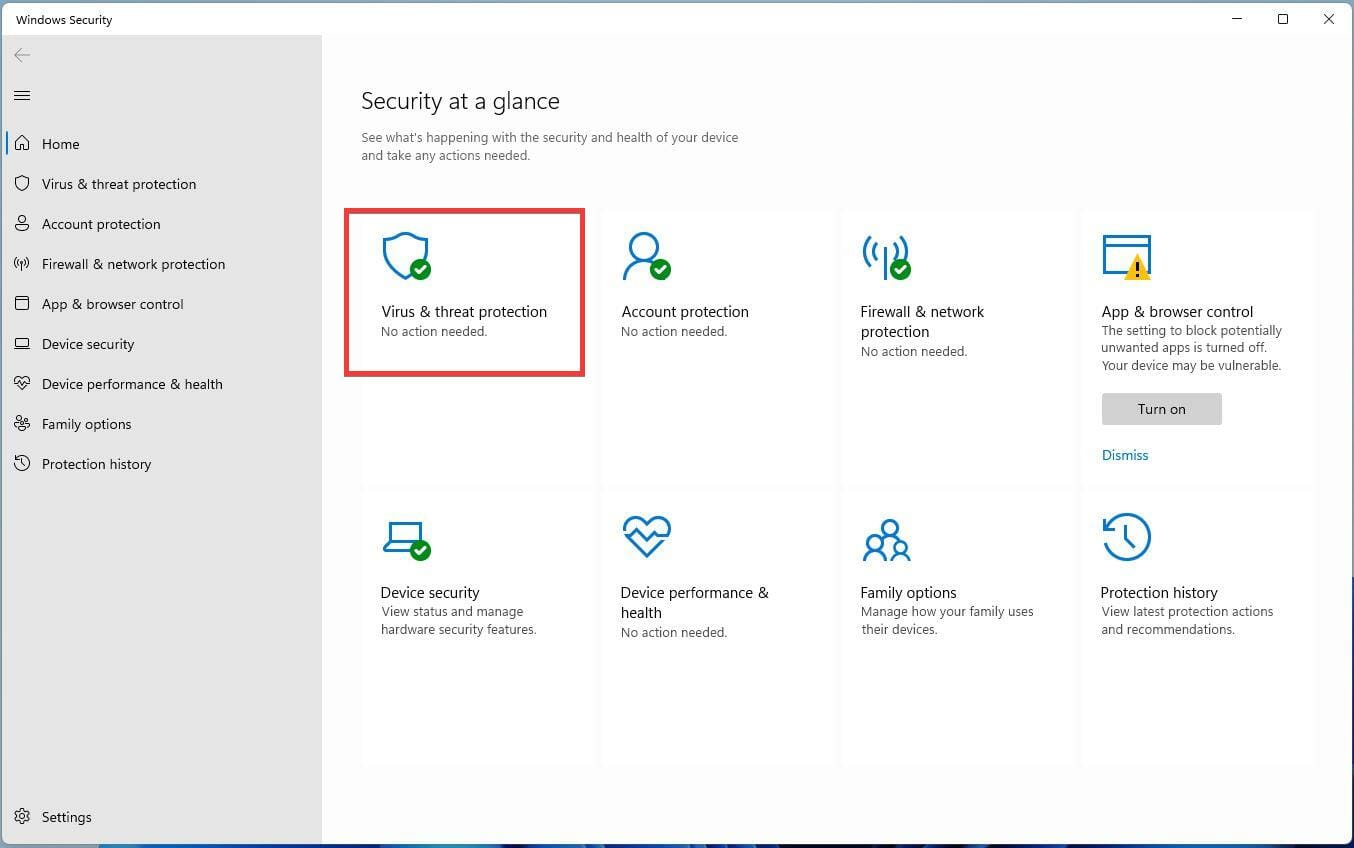
- Click Virus & threat protection. A window will appear for Windows Security.
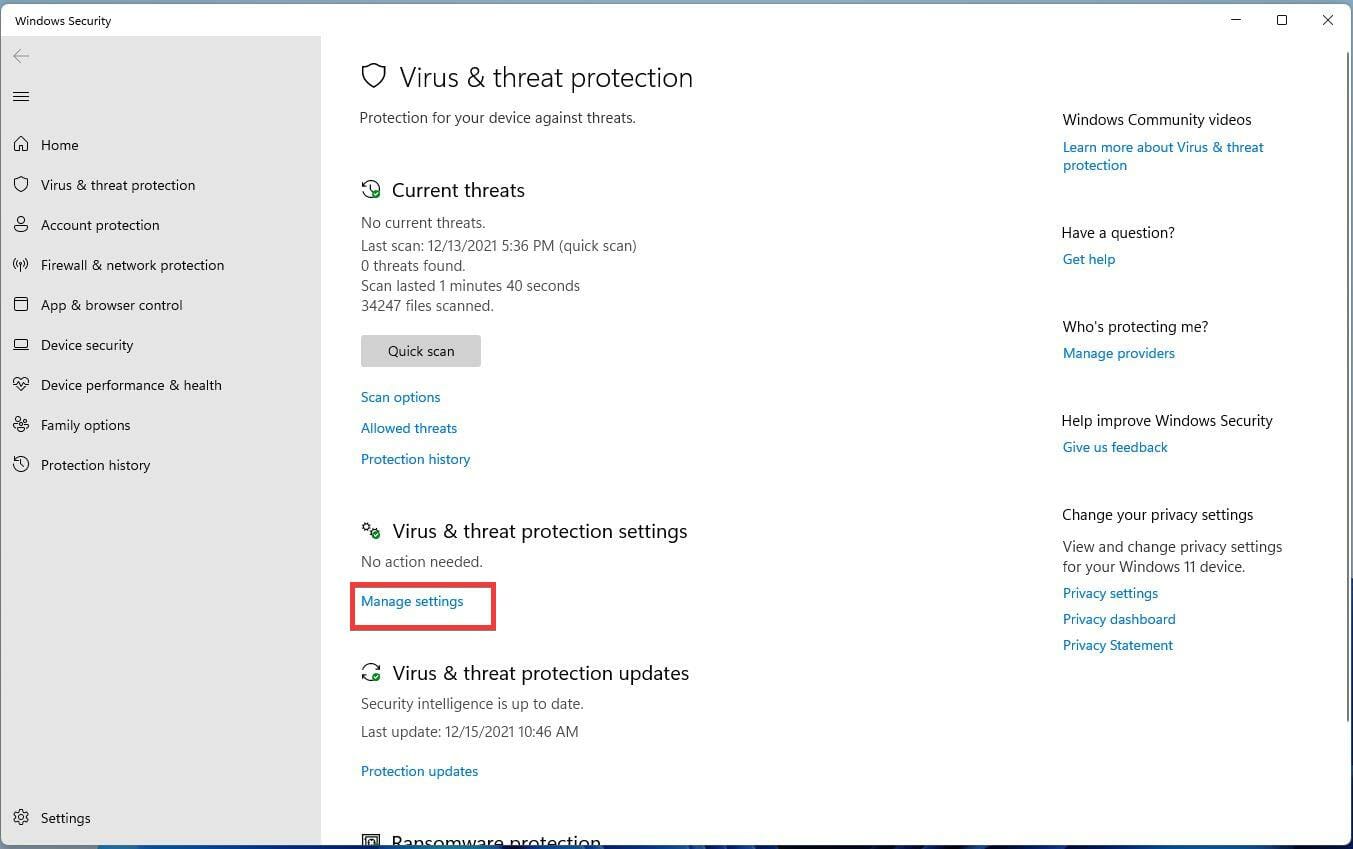
- Locate Virus & threat protection settings. It’s the second entry.
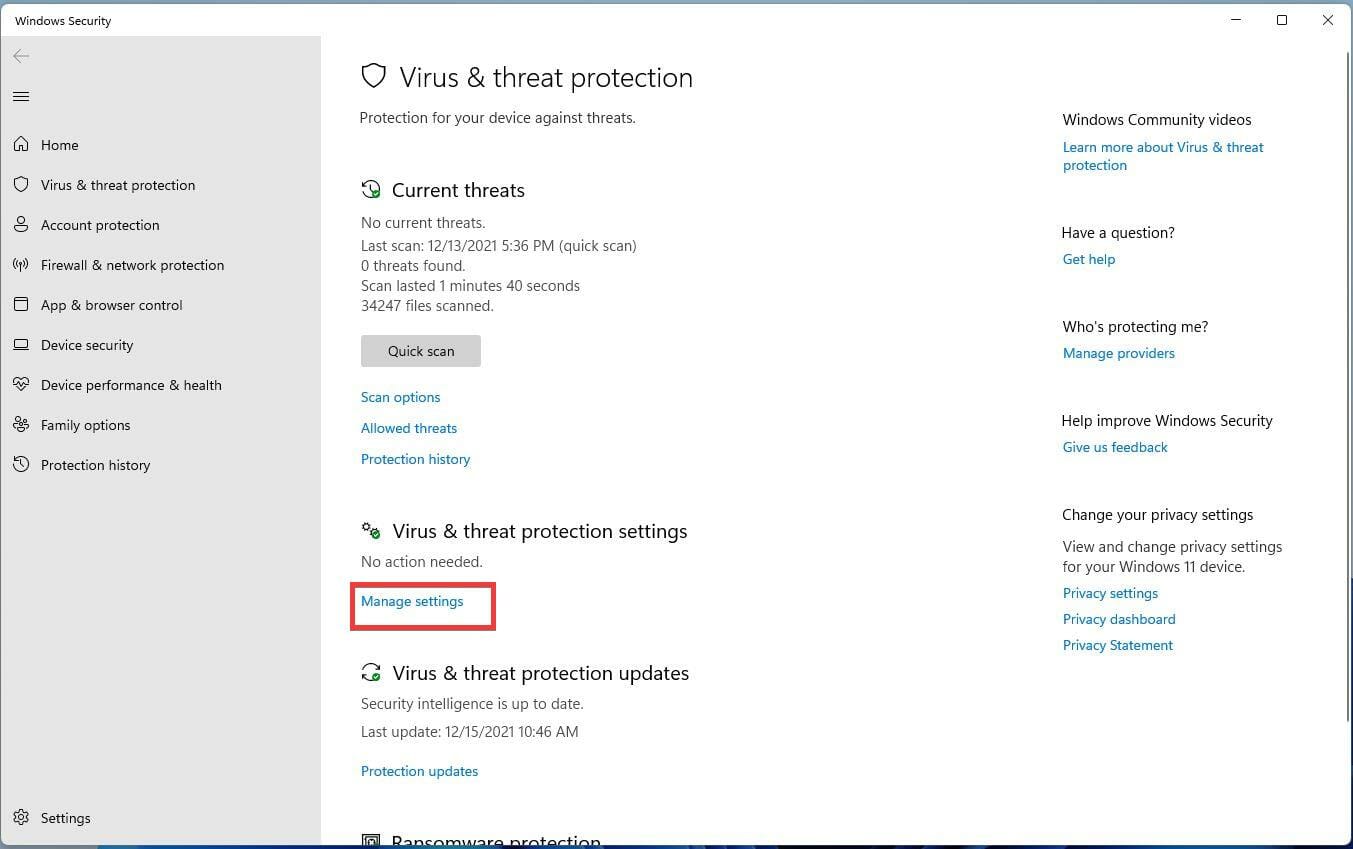
- Click Manage settings underneath it.
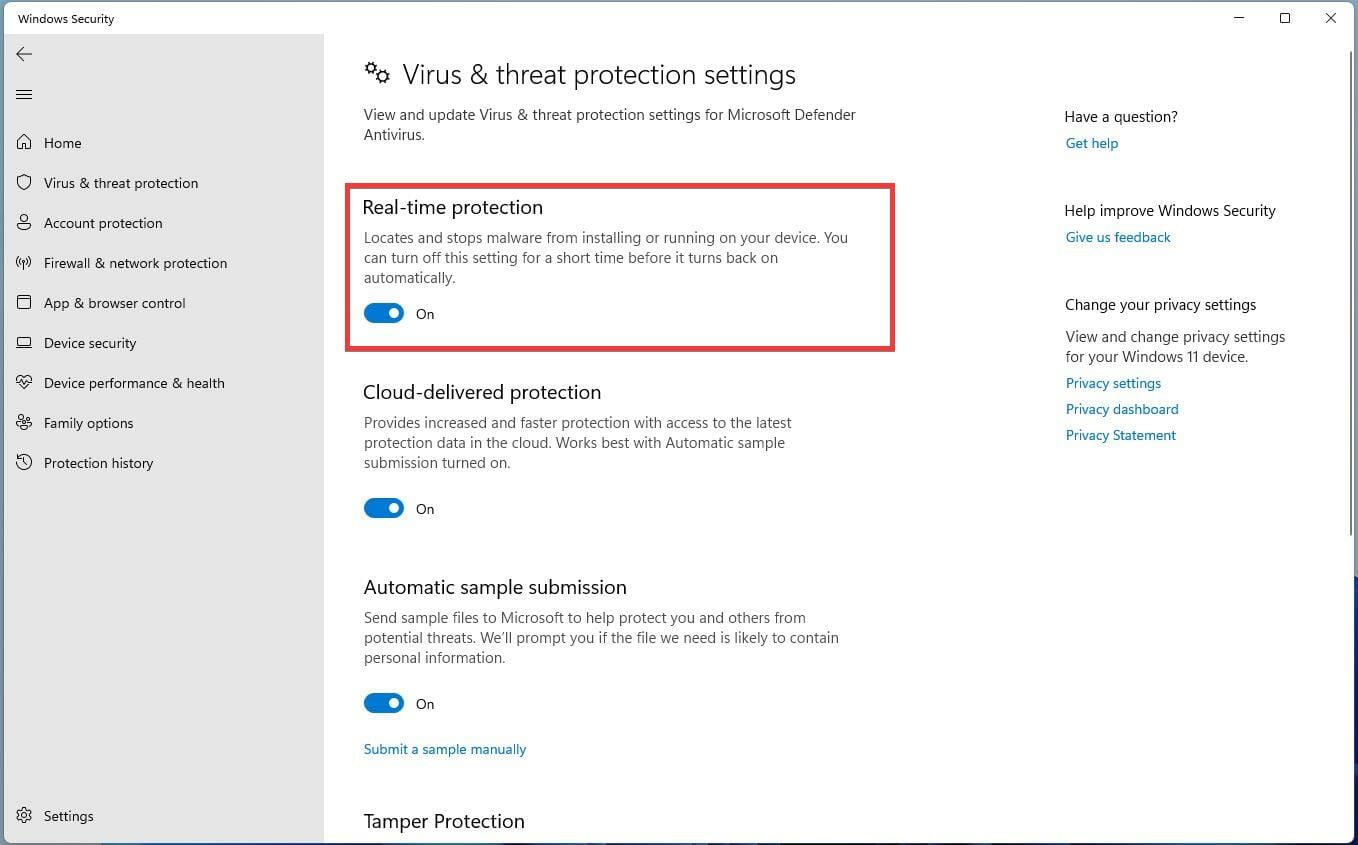
- Locate Real-time protection and slide the switch to turn off Windows Defender.
 NOTE
NOTE
2. Use the Registry Editor
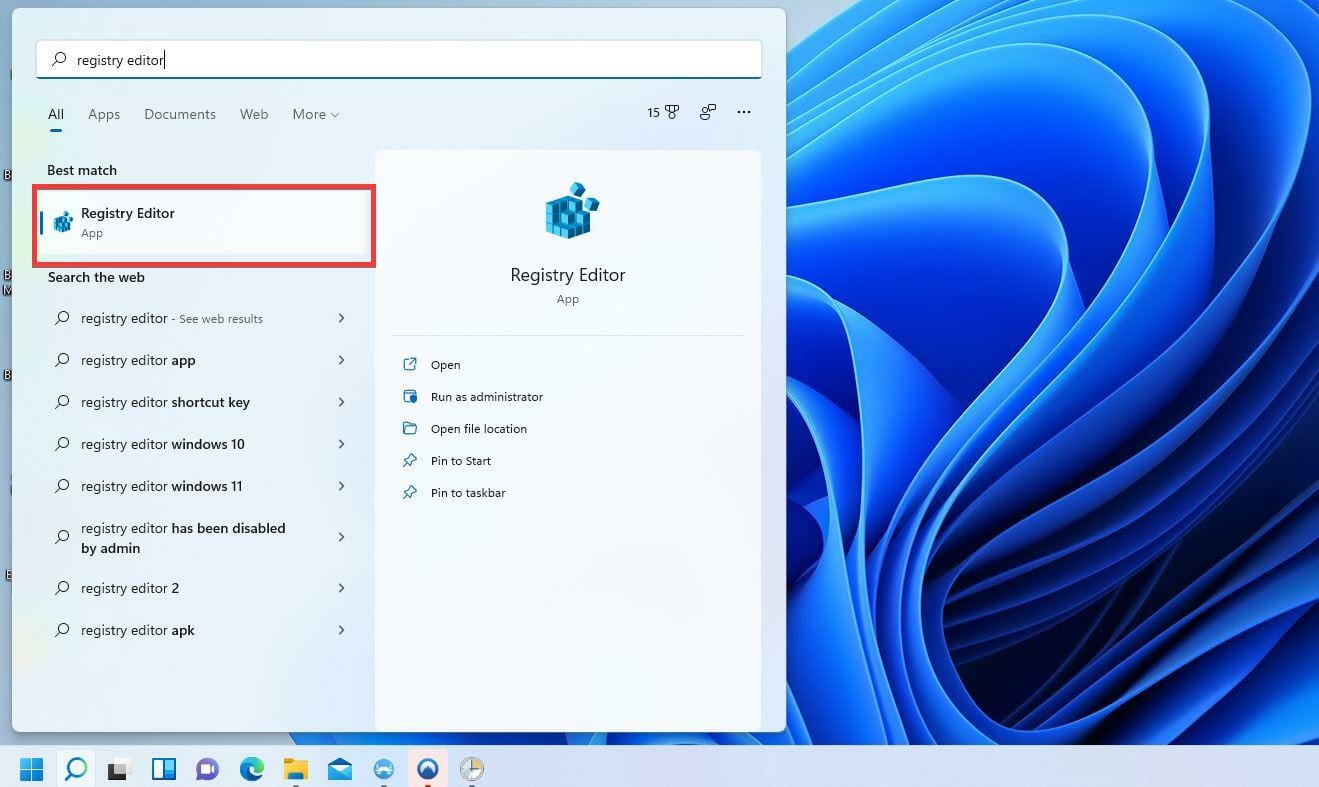
- Click on the magnifying glass icon to bring up the Search bar.
- Type Registry Editor in the Search bar.
- Click on the first entry you see.
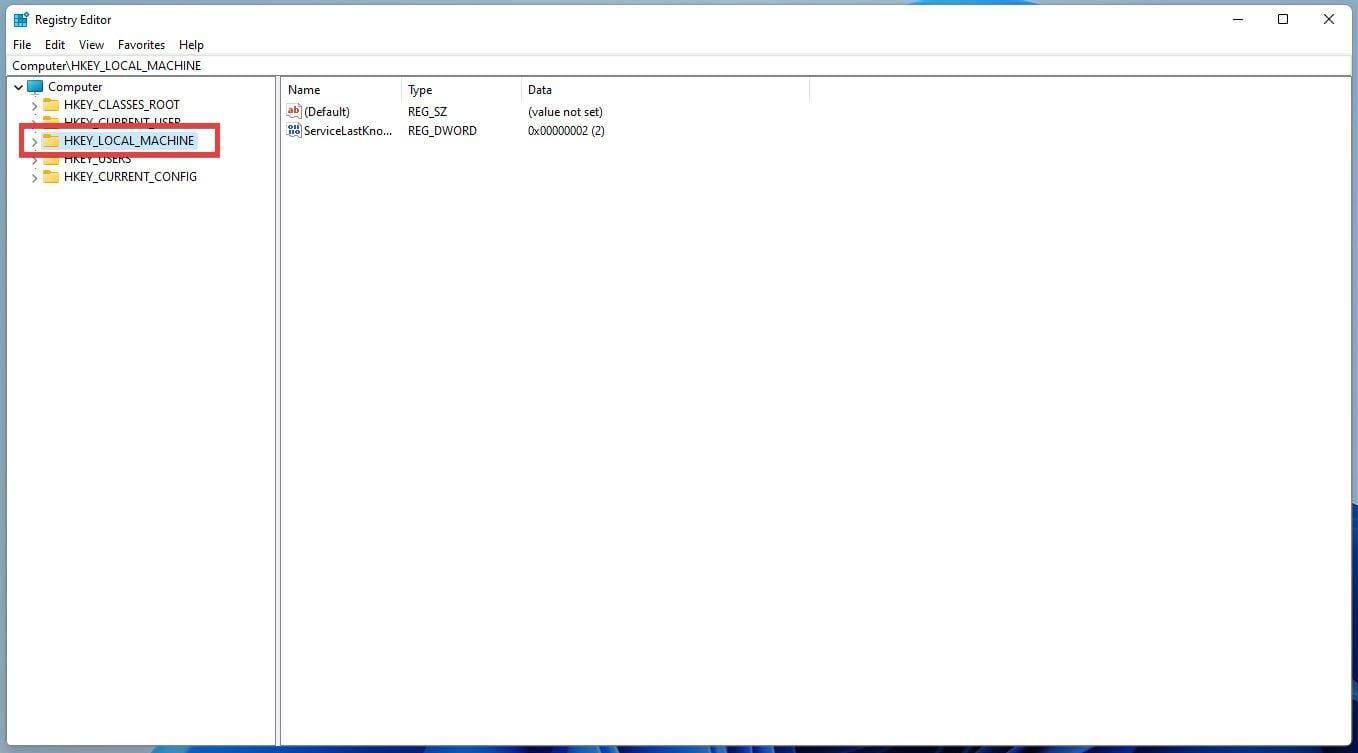
- On the left hand side of the Registry Editor, click on the arrow next to HKEY_LOCAL_MACHINE to open the drop-down menu.
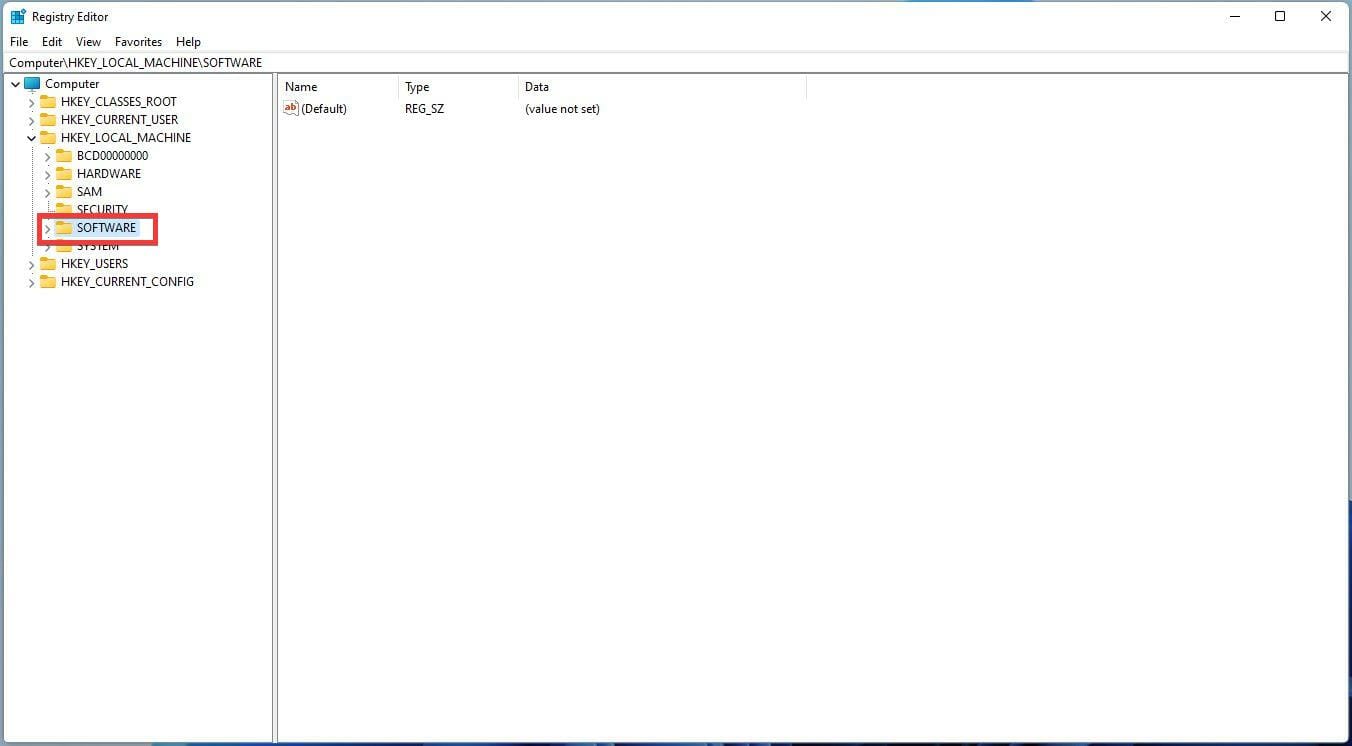
- In the new menu, click SOFTWARE to open another drop-down menu.
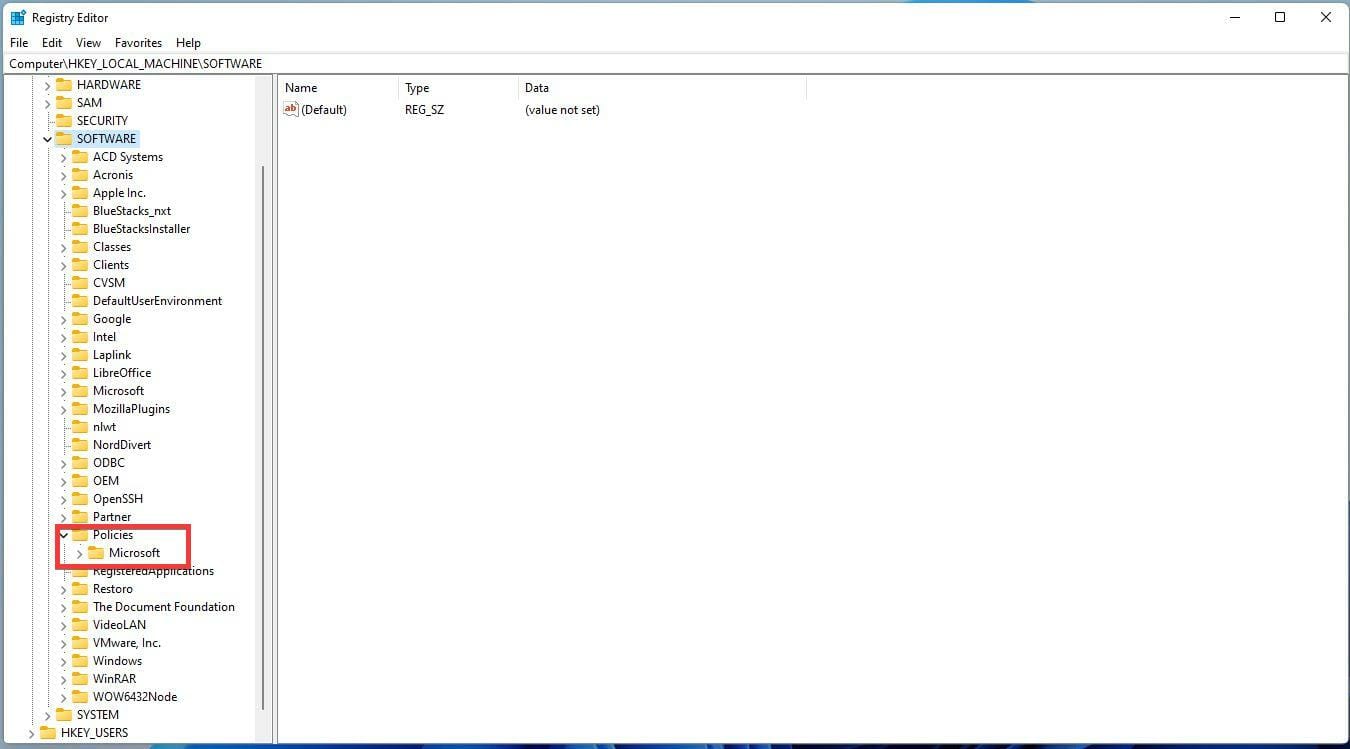
- Scroll down and click Policies.
- Click Microsoft.
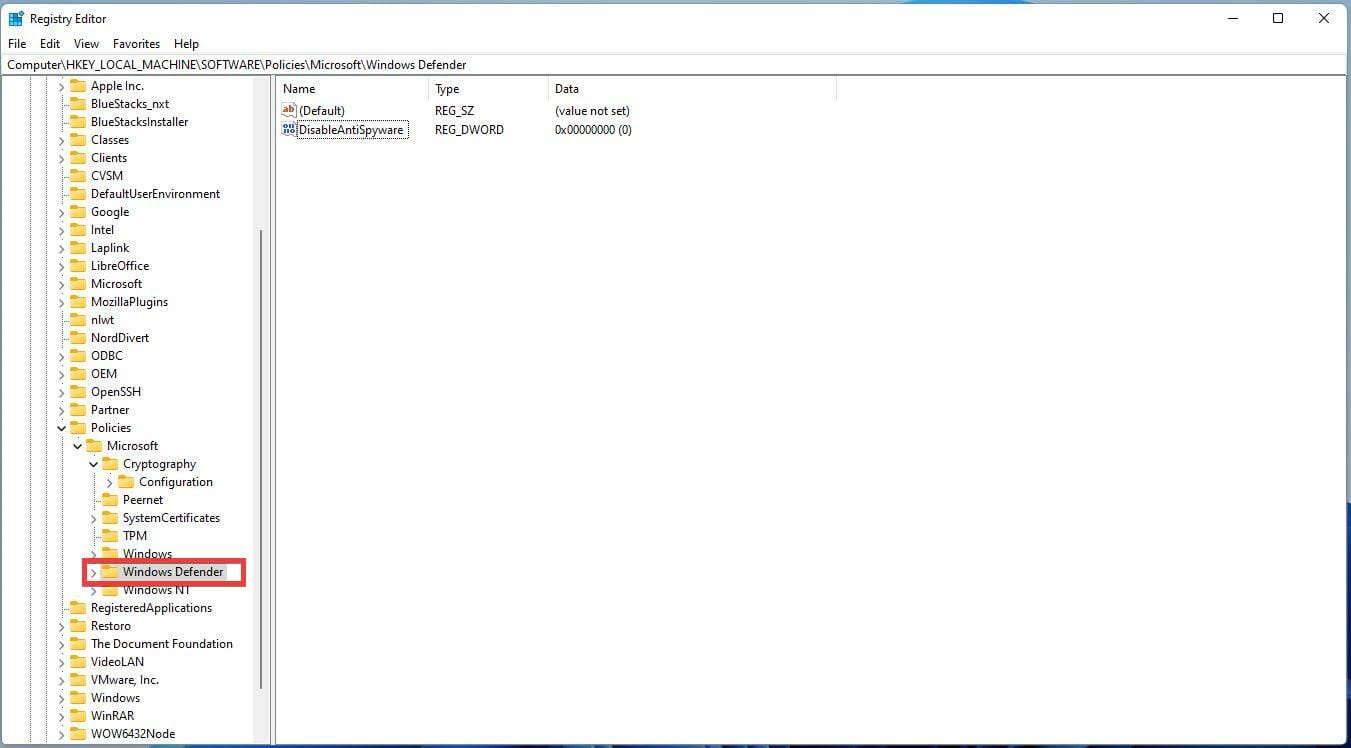
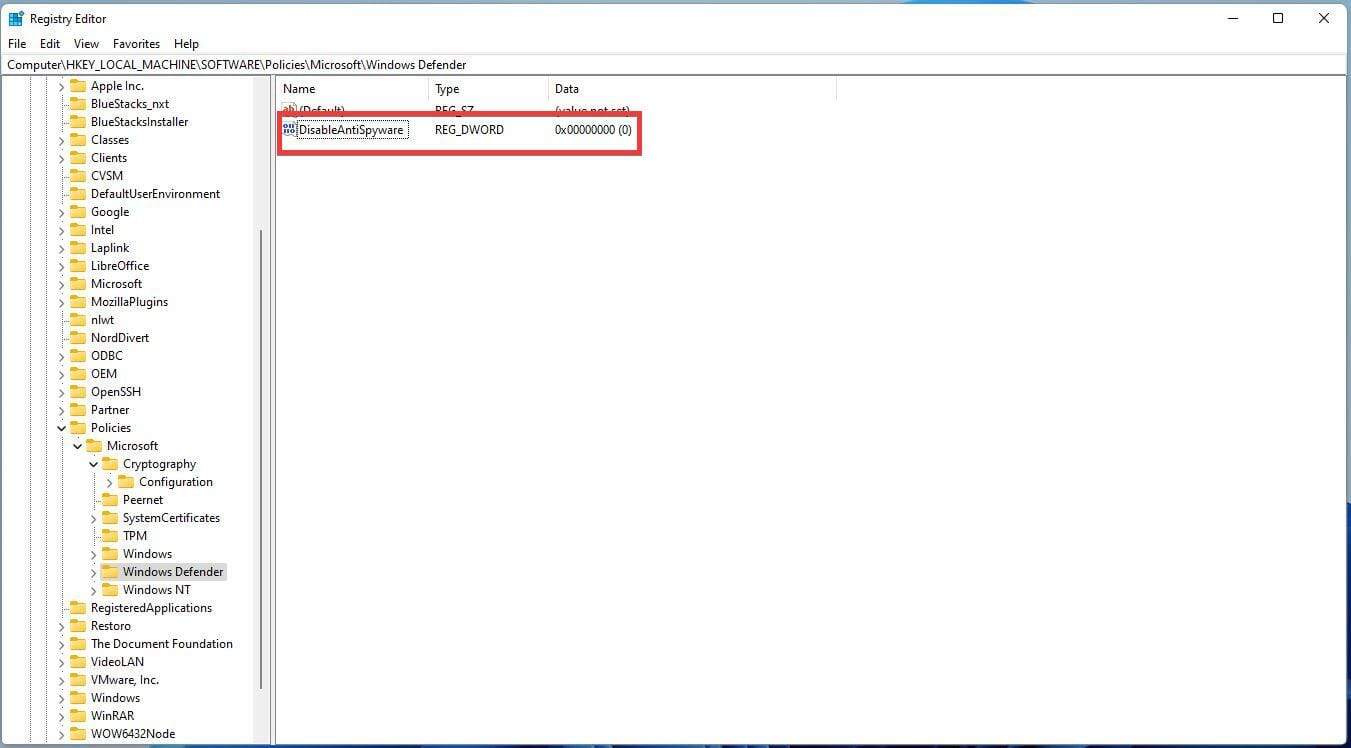
- Click Windows Defender.
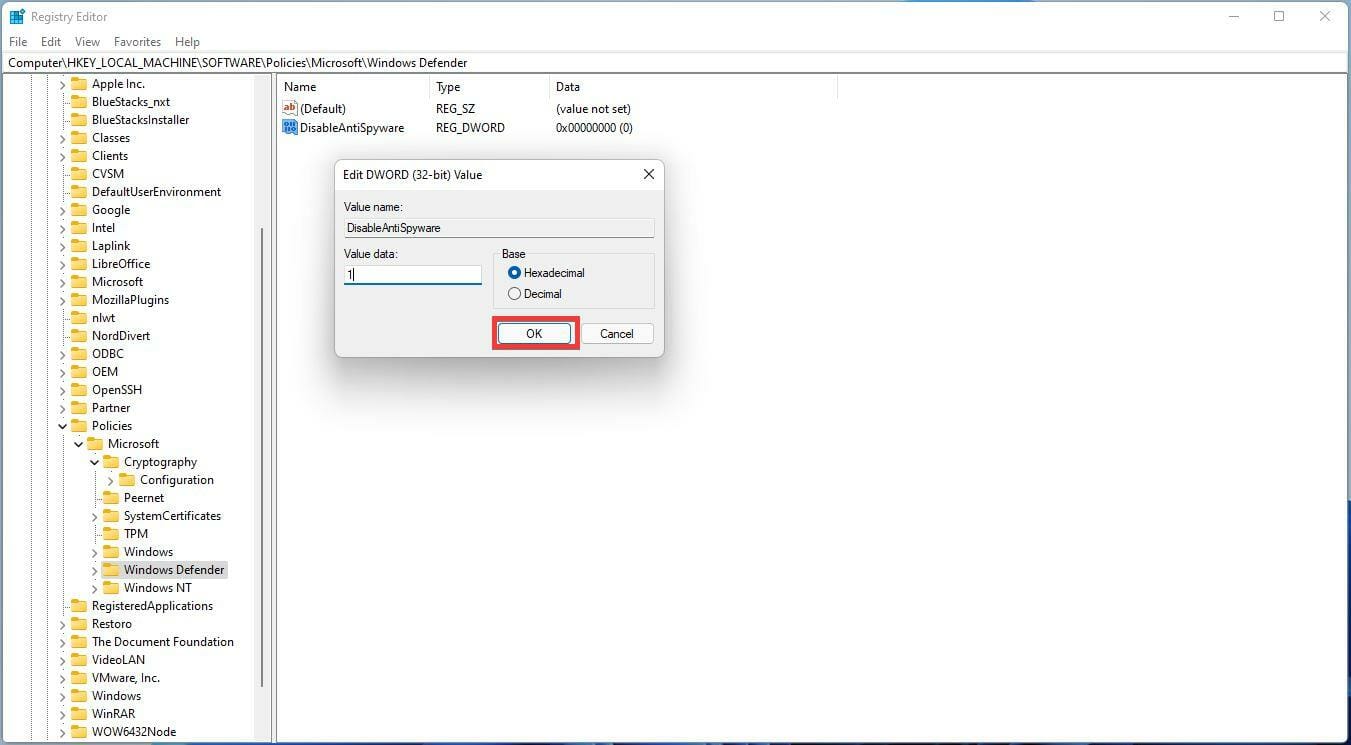
- Locate a registry entry called DisableAntiSpyware.
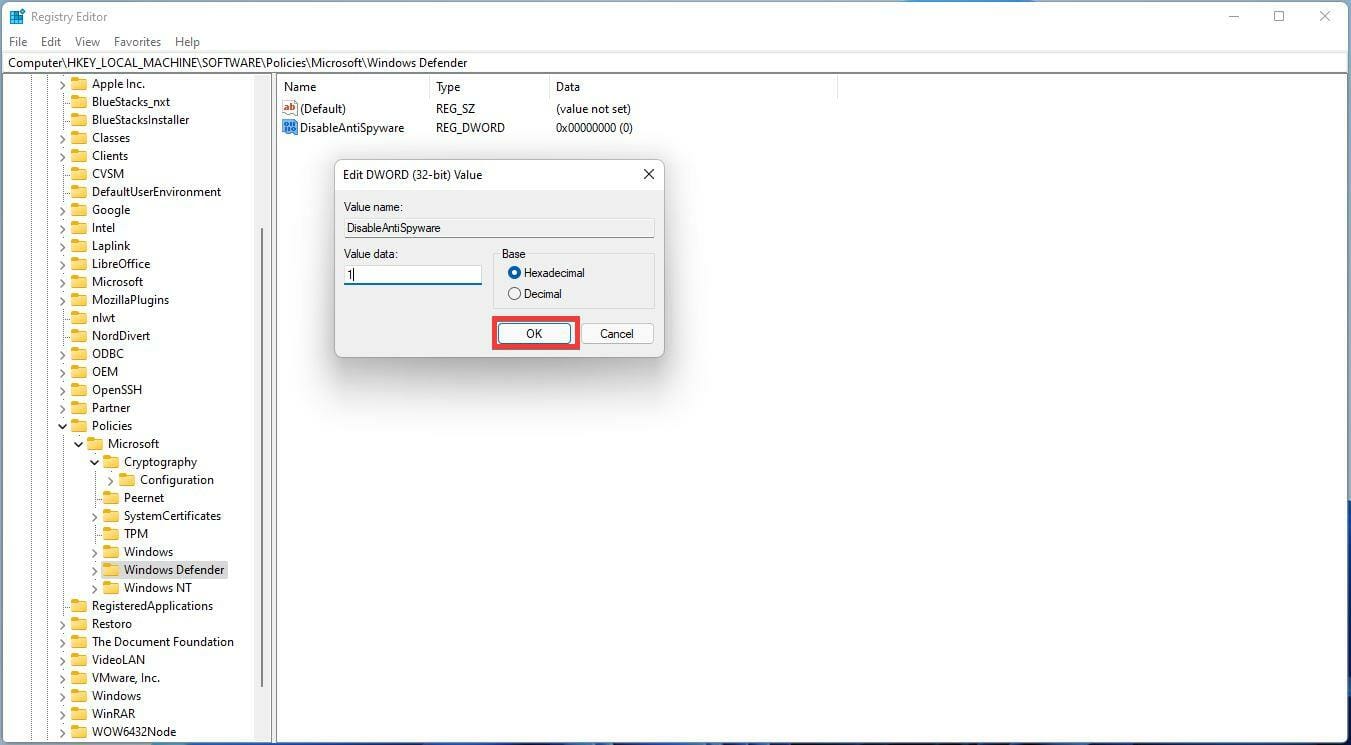
- Double-click it and a small window will appear.
- In this new windows, set the Value Data to 1. Then click Ok.
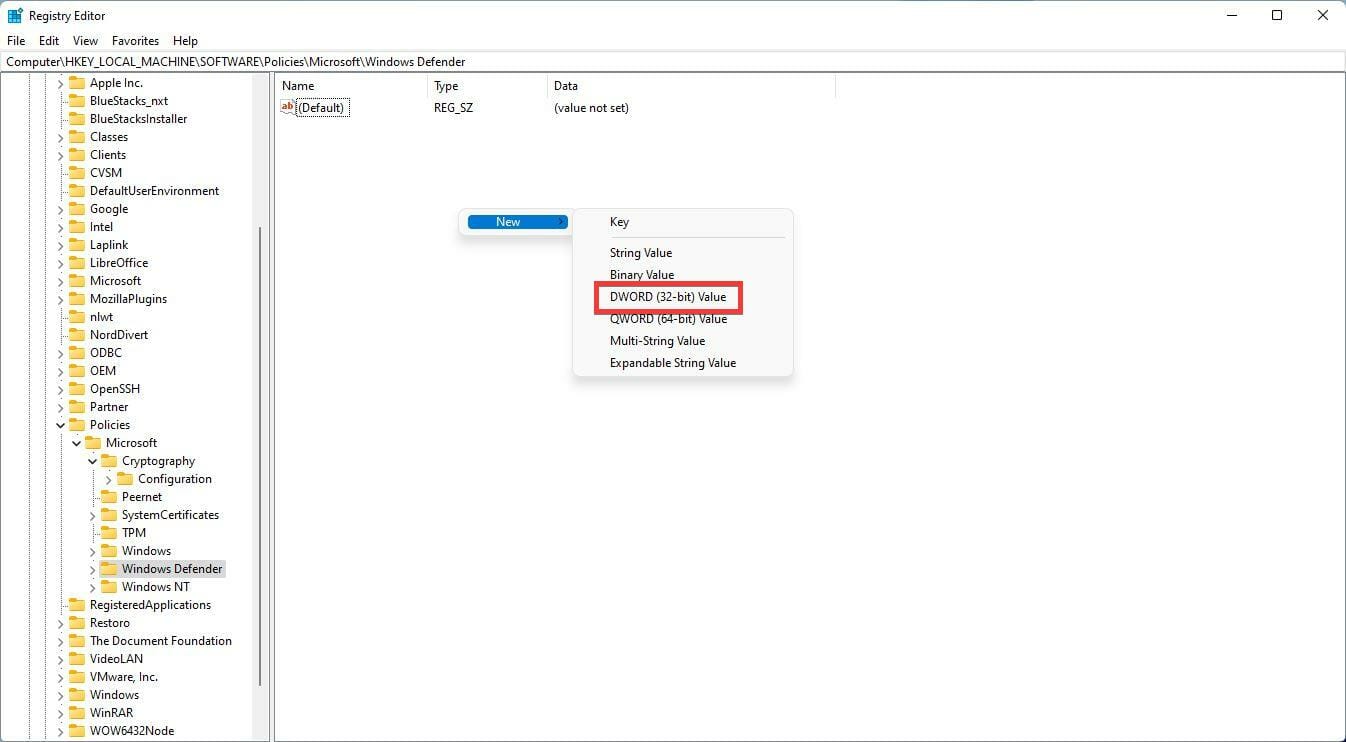
- If there is no DisableAntiSpyware entry, you can create it and perform the same steps.
- While still in the Windows Defender page, right-click to bring up a drop-down menu.
- Select DWORD (32 bit) Value.
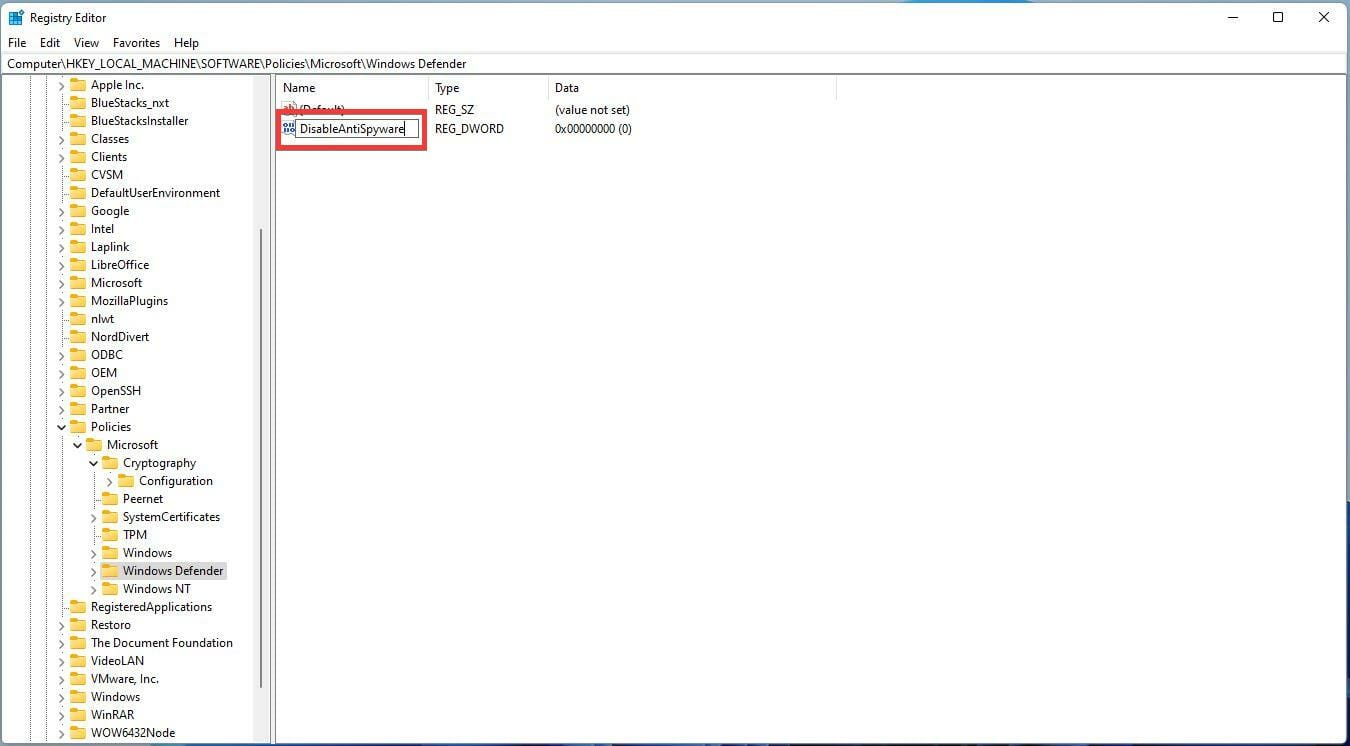
- Name the registry DisableAntiSpyware.
- Perform the earlier steps of double-clicking and setting the Value Data to 1.
3. Add the process to the Exclusion List
- Click the magnifying glass icon to bring up the Search bar.
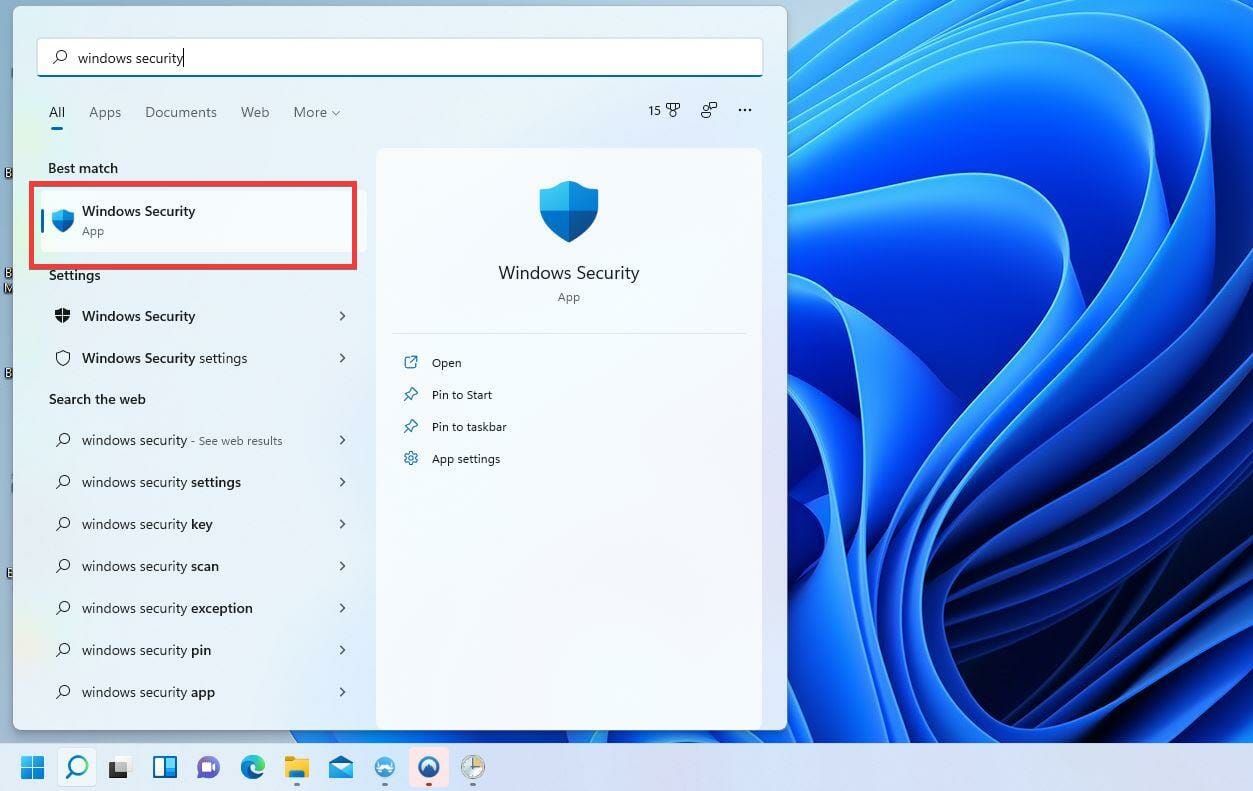
- Type Windows Security in the Search bar.
- Click the first entry you see.
- In Windows Security, click Virus & threat protection.
- Scroll down to Manage settings underneath Virus & threat protection settings.
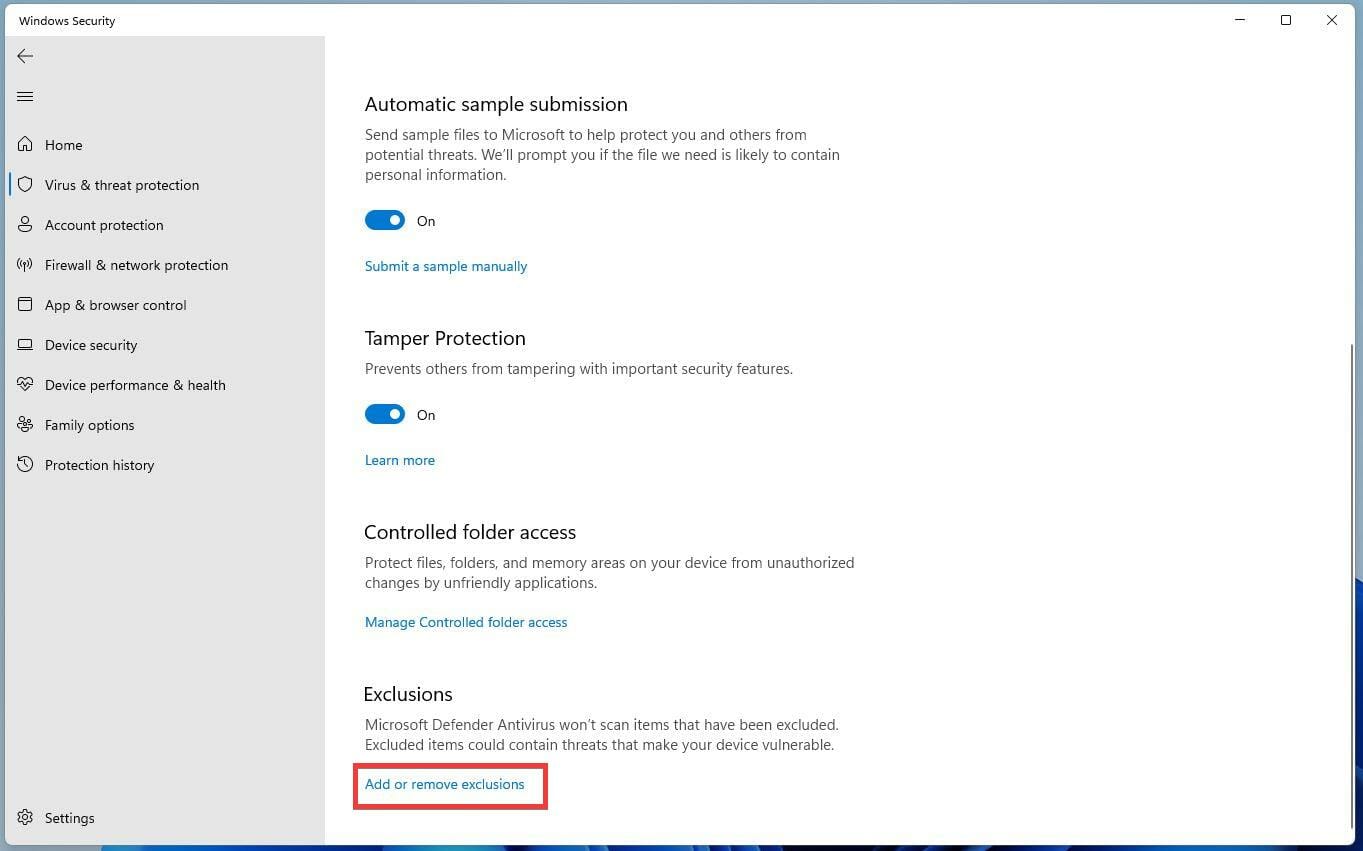
- In this new window, scroll all the way down where you see a section titled Exclusions.
- Under Exclusions, click Add or remove exclusions.
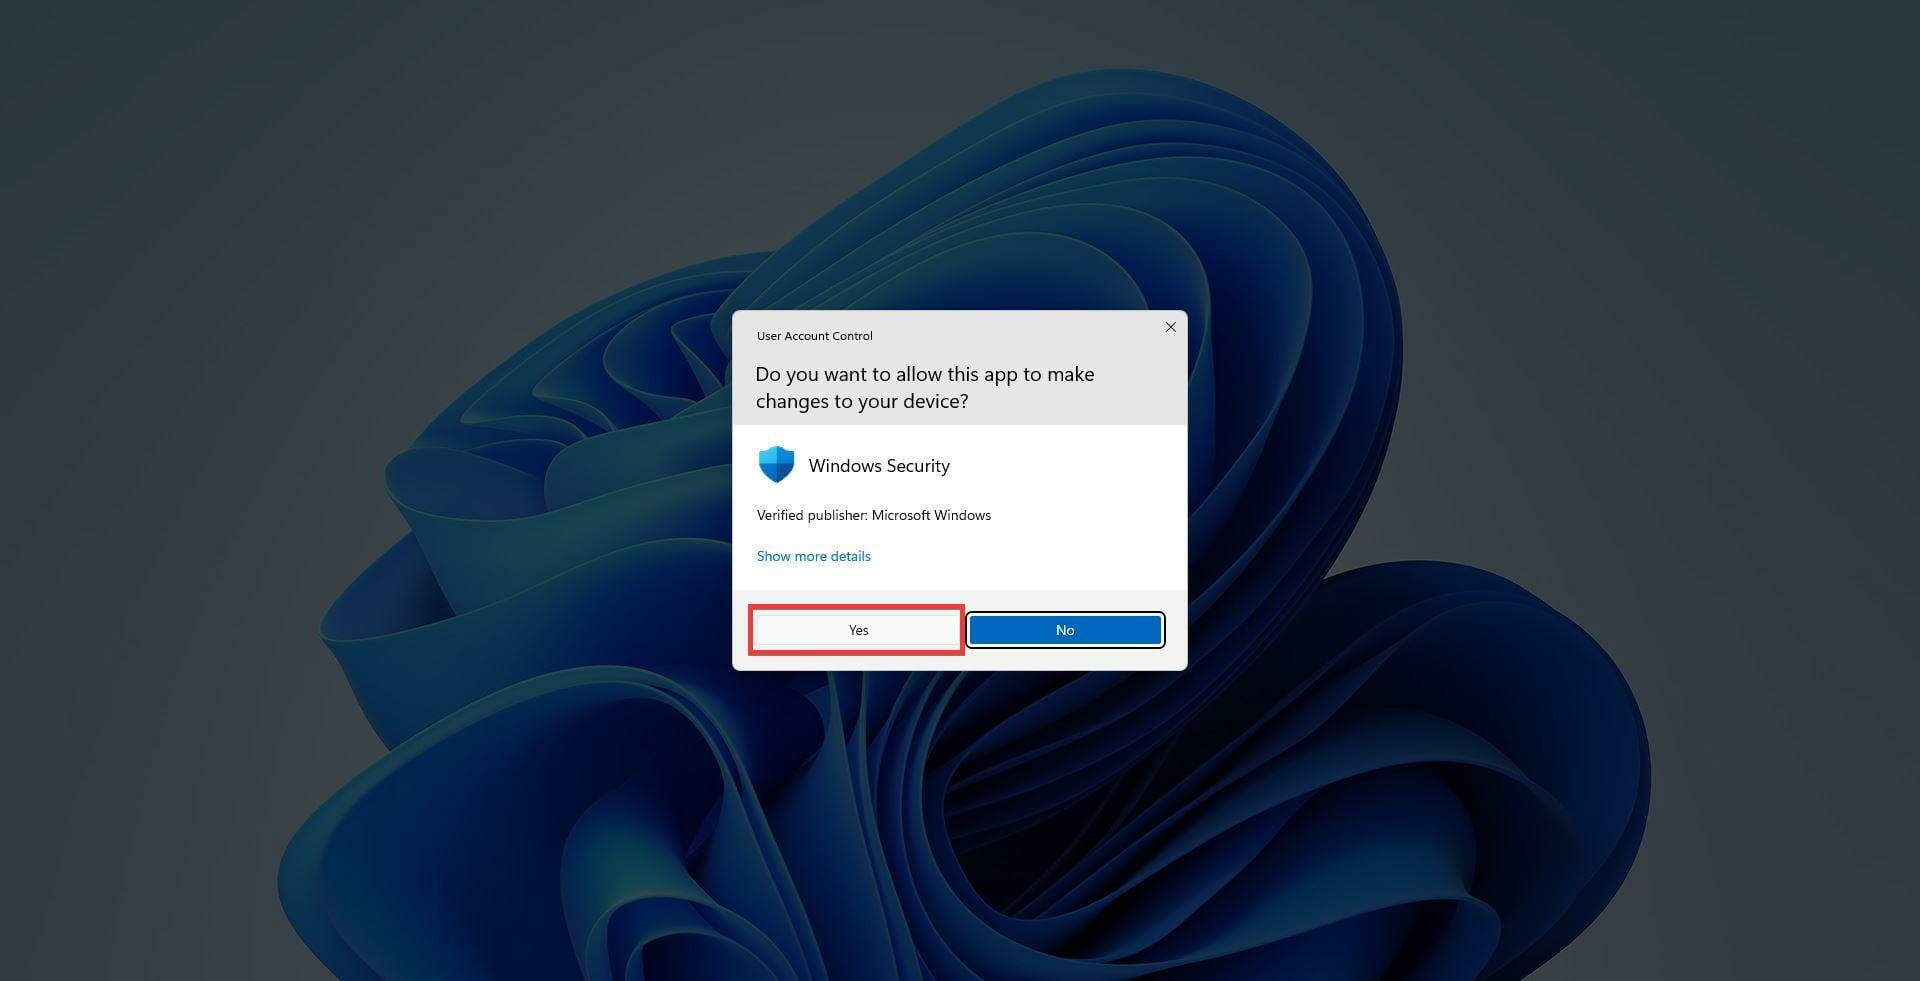
- A small window will appear asking you if you want to make change. Select Yes.
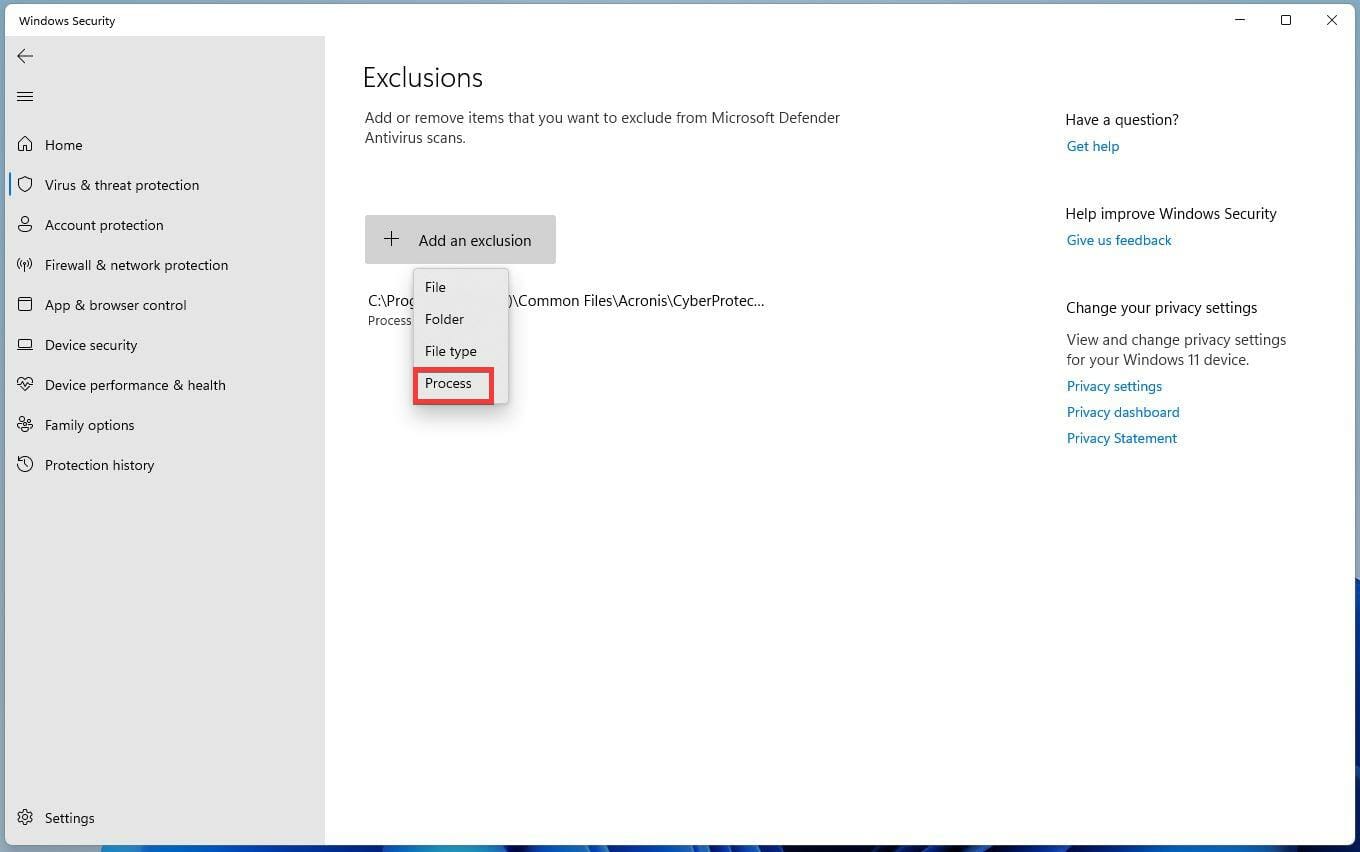
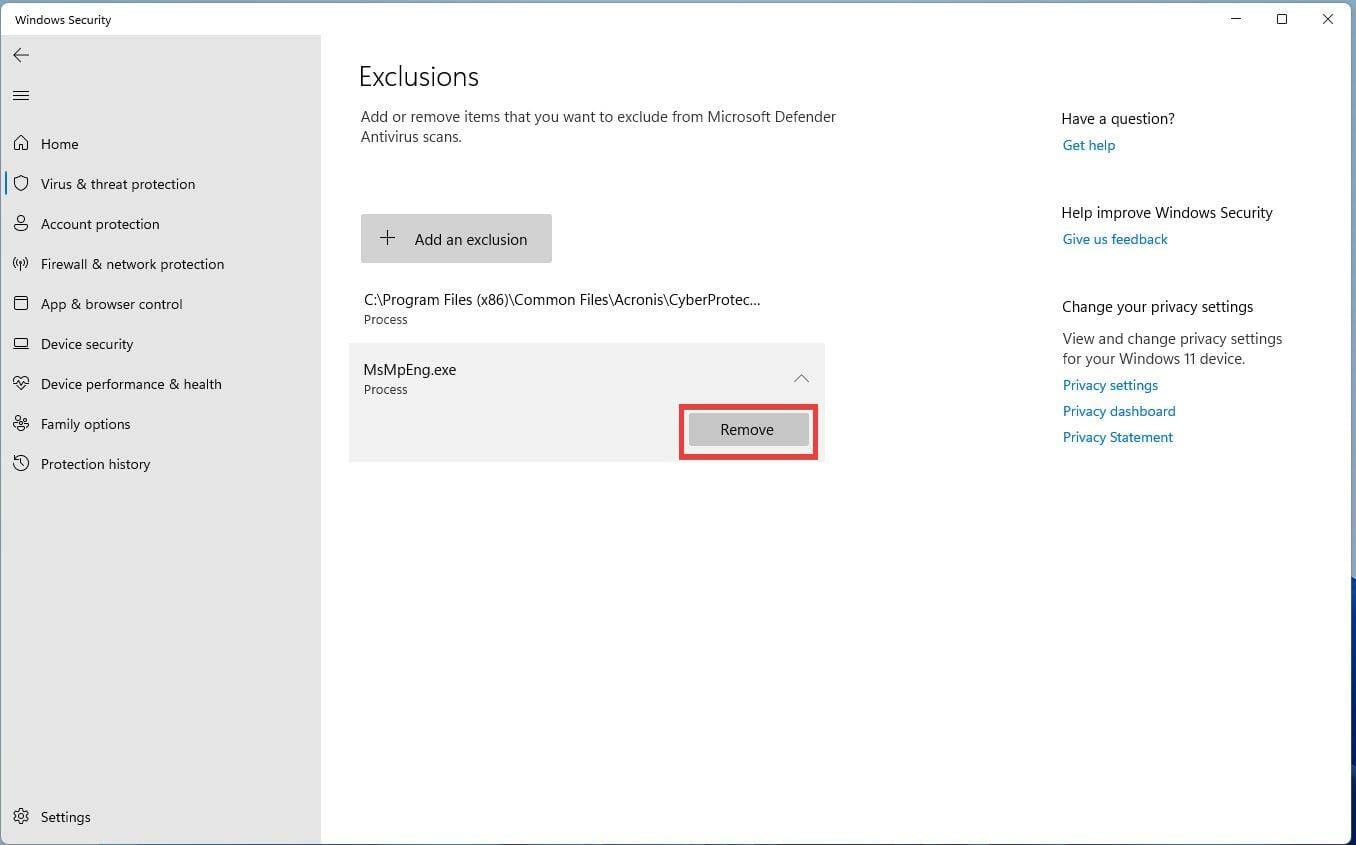
- In the Exclusions window, click Add an exclusion to bring down a drop-down menu.
- In this drop-down menu, select Process.
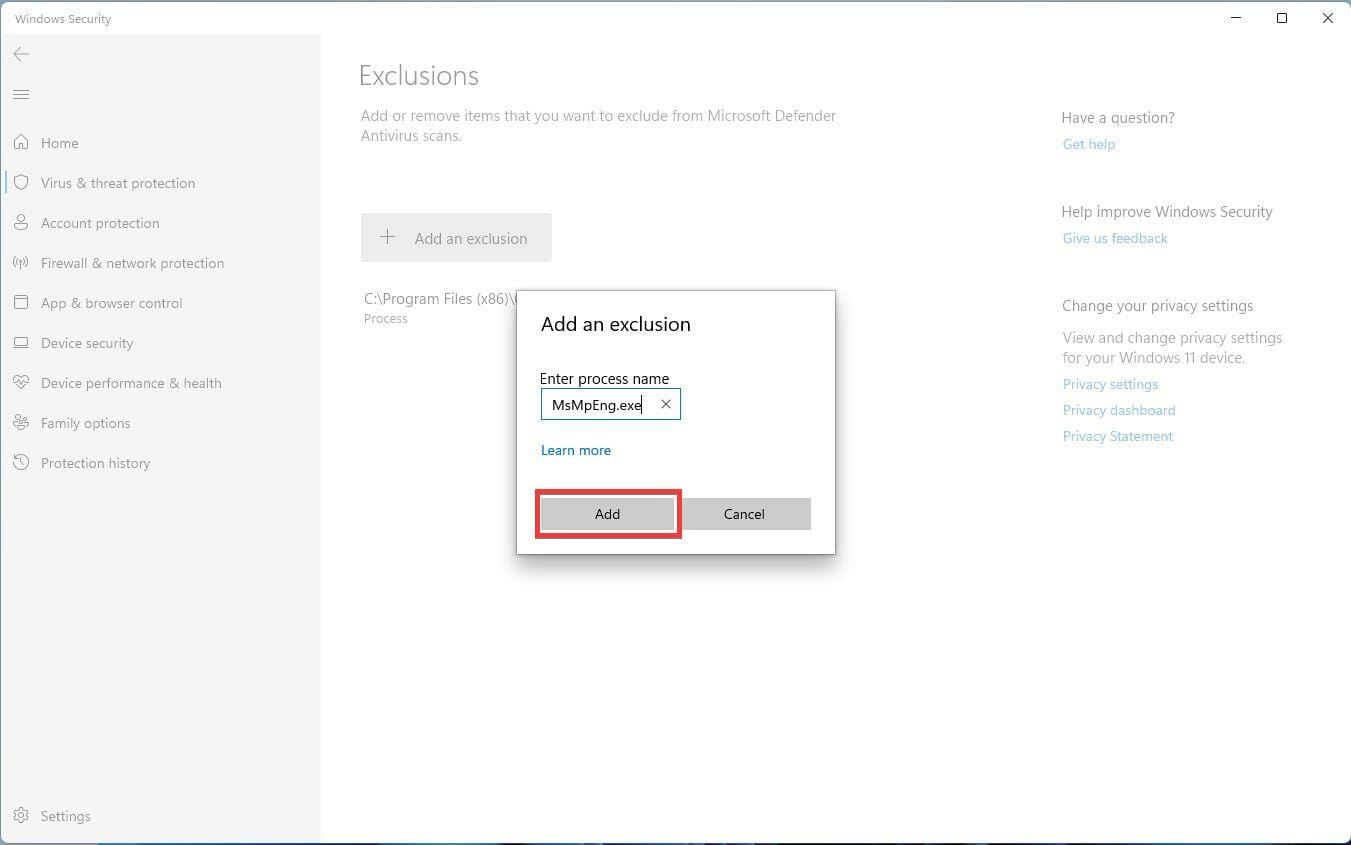
- A small window will appear. Type MsMpEng.exe. This is the executable file for Antimalware Service Executable.
- Select Add and Antimalware Service Executable is now on the Exclusion List.
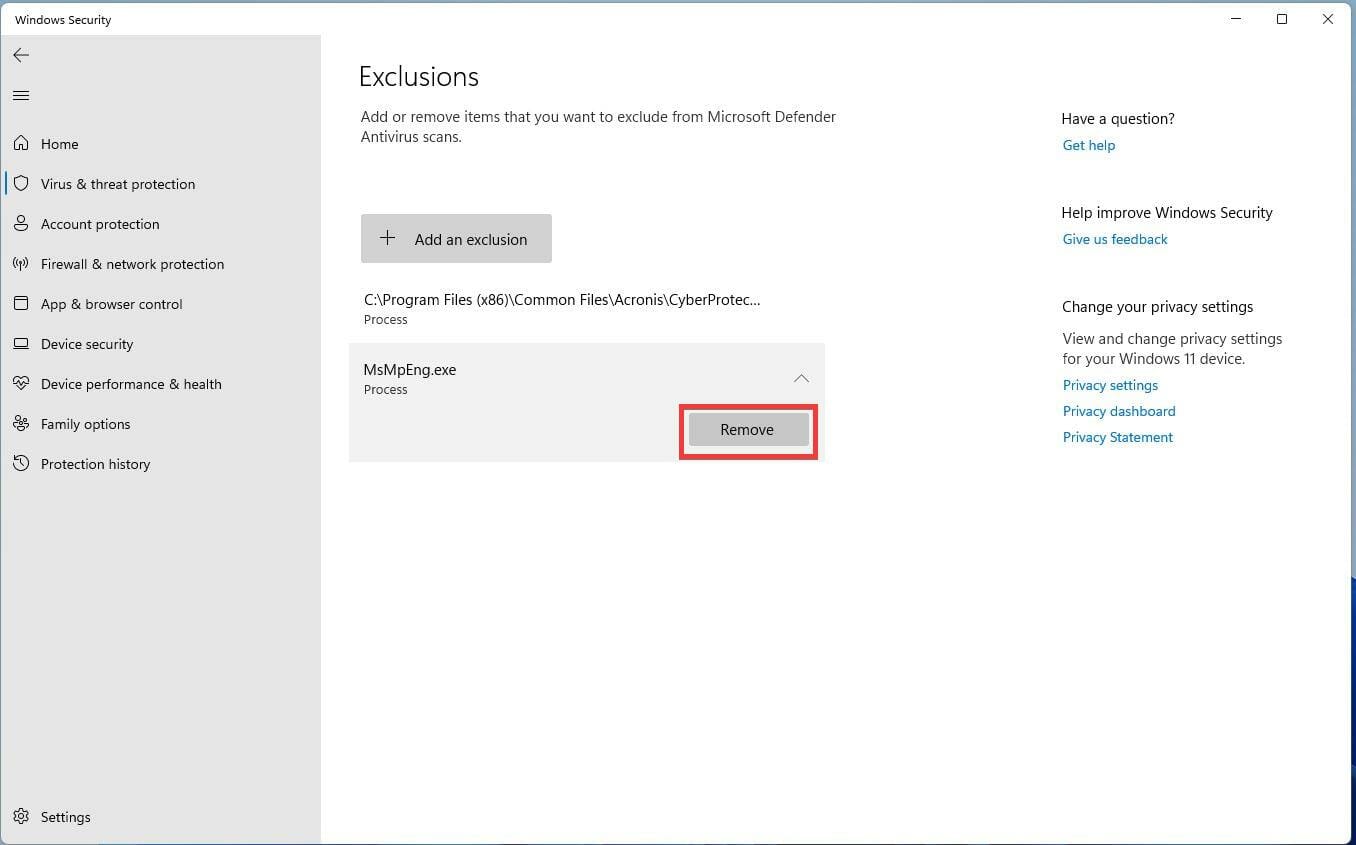
- To remove it from the list and the process, click on the exclusion’s arrow and select Remove.
 NOTE
NOTE
4. Change Scan Scheduling settings
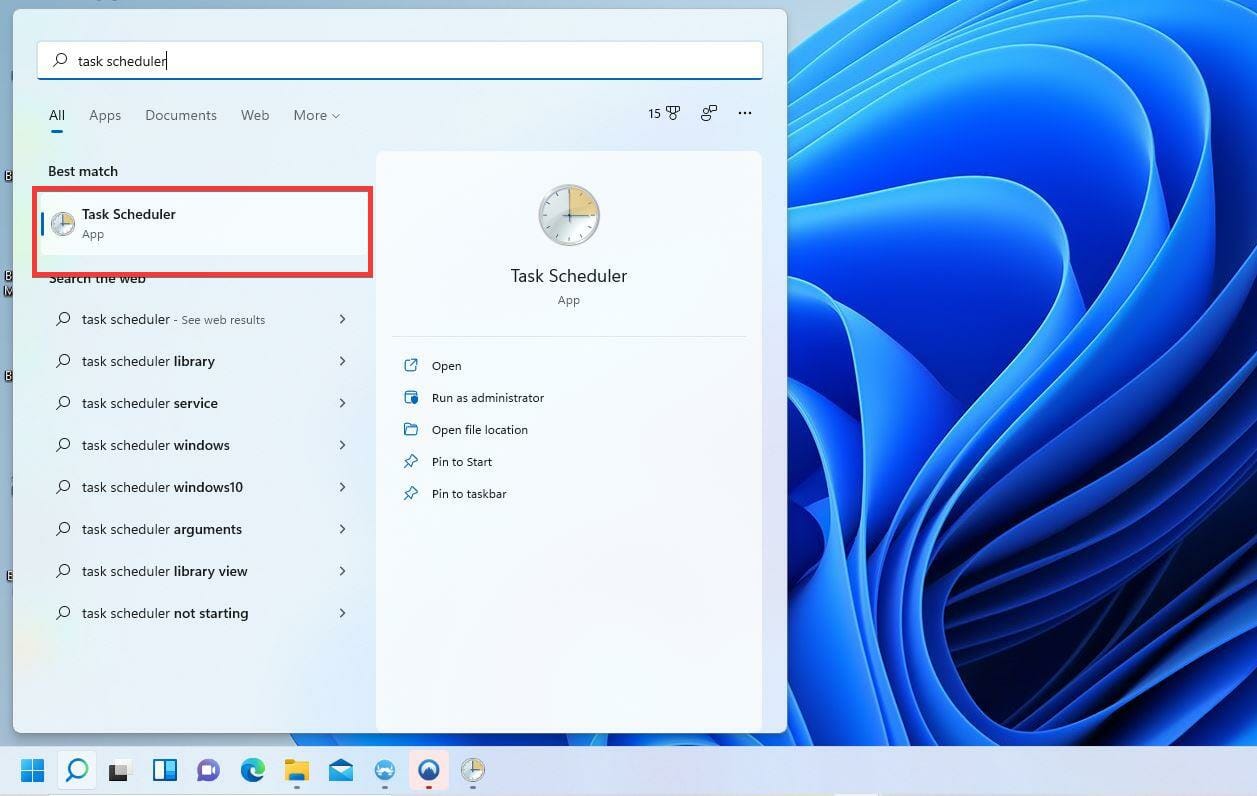
- Open the Search bar again and type Task Scheduler.
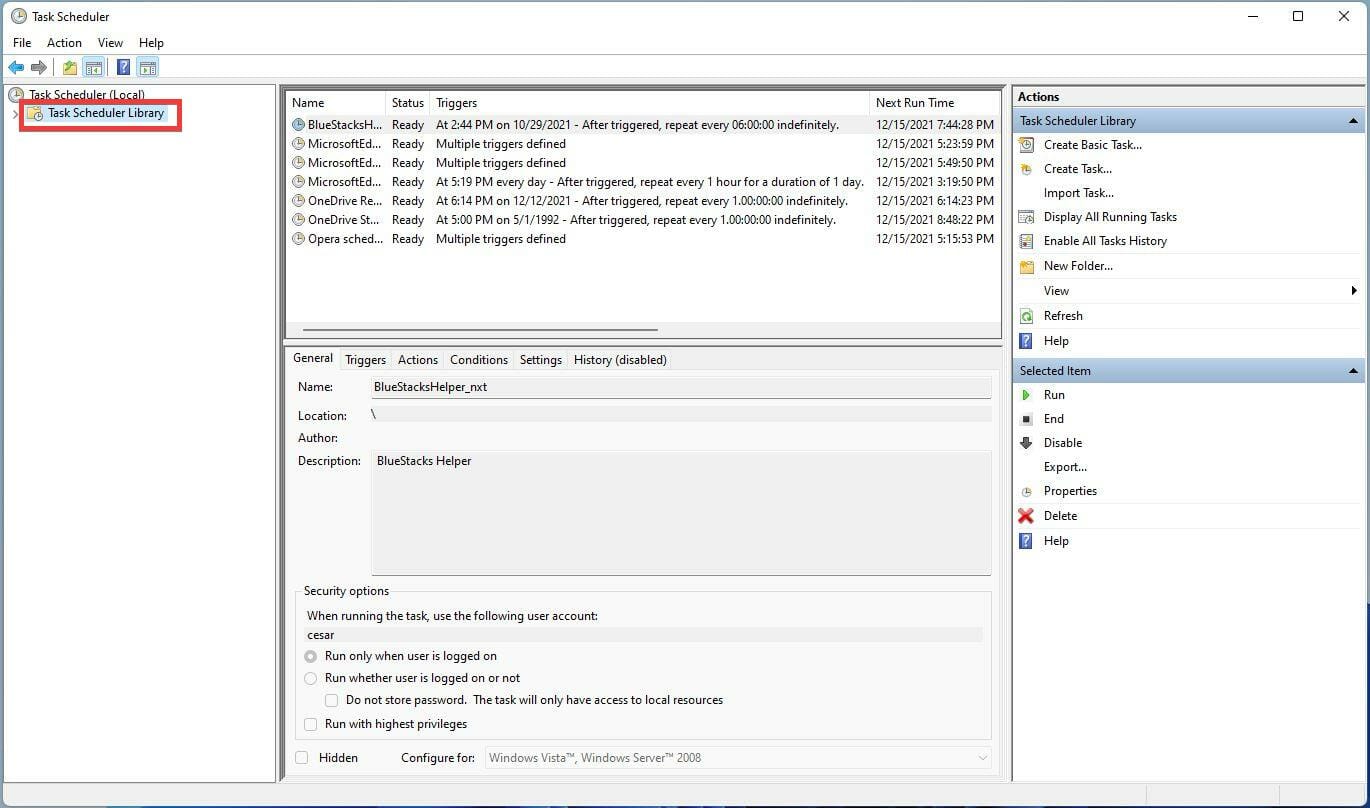
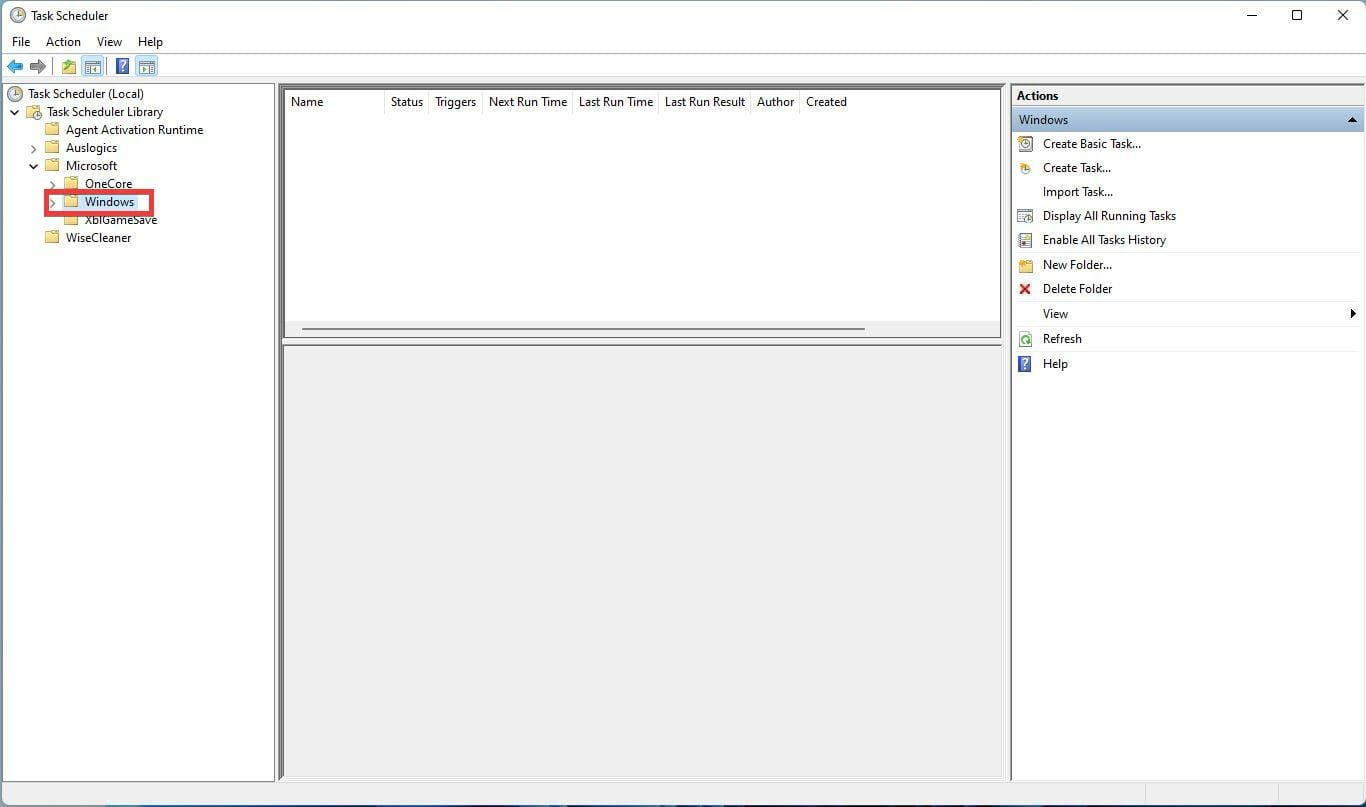
- In the new window, click Task Scheduler Library.
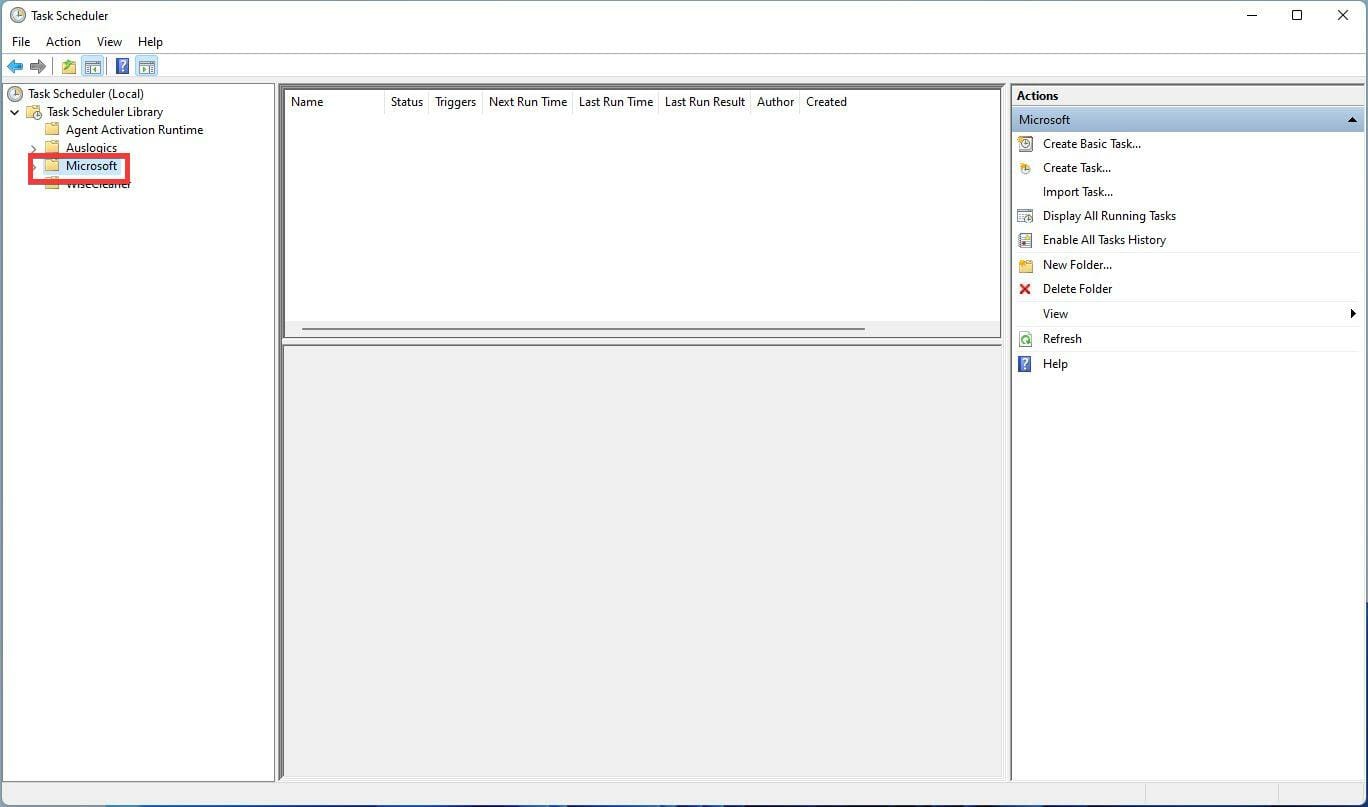
- In the expanded folder, locate and click on the arrow next to Microsoft to open another drop-down menu.
- Then click Windows.
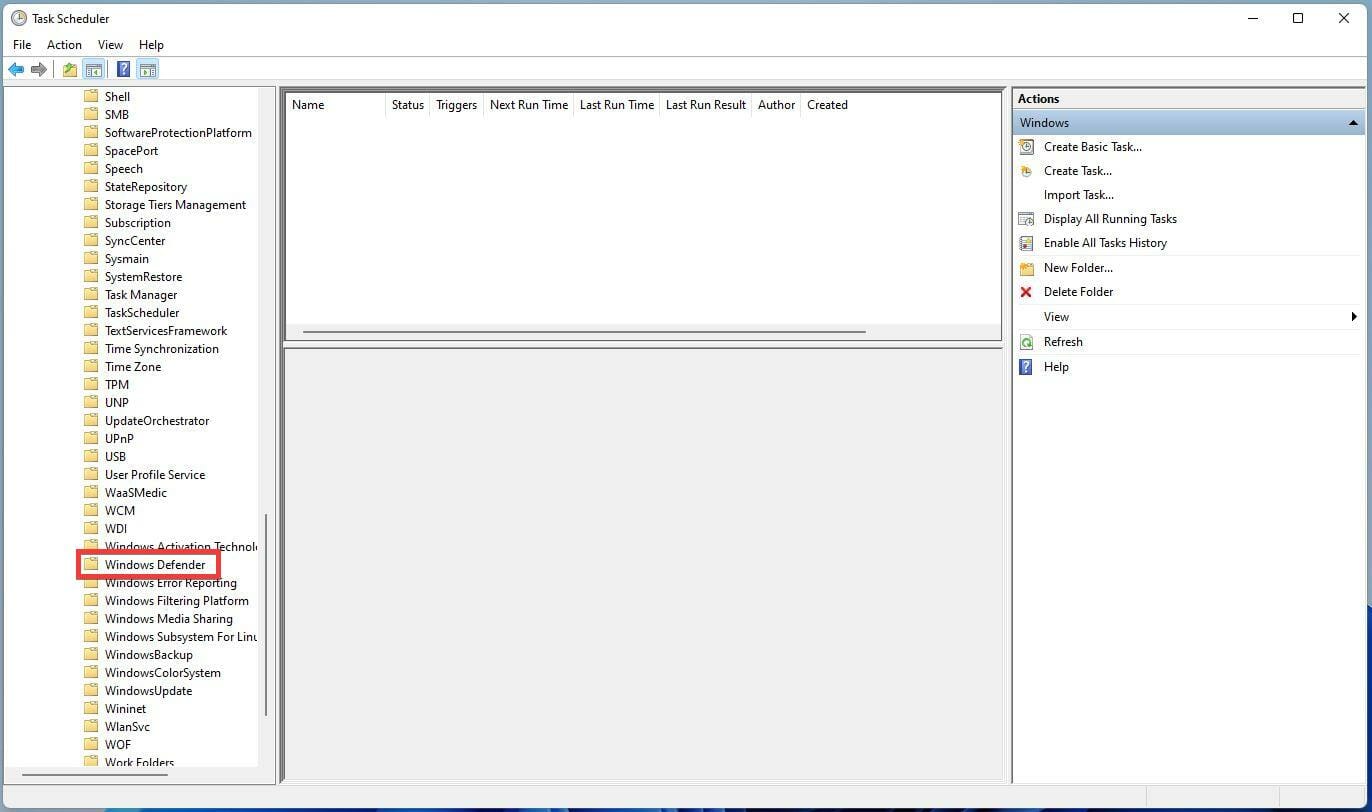
- Scroll down and locate Windows Defender.
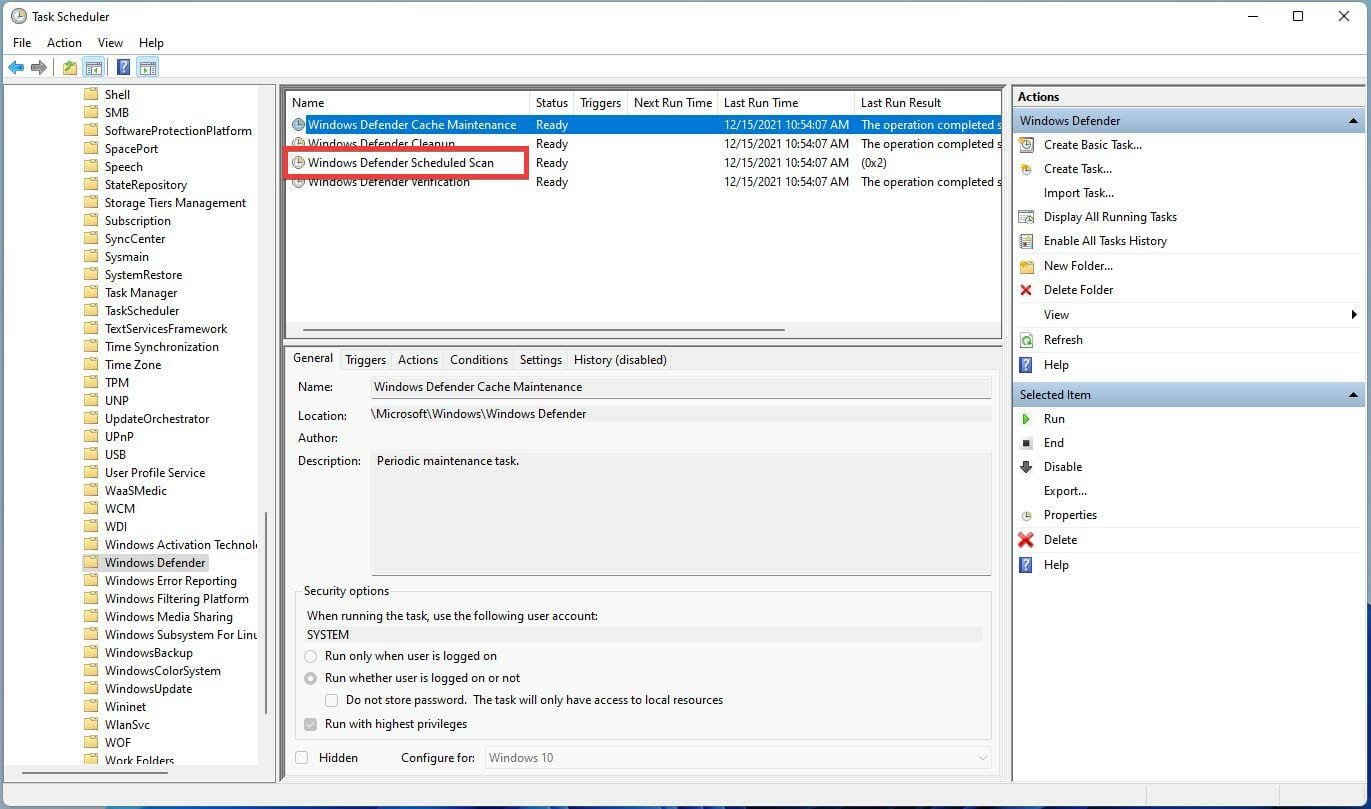
- In this new Windows Defender folder, locate Windows Defender Scheduled Scan in the middle panel, then double click it.
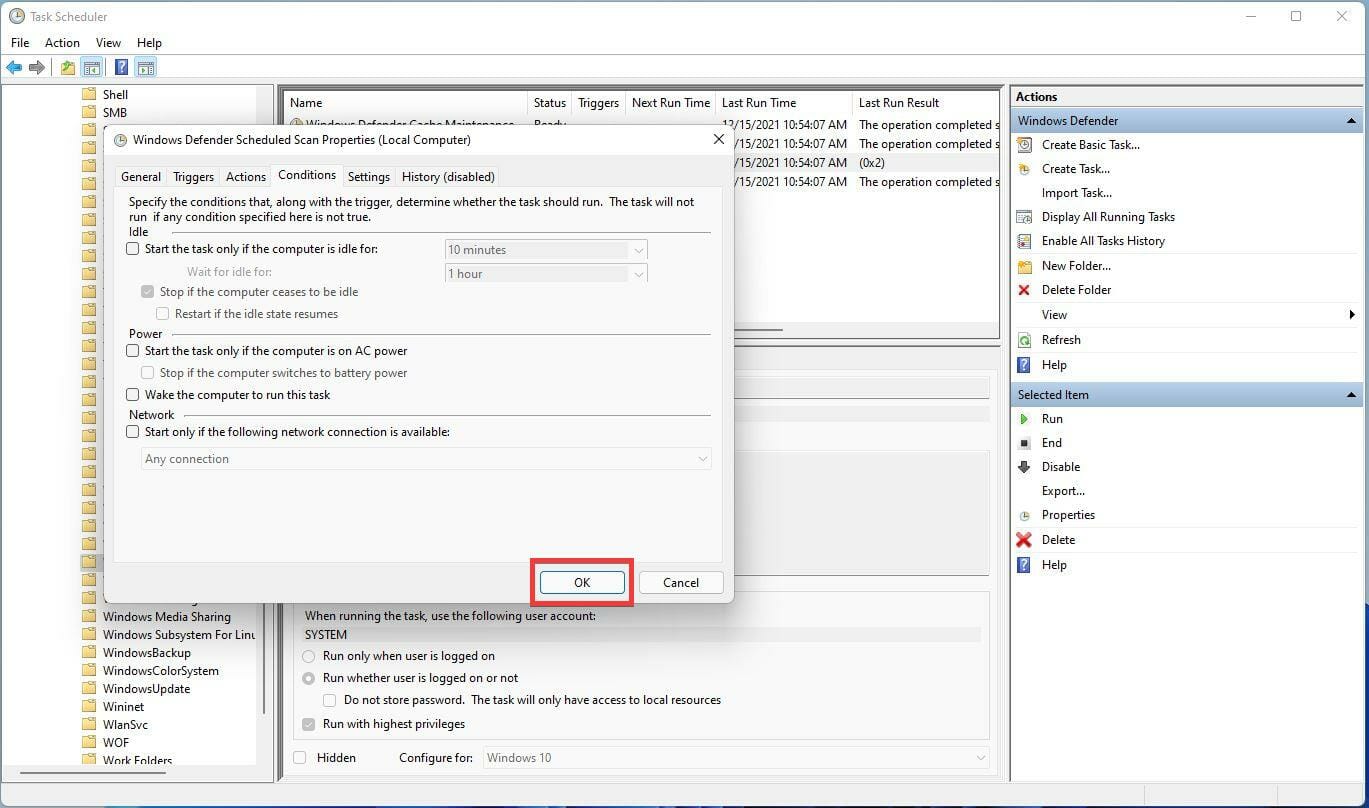
- In this new window, click the Conditions tab.
- Uncheck all the options, then click OK. This will wipe out all the scheduled Windows Defender scans on your Windows 11 computer.
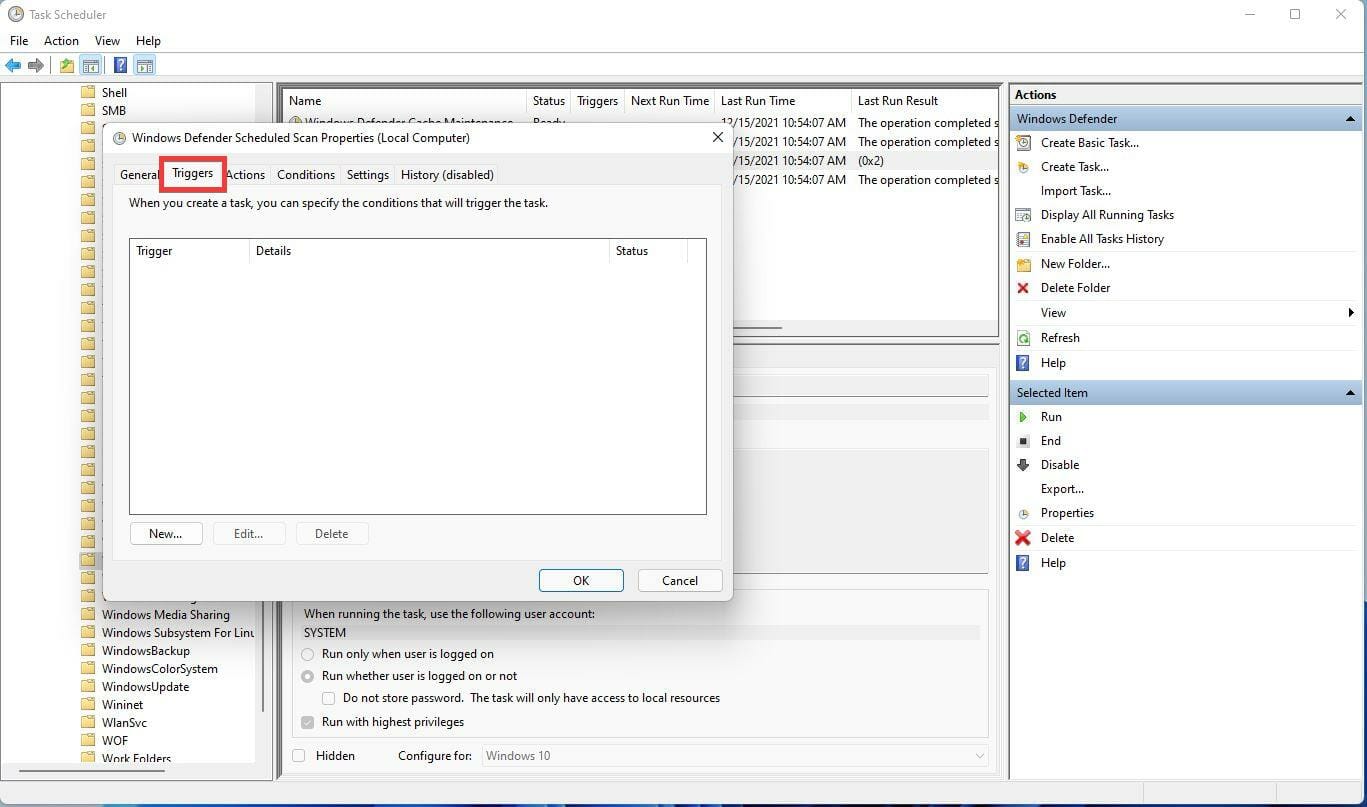
- If you still want the scans while also having better control over them, you can schedule your own by going to the Triggers tab.
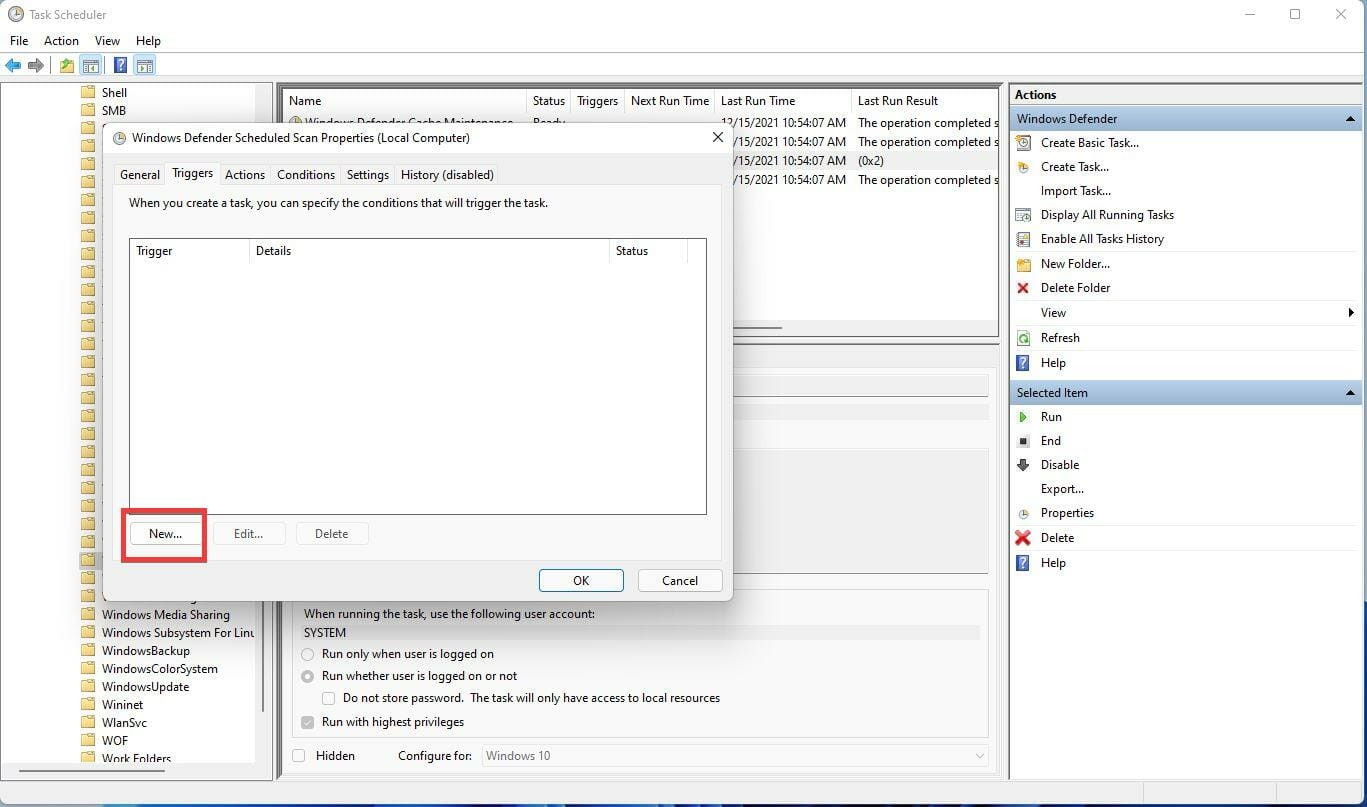
- Once there, select New to create a new schedule.
- Create the scan by selecting if you want it done once, daily, weekly, or monthly. You can also select the date and time, and when you want it to start.
- As soon you’re done configuring, hit OK.
How to fix issues caused by disabling the Antimalware Service Executable
For the most part, performing the earlier steps will do the job, but you don’t want the program to be off forever. Your computer still needs that protection, and as such, it’s recommended that you get proper antivirus software.
If it wasn’t for the high CPU consumption, Windows Defender would be perfect, but many third-party apps are better optimized.
What’s so beneficial about these apps is that they aren’t resources hogs and have a much better-looking user interface making the process more enjoyable and less of a headache.
Some even come with cool features like webcam support and high-level file encryption capabilities.
Feel free to leave a comment below if you have any questions on other Windows 11 apps or features. Also, leave comments about guides that you’d like to see.






User forum
0 messages