How to Use Win32 Disk Imager for Creating Bootable USB Drives

Win32 Disk Imager is a popular tool for creating bootable USB drives from ISO files. It is simple to use, but knowing the correct steps can help ensure you avoid common mistakes.
This guide will walk you through the process of using Win32 Disk Imager to create a bootable USB drive for installing operating systems like Linux, Windows, or creating recovery tools.
Table of contents
How to Use Win32 Disk Imager?
1. Insert the USB Drive
Make sure your USB drive is inserted and ready for use, as all data will be erased during the process.
- Plug the USB drive into your computer.
- Make sure it’s large enough to hold the image file (at least 8GB for most OS images).
- All data on the USB drive will be erased during this process, so back up any important files first.
You can verify if your USB is bootable by checking it with this guide: How to check if your USB is bootable.
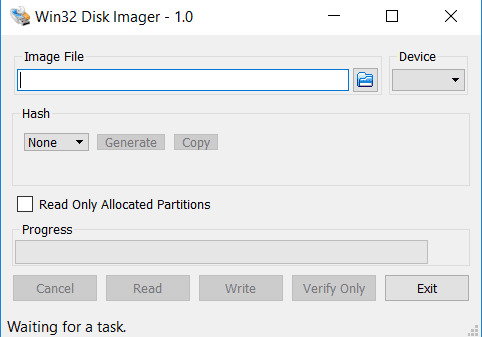
2. Open Win32 Disk Imager
Launch Win32 Disk Imager to start the process of creating the bootable USB.
- Launch the program by clicking on its icon in the Start menu or desktop.
- When the application opens, you’ll see a simple interface with options for selecting the image file and the target device.
3. Select the ISO Image
Choose the ISO image file you want to write to the USB drive.
- Click on the folder icon next to the “Image File” field.
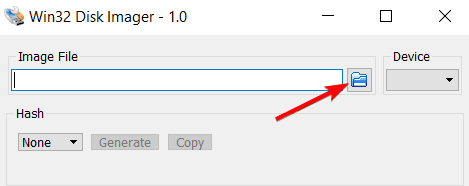
- Navigate to the location where your ISO file is stored (e.g., Windows 10 ISO or Linux distribution).
- Select the image file and click Open.
For creating a Windows 11 bootable USB, check this guide for additional steps: Create a Windows 11 bootable USB drive.
4. Select the USB Drive
Ensure that the correct USB drive is selected as the target for writing the image.
- In the “Device” dropdown menu, choose the USB drive you want to use.

- Make sure it matches the drive you inserted in Step 1. If you’re unsure, double-check the drive’s letter in Windows Explorer.
5. Write the Image to the USB Drive
Now you’re ready to write the image to the USB drive.
- Once everything is set, click on the Write button.

- A warning will appear, reminding you that all data on the USB drive will be erased. Confirm that you want to proceed.
- The process will begin, and it may take several minutes to complete depending on the size of the image and the speed of your USB drive.
6. Wait for the Process to Complete
Allow the process to finish before ejecting the USB drive.
- Once the writing process is finished, you’ll see a “Write successful” message.
- You can now safely eject the USB drive.
What is Win32 Disk Imager?
Win32 Disk Imager is a free utility that allows users to write raw image files (such as ISO files) to USB drives or SD cards. It’s often used to create bootable USBs, which can then be used to install operating systems or run diagnostics.
FAQ
Yes, Win32 Disk Imager works with both USB drives and SD cards.
Win32 Disk Imager supports various ISO files like OS installation images and recovery tools.
Right-click the USB drive in This PC and select Properties to check the format.
Restart your PC and select the USB drive from the boot menu to test it.
Conclusion
Win32 Disk Imager is a simple yet effective tool for creating bootable USB drives from ISO files. By following the steps outlined in this guide, you can easily write an image to a USB drive and use it for installing operating systems or creating recovery tools.
If you want to set up a dual-boot system with Linux, refer to this guide: How to dual boot Windows 11 and Linux.
Read our disclosure page to find out how can you help Windows Report sustain the editorial team. Read more


Improve this guide


User forum
0 messages