Can’t sync emails on Windows 10/11? Here’s how to fix it
11 min. read
Updated on
Read our disclosure page to find out how can you help Windows Report sustain the editorial team. Read more

Not being able to sync your emails on Windows 10 can be a big problem, especially if you relay on email for communication. Although this can be a major problem, there’s a way to fix it.
Are you frustrated or stuck trying to sync emails on your Windows device or computer? Worry no more because we’ve got solutions to help you fix it.
The digital age has come with a myriad of benefits including being able to view and respond to emails via multiple devices, besides your computer.
But what happens when you cannot sync emails on your Windows device or PC?
Usually, it may seem as easy as clicking or pressing the sync tab and expecting the process to continue, but sometimes, there are situations that call for different solutions to getting all your messages.
Here’s how you can sync emails on Windows when it doesn’t seem to be working.
Having Windows 10 mail sync problems? Try these solutions
- Run App troubleshooter
- Change privacy settings to enable syncing
- Change Mailbox Sync settings
- Remove the email account then add it back
- Reconfigure your account
- Run a System File Checker scan
- Manually reinstall missing FOD Package
- Run Windows Update troubleshooter
- Download the latest version of Windows 10
- Check your security software
- Turn off Windows Defender Security Center
- Check Advanced Mailbox settings
- Check Two-factor authentication
- Check account settings if they’re outdated
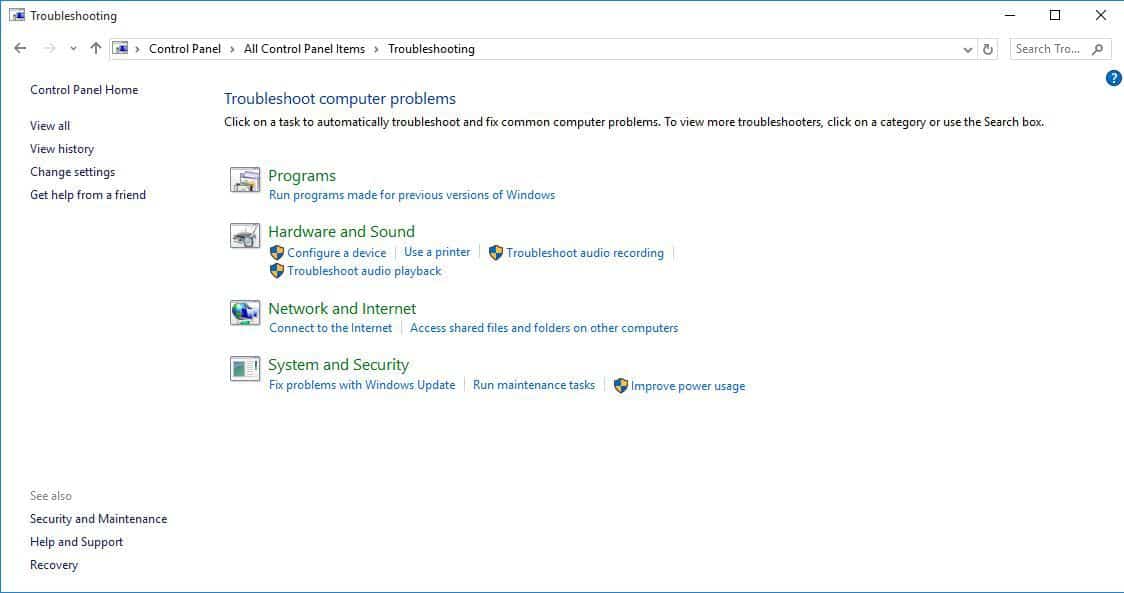
Solution 1 – Run App troubleshooter
- Right click Start
- Select Control Panel
- Go to the top right corner and change View by option to Large icons
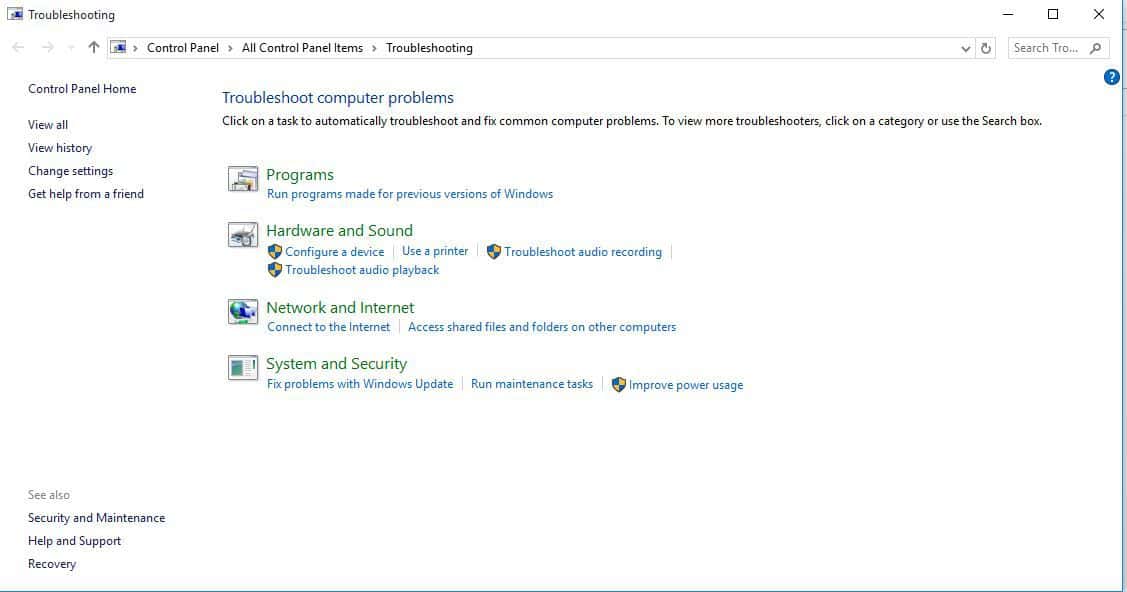
- Click Troubleshooting
- Click on View all option on the left panel
- Select Windows store Apps
- Follow the instructions to run the app troubleshooter
Check whether you are able to sync emails again. If not, go to the next solution.
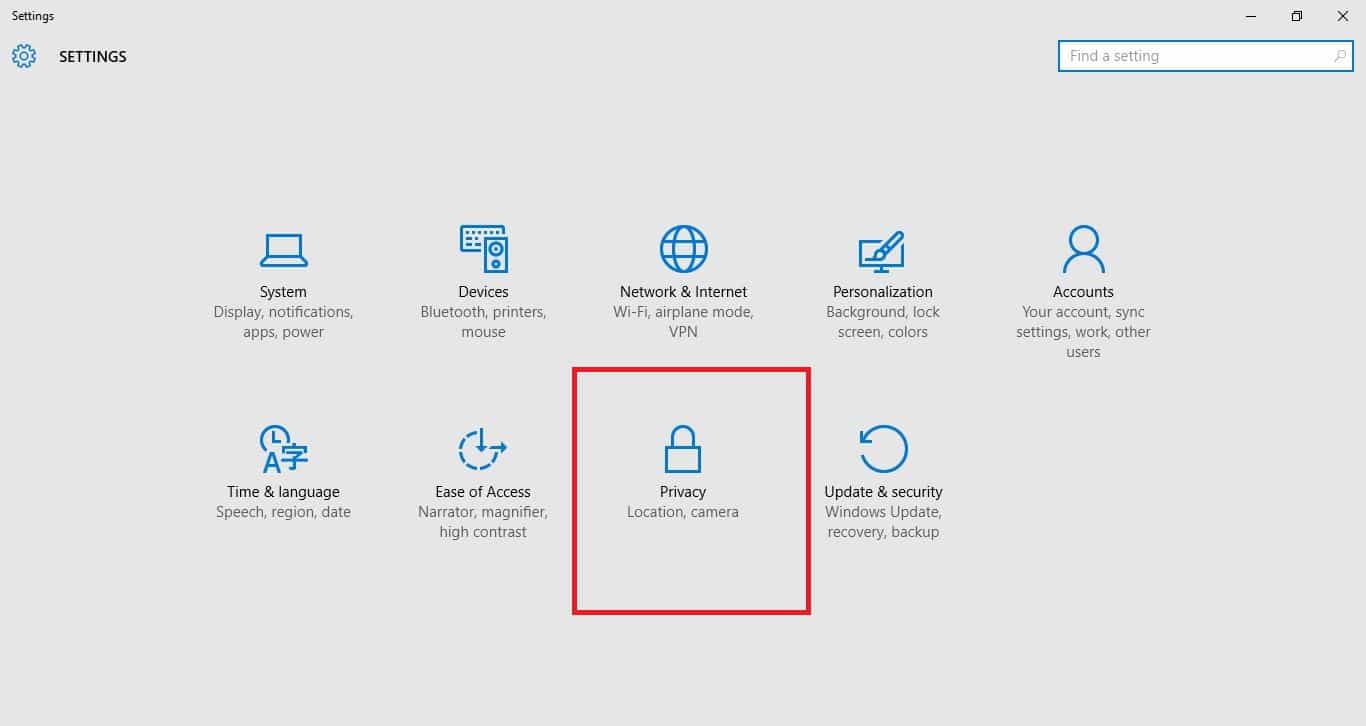
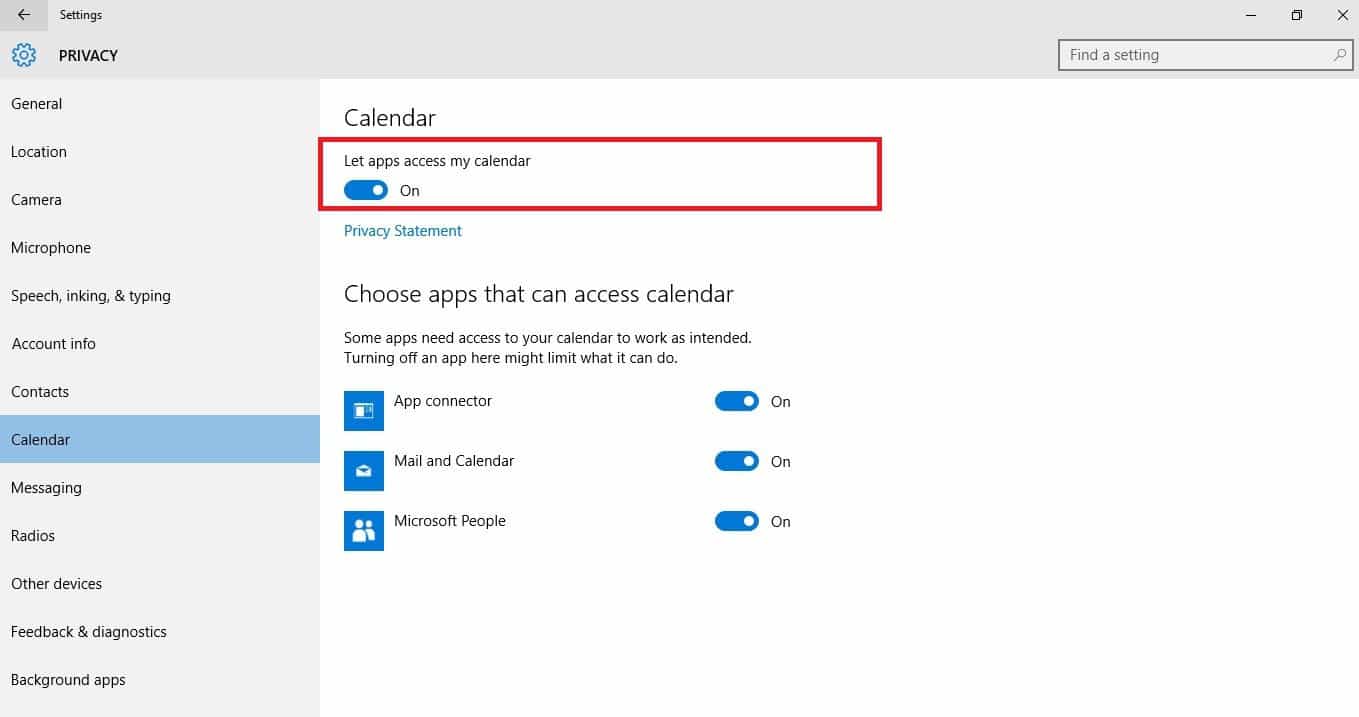
Solution 2 – Change privacy settings to enable syncing
- Click Start
- Select Settings
- Click Privacy
- Select Calendar on the left pane
- Turn on Let apps access my Calendar
- Go to Choose apps that can access calendar
- Ensure that access for App Connector and Mail and Calendar are on
Does this let you sync emails again? If not, try the next solution.
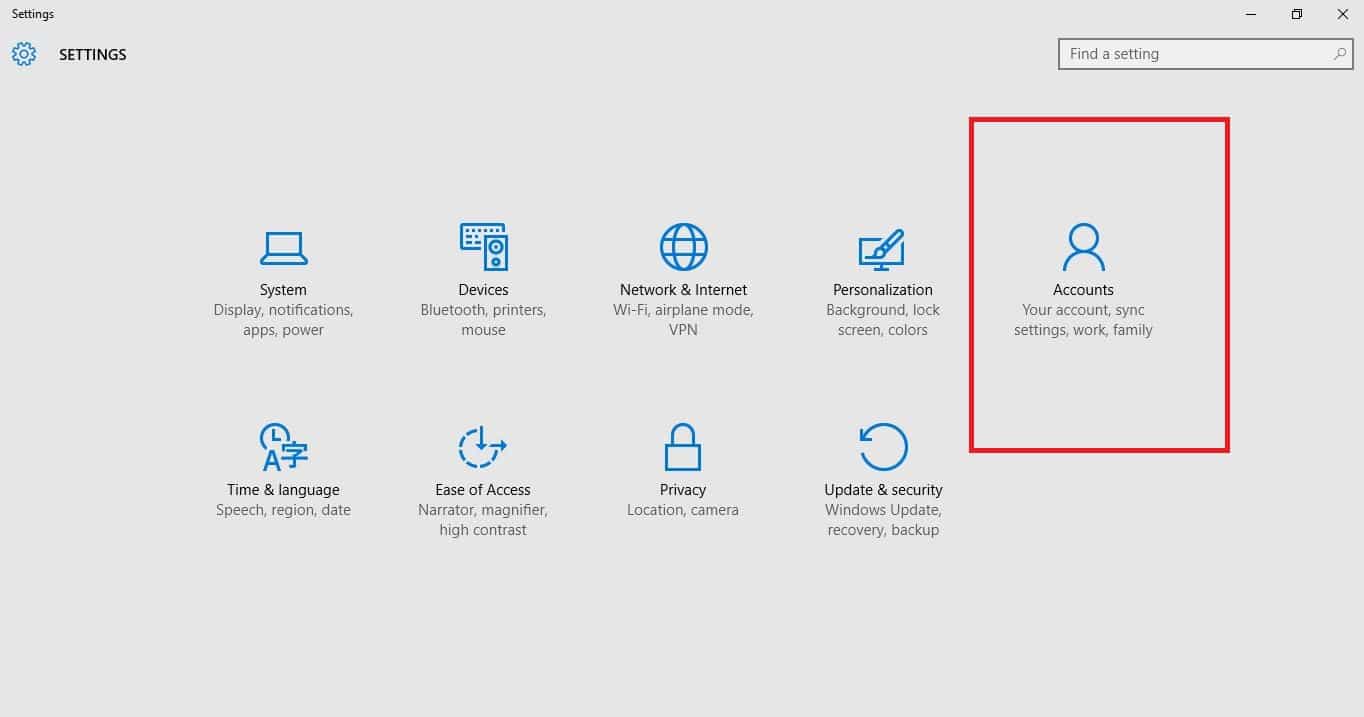
Solution 3 – Change Mailbox Sync settings
- Click Start
- Select Settings
- Select Accounts
- Click your account to edit settings
- Click Change Mailbox Sync Settings
- In the Download Email from menu, choose any time
- Click Done
- Click Save
Check whether you are able to sync emails again. If not, go to the next solution.
Solution 4 – Remove the email account then add it back
You can try to confirm if you remove the email account from Mail App, then add it back again to resolve the sync emails issue.
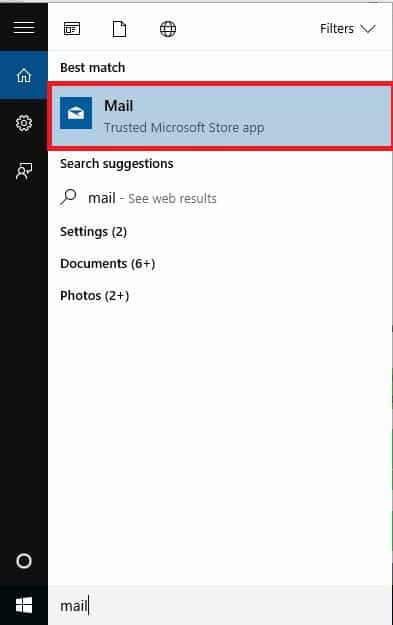
- Click Start
- Type Mail in the search field box
- Click the Mail app to open it
- At the bottom of the left pane, click the Gear icon
- Select Manage Accounts
- Choose the account you want to remove
- Select Delete account from this device
- Add the account back again
You can remove your account and then add it again using advanced setup if you still cannot sync emails after the above process.
The option to delete the email account will be disabled if you’re using the account with the Microsoft account ID you’re logged into.
Solution 5 – Reconfigure your account
You will have to first change the Microsoft account into a local account, then change it back to a Microsoft account.
This helps the email account to sync emails in Mail app.
Here’s how to do this:
- Click Start
- Select Settings
- Click Accounts
- Under Your Account on the left pane, select Sign in with Local Account instead
- Follow the same steps to switch back the account to a Microsoft account
When you switch back to the Microsoft Account, enter your credentials correctly.
Solution 6 – Run a System File Checker scan
A System File Checker scan checks or scans all protected system files, and then replaces the incorrect versions, with the genuine, correct Microsoft versions.
Here’s how to do this:
- Click Start
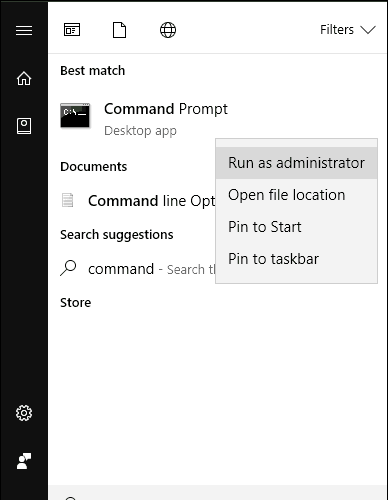
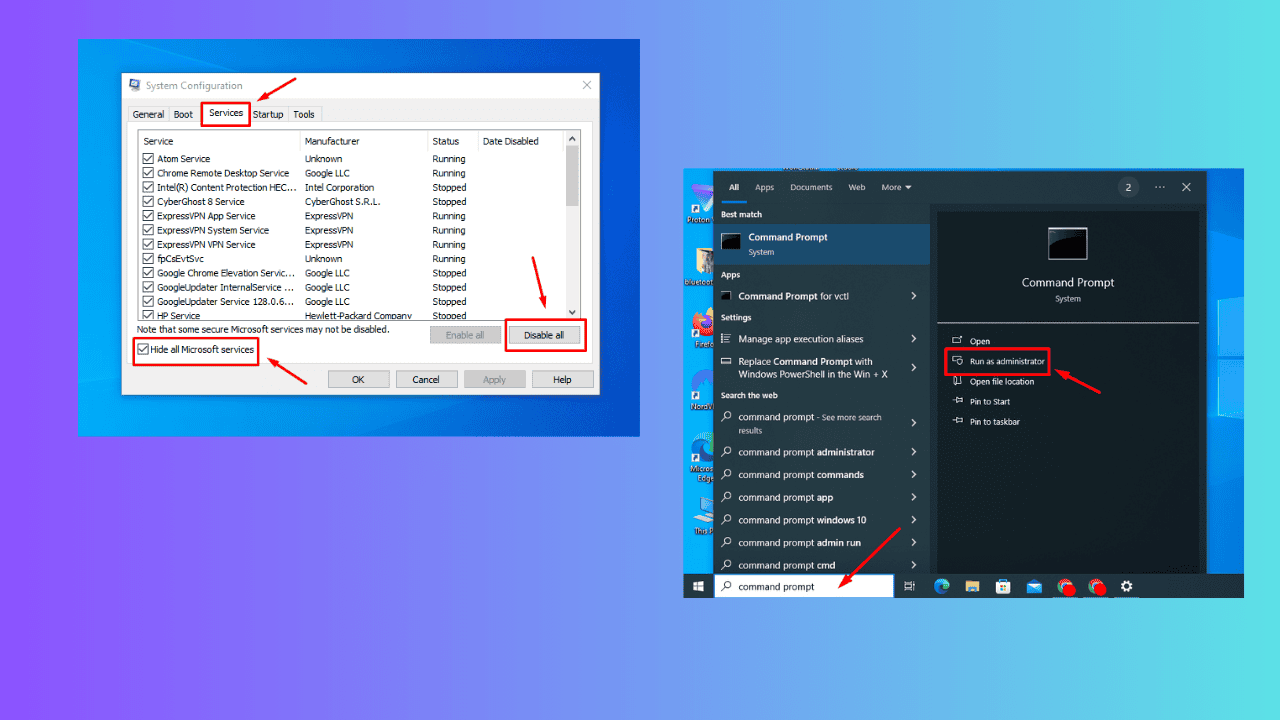
- Go to the search field box and type CMD
- The Command Prompt app will be listed in the search results
- Right click and select Run as Administrator
- Type sfc/scannow
- Press Enter
- Restart your computer
If you still can’t sync emails after this scan, try the next solution.
- ALSO READ: 10 Best Registry Cleaners for Windows 10
Solution 7 – Manually reinstall missing FOD Package
Sometimes after upgrading your Windows Build, you may experience problems with Mail for Windows 10 such as your email accounts not syncing new emails, or inability to view email settings, or you just cannot create new email accounts.
This happens because one of the main components for email functionality is a Function-on-demand (FOD) package that may have been removed.
Here’s how to manually reinstall the missing FOD package using Command Prompt:
- Click Start
- In the search field box, type CMD
- Go to Command Prompt on the search results and right click on it
- Select Run as Administrator
- Click Yes to let the app make changes to your computer or device
- At the command prompt, enter this command:
dism /online /Add-Capability /CapabilityName:OneCoreUAP .OneSync~~~~0.0.1.0
- Press Enter
- The reinstall will start. If there is no progress, press Enter again
- Once reinstall is complete, you’ll be prompted to reboot your computer. If not, restart it yourself
- After restarting, confirm the account can sync emails in the Mail app.
If your account doesn’t sync emails correctly, try the following:
- Click Start
- In the search field box, type Mail
- Select Mail app from search results
- Go to Settings
- Click Manage Accounts
- Select the account to edit its settings
- If Account Settings dialog is available, then the component was installed successfully
- If your account still can’t sync emails, delete it then add it back again in Mail App by clicking Settings>Manage Accounts>Select account>Delete account from this device>Delete
Once the account is deleted or removed, select Add account to add it back again.
Solution 8 – Run Windows Update troubleshooter
Sometimes you can’t sync emails if your computer can’t find the correct IP address when trying to resolve a URL for Windows Update website, or for Microsoft Update website.
This error, usually coded as 0x80072EE7, may occur if the hosts file contains a static IP address.
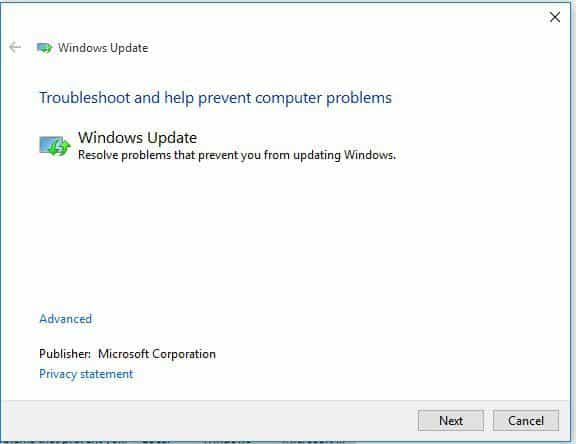
Windows Update troubleshooter resolves any issues that prevent you from updating Windows.
Here are the steps to fix this by running Windows Update troubleshooter:
- Click Start
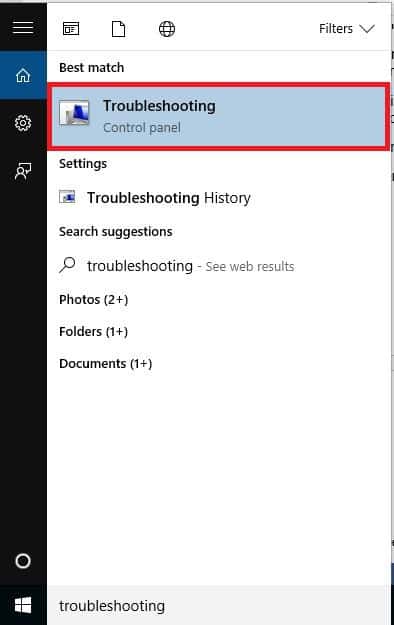
- In the search field box, type Troubleshooting
- Click Troubleshooting
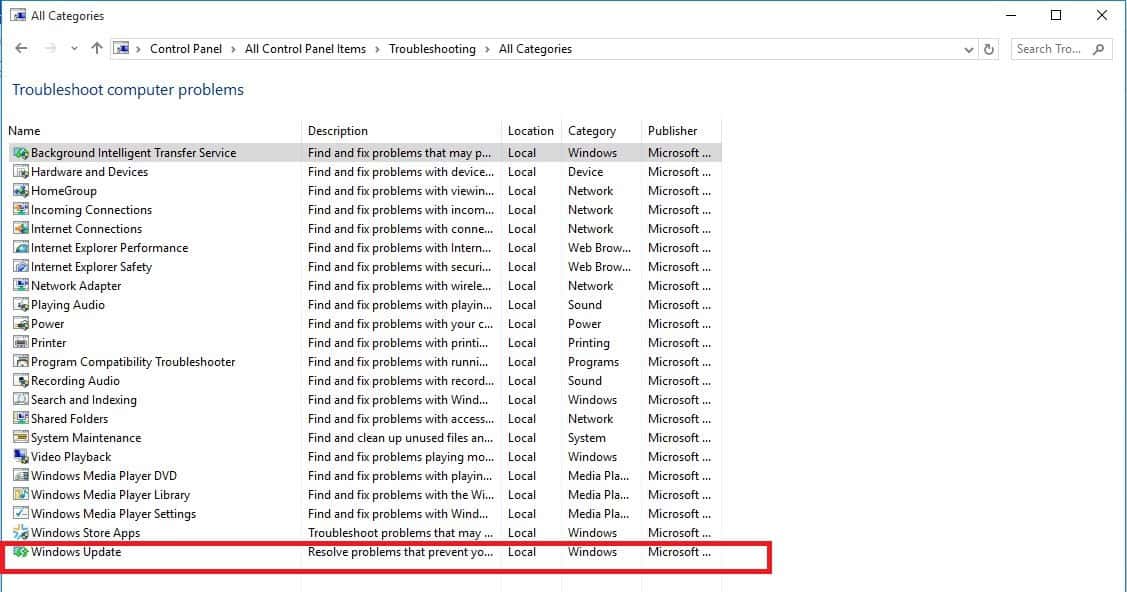
- Click View all in the left pane
- Select Windows Update
- Run Windows Update Troubleshooter and follow the instructions on the screen
Does this let you sync emails? If not, try the next solution.
Solution 9 – Download the latest version of Windows 10
If your Windows 10 version is outdated, then Mail and Calendar apps may not work properly, making you unable to sync emails.
Here’s how to find out if your Windows 10 is the latest version and download updates:
How to determine if Windows is outdated:
- Click Start
- Select Settings
- Click System
- Click About
- Note the numbers near Version and Build
- Go to Windows 10 release information and check the recommended version and build that shows ‘Microsoft Recommends’. If the recommended one is higher than your current version or build, download the latest version.
How to download the latest Windows version
- Ensure you’re connected to the internet
- Click Start
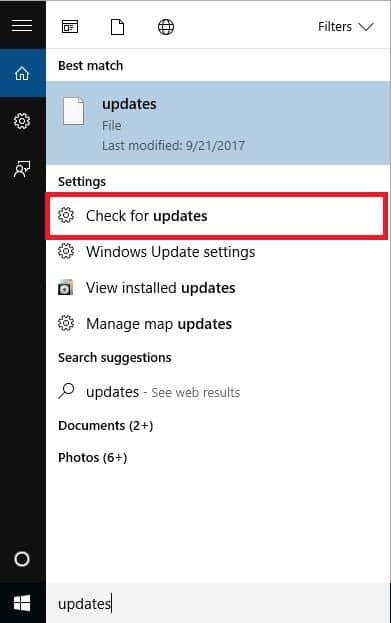
- Go to the search field box and type Updates
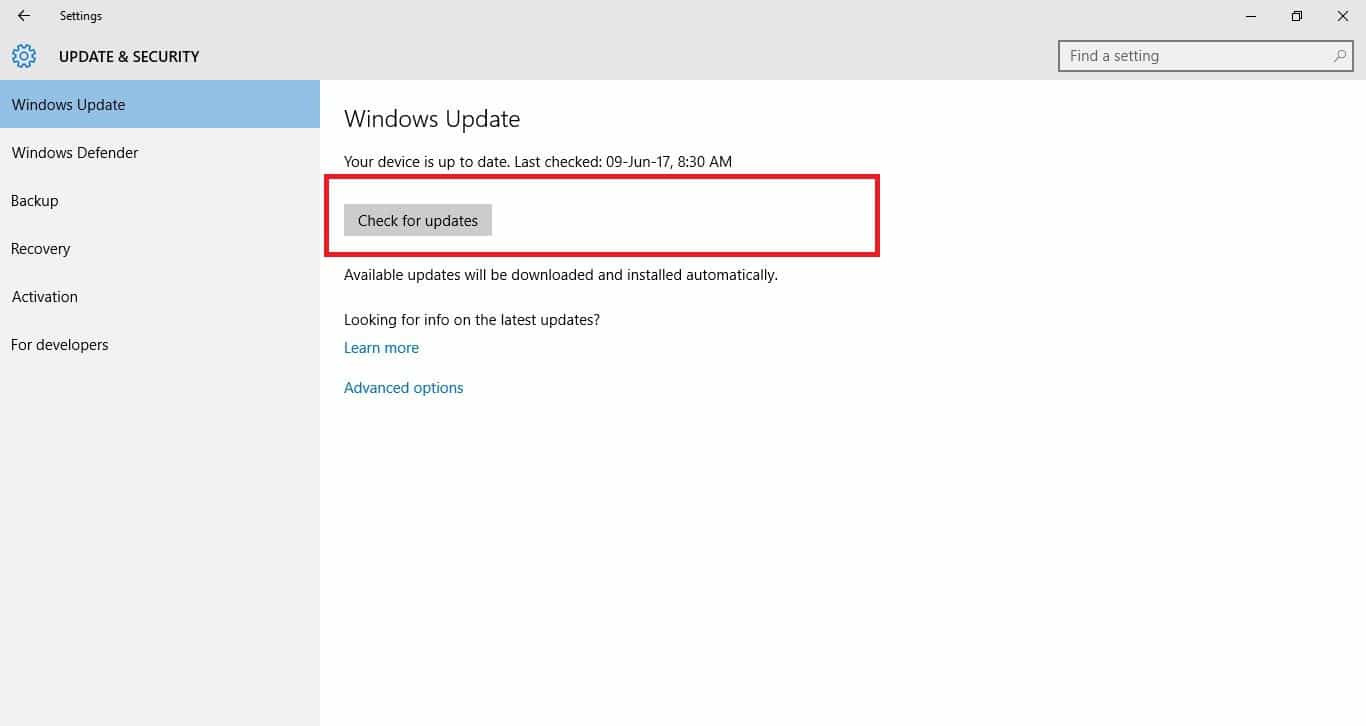
- Click Check for Updates
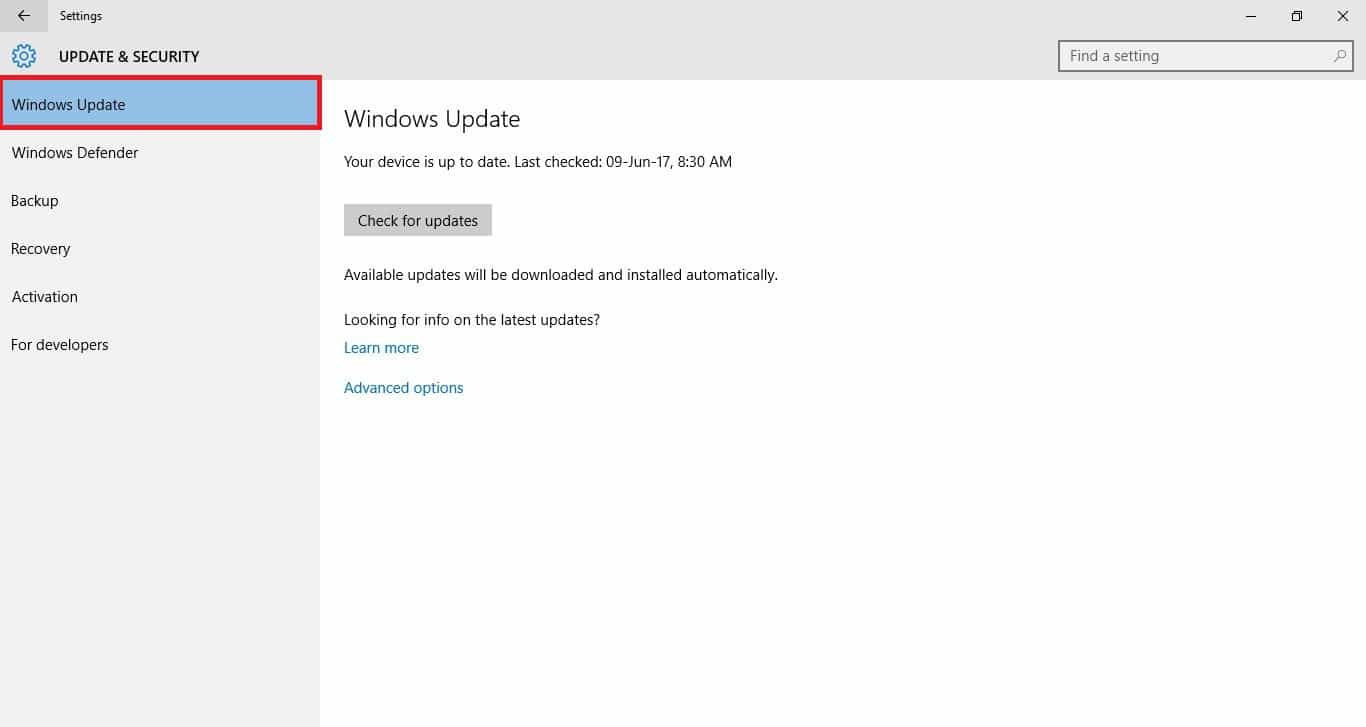
- Go to Windows Updates
- Click Check for updates
- Try and install the updates shown
If you still cannot update it, do the following:
- Go to Microsoft website and click Download Windows 10
- Select Update Now
- At the bottom of the page, click Run when asked what to do with the file download
- Follow the instructions in the Update Assistant and restart your computer if prompted to
Solution 10 – Check your security software
Firewalls and your antivirus program software may prevent you from being able to sync emails and even calendar events.
It isn’t recommended to permanently turn the security software off, but doing this temporarily will check if it is the actual cause preventing you from syncing emails.
If your computer or device is connected to a network, the network’s policy settings may prevent you from turning off your firewalls and antivirus software. If you disable your antivirus program, do not open any email attachments or click links in messages from unknown people.
Immediately after you’re done fixing connection error, re-enable your antivirus and firewall.
- ALSO READ: The 5 best Windows 10 firewalls
Solution 11 – Turn off Windows Defender Security Center
This is a free security software included in Windows 10. If you’ve not installed any other security software besides this one, turn off Windows Defender Security Center temporarily by doing the following:
- Click Start
- Open Windows Defender Security Center
- Select Fire and network protection
- Choose a network profile
- Turn off Windows Firewall for the network profile you’ve chosen
- Repeat the same for each profile
If you’re able to sync emails, allow the Mail and Calendar apps through the firewall by doing the following:
- Click Start
- Open Windows Defender Security Center
- Select Fire and network protection
- Click Allow an app through firewall
- Click Change Settings
- In the list of allowed apps and features, check the box next to Mail and Calendar
- Check the box in the Private and Public columns
- Click Ok
Repeat these steps to re-enable the firewalls for each profile.
Solution 12 – Check Advanced Mailbox settings
If your email account is Google, Yahoo Mail, iCloud, IMAP or POP3, check the settings from the advanced mailbox settings to ensure it is configured to the email provider’s specification.
If you’re using Outlook, Office 365 or Exchange account, advanced mailbox settings won’t be there unless you set up the account using advanced set up.
Follow these steps to check advanced mailbox settings:
- Click Start
- Type Mail in the search field box
- Click the Mail app to open it
- At the bottom of the left pane, click the Gear icon
- Select Manage Accounts
- Click Change Mailbox sync settings
- Select Advanced mailbox settings
- Confirm that your incoming and outgoing email server addresses and ports are correct
- If your email provider doesn’t need authentication, uncheck the box next to Outgoing server requires authentication
- If your email provider requires separate authentication for sending emails, uncheck the box next to Use the same name and password for sending email then provide the outgoing server username and password
You can also change the following settings where applicable:
- If your provider needs SSL for incoming mail, check the box next to Require SSL for incoming email. For outgoing email, check the box next to Require SSL for outgoing email.
- Confirm that your Contacts server, and Calendar server addresses are correct.
Note: If you’re using Exchange account that needs advanced settings, remove it, then add it back using the advanced settings.
- ALSO READ: 6 best clean email list software to use
Solution 13 – Check Two-factor authentication
The two-factor authentication function protects your account from being infiltrated by outsiders or unknown people.
It’s a means of protecting it from others accessing or signing into it, by verifying your identity using a password, plus a second method like your contact or security information.
Mail and Calendar apps on Windows 10 do not support the two-factor authentication, so if it is turned on for your account, create an app password for the account, which will be used instead of your normal password for apps that don’t support two-factor authentication.
Check with your email provider on how to do this.
Solution 14 – Check account settings if they’re outdated
If your account settings are out of date, this can be due to an incorrect password.
Here’s how to fix this:
- Go to Mail app
- Go to the notification bar at the top of the app
- Click Fix account
- Update your password
- Enter the new password
- Select Done
For Gmail or iCloud, you’ll need to go to the respective websites to change your password.
Any luck with these solutions? Let us know in the comments section below.
RELATED STORIES TO CHECK OUT:







User forum
2 messages