How to Fix Windows Update Error 0x80240031
First run the Windows Update troubleshooter
![]() 7 min. read
7 min. read
![]() Published on
Published on
Share this article
Improve this guide
Read our disclosure page to find out how can you help Windows Report sustain the editorial team. Read more
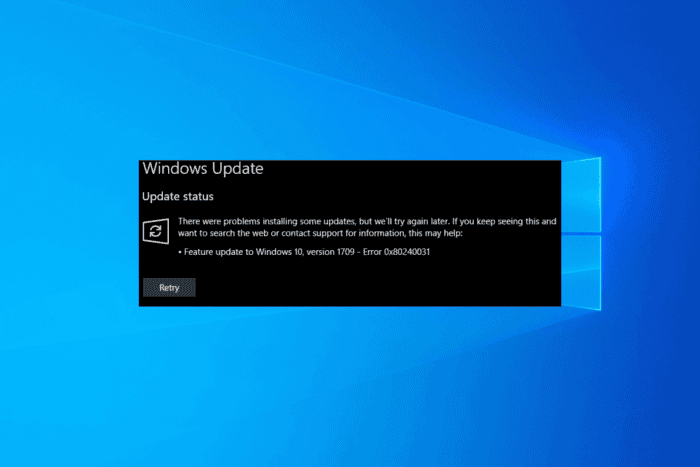
Many of our readers have complained about getting error 0x80240031 while installing an update on Windows 10. This could occur due to malware infection, incorrect configuration settings, insufficient disk space, or corrupted Windows system files.
How can I fix the Windows update error 0x80240031?
1. Run the Windows update troubleshooter
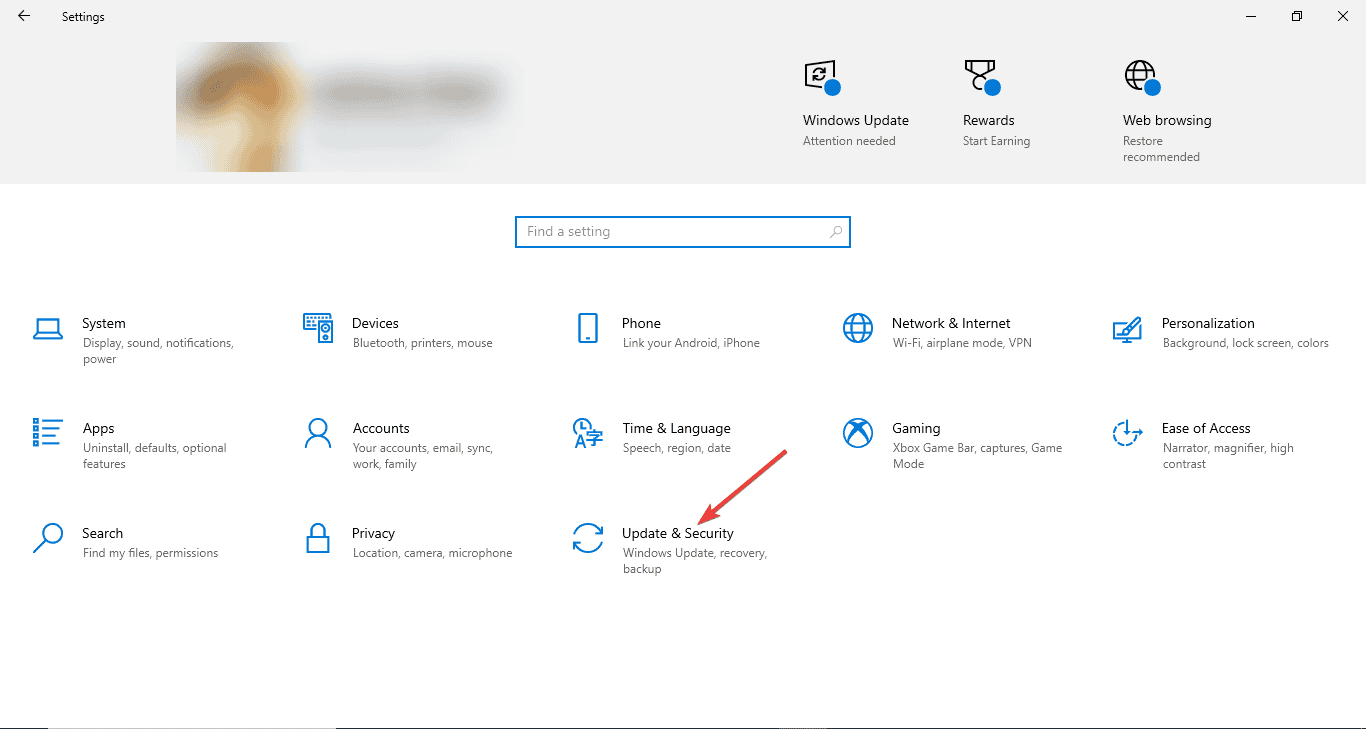
- Press Windows + I to open the Windows Settings app.
- Go to Update & Security.

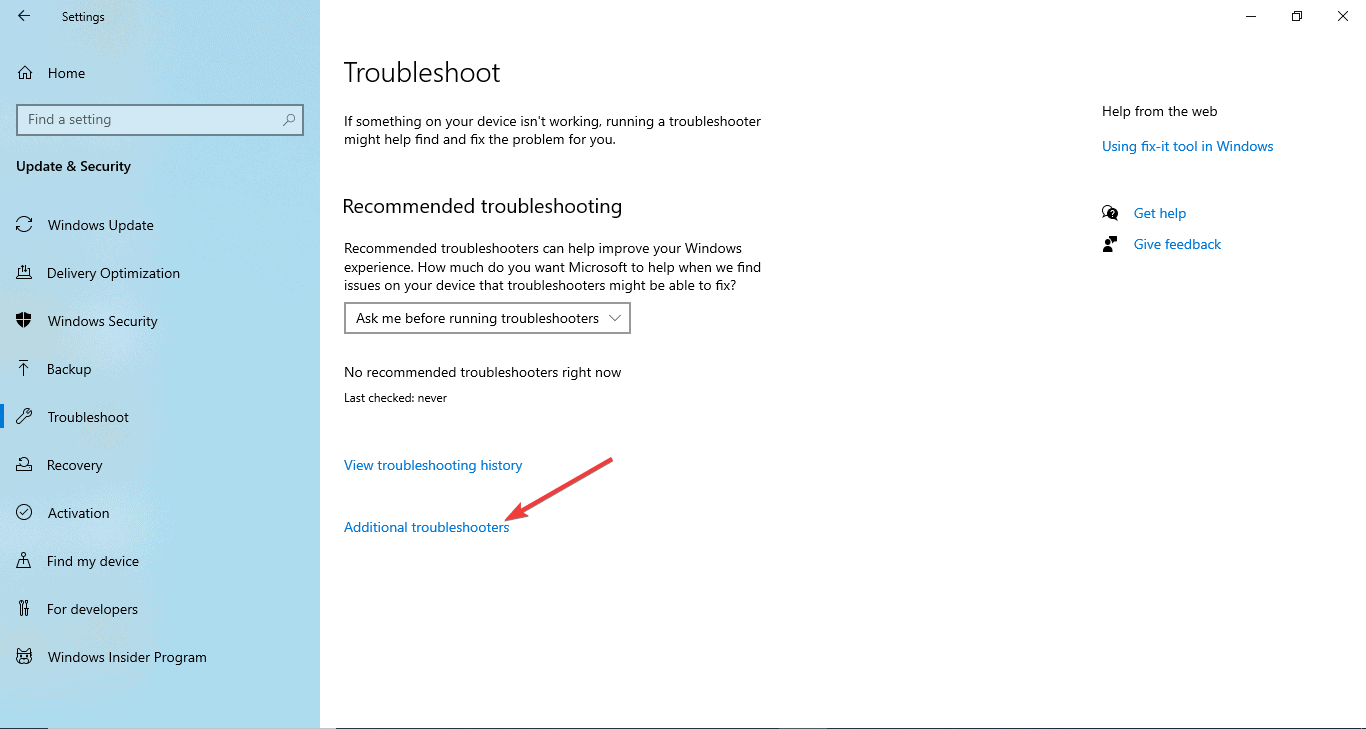
- Click Troubleshoot, then select Additional troubleshooters.
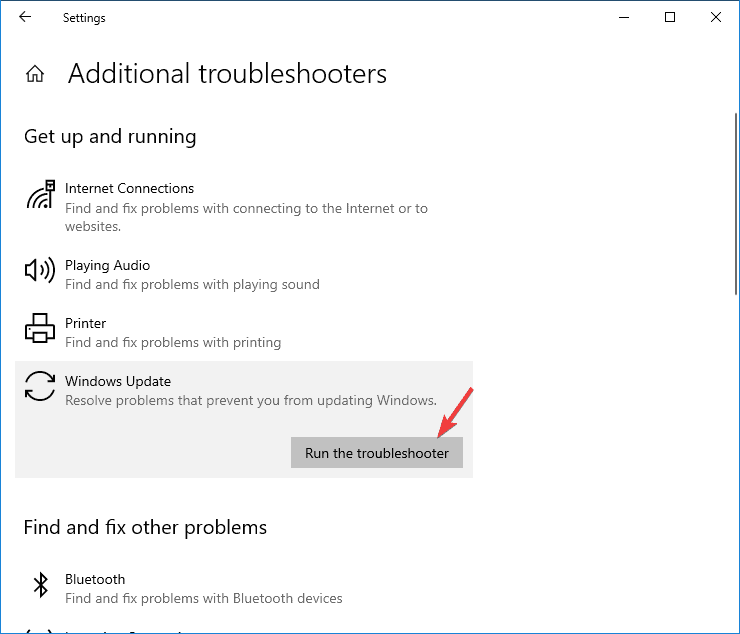
- From the list of troubleshooters, click Windows Update, then click the Run the troubleshooter button.

- Follow the on-screen instructions to complete the process.
Running the troubleshooter can also help you fix Windows Update error code 0xc007000d; read this guide to learn more.
2. Perform a clean boot
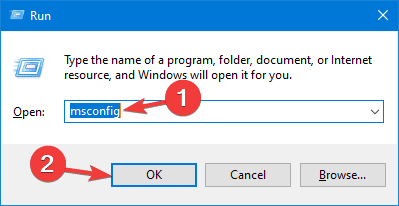
- Press Windows + R to open the Run window.

- Type msconfig and click OK to open System Configuration.
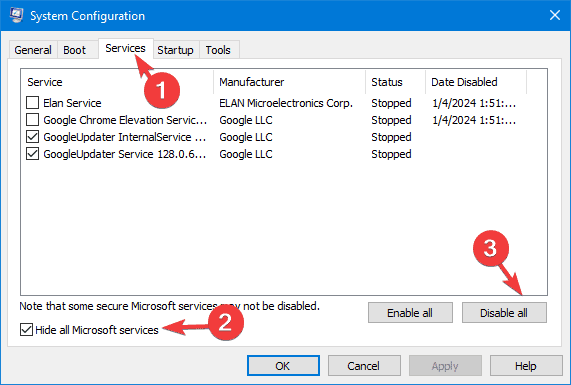
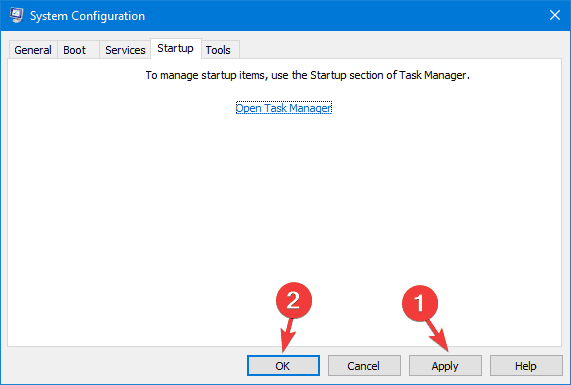
- On the System Configuration window, go to the Services tab, place a checkmark next to Hide all Microsoft services, and click Disable all. This will ensure only non-Microsoft services are disabled.

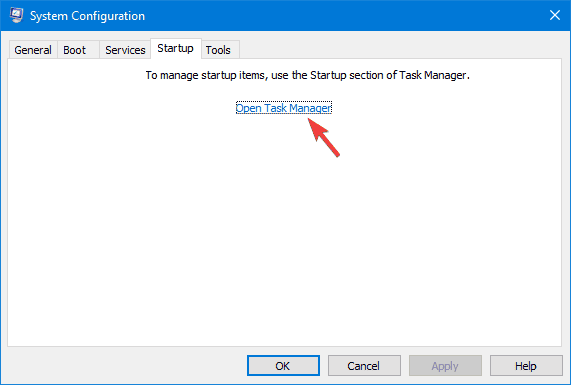
- Switch to the Startup tab and click the Open Task Manager link.
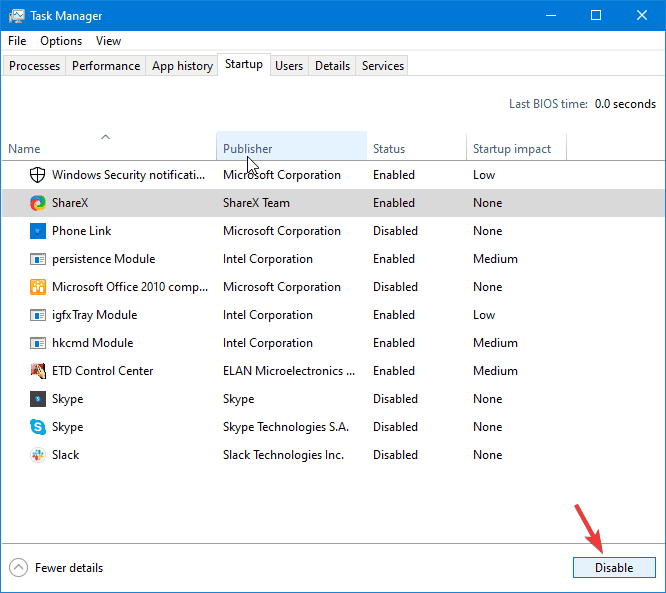
- On the Task Manager window, for each Enabled item, select them one by one and click Disable. You can always turn them back off.

- Close Task Manager.
- On the System Configuration window, click Apply, then OK.
- Click Restart to reboot your PC.
3. Reset the Windows components
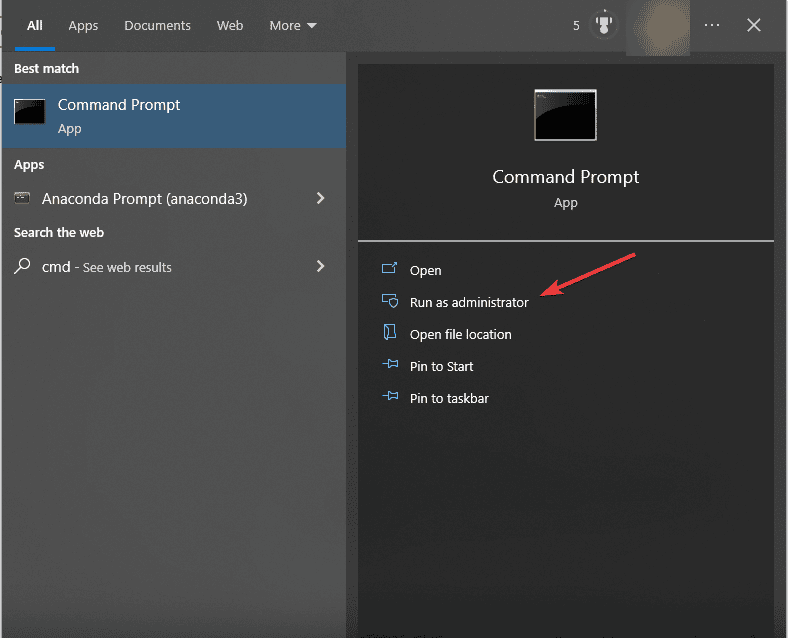
- Press the Windows key, type cmd in the search box, and select Run as administrator.

- Type the following commands to stop the BITS and Windows Update services and hit Enter after each command:
net stop bits
net stop wuauserv - Copy & paste the following script to delete the qmgr*.dat files and press Enter:
Del "%ALLUSERSPROFILE%Application DataMicrosoftNetworkDownloaderqmgr*.dat" - Type the following commands to rename the following folders to *.BAK and hit Enter after every command:
Ren %systemroot%SoftwareDistributionDataStore *.bak
Ren %systemroot%SoftwareDistributionDownload *.bak
Ren %systemroot%system32catroot2 *.bak - Now, copy & paste the following commands to reset the BITS service and the Windows Update service and hit Enter after every command :
 sc.exe sdset bits D:(A;;CCLCSWRPWPDTLOCRRC;;;SY)(A;;CCDCLCSWRPWPDTLOCRSDRCWDWO;;;BA)(A;;CCLCSWLOCRRC;;;AU)(A;;CCLCSWRPWPDTLOCRRC;;;PU)
sc.exe sdset wuauserv D:(A;;CCLCSWRPWPDTLOCRRC;;;SY)(A;;CCDCLCSWRPWPDTLOCRSDRCWDWO;;;BA)(A;;CCLCSWLOCRRC;;;AU)(A;;CCLCSWRPWPDTLOCRRC;;;PU) - Type in this command to open System32 and press Enter:
cd /d %windir%system32 - Copy & paste the following commands to reregister the BITS and Windows Update files and hit Enter after each command:
regsvr32.exe atl.dll
regsvr32.exe urlmon.dll
regsvr32.exe mshtml.dll
regsvr32.exe shdocvw.dll
regsvr32.exe browseui.dll
regsvr32.exe jscript.dll
regsvr32.exe vbscript.dll
regsvr32.exe scrrun.dll
regsvr32.exe msxml.dll
regsvr32.exe msxml3.dll
regsvr32.exe msxml6.dll
regsvr32.exe actxprxy.dll
regsvr32.exe softpub.dll
regsvr32.exe wintrust.dll
regsvr32.exe dssenh.dll
regsvr32.exe rsaenh.dll
regsvr32.exe gpkcsp.dll
regsvr32.exe sccbase.dll
regsvr32.exe slbcsp.dll
regsvr32.exe cryptdlg.dll
regsvr32.exe oleaut32.dll
regsvr32.exe ole32.dll
regsvr32.exe shell32.dll
regsvr32.exe wuaueng.dll
regsvr32.exe wuaueng1.dll
regsvr32.exe wucltui.dll
regsvr32.exe wups.dll
regsvr32.exe wups2.dll
regsvr32.exe wuweb.dll
regsvr32.exe qmgr.dll
regsvr32.exe qmgrprxy.dll
regsvr32.exe wucltux.dll
regsvr32.exe muweb.dll
regsvr32.exe wuwebv.dll
regsvr32.exe initpki.dll
regsvr32.exe wuapi.dll - Type the command to reset Winsock using the following command and press Enter:
netsh winsock reset
net start bits
net start wuauserv - Now, copy & paste the following commands to restart the BITS and the Windows Update services and hit Enter after every command:
net start bits
net start wuauserv - Restart your computer to let the changes take effect.
Resetting the Windows components can also help you fix the Windows Update not loading or working; check out the guide to learn more.
4. Run SFC & DISM scans
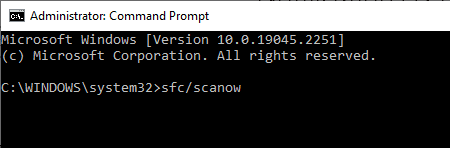
- Press the Windows key, type cmd in the search box, and click Run as administrator.
- Copy & paste the following command to repair the Windows update files and press Enter:
DISM /Online /Cleanup-Image /CheckHealth
DISM /Online /Cleanup-Image /ScanHealth
DISM /Online /Cleanup-Image /RestoreHealth - Once done, you will see The restore operation completed successfully; type the following command to repair the system files and hit Enter:
sfc/scannow
- Wait until you see sfc scan verification reaches 100% completion, then close the Command Prompt window.
- Reboot your PC to save the changes.
Running a DISM scan can also help you fix if there were some problems installing updates issue; read this separate guide to learn more.
5. Repair the hard driver errors
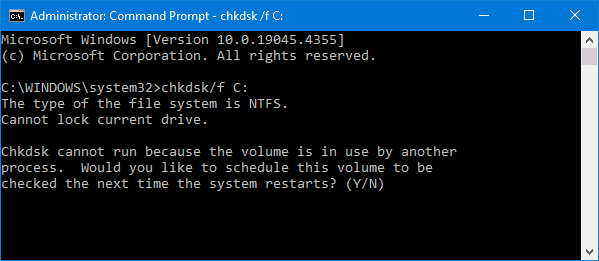
- Press the Windows key, type cmd in the search box, and click Run as administrator.
- Type the following command to repair the hard driver error and hit Enter: chkdsk/f C:

- Type Y to proceed; once the command is executed, restart your computer.
6. Run Automatic Repair
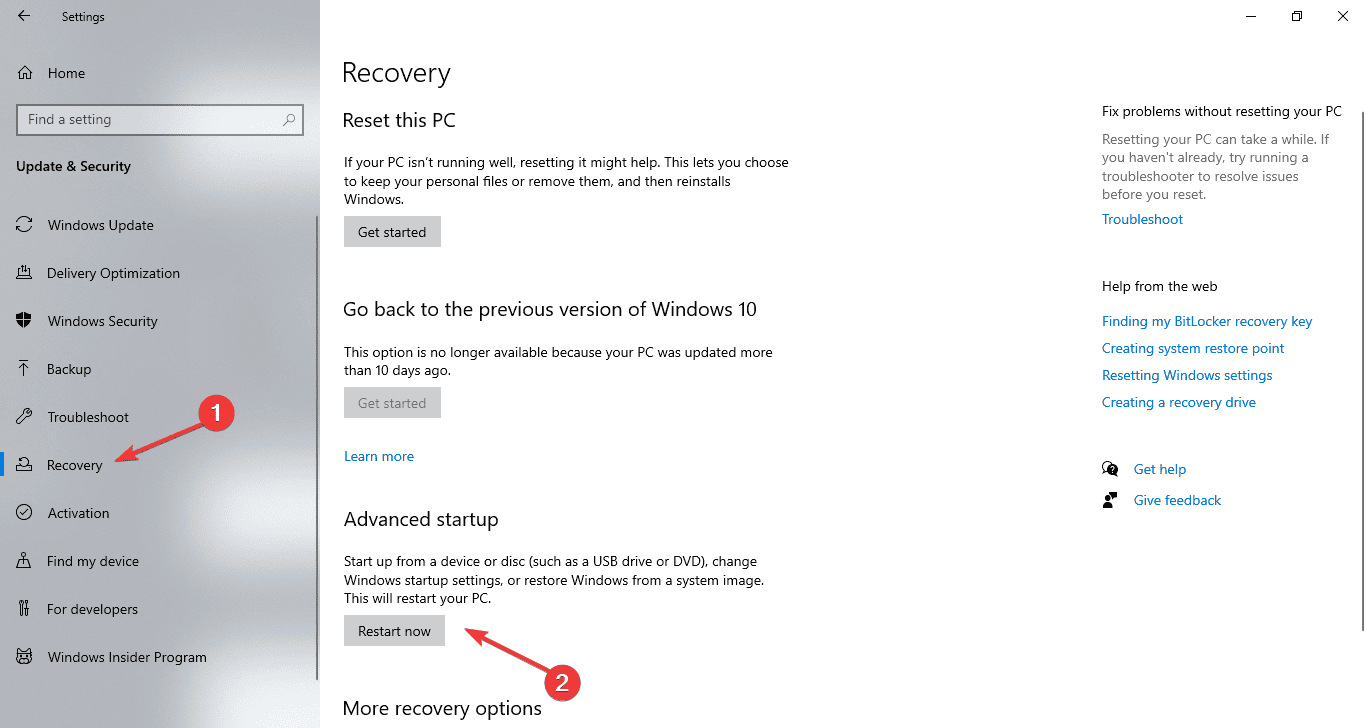
- Press Windows + I to open the Windows Settings app.
- Go to Update & Security.
- Click Recovery from the left pane.
- Locate Advanced Startup and click Restart Now.

- The computer will restart and will take you to the blue screen.
- Click Troubleshoot.
- Then, on the next page, select Advanced Options.
- Click Automatic Repair to initiate the repair process.
7. Perform a clean installation
 NOTE
NOTE
7.1 Create installation media
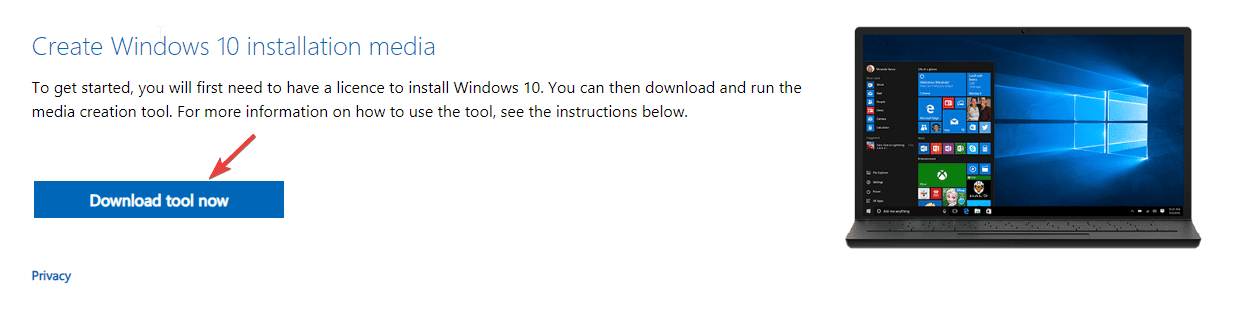
- Go to the Microsoft Windows 10 download page.

- Click the Download tool now to get the Media Creation tool on your device.
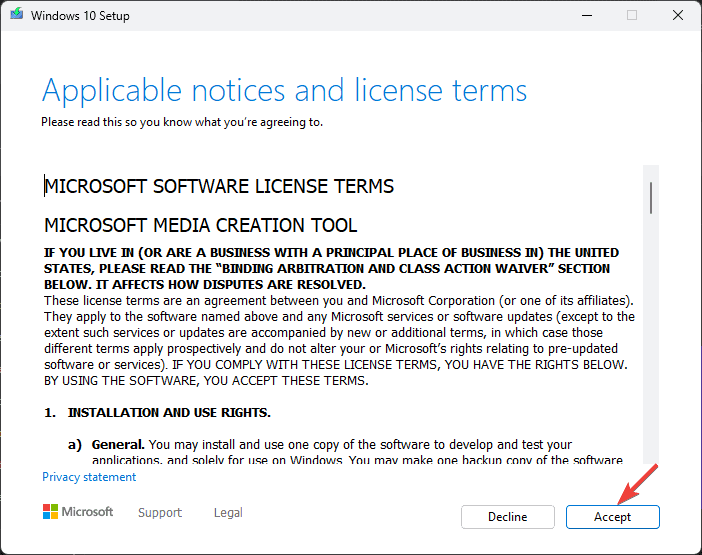
- Connect the USB drive, double-click the Media Creation tool to run it, and click Accept.

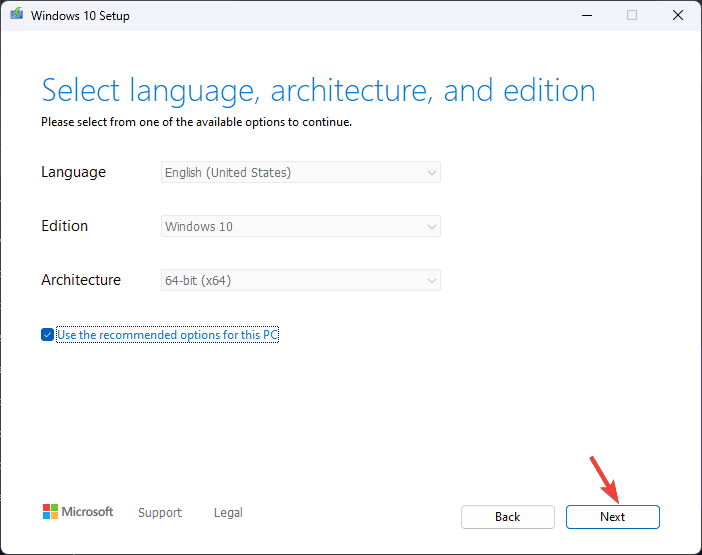
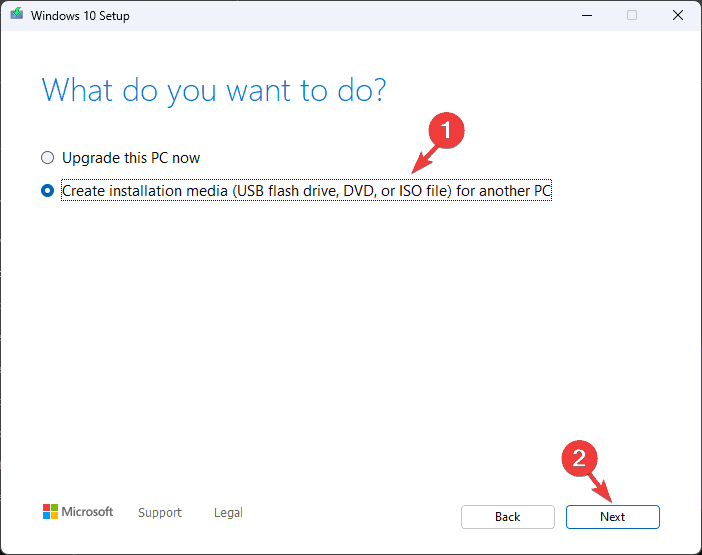
- Select Create installation media (USB flash drive, DVD, or ISO file) for another PC, and click Next.
- Choose the language, edition, and architecture (32-bit or 64-bit) for Windows 10, then click Next.
- Select USB flash drive and click Next. This will make the USB a bootable media.
7.2 Install Windows 10
- Connect the USB drive to the targeted computer, then restart it.
- Press F2, F12, ESC, or DEL (the specific key per your manufacturer) during startup to access the BIOS/UEFI settings.
- In the BIOS settings, go to the Boot menu and select the USB drive to prioritize booting from the flash drive, then press F10 to save the changes and exit.
- Now, the computer will restart and boot from the USB drive.
- Select the language, time and currency format, & keyboard input method, then click Next.
- Click the Install Now button.

- On the following screen, enter the Windows 10 product key when asked. You can skip the step if you have already activated Windows 10 and installed it on the device.
- Next, accept the license terms and click Next.
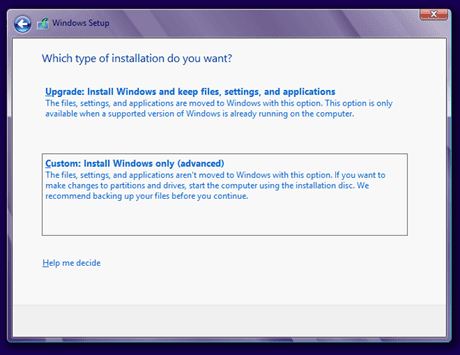
- Choose Custom: Install Windows only (Advanced) to perform a clean installation.

- Select the drive you want to install Windows, or you can delete existing partitions. If you want to perform a completely fresh installation, choose the partition of your drive, then click Delete. In case you need a new one, click New to create a new partition.
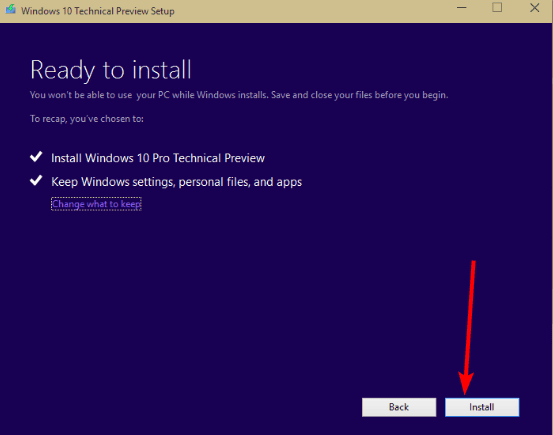
- Follow the on-screen instructions to complete the process.
7.3 Configure Windows settings
- Once the installation is done, choose your region and keyboard layout.
- Connect to the Wi-Fi network when prompted.
- Next, sign in with a Microsoft account or create if needed.
- Choose the privacy settings per your preferences, then follow other prompts to set up other features.
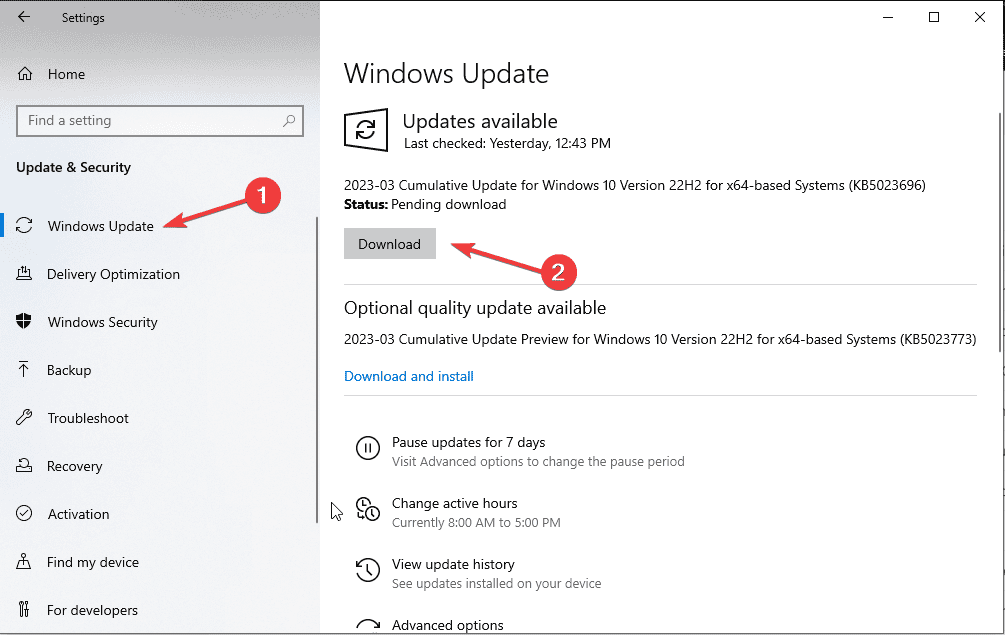
- Once the setup is complete, go to Windows + I to open Settings, go to Update & Security, and choose Windows Update.

- Click Check for updates.
To conclude, to fix the Windows Update error 0x80240031 on Windows 10, you can run the SFC scan to repair the corrupted system files, try performing automatic repair, or reset Windows components. You can also use a reliable Windows Update repair tool to fix all such errors automatically and quickly.
If you have any other suggestions or comments about the topic, feel free to mention them in the comments section below. Additionally, if you need any help with error code 8024200d, we have just the guide for you.


User forum
0 messages