How to Fix ERROR_FIRMWARE_UPDATED 728 (0x2D8)
First check if the latest firmware version is compatible with your device
3 min. read
Updated on
Read our disclosure page to find out how can you help Windows Report sustain the editorial team. Read more
Key notes
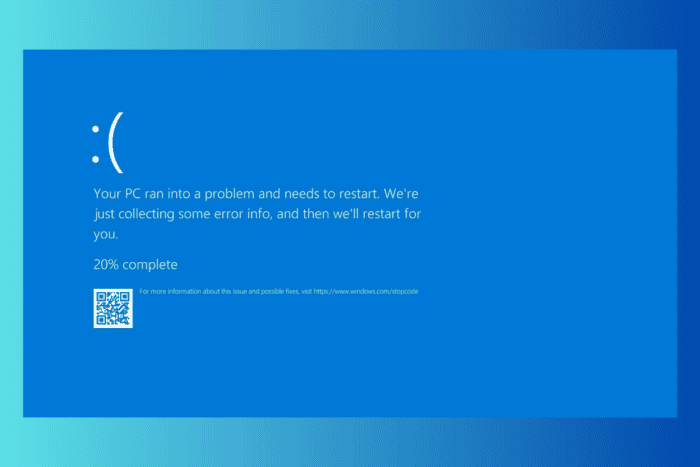
The ERROR_FIRMWARE_UPDATED with error message 728 (0x2D8) and description Windows has detected that the system firmware (BIOS) was updated [previous firmware date = %2, current firmware date %3], can appear after a BIOS update or attempt to downgrade or if the firmware update process was interrupted or incompatible.
This error indicates that the system firmware (BIOS) was updated; however, there might be a mismatch or conflict between the current and previous firmware versions.
How can I fix ERROR_FIRMWARE_UPDATED 728 (0x2D8)?
1. Check if the update is complete
Before performing any advanced steps, you must ensure the BIOS/firmware update was completed successfully and was not interrupted due to a system crash or power failure.
If the update was not installed properly, follow the steps in Methods 2 and 3 to try to apply the firmware update.
2. Go back to the previous firmware version
- Go to the manufacturer’s website for your computer (HP, Dell, Asus). We are demonstrating the steps using an HP device here.
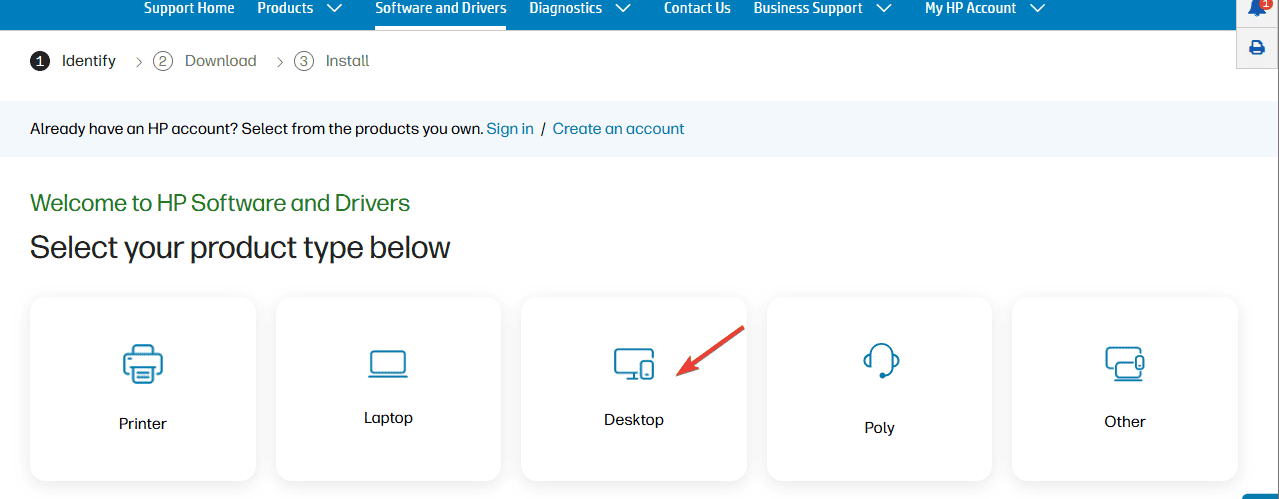
- Select the device.
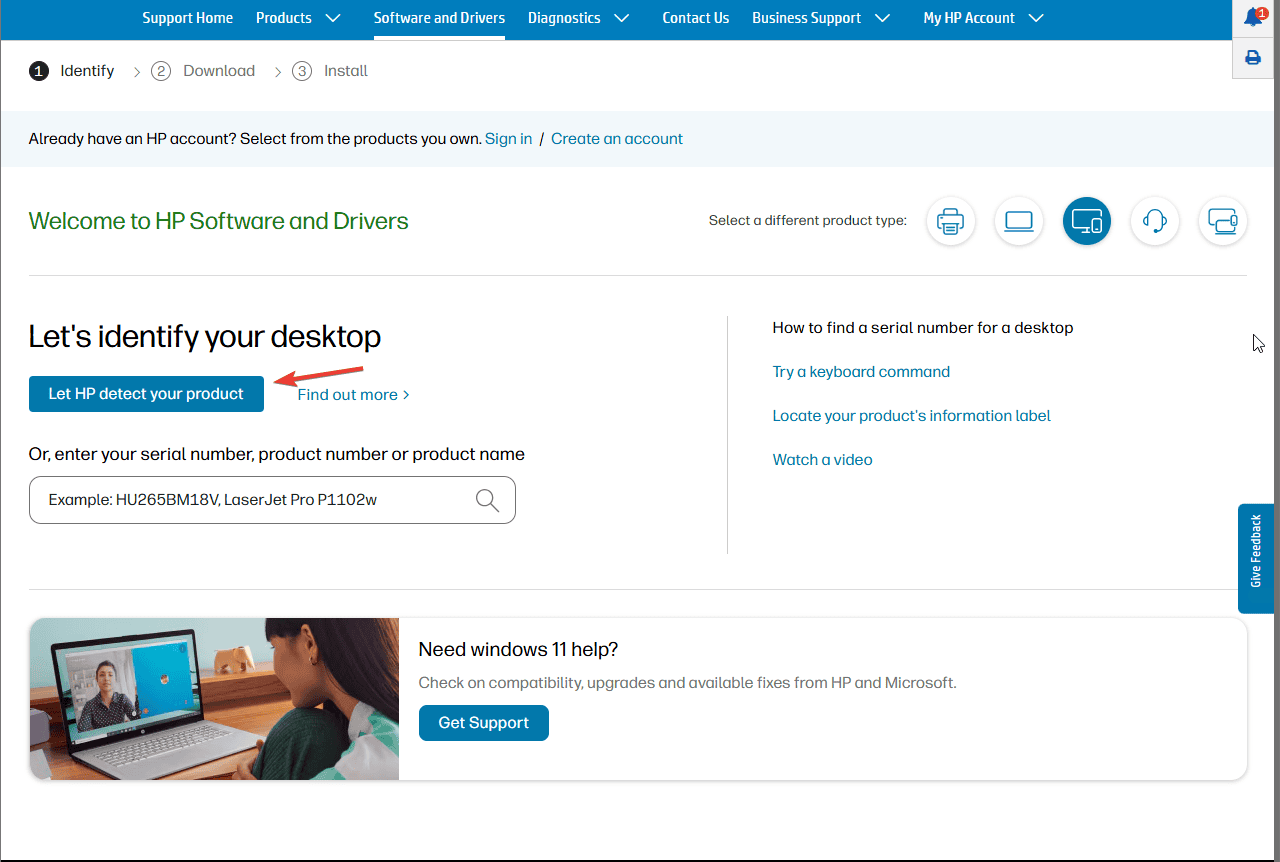
- Click Let HP detect your product and select the device.
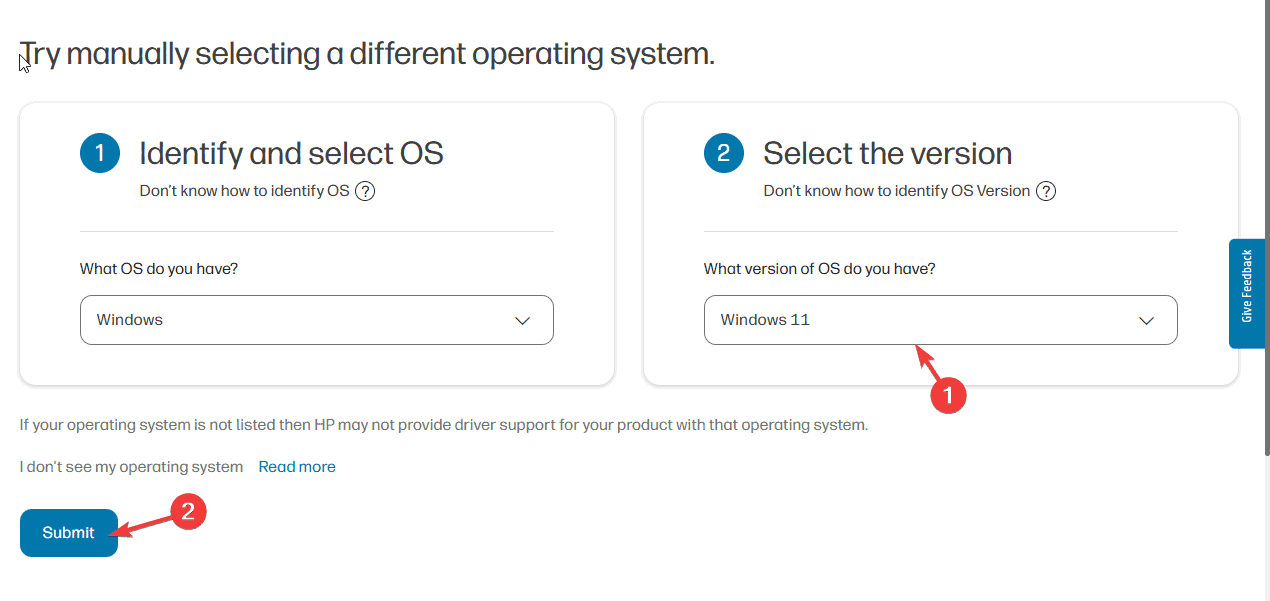
- Select the Windows OS and version, then click Submit.
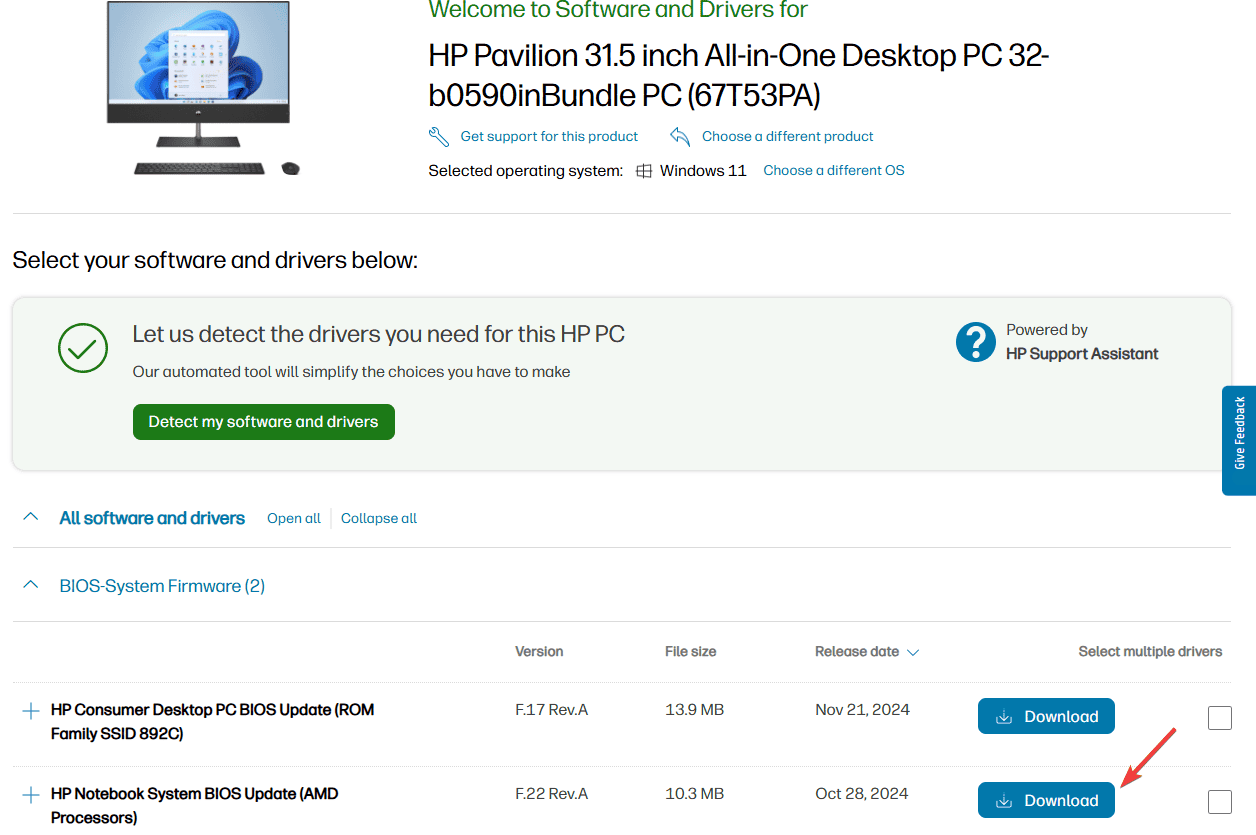
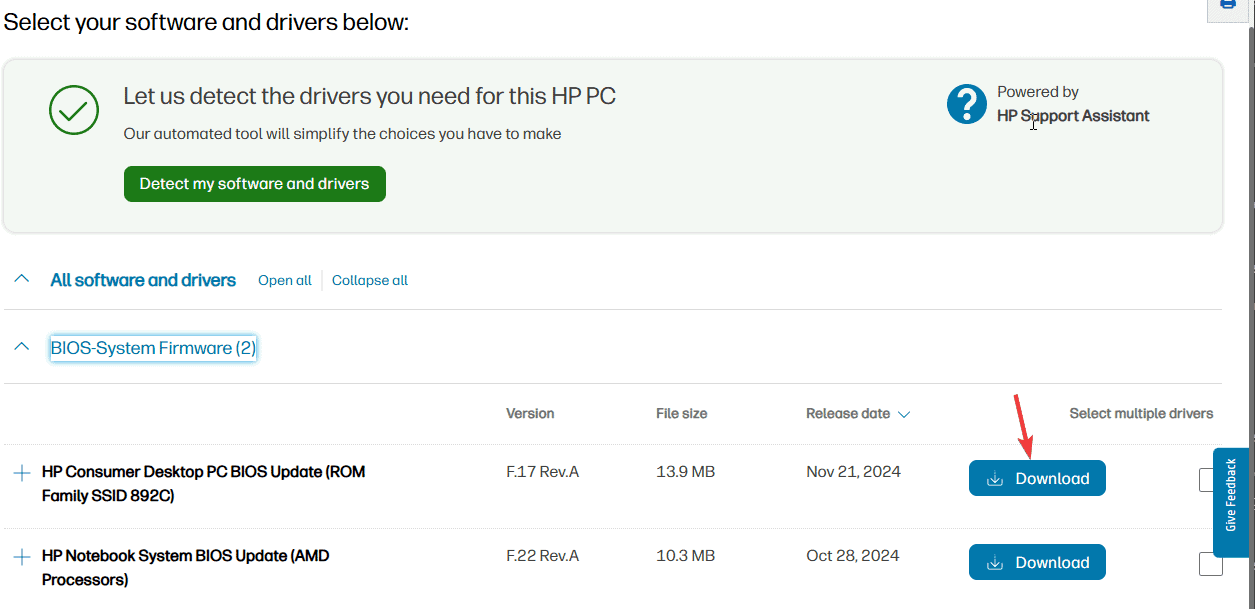
- Under All software and drivers, click BIOS-System Firmware.
- Choose the previous version and click Download.
- Once downloaded, double-click the file and follow the on-screen instructions to complete the process.
3. Update BIOS/UEFI to the latest version
- Go to the manufacturer’s website for your computer (HP, Dell, Asus). We are demonstrating the steps using an HP device here.
- Choose your device from the list of products.
- Click Let HP detect your product and select the device.
- Select the Windows OS and version, then click Submit.
- Under All software and drivers, click BIOS-System Firmware.
- Choose the latest version and click Download.
- Once downloaded, double-click the file and follow the on-screen instructions to complete the process.
4. Reset the BIOS settings to default
- Press the Windows key, click the Power button, and select Shut Down.
- Open the case if it is a desktop PC or access the laptop battery. Alternatively, you need to open the back case if you are using the latest laptops.
- Look for the CMOS battery, typically a silver-colored coin cell battery. It is near the center or sides of the motherboard. Please remove the battery and leave it out for 5 to 10 minutes.
- Now, reinsert the CMOS battery back into its socket.
If you are not comfortable following these steps, follow these instead:
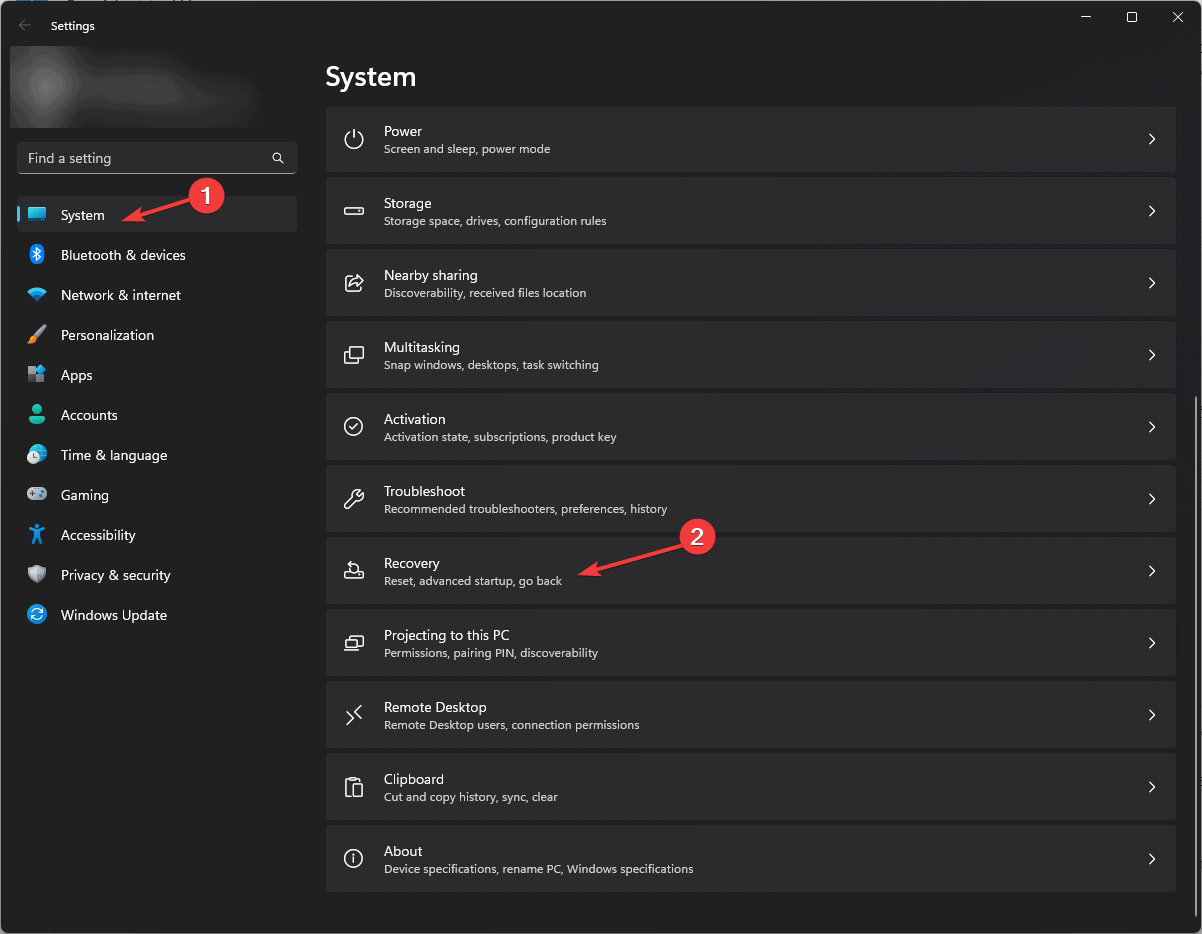
- Press Windows + I to open the Settings app.
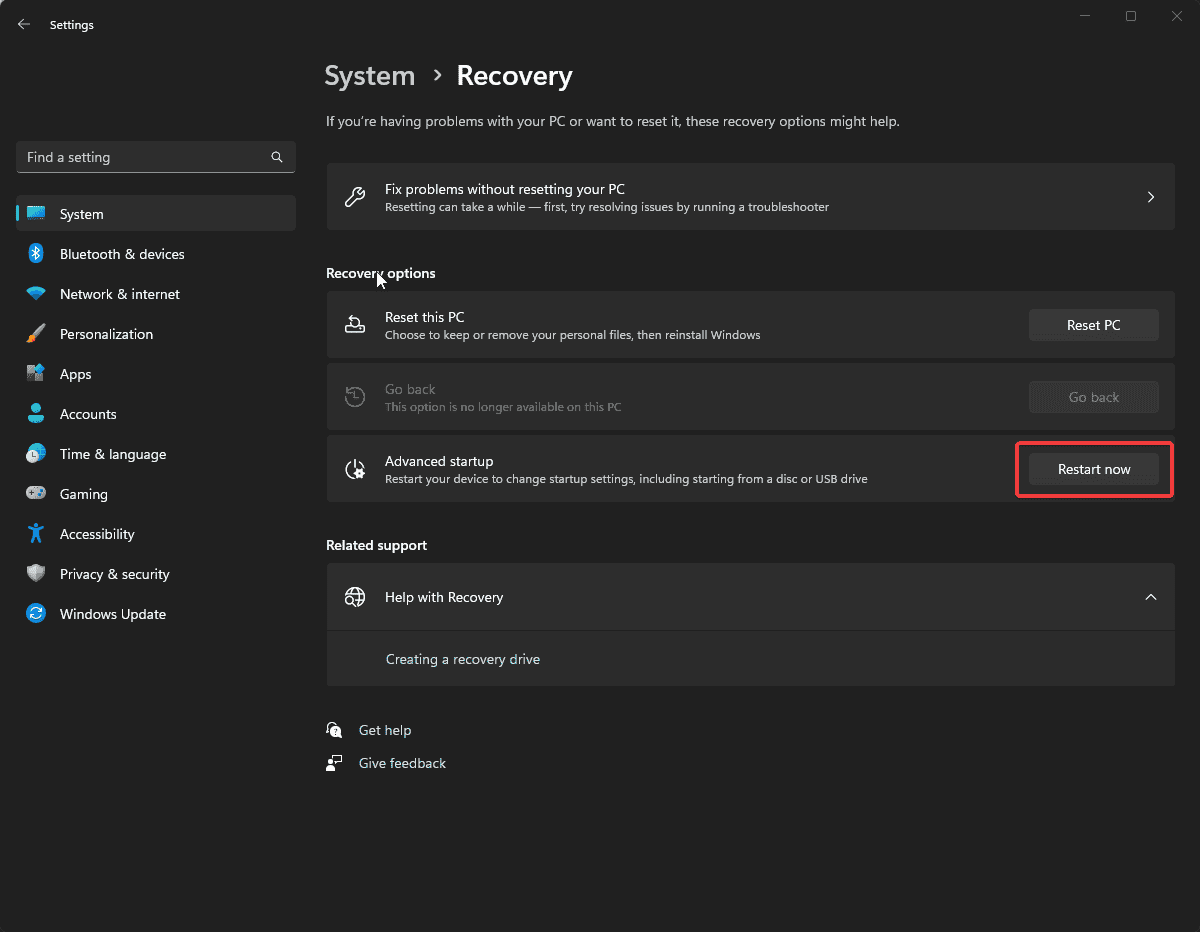
- Go to System, then click Recovery.
- For Advanced startup, click Restart now.
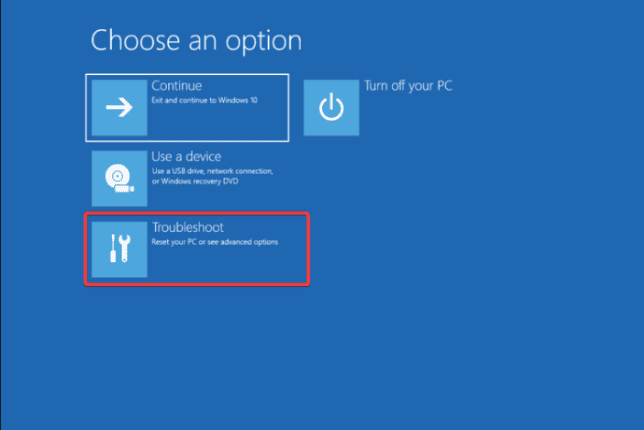
- On the Choose an option screen, select Troubleshoot.
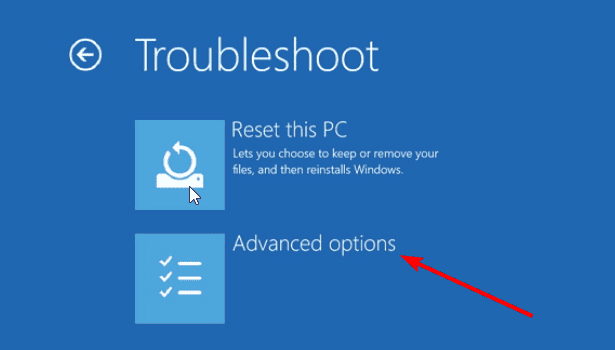
- Click Advanced options on the following screen.
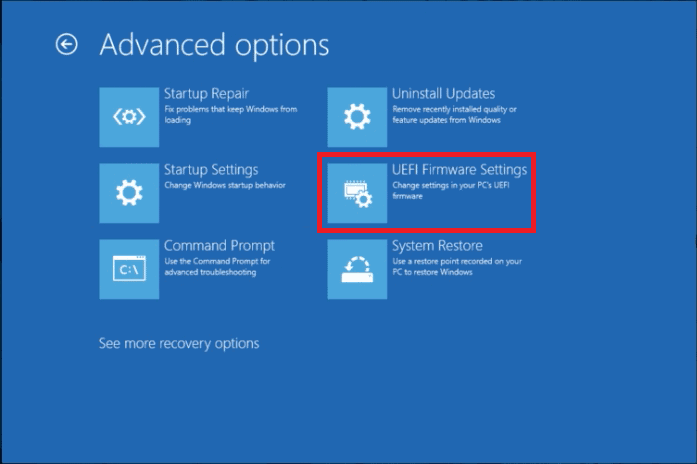
- Next, select UEFI Firmware Settings.
- Click Restart.
- In the BIOS mode, look for Restore Defaults, Load Optimized Defaults, or Load Fail-Safe Defaults.
- Select it and click Save & Exit or press F10 to save the changes.
Resetting the BIOS settings to default can help you fix other BSoD errors, such as Invalid_Extended_Processor_State; read this guide to learn more.
In conclusion, to fix the ERROR_FIRMWARE_UPDATED, first check if the update is complete, try downloading the previous or latest firmware version, and then Reset the BIOS using the CMOS battery.
While discussing BSoD errors related to BIOS, you can check out this detailed guide on another BIOS error: ACPI BIOS ERROR. We have also covered the ACPI BIOS FATAL ERROR error on Windows 10 in a separate guide.
If you have any suggestions or questions about the BSoD error, feel free to mention them in the comments section below.




User forum
0 messages