How to Exit Windows Recovery Mode if You're Stuck
Exiting the Recovery Mode is simple as clicking a button
7 min. read
Updated on
Read our disclosure page to find out how can you help Windows Report sustain the editorial team. Read more
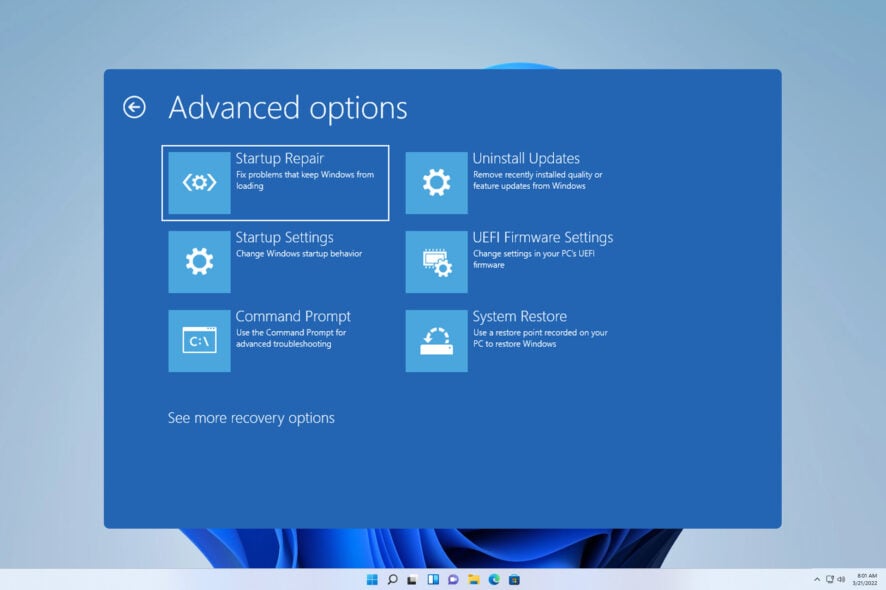
Windows Recovery Environment is a special segment of Windows that allows you to repair various issues. However many users get stuck in it, and they are wondering how to exit Windows Recovery Mode.
The easiest way to get out of the Windows Recovery mode is to press and hold the Power button on your PC. However, this only works if there aren’t any major problems with Windows.
How do I exit Windows Recovery Mode?
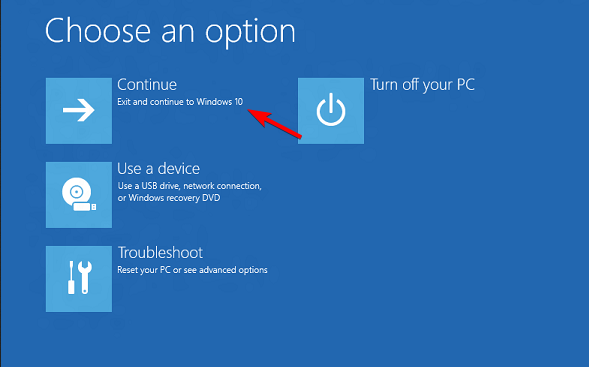
1. Using the Continue option
- Before you can troubleshoot your PC, you’ll get a list of options.
- Select Continue to boot to Windows normally.
- Alternatively, you can use Turn off your PC.
Keep in mind that this method will only work if there aren’t any issues with your system.
2. Use Startup Repair
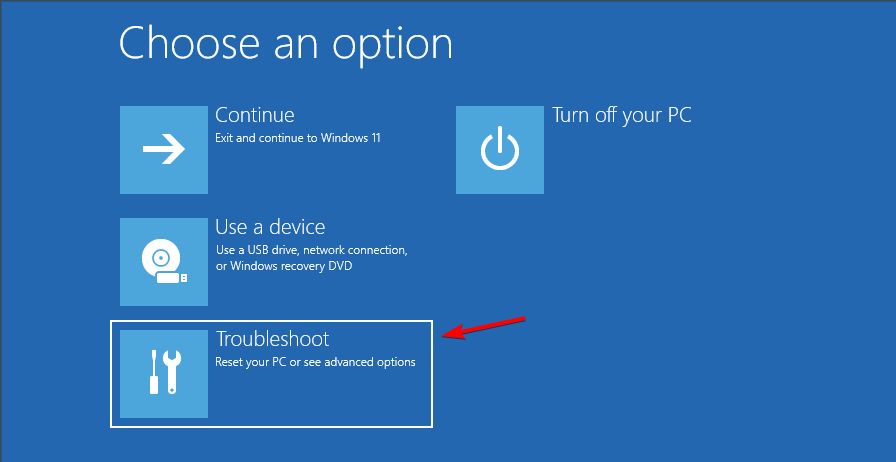
- When you access Recovery Mode, choose Troubleshoot.
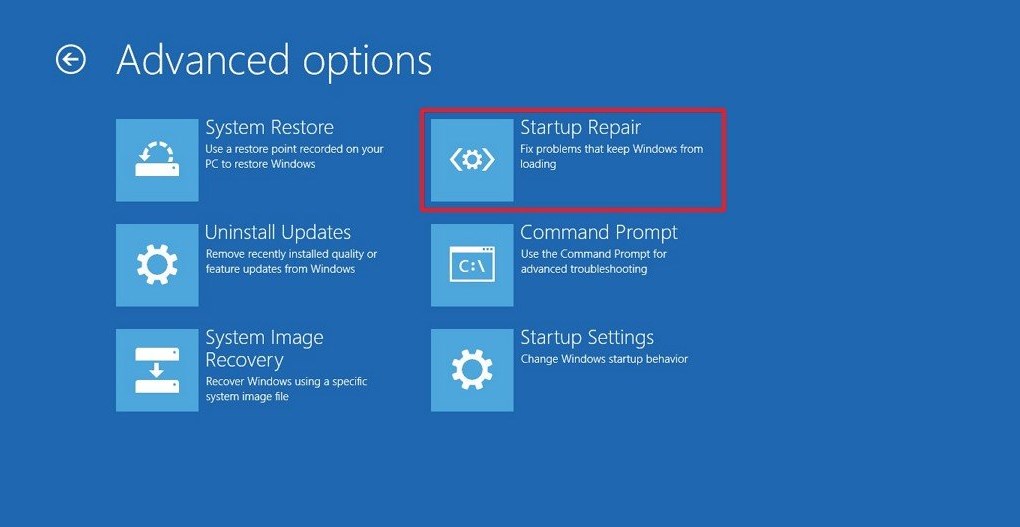
- Next, click on Advanced options.
- Select Startup Repair.
- Windows will now try to repair your installation.
This feature doesn’t require any user input, but it can only help with minor issues, such as missing or damaged system files, so it’s not as useful as others in Windows Recovery Environment.
3. Use System Restore
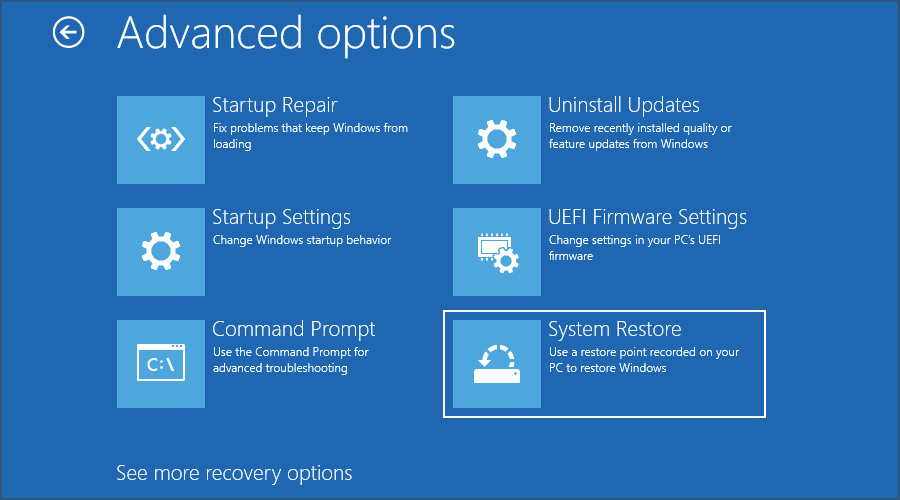
- Choose Troubleshoot and Advanced options when you enter Recovery Mode.
- Now select System Restore.
- Select your user account and enter your password.
- Now follow the instructions on the screen and select the desired point to restore to.
This feature is rather simple to use, and it can help if issues started appearing after installing a certain update, software, or driver. By using this feature, you’ll restore your system to a different point in time and hopefully fix the problem.
Do keep in mind that this isn’t an all-powerful feature, so it can’t help with major issues. It’s also worth mentioning that to use this feature, you need to create a system restore point beforehand.
Usually, Windows does that automatically, but it’s not always reliable.
4. Use System Image Recovery
- After you access Recovery Mode, go to Troubleshoot and select Advanced Options.
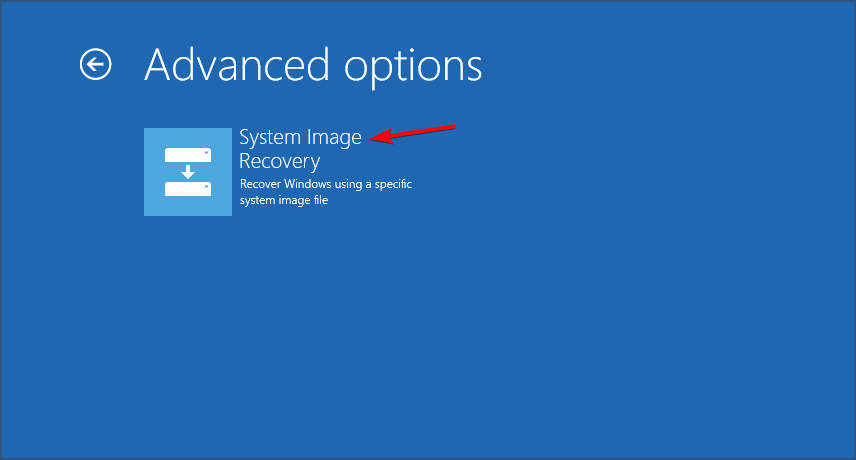
- Next, select System Image Recovery and click on See more recovery options, and then select System Image Recovery.
- Make sure that the drive with your system image is connected.
- Windows should now automatically detect the system image. If it doesn’t you’ll have to manually search for it.
- Select the desired image and follow the instructions on the screen to complete the process.
In case you’re not familiar, a system image is an exact copy of your hard drive. With it, you can restore your entire drive to the exact state it was while creating a drive image.
This is an incredibly powerful recovery feature, and it can fix almost any problem on your PC. However, it’s not enabled by default, and to use it, you need to manually create a system image and store it on a secure drive.
5. Use Safe Mode
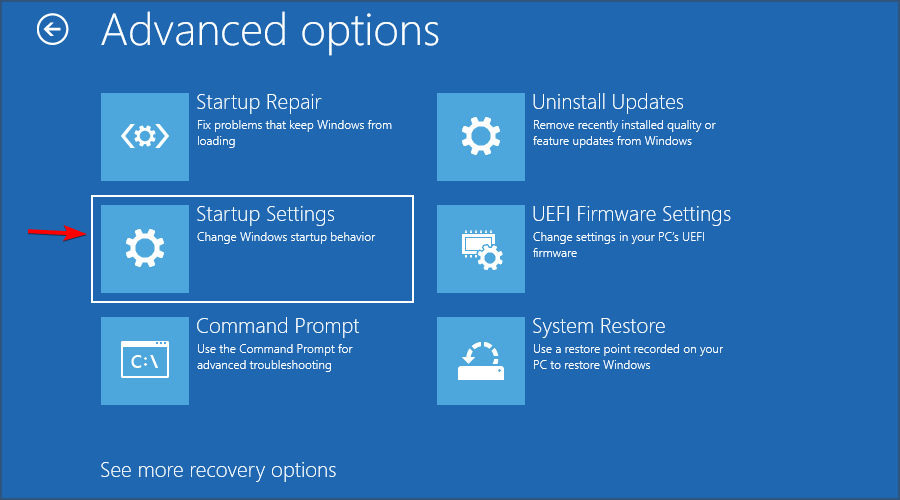
- Once you enter Recovery Mode, go to Troubleshoot and select Advanced options.
- From advanced startup, choose Startup Settings and click Restart.
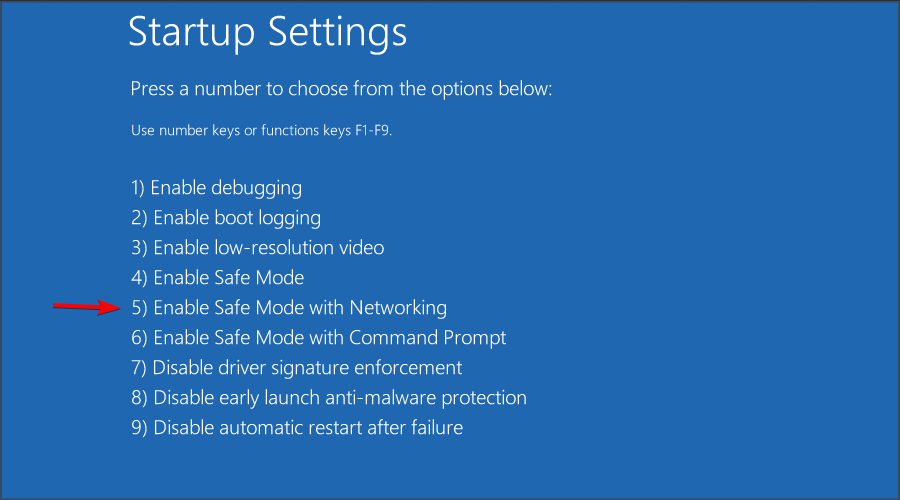
- You’ll be presented with various startup options. Now choose one of several versions of Safe Mode by pressing the corresponding keyboard key.
Safe Mode is a special mode of Windows that starts with limited drivers and files. As such, you can use it to troubleshoot issues with any third-party apps and drivers.
If an issue appears in Safe Mode, it means that the issue you’re dealing with is caused by a damaged installation or hardware.
To complete these steps, you need a working keyboard. In case you’re having issues, we have a guide that can help if keyboard is not working in Recovery Mode.
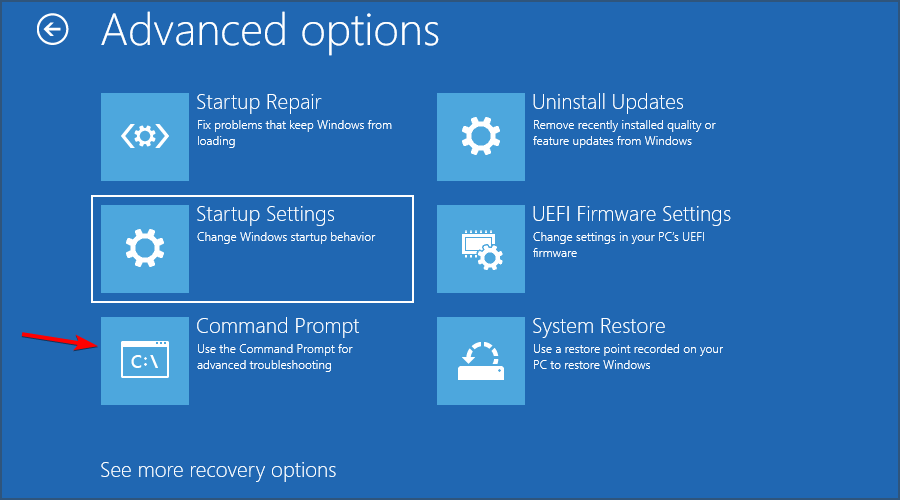
6. Use Command Prompt
- Just like with previous methods, select Troubleshoot and Advanced options.
- From advanced startup, select Command Prompt.
- The command line will now start.
In Command Prompt, you can use SFC scan to fix your system:
sfc /scannow /offbootdir=d: /offwindir=d:\windows
Keep in mind that you might have to change the drive letters in Windows Recovery Environment in order for this command to work.
You can use the DISM command from the Windows image to repair your system:
Dism /Image:C:\offline /Cleanup-Image /RestoreHealth /Source:c:\test\mount\windows
Remember that you need to replace the Source path with the path that matches the location of the Windows image file on your installation media.
You can also use Command Prompt to repair scan your hard drive and repair damaged files with this command:
chkdsk /r C:
Lastly, you can fix boot records by running these commands:
bootrec /RebuildBcd
bootrec /fixMbr
bootrec /fixboot
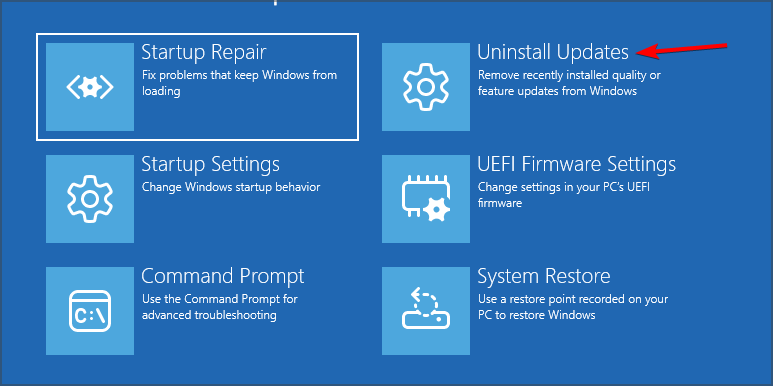
7. Uninstall recent updates
- In recovery mode, go to Troubleshoot.
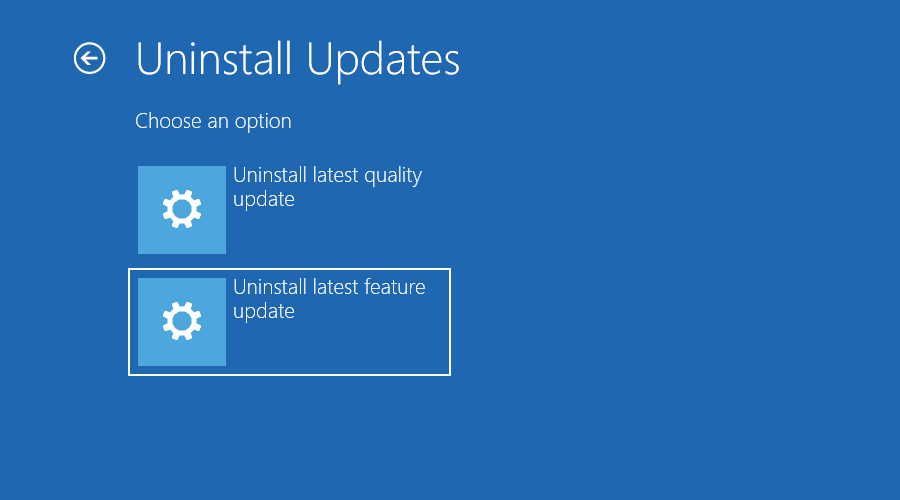
- Navigate to Advanced Options and choose Uninstall Updates.
- Select if you want to remove quality or feature update.
- Follow the steps on the screen to complete the process.
This method is useful if your PC can’t boot anymore after a bad update, so you might want to try this feature.
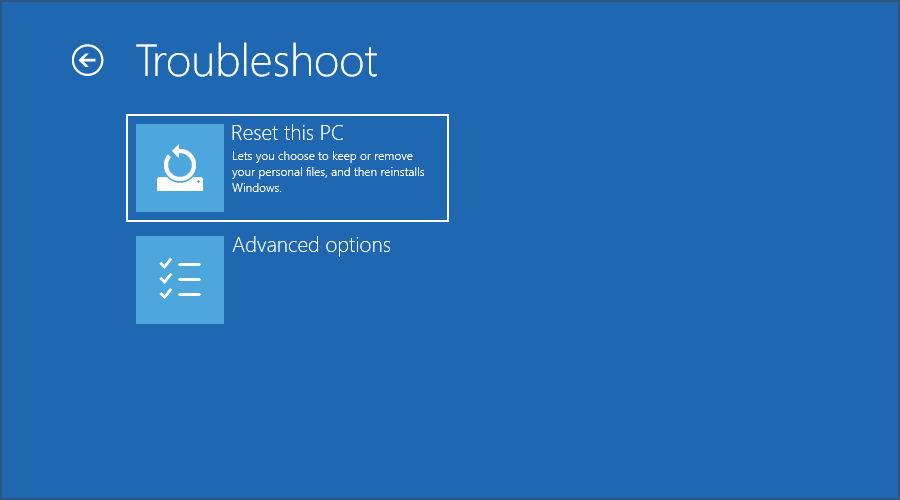
8. Perform a Windows reset
- Boot to Recovery Mode and choose Troubleshoot.
- Now select Reset this PC.
- Select Just remove my files.
- Follow the instructions on the screen to complete the process.
How can I disable Automatic Repair Tool?
- Start your PC in Recovery Mode.
- Navigate to Troubleshoot and choose Advanced options.
- Select Command Prompt.
- Run the following command:
bcdedit /set {default} recoveryenabled no
In case the command doesn’t work run bcdedit command and use it to find the identifier in Windows Boot Loader. Use that identifier instead of {default}.
Many users choose to disable this feature because it starts automatically after Windows crashes a couple of times. Unfortunately, automatic repair doesn’t usually fix any problems. However, users still have to wait every time for the scan to finish before they can access Windows Recovery Environment.
This is why some are choosing to disable this feature to get faster to the troubleshooting process.
What is Windows Recovery Mode?
- It’s a special segment of Windows used for troubleshooting and repair.
- After several unsuccessful boot attempts, your PC will start in recovery mode.
- You can use it to start your PC in Safe Mode.
- System Restore is also available in Recovery Mode.
- You can use this feature to restore Windows from a system image.
- Removing system updates is also possible from the Recovery Mode.
- For more advanced users, there’s Command Prompt available.
- If your PC cannot recover, you can use it to perform a factory reset.
Why is my PC booting into Recovery Mode?
- Your Windows installation is damaged, and it can’t start.
- Issues with drivers or software can cause your PC to get stuck in Recovery Mode.
- Problems with new hardware can cause the PC not to boot properly.
- Issues with the boot drive.
- Faulty hardware is another cause for this issue.
Keep in mind that sometimes Windows won’t enter Recovery Mode, but we covered that in a separate guide.
How can I troubleshoot hardware issues with Recovery Mode?
Hardware issues are hard to diagnose, but you can use the Recovery Mode and Command Prompt to scan your hard drive with chkdsk command as we discussed earlier.
If you notice many damaged files, your drive is probably damaged and needs to be replaced. You can also use diskpart command to check if your drive is showing on your PC.
Lastly, you can use Safe Mode to remove any incompatible drivers from your PC
How can I avoid getting stuck in the Windows Recovery Mode?
- Make sure that you regularly create System Restore points.
- Have the system disk image ready for recovery.
- Keep your drivers and system up to date.
- Make sure not to install conflicting applications on your PC.
As you can see, you can exit Windows Recovery Mode easily, but if you’re stuck inside it, you can always use the recovery tools from this guide to repair your PC and fix any underlying issues you might have.
These tools are also helpful for advanced troubleshooting, so you should familiarize yourself with them.
Although this guide mostly covers Windows 11, it’s just as easy to enter Recovery Mode on Windows 10 and use it to repair your PC. We also have a great guide on how to enter into Recovery Mode in Windows 11, so don’t miss it.
We hope you found this guide informative, and if you have any questions, feel free to ask in the comments section below.




User forum
0 messages