10 Ways to Fix Steam Overlay not Working in Windows 10/11
Start by running the app with admin privileges
Key notes
- Steam is one of the most amazing apps for gamers, but the Overlay is sometimes not working.
- You should ensure that you run the latest Steam version with the correct privileges.
- A great option to use is disabling and re-enabling the Steam Overlay for individual games.
- Steam Overlays might not work because of antivirus restrictions, so you’ll need to disable them temporarily.

Is your Steam Overlay not working on Windows 10? Do not worry! Because it comes with several solutions for this problem, today’s guide is perfect for you.
For many reasons, Steam is the most prominent digital platform and much more than a simple game digital distribution service. It offers a bag of valuable features and makes the gaming experience so much more enjoyable.
One of those features is Steam Overlay which works in the background and allows players to communicate with their fellow gamers, coordinate, and share the mutual enjoyment of the playtime.
However, this feature isn’t as steady as one would assume. Many users reported that Steam Overlay is not working on Windows 10.
For that reason, we enlisted a hefty list of solutions. Remember that some of these apply to other Windows iterations, but our goal was to focus on Windows 10.
So if you’re stuck with Steam Overlay not working, check the solutions and workarounds below.
Why isn’t my Steam Overlay working?
Steam Overlay is a piece of the Steam user interface that can be activated over the top of almost any game launched through Steam. In addition, it lets you access the friend list, web browser, chat, and in-game DLC purchasing.
Because it is essential to be aware of the most important causes that can get your Steam Overlay unable to work, we’ve compiled a list you should verify:
- Wrong privileges – To get the best out of the Steam experience, running the app with admin privileges is always essential. So if your Steam Overlay is not working on Windows 10, we recommend ensuring you’ve accessed it as an administrator.
- Outdated app – Like any other soft or PC component, Steam needs to be constantly updated, so it will let you use any of its features without any problem. In addition, you should also update your OS.
- Temporary glitches – In this case, we suggest disabling and re-enabling Steam Overlay for individual games. If this seems like not working, try reinstalling the app.
- Antivirus or third-party app is blocking Steam Overlay – Antivirus software might sometimes be too protective, so it may stop you from performing specific actions in Steam. The same might happen when a third-party app is running in the background. To solve this quickly, you’ll probably need to disable them temporarily.
Although there are a few causes you should consider if Steam Overlay is not working, you’ll discover solutions for each of the above issues.
How does Steam overlay work?
While playing games, players can access various Steam Community features through the community overlay, an in-game interface. Any game that supports and has the overlay enabled will open it when Shift + Tab is used as the default hotkey.
Many games use the overlay in the background to enable in-game elements that need Steam, in addition to granting access to Steam community services. You might not even know that a game utilizes the overlay in certain situations.
Games will utilize the Steam overlay differently depending on whatever features they support and how the developer integrated it because it is a customizable Steamworks feature. In-depth details can be discovered in the Steam community or by getting in touch with particular game developers.
How can I fix Steam Overlay if it’s not working on Windows 10?
1. Run the Steam client as an administrator
- Right-click on the Steam client’s desktop shortcut and open Properties.
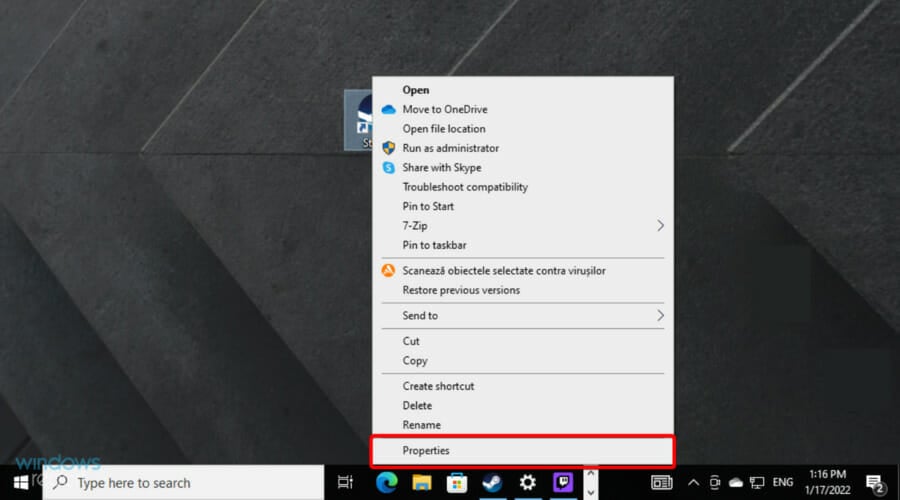
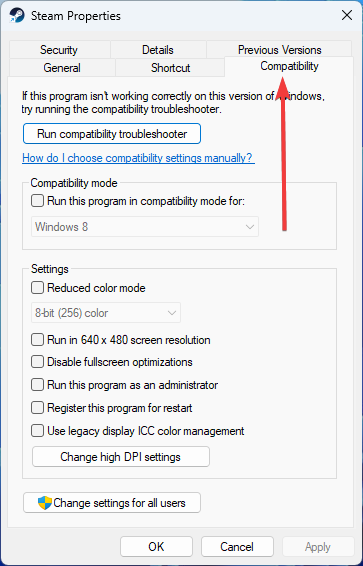
- Choose the Compatibility tab.
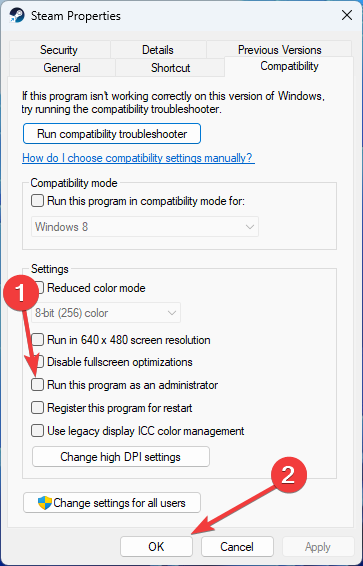
- Check the Run this program as an administrator box and confirm changes.
This is a frequent suggestion on various forums, and we advise you to follow it through if Steam Overlay is not working on Windows 10.
Even though most users who run the Steam client on Windows 10 do so with an administrative account, it’s still worth a try.
Also, we advise running the game through the Steam client instead of doing it directly from its shortcut.
2. Make sure you’re running the latest version
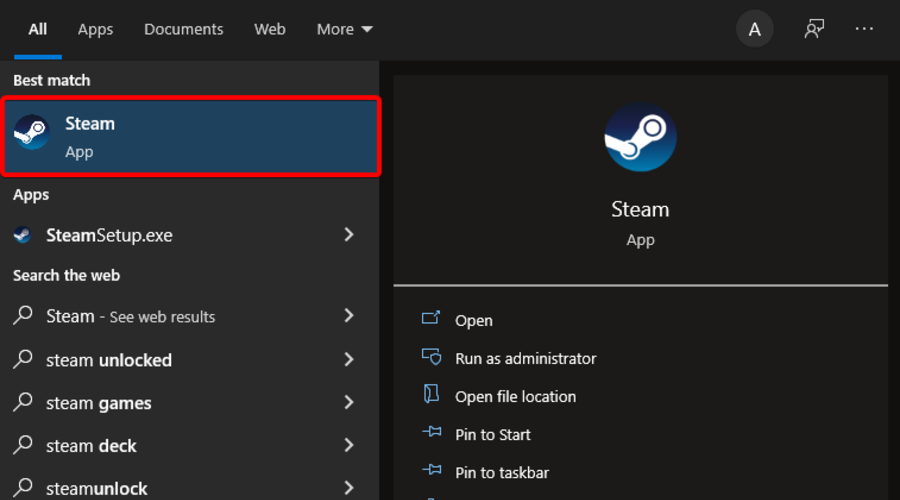
- Press on the Windows key, type Steam, then open the app.
- From the app’s top-left corner, click on Steam, then choose to Check for Steam Client Updates.
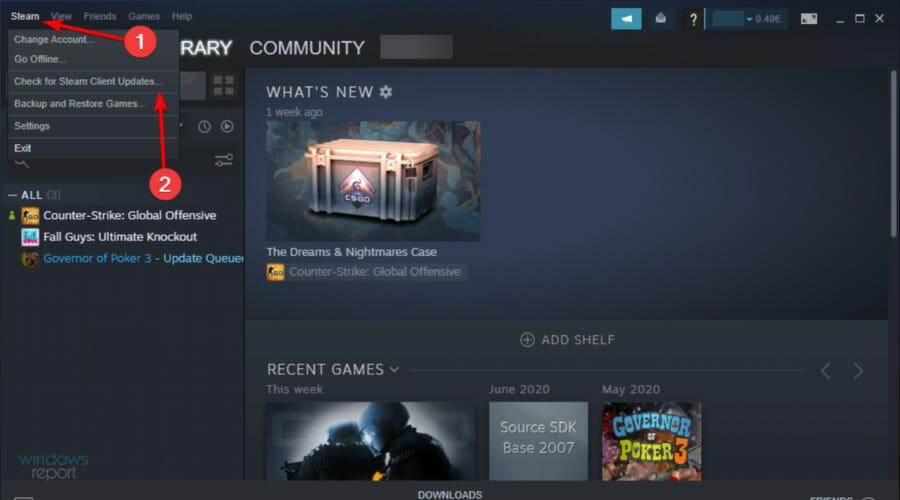
- Wait until updates are installed and restart Steam.
Issues with Steam Overlay have been present for over a few years, especially on the older Windows iterations.
Although the client updates on its own once you start it, you can always check for updates manually, just in case something goes wrong with the automatic updates.
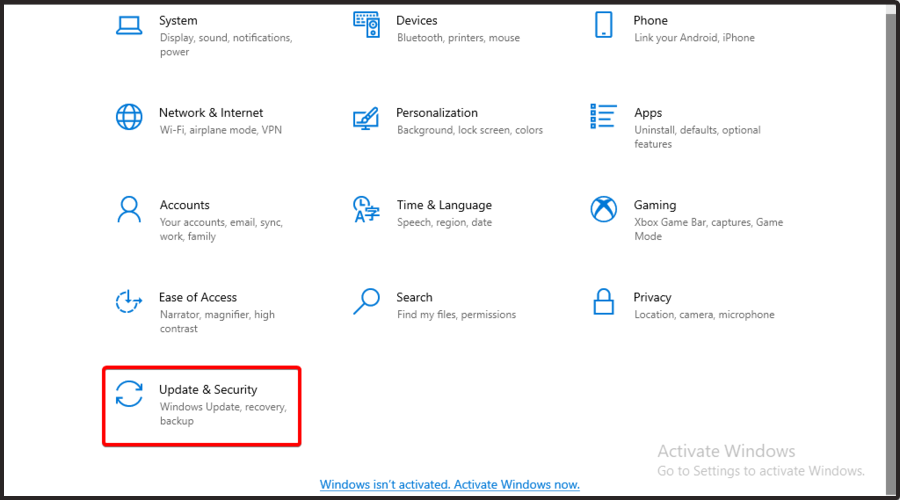
3. Update Windows 10
- Press simultaneously on the following keys: Windows + I.
- Go to Update & Security.
- Stay on the Windows Update page, then click on Check for updates from the right window pane.
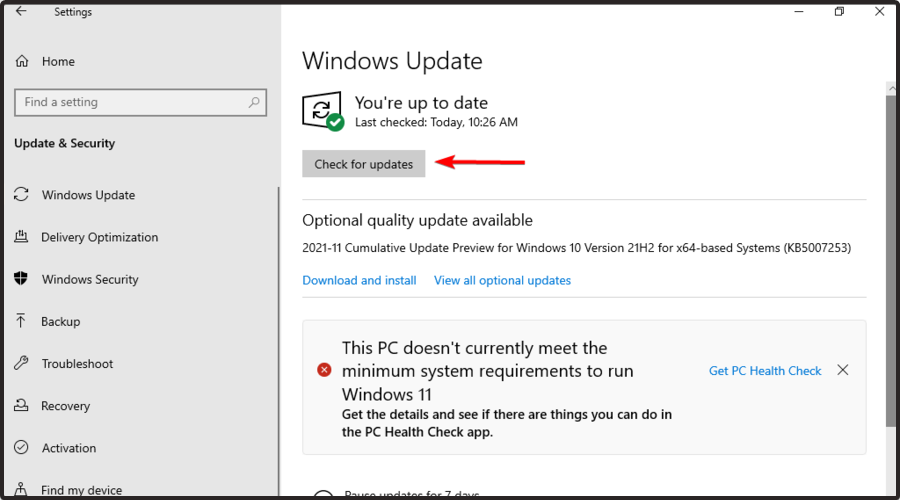
- Wait until the process is done.
Another reason for Steam Overlay issues might lie in Windows 10, so ensuring you have the latest update is of utmost importance.
And, of course, we suggest avoiding the insider versions of Windows 10 and Steam. Beta programs are not stable and thus might result in stability and performance issues.
In addition, you can even roll back Windows 10 if the problem started after a major Windows Update.
- Use the following keyboard shortcut: Windows + I.
- Navigate to Update & Security.
- From the left window pane, click on Recovery.
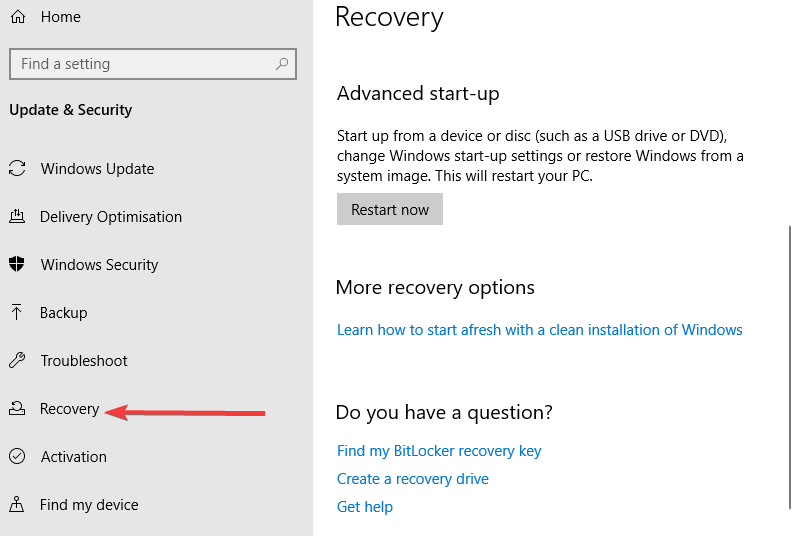
- Choose to roll back Windows 10 to previous versions.
4. Disable and re-enable the Steam Overlay for individual games
- Hit the Windows key from your keyboard.
- Now, search for Steam, and open it.
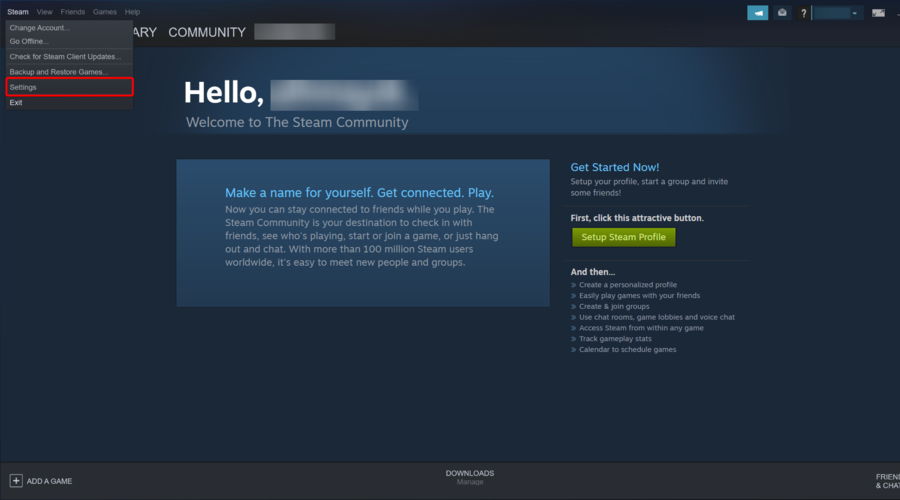
- Look at the top-left corner of the window and click on Steam.
- Navigate to Settings.
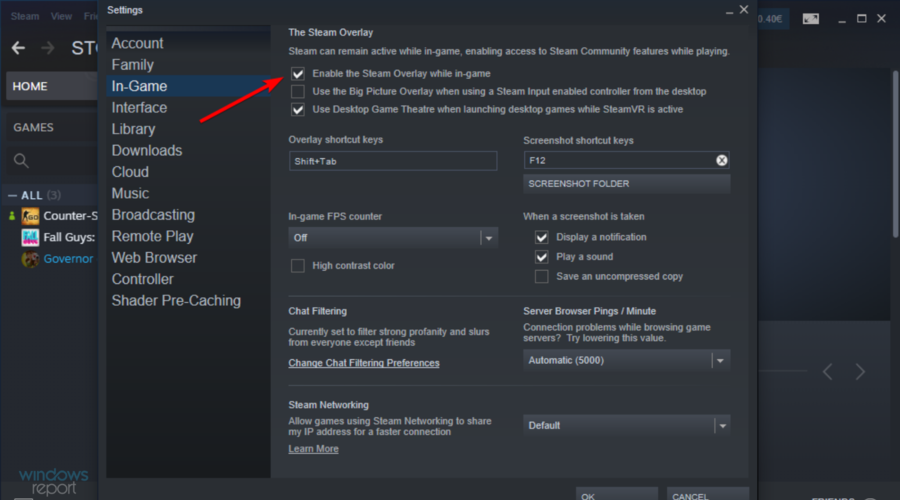
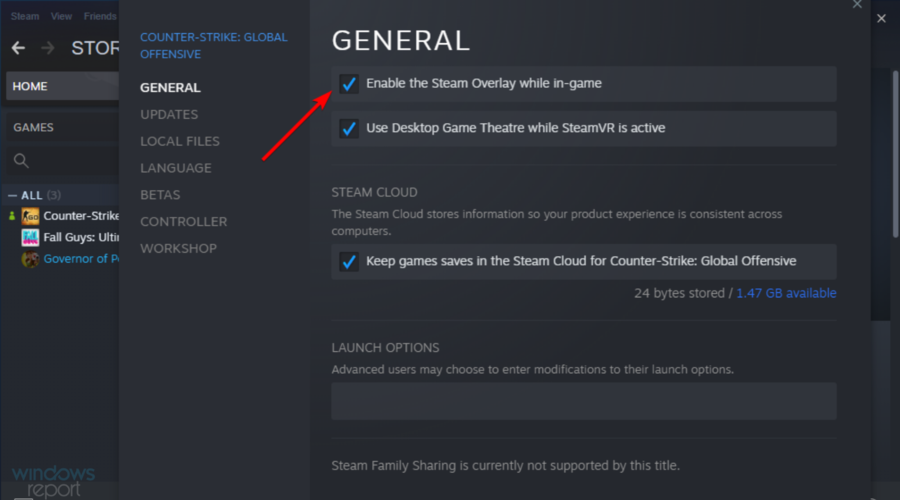
- Choose In-game from the left pane.

- Check the Enable the Steam Overlay while in-game box and confirm changes.
- Now, open the Library from the top menu of the window.
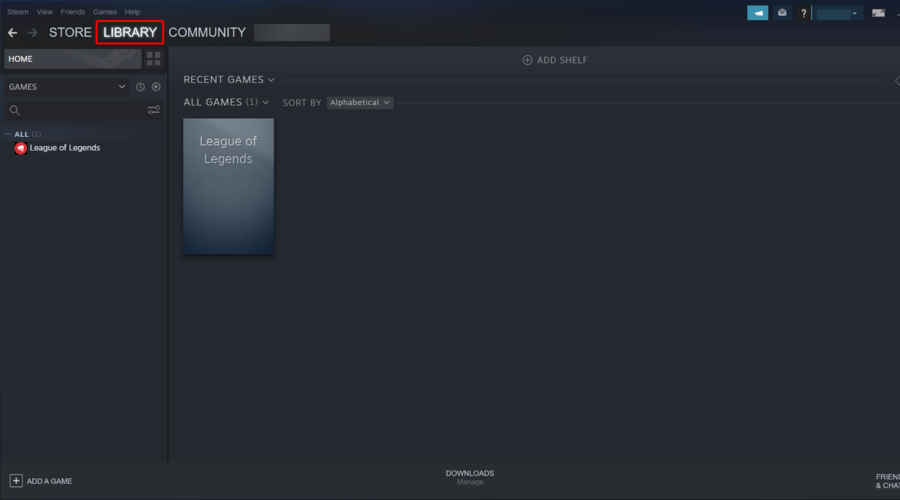
- From the All section, right-click on the affected game and open Properties.
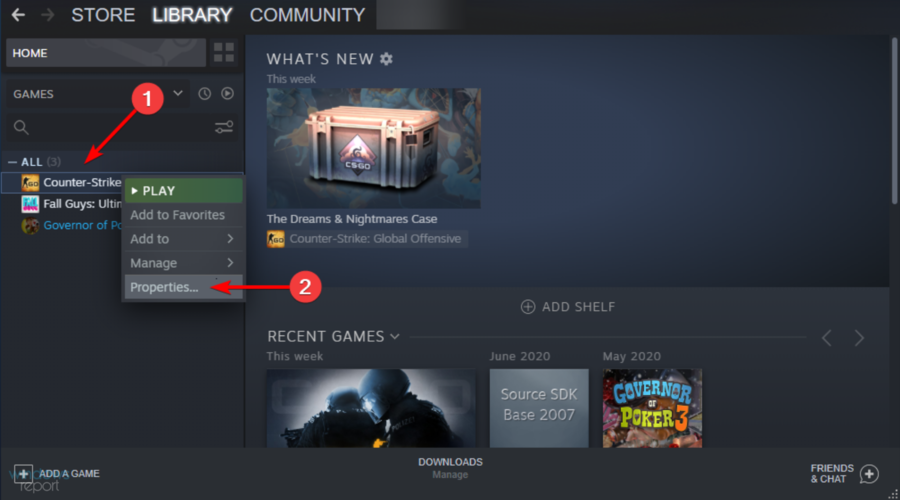
- Check the Enable the Steam Overlay while in-game box and save changes.
- Restart Steam and start the game.
4. Kill the gameoverlayui.exe process
- Press on the Windows key, type Steam, then open it.
- Run the game you want.
- Use the following keyboard shortcut: Ctrl + Alt + Delete.
- Choose Task Manager.
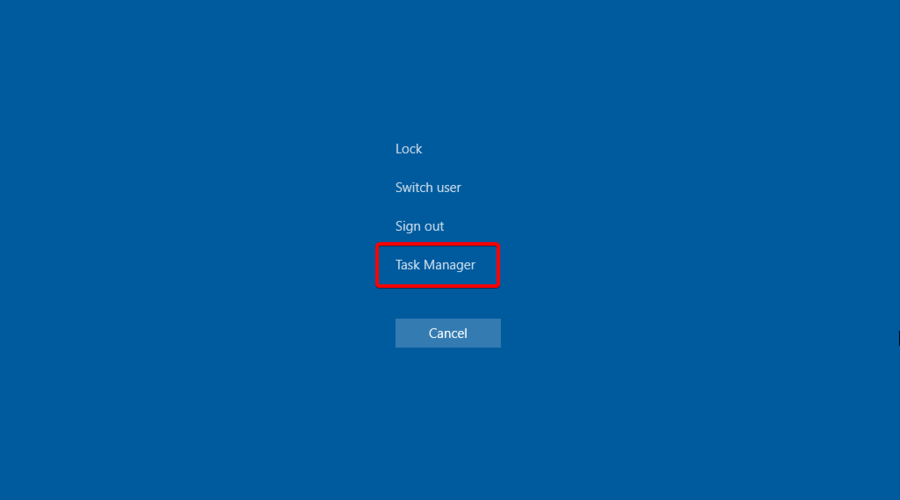
- Under Processes, find gameoverlayui.exe and terminate it.
- Get back to the game and press the Shift + Tab hotkey to access the Steam Overlay.
5. Add an exception to the antivirus firewall
Once installed, the Steam client should be able to communicate through your antivirus firewall freely. However, that doesn’t need to be the case at all times.
In addition, a third-party firewall might block Steam from network access, which also can be a problem starter. Now, you can either disable all firewalls while playing or create an exception in both the native and third-party firewalls.
However, completely disabling the firewall can expose your system to online threats. Instead, we suggest you use a more robust antivirus solution with a reliable firewall.
To do so, it’s advised to choose an efficient antivirus with robust security and without blocking Steam services.
6. Disable other third-party applications while gaming
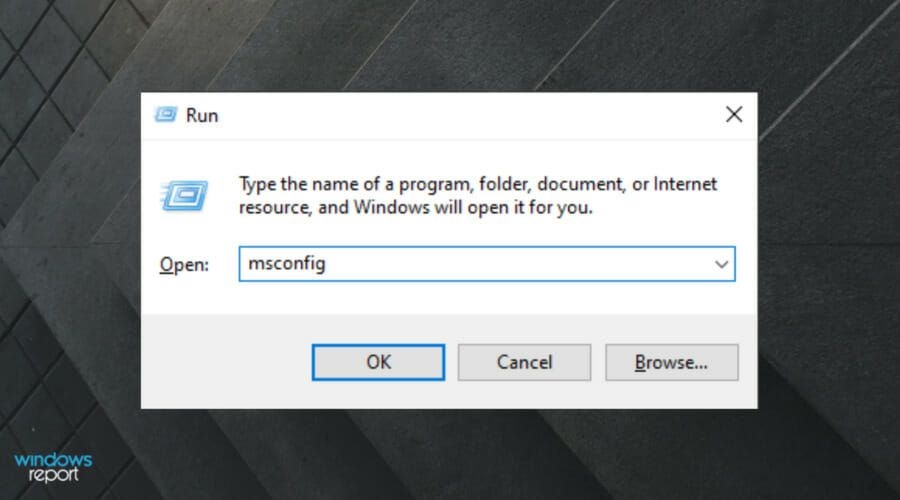
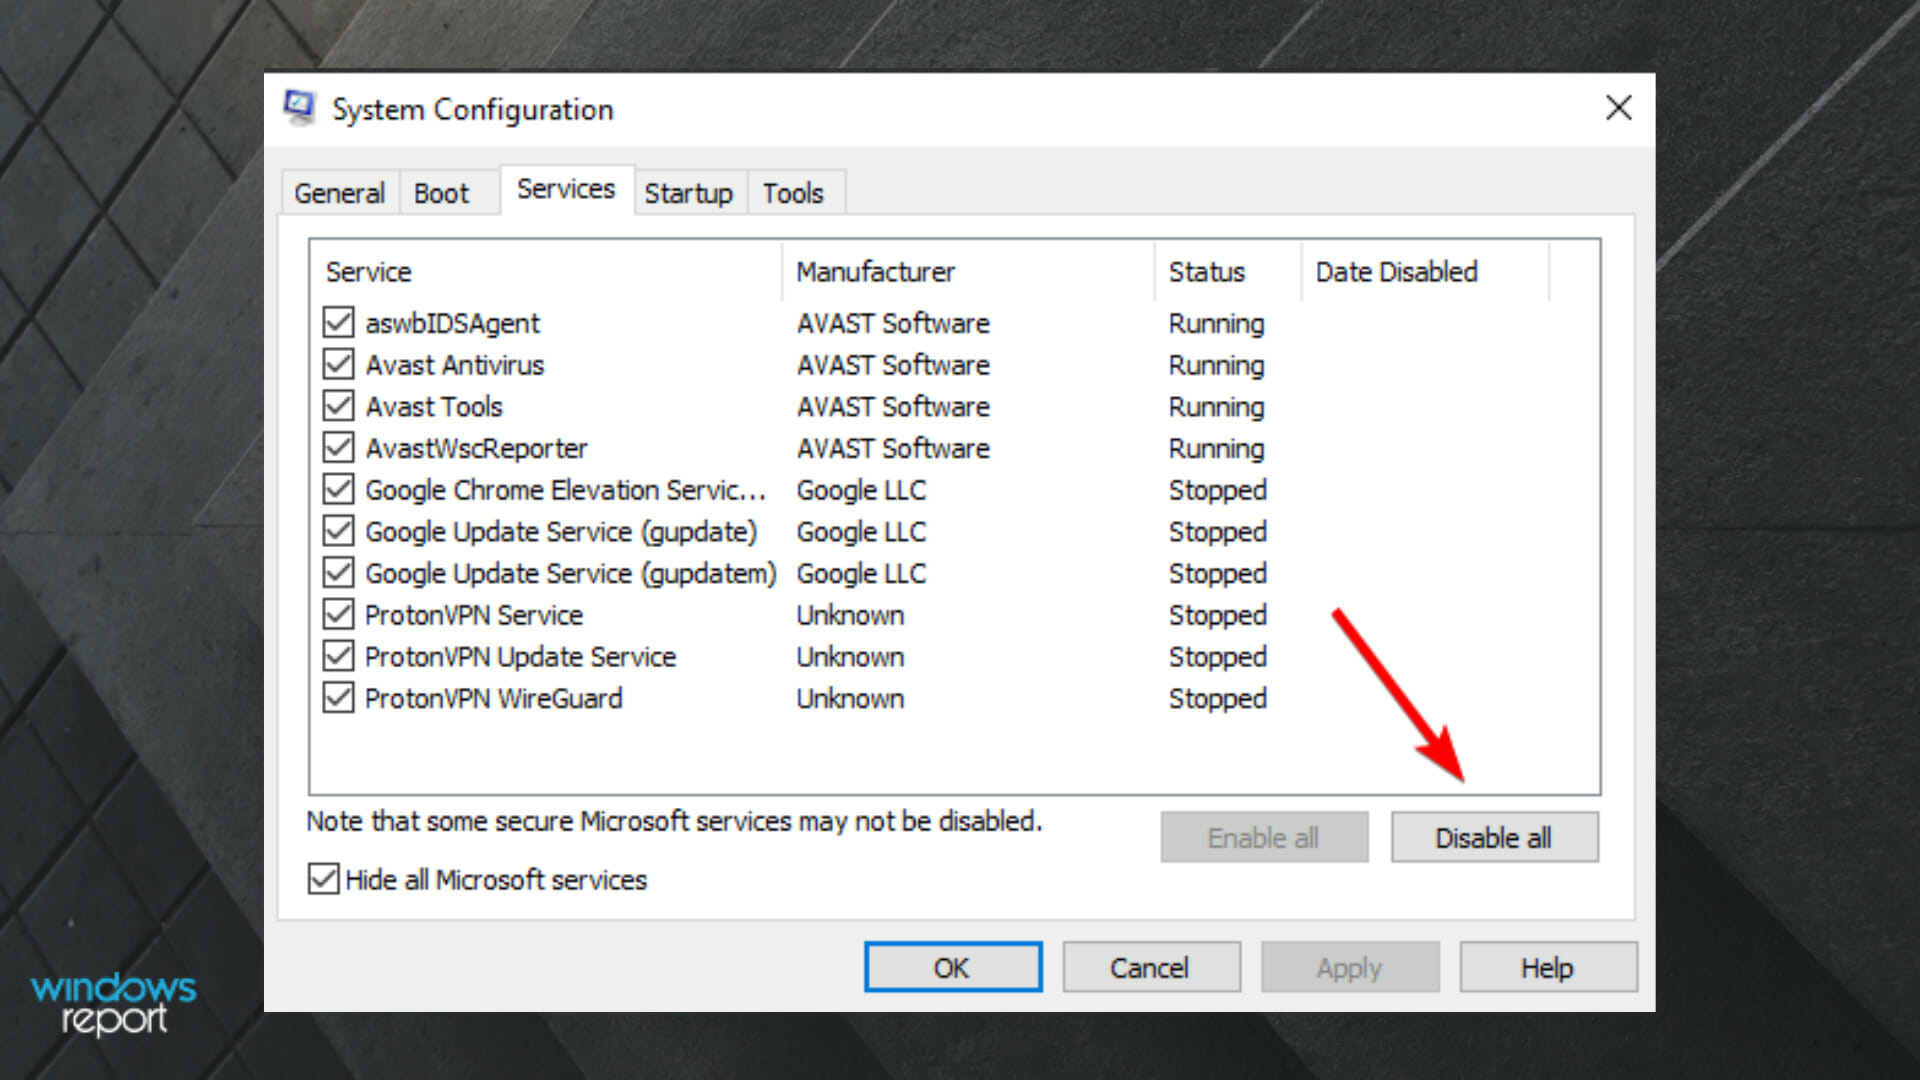
- Use the following keyboard shortcut: Windows + R.
- Type msconfig, then hit the Enter key.
- Under the Services tab, check the Hide all Microsoft services box.
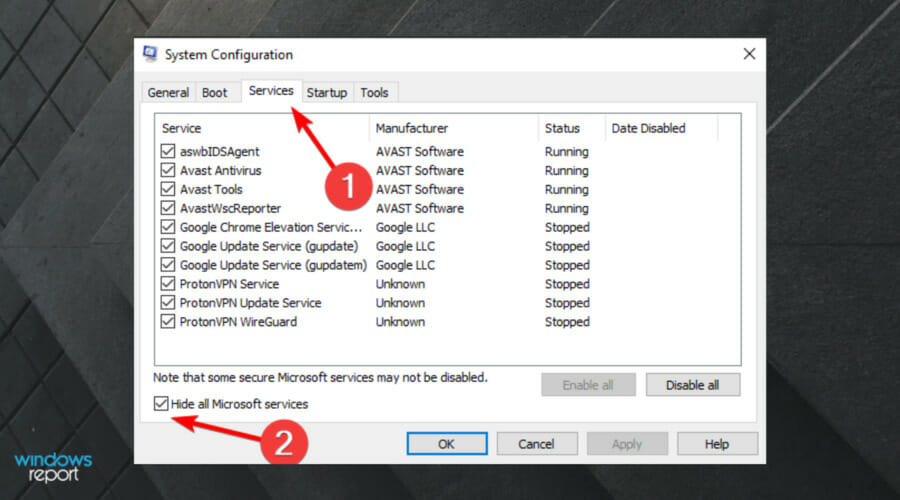
- Click Disable all to disable all active third-party services.
- Now, select the Startup tab and go to Task Manager.
- Prevent all programs from starting with the system and confirm changes.
- Restart your PC.
As you can imagine, the Steam app is an exception, as it needs to run in the background for the Overlay to work in the first place.
But many users discovered that specific third-party applications that work in the background could block the Steam Overlay.
Also, some of them might be triggered by the Shift + Tab shortcut, which is the default for Steam’s feature.
However, if Steam Overlay is still not working on your Windows 10 PC, make sure you keep on reading.
7. Check the game integrity
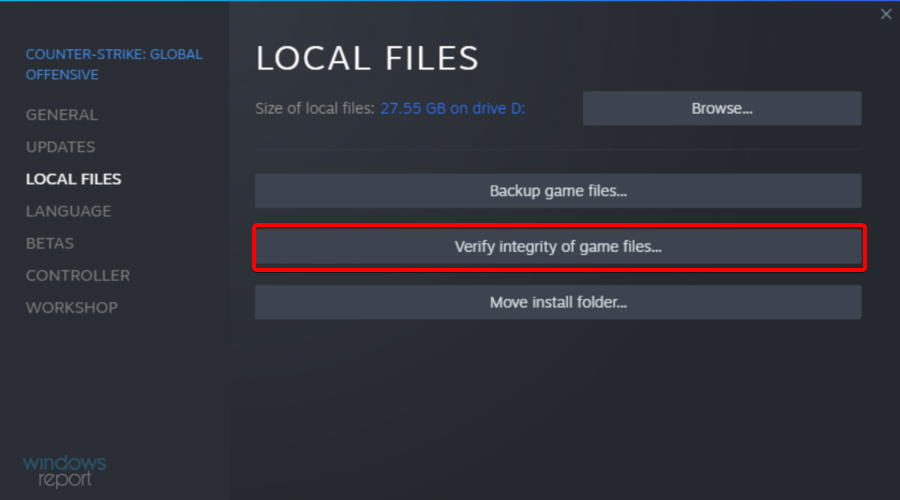
- Press on the Windows key, type Steam, and open the app.
- From the app’s main menu, choose Library.

- Right-click on the affected game and open Properties.
- Select the LOCAL FILES tab.
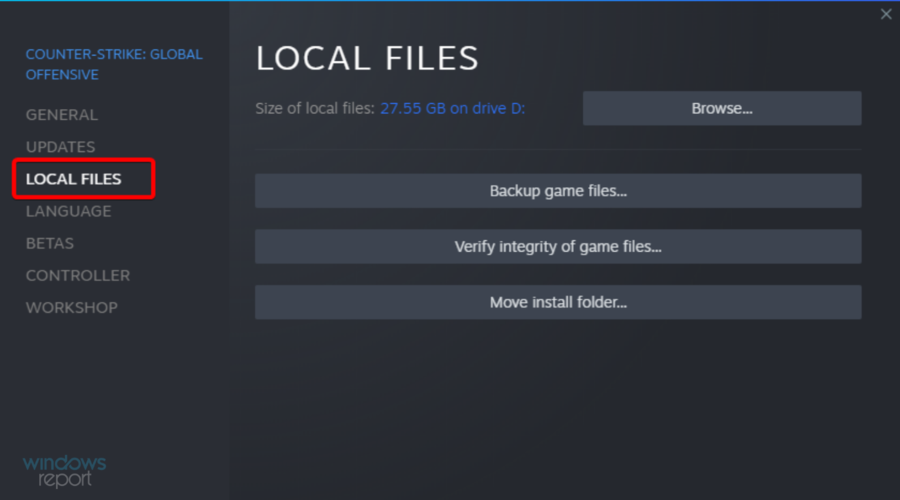
- Finally, click on the VERIFY INTEGRITY OF GAME FILES…button.
This ensures that the game isn’t corrupted or includes incomplete files. However, if Steam Overlay is still not working, we have a couple more options you can try.
9. Reinstall the Steam client
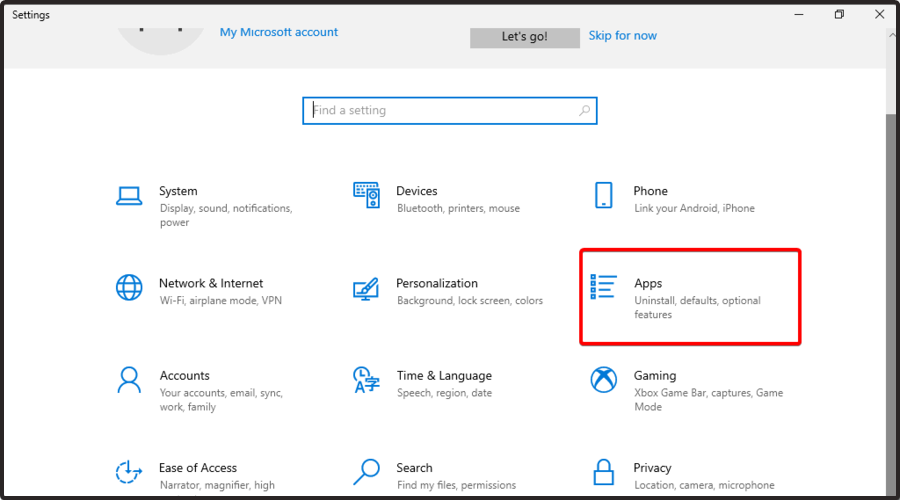
- Use the following keyboard shortcut: Windows + I.
- Go to Apps.
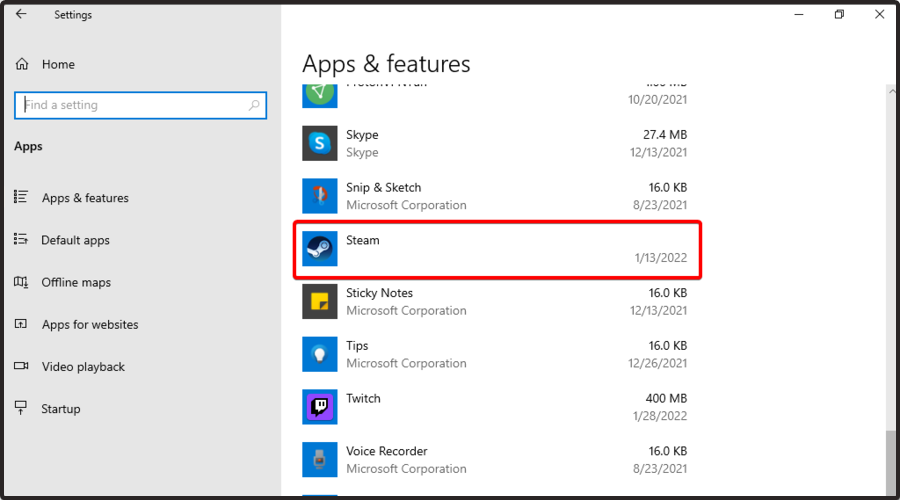
- From the right side of the window, search for Steam.
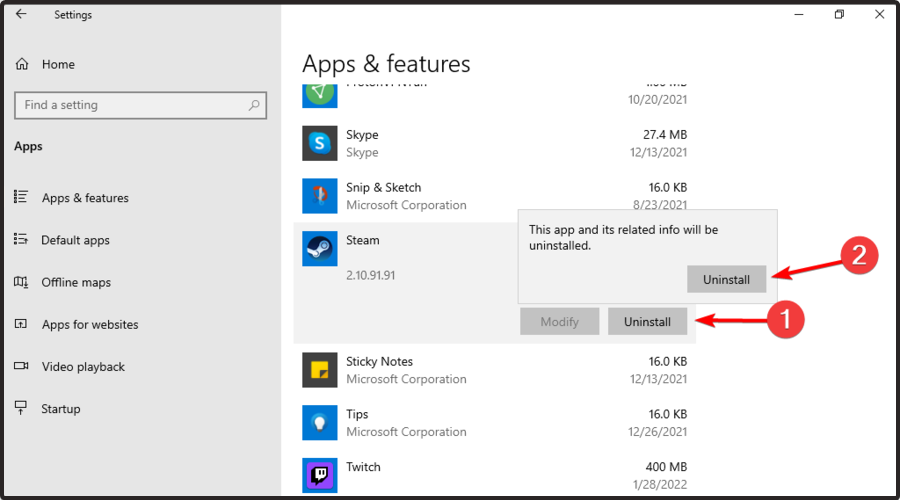
- Click on it, then select Uninstall, and click again on Uninstall.
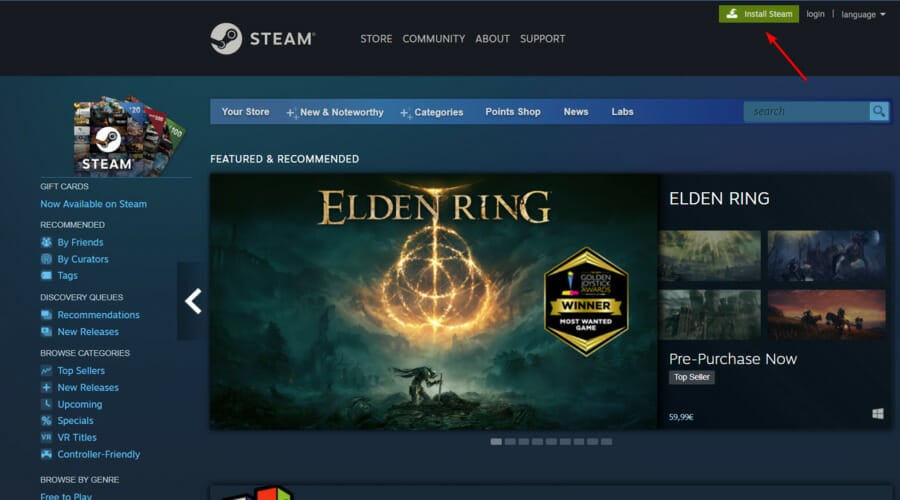
- Wait until the process is completed, and navigate to the Steam download page.
- From the top-right corner of the window, click on Install Steam.
- Follow the on-screen instructions to reinstall the app.
- Open it, then input your credentials and log in.
Now that we’ve covered all (or a large majority) of possible issues and the last workaround we might suggest is to try and reinstall the Steam client.
This is a hail-mary attempt, but it just might work. However, don’t forget that the corruption of the installation files is a possibility.
In addition, we suggest removing all configuration files and keeping only the installed games, as re-downloading them can take a lot of time.
Once you’ve done that, give Steam another go. If the problem is persistent, there’s only so much you can do.
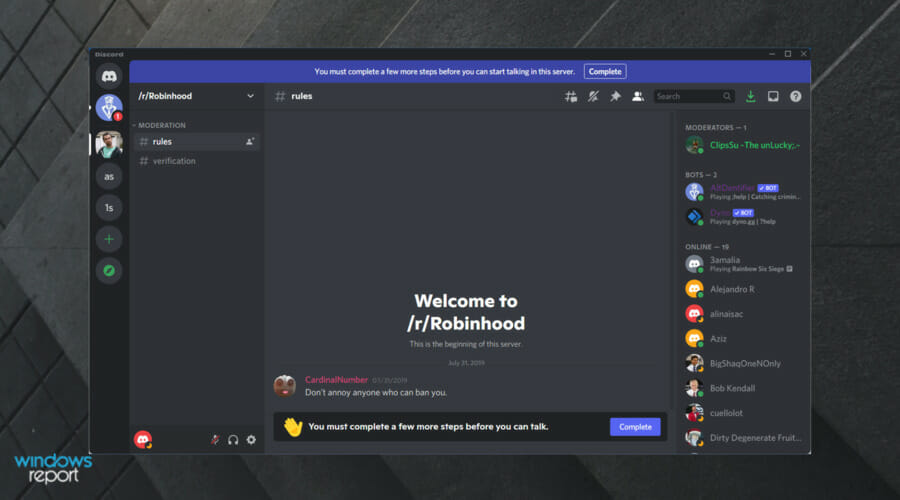
10. Try an alternative app
The final option is to move to another third-party application that offers similar features.
For the time being, Discord is holding its ground quite well, and many gamers use it to communicate with fellow gamers.
How can I fix the Steam overlay not working in Windows 11?
Here is the good news – if you have read this guide so far, you can fix the Steam overlay not working in Windows 11. This is because Windows 10 and the latest Microsoft OS share a lot.
Except for very minor and rare UI differences, you will find the identical steps on Windows 11.
So we recommend you pick whatever solution seems right for you and try it on your Windows 10 PC.
Does disabling Steam overlay affect FPS?
You can increase your average FPS by disabling Steam Overlay. Several users have recorded a reasonably consistent 299 fps after recording at 230–260 fps.
Even while it could be a bother, if you’re using a subpar PC, it could mean the difference between 40–50 frames per second and 60–70 frames per second.
There are some other alternatives, but in our opinion, Discord is more than worth a try.
Note that these solutions will be helpful if the Steam overlay is not working on Terraria, r6, Smite, Lost Ark, Rocket League, Rust, Apex Legends, and even non Steam game.
With that said, we can conclude this article. If Steam Overlay is not working in Windows 10, follow the above steps carefully, and you’ll get rid of this error in less than a few minutes.
This feature is closely related to the WebHelper service, and we have a whole guide dedicated to Steam Client WebHelper High CPU usage, so don’t miss it.
If you have any additional questions or suggestions, feel free to tell us in the comments below.
Read our disclosure page to find out how can you help Windows Report sustain the editorial team. Read more


Improve this guide

User forum
0 messages