FPS Drop After Windows Update: 4 Ways to Quickly Fix It
Sometimes, third-party apps may interfere with GPU performance
4 min. read
Updated on
Read our disclosure page to find out how can you help Windows Report sustain the editorial team. Read more
Key notes
- FPS can drop after a Windows update if the graphics driver is outdated.
- An unstable Internet connection, as well as overheating, can trigger this error.
- Run the CHKDSK scan to check for hard disk problems.
Some of our readers have recently reported an FPS drop after Windows 11 update, and they do not know what fix to apply.
In case you’re also experiencing random stutters while playing some online multiplayer shooting games, or after a Windows 11 update, this article will provide you with simplified steps on how to fix the issue.
Why did my FPS drop after a Windows update?
There can be several reasons why you are experiencing frames per second drop after updating your Windows 11 PC. Below are some of the potential reasons behind the error:
- Buggy Windows update – It is not uncommon to experience frame drop issues after a Windows update. In this case, rolling back the update is the best choice.
- Problematic graphics driver – This error can also manifest due to an outdated or corrupted driver. You can visit Nvidia’s official website or AMD to download the latest graphics driver for your device.
- Internet connection issues – When playing an online game, you need to ensure that you have an excellent Internet connection; else, experiencing an FPS drop would be inevitable.
- Inadequate cooling system – When the components begin to overheat, you will notice a performance drop in your system. You can check here for the best laptop cooling software.
The above causes are a few of the many other factors that may contribute to the FPS drop after a Windows update on your PC. Let’s proceed to how you can fix this problem.
If you’re experiencing high FPS drops, specifically on Windows 10, our comprehensive guide on how to fix high FPS drops in Windows 10 might be of help.
What can I do if FPS drops after a Windows update?
Before anything, apply the following quick checks:
- Ensure that your computer meets the minimum requirements for the app you use when encountering the FPS drop issue.
- Check if your computer is overheating.
- Ensure that the resource consumption is not too high. You can reduce the RAM usage to decrease the strain on your CPU if it is too high.
- Close any applications that you don’t need.
- Check if you are properly connected to the Internet.
If, after confirming the above checks, nothing works, you can explore the advanced solutions listed below.
1. Update your graphics card driver
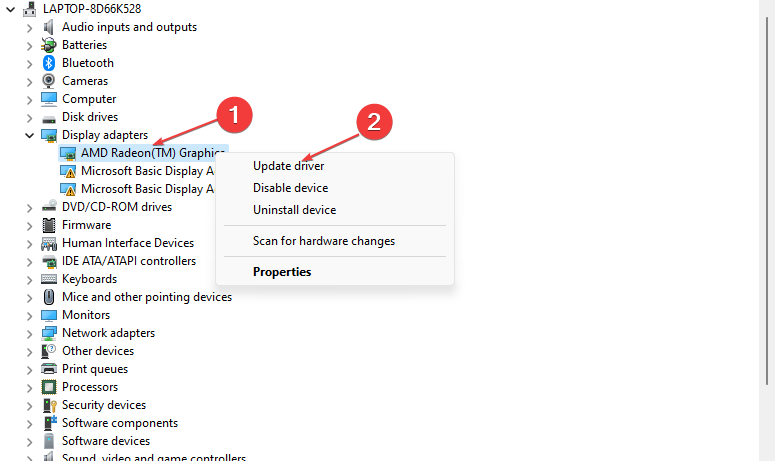
- Press the Windows + R keys to open the Run window, type devmgmt.msc, and press Enter.
- Expand the Display adapters section, right-click on the graphics driver, and select the Update driver option.
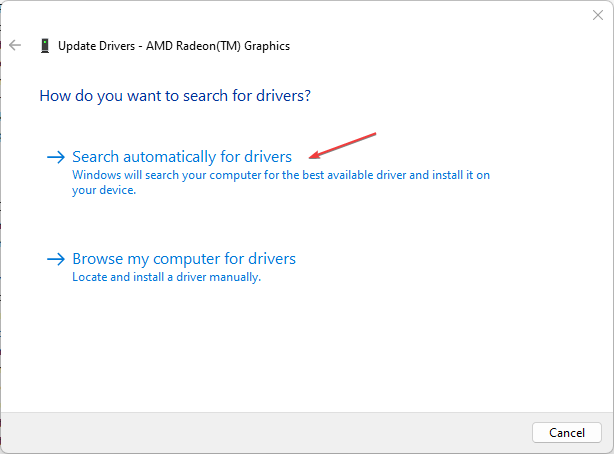
- Now, select Search automatically for drivers and let Windows install the best available version.
- Restart your computer after the updating process is complete.
Alternatively, depending on your GPU, you could download the latest graphics driver from the manufacturer’s official site (Nvidia’s official website or AMD, or Intel).
2. Run the CHKDSK command
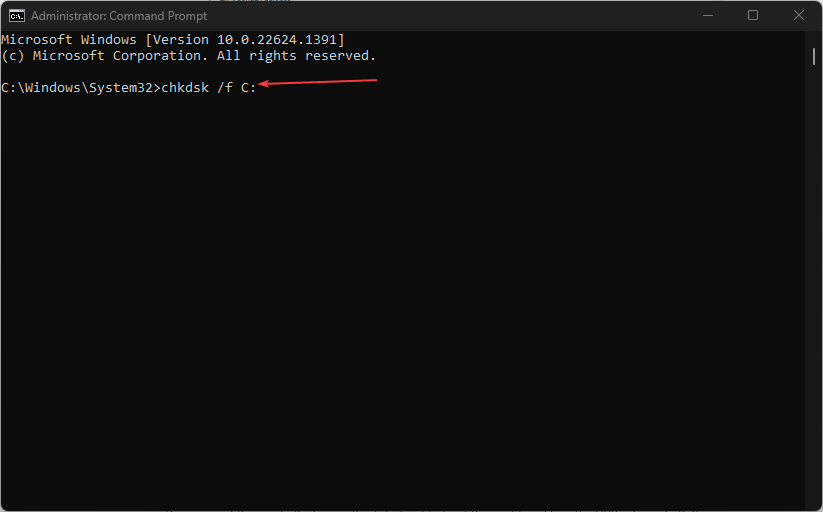
- Press the Windows key to open the Start menu, type command prompt and choose Run as administrator.
- Next, type the following command (replace C with your drive letter) and press Enter to run it: chkdsk /f C:
- Follow the prompts that come afterward to restart your PC.
If you’re finding it difficult to run the CHKDSK scan, you can check our detailed guide on how to fix chkdsk.
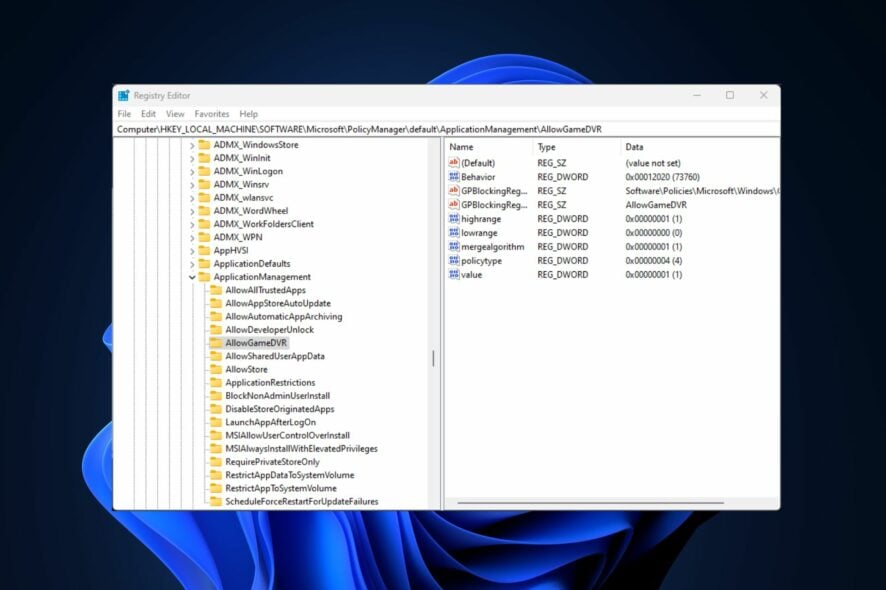
3. Turn off Game DVR in the Registry
- Press the Windows + R keys to launch the Run window, type regedit, and click OK.
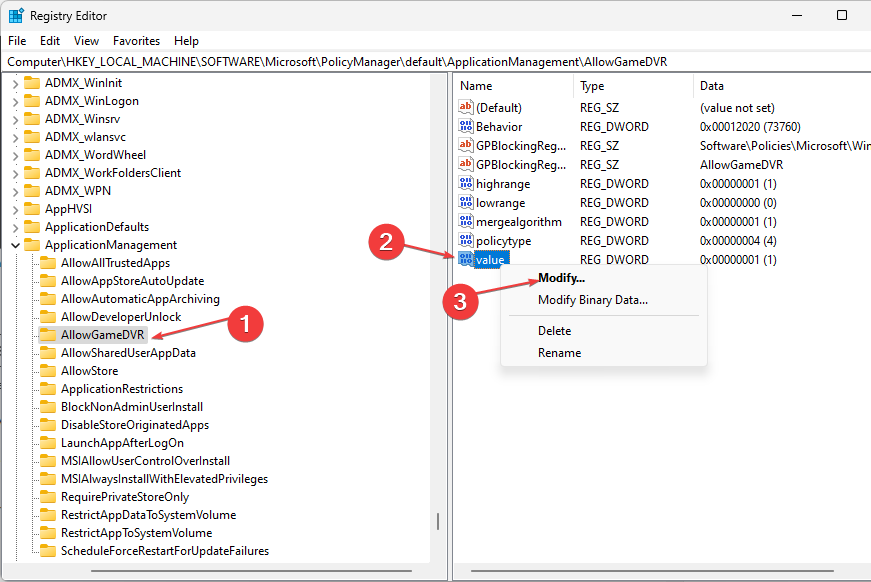
- Navigate to the following path:
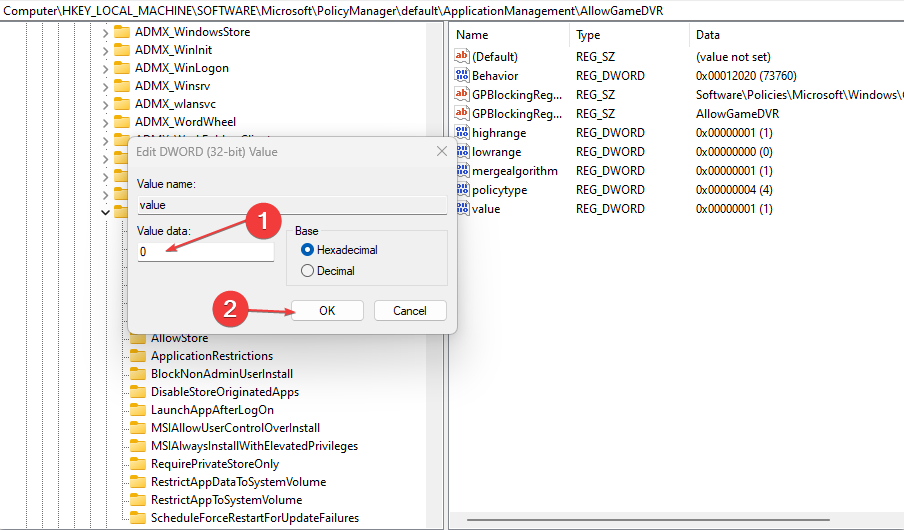
Computer\HKEY_LOCAL_MACHINE\SOFTWARE\Microsoft\PolicyManager\default\ApplicationManagement\AllowGameDVR - Right-click on the value in the right pane, select Modify, and change the value data to 0.
- Restart your PC for the changes to take effect.
This is one of the most effective methods to troubleshoot this problem. Once the DVR is turned off, the issue should be resolved.
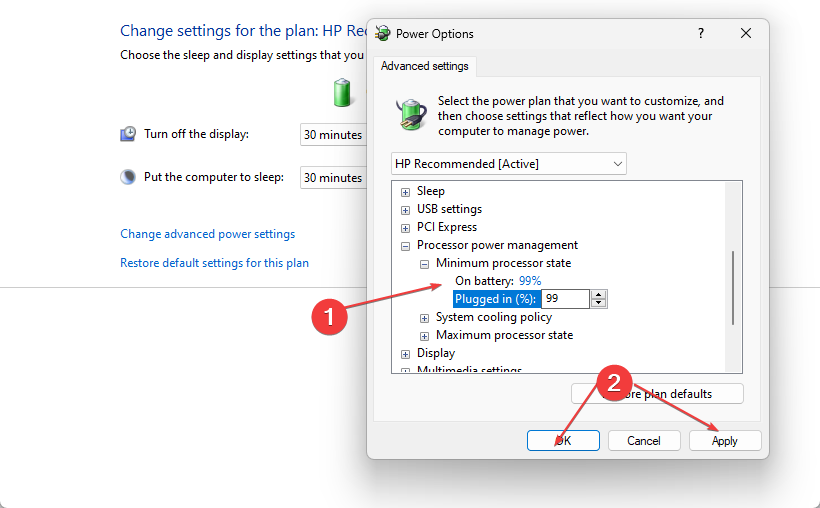
4. Disable Turbo boost
- Press the Windows key, input control panel, and click Enter.
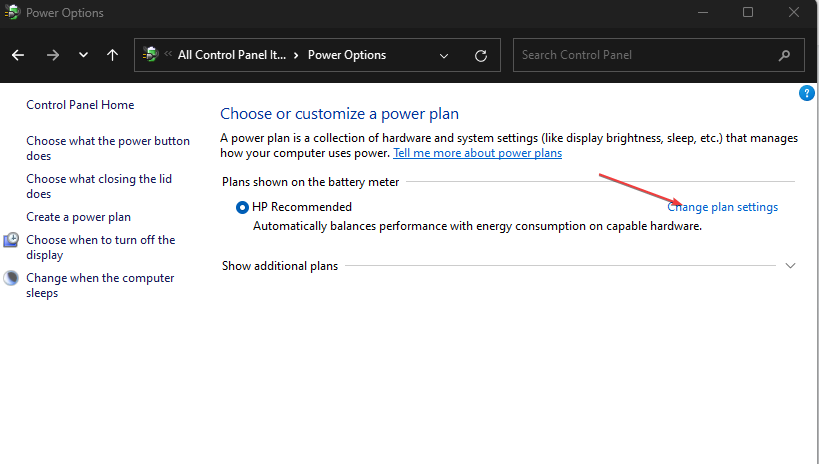
- Select Hardware and Sound, then click on Power Options.
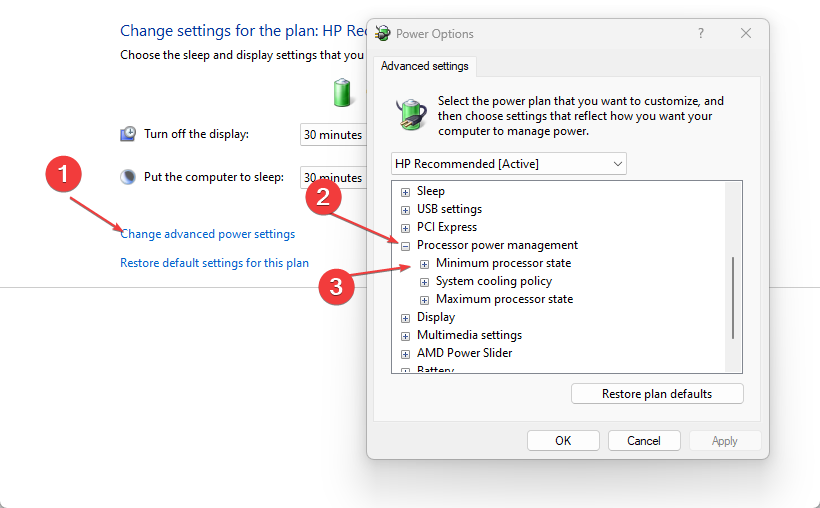
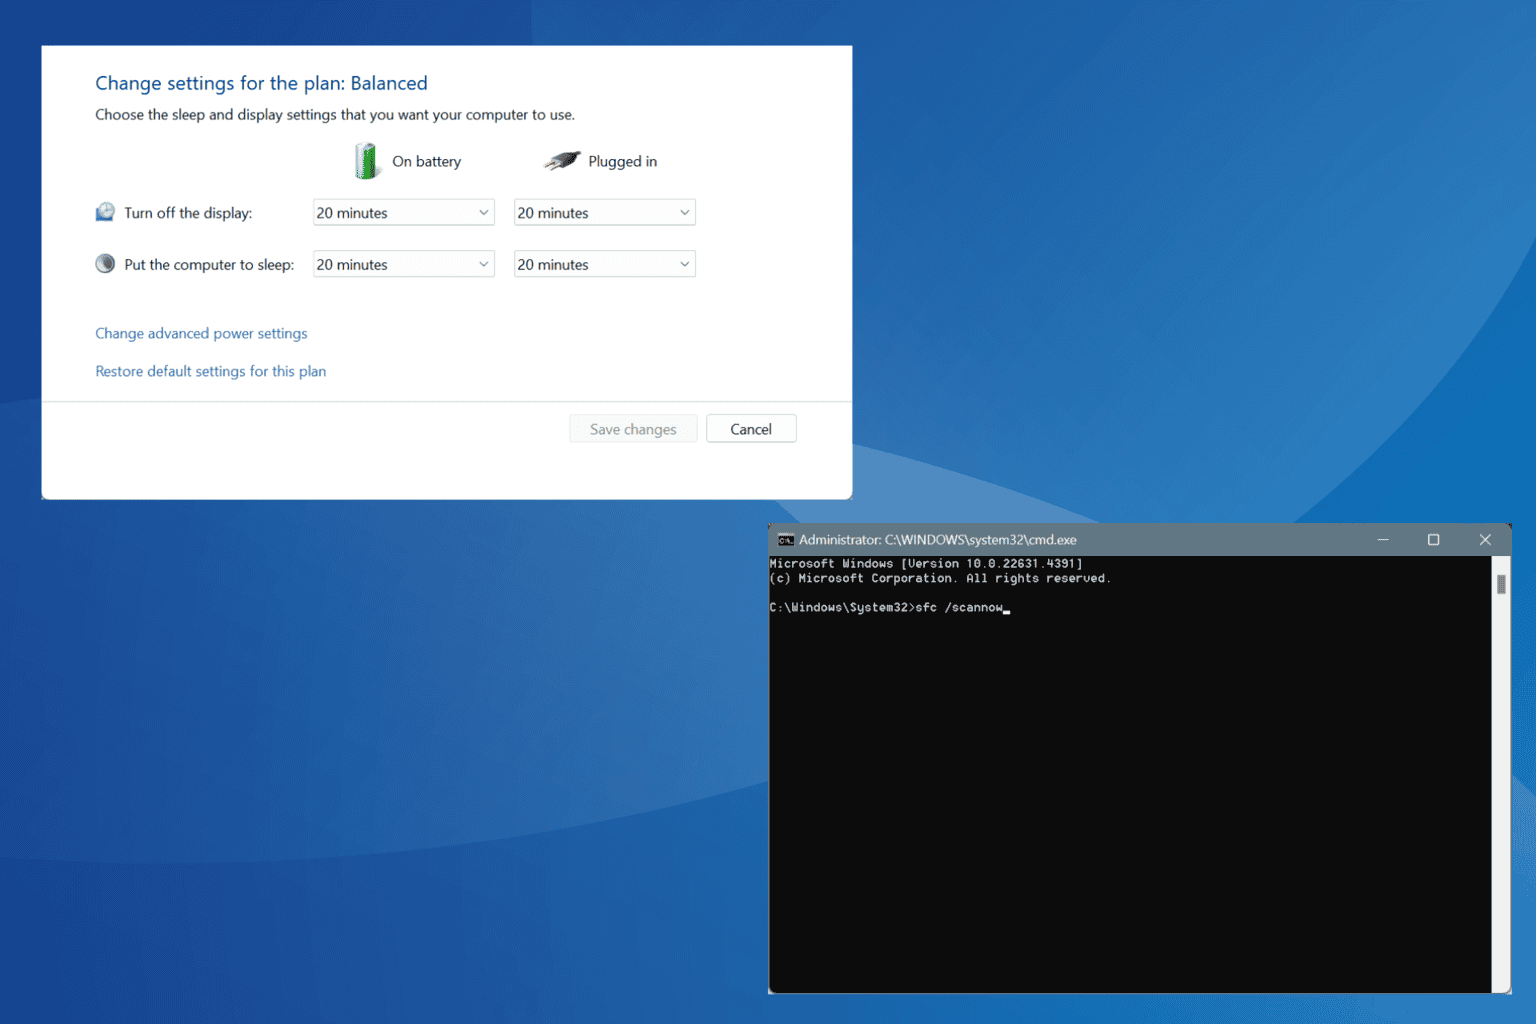
- Choose the Change plan settings and click on Change advanced power settings.
- Select Processor power management and Maximum processor state. Then, set their values for On battery and Plugged to 99%.
- Then, click Apply and OK to save the changes.
Ensure that you work your way through any of the steps provided in this article to know which works best for you.
Additionally, some of our readers have found the ways to fix FPS drops, lag & stutter after BIOS updates helpful. You can explore some solutions in the guide as they may work for you.
If you have any questions or suggestions, do not hesitate to use the comments section below.



User forum
0 messages