How To Fix Windows Update 8024200d Error [7 Proven Solutions]
![]() 4 min. read
4 min. read
![]() Published on
Published on
Share this article
Improve this guide
Read our disclosure page to find out how can you help Windows Report sustain the editorial team. Read more
Want to learn how to fix the Windows Update 8024200d error? It typically arises from damaged update files, system file issues, low storage, or software conflicts. But don’t worry—it’s straightforward to resolve. I’ll show you how to solve this problem and ensure your system receives vital updates.
But before we begin, do this preliminary check first:
- Perform a Disk Cleanup: Type “disk cleanup” in the Windows search bar and open it. Choose the file types to delete and click “OK.” Confirm by tapping “Delete files.” This will free up some space for the update to install properly.
Now, let’s get started and get your system back on track.
How To Fix Windows Update 8024200d Error
Follow these fixes in the order they appear in:
Reset the Windows Update Components
Resetting the Windows Update components can resolve various issues, including the 8024200d error. Follow these steps:
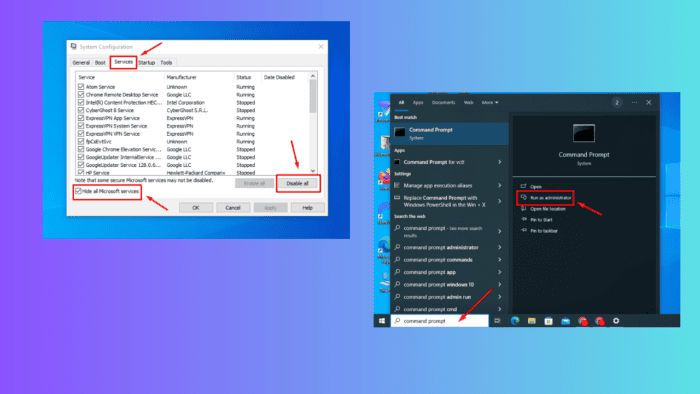
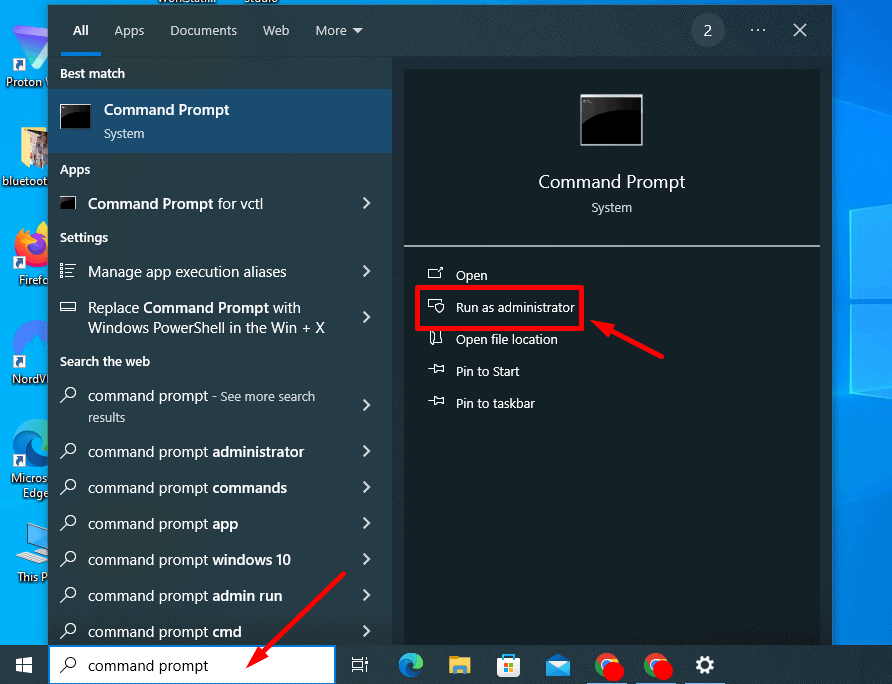
- Type Command Prompt in the search bar beside the Windows icon and click Run as Administrator.
- Copy and paste these commands:
net stop wuauserv
net stop cryptSvc
net stop bits
net stop msiserver
ren C:\Windows\SoftwareDistribution SoftwareDistribution.old
ren C:\Windows\System32\catroot2 catroot2.old
net start wuauserv
net start cryptSvc
net start bits
net start msiserver
Pause
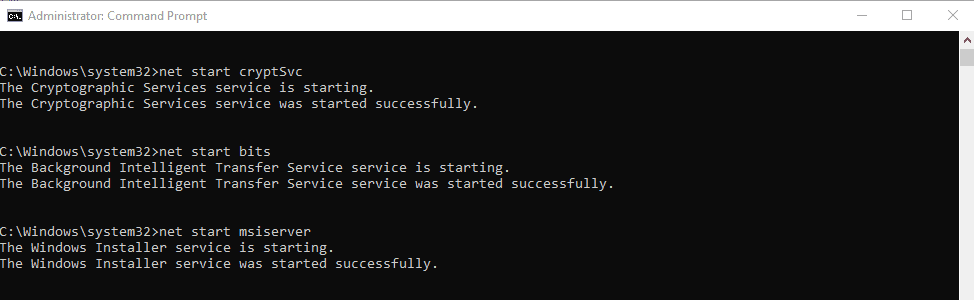
Once complete, close the window and check if it solved the error.
Run the Windows Update Troubleshooter
Windows has a built-in troubleshooter designed to identify and fix common update problems. Running this tool can help with the error 8024200d. Here’s what to do:
- Open Settings by pressing Windows + I.
- Tap Update & Security.
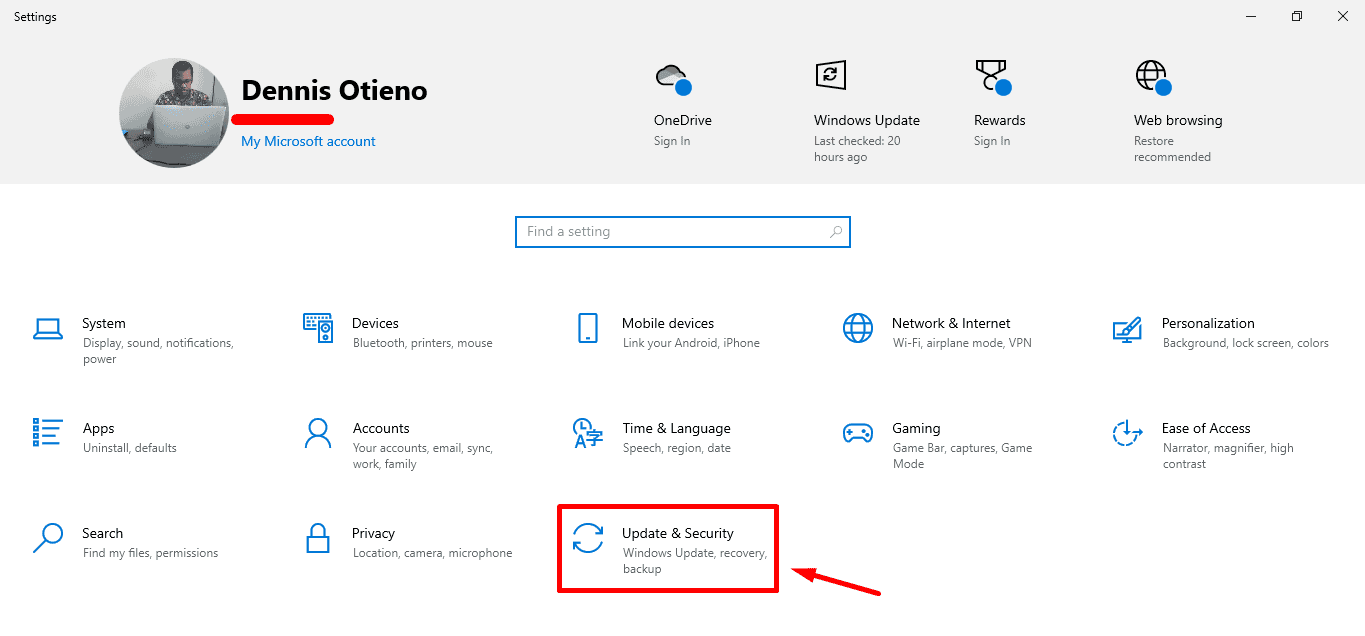
- Click Troubleshoot and select Additional Troubleshooters.

- Select Windows Update and click Run the troubleshooter.
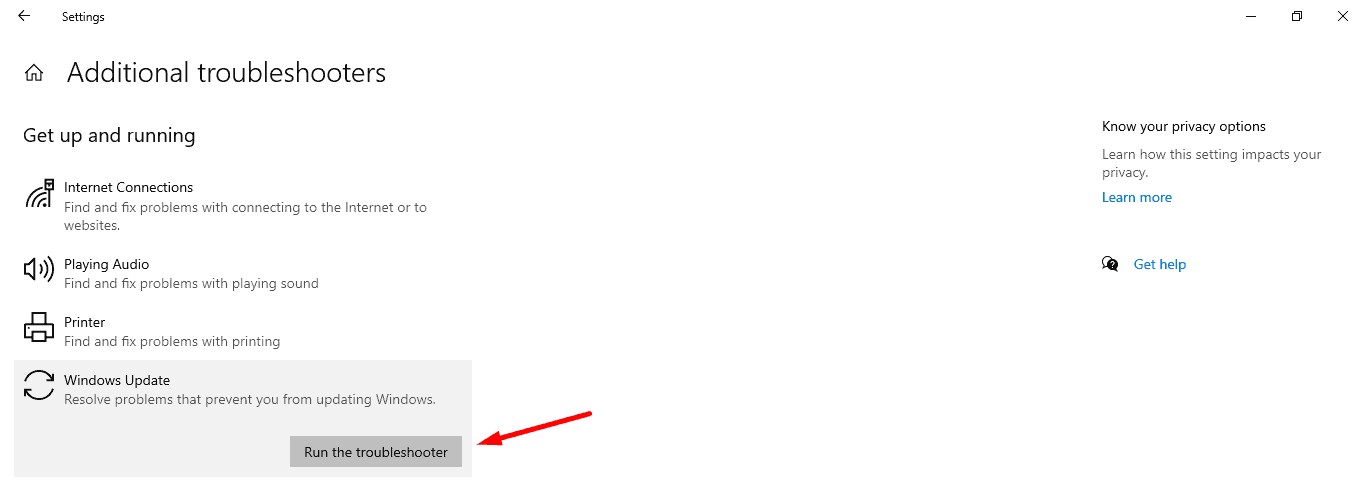
If the troubleshooter recommends fixes, apply them and restart your computer to ensure all changes take effect.
Temporary Disable Antivirus
Sometimes, Your PC’s antivirus can interrupt the update process. So, try temporarily disabling your antivirus, then run Windows Update again. Remember to re-enable it after the update process is complete.
Follow the below steps:
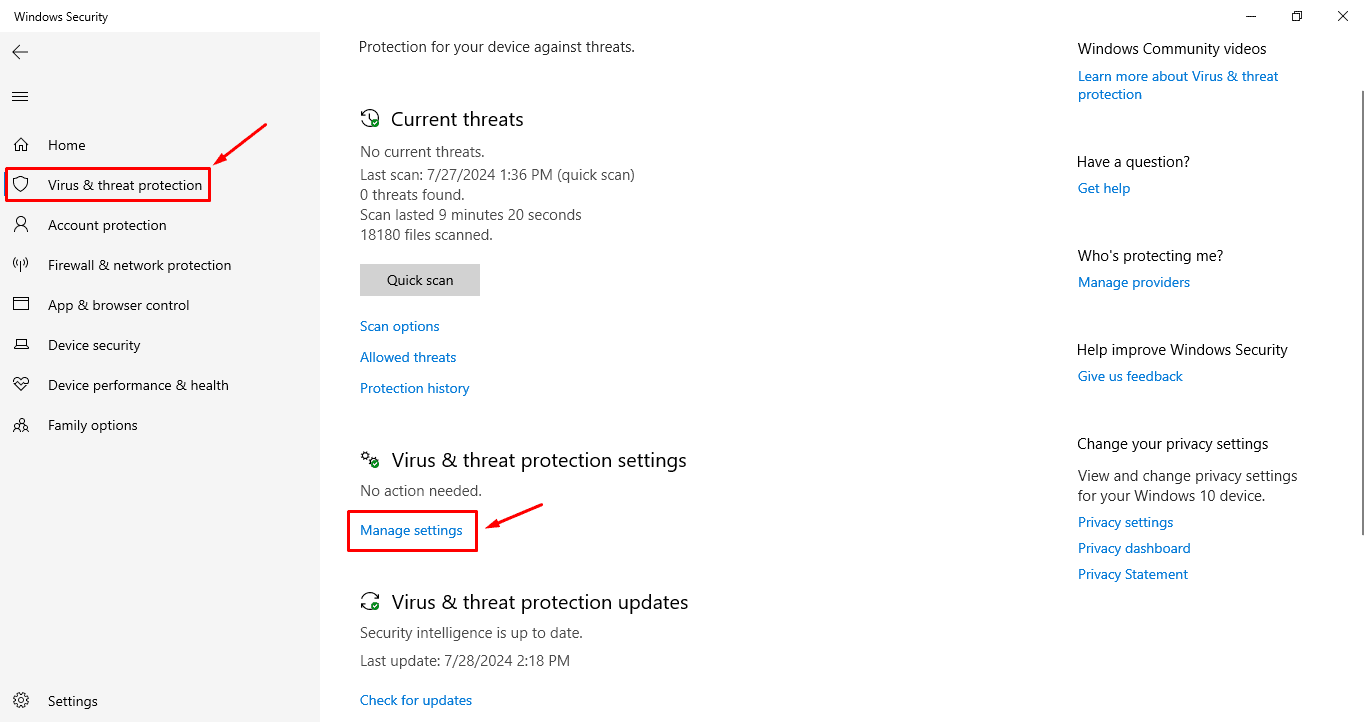
- Type Windows Security on the search bar and open the app.
- Tap Virus & Threat Protection, and select Manage settings under Virus & Threat Protection settings.
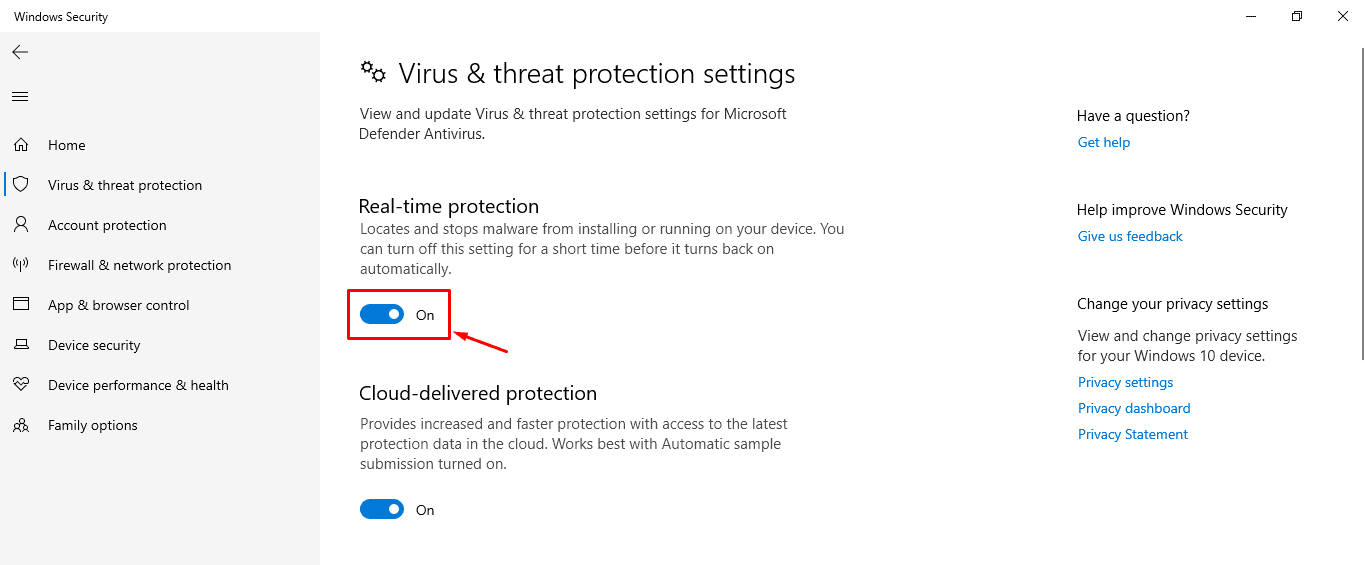
- Toggle off the real-time protection button.
Perform a Clean Boot
A clean boot starts Windows with minimal drivers and startup programs. This can help eliminate software conflicts that occur during the update process.
- Press Windows + R, type msconfig, and press Enter.

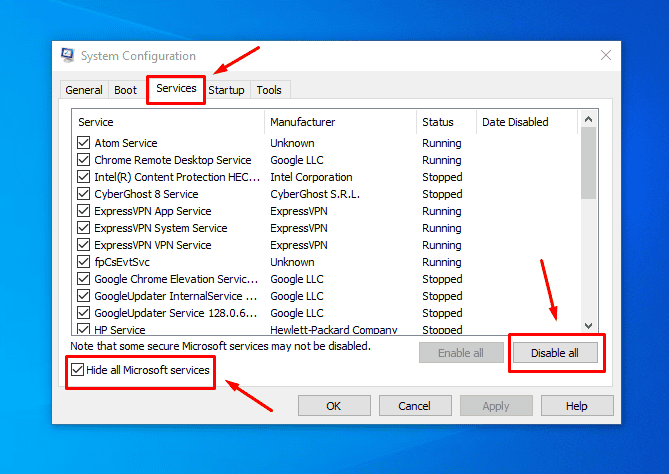
- The System Configuration window will pop up. Go to the Services tab, check Hide all Microsoft services, and then click Disable all.
- Go to the Startup tab, click Open Task Manager, and disable all startup items. Once you’ve done this, tap OK.
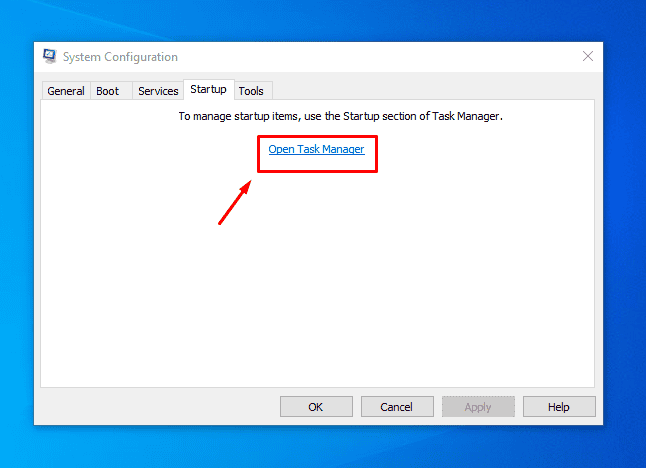
Restart your computer and try to update Windows.
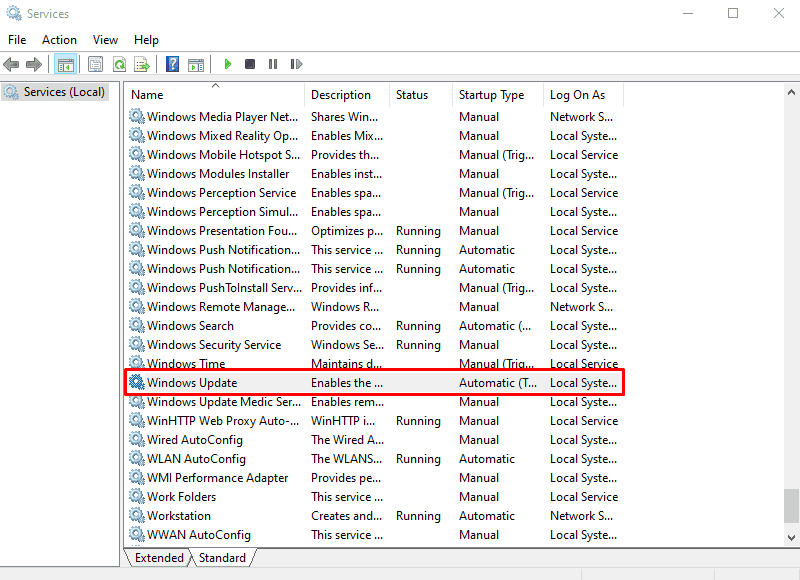
Restart the Windows Update Service
Restarting the Windows Update service ensures that the update process functions smoothly. Here are the steps:
- Press the Windows key + R to open the Run dialog box. Type services.msc and press Enter.

- Scroll through the list of services until you find Windows Update. Double-click on it to open its properties.
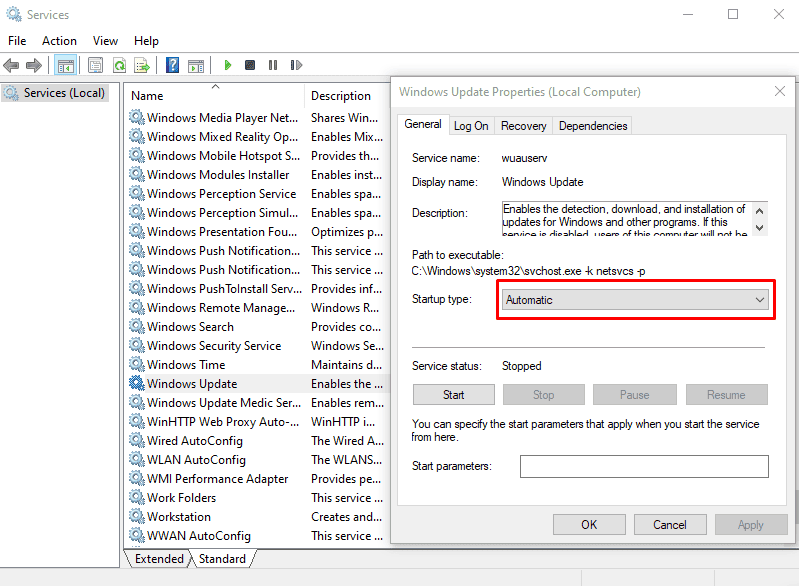
- In the properties window, ensure the Startup type is set to Automatic. If it’s not, select Automatic from the drop-down menu.
- Click on the Start button to activate the service. If it’s already running, click on Restart at the top left to refresh it.
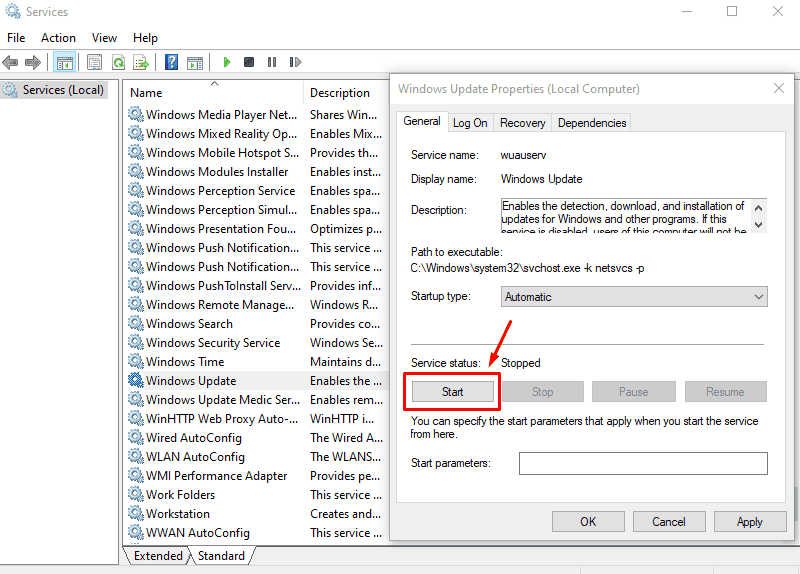
Check if the error is solved.
Run SFC and DISM
The System File Checker (SFC) and Deployment Imaging Service and Management Tool (DISM) are utilities that can repair corrupted system files, which might be causing the update error. Follow the below steps:
- Press the Windows Icon + R, type cmd, and click Ctrl + Shift + Enter to open Command Prompt as an administrator.

- To run SFC, type sfc /scannow and press Enter. After the process is complete, restart your PC.
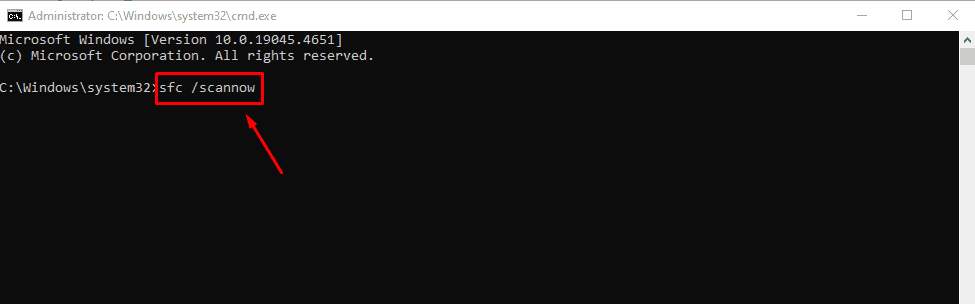
Check if the error is solved. If not, run DISM.
- Run command prompt as administrator.
- Type DISM /Online /Cleanup-Image /RestoreHealth and press Enter.
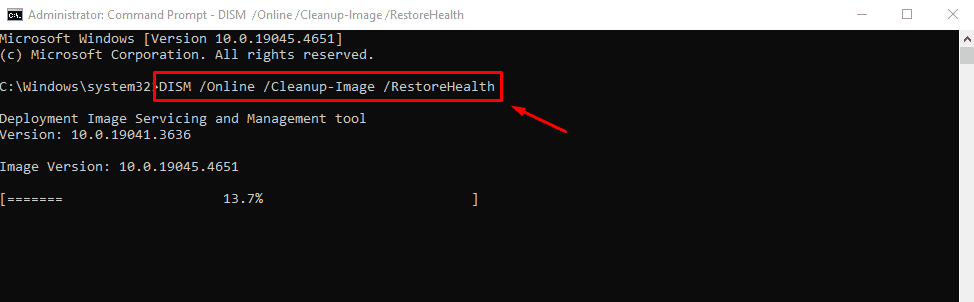
After completing the scan, restart your PC and confirm if you can update your Windows without the error.
Manually Download and Install the Update
If all else fails, you can manually download and install the update from the Microsoft Update Catalog.
- Visit the Microsoft Update Catalog.
- Search for the update using its KB number, then download the appropriate version for your system.
Press Windows + I > Update & Security > View Update History to know your KB number.
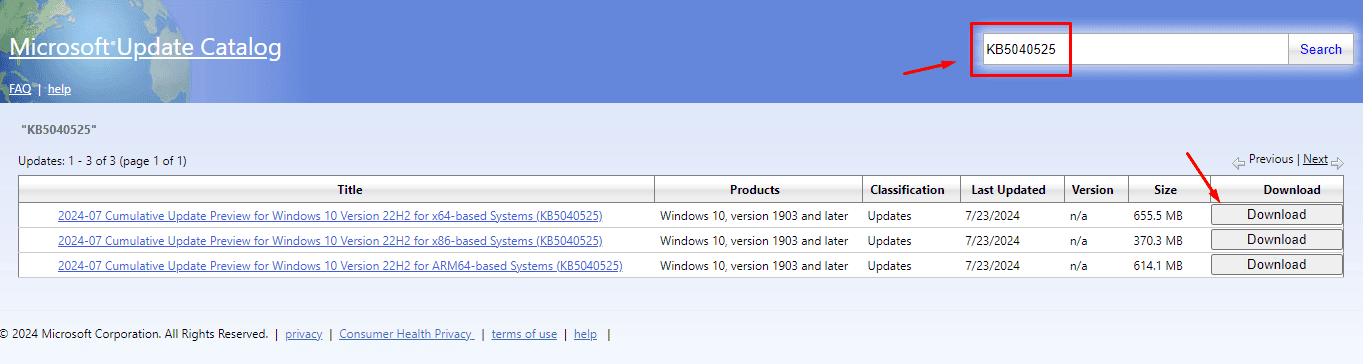
Open the downloaded file and follow the on-screen instructions to install the update.
So, now you know how to fix the Windows Update 8024200d error! The above steps will help you overcome it and keep your system updated and protected with the latest security patches.
Moreover, if you’re experiencing similar trouble with error codes 0x80240031, 0xd000034, or 0x8024d001, we can help you out!


User forum
0 messages