How to Import & Export Start Layout in Windows 11
Customize your Start menu & reduce clutter
4 min. read
Updated on
Read our disclosure page to find out how can you help Windows Report sustain the editorial team. Read more
Key notes
- To import a custom start menu layout on Windows 11, you need to export the layout file in JSON format.
- Next, you need to use MDM tools like Microsoft Intune to get it on the desired system.
- Find the step-by-step instructions to personalize your Start menu down below.
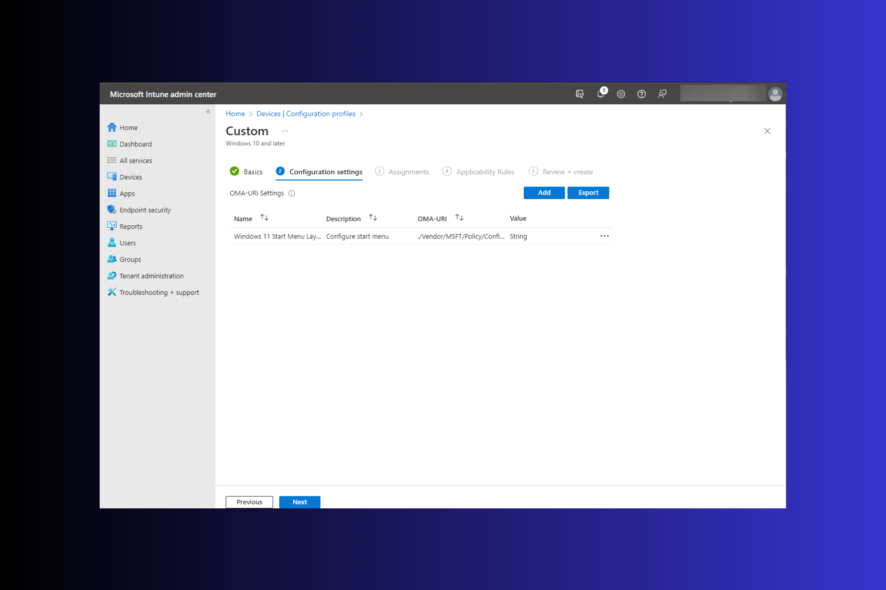
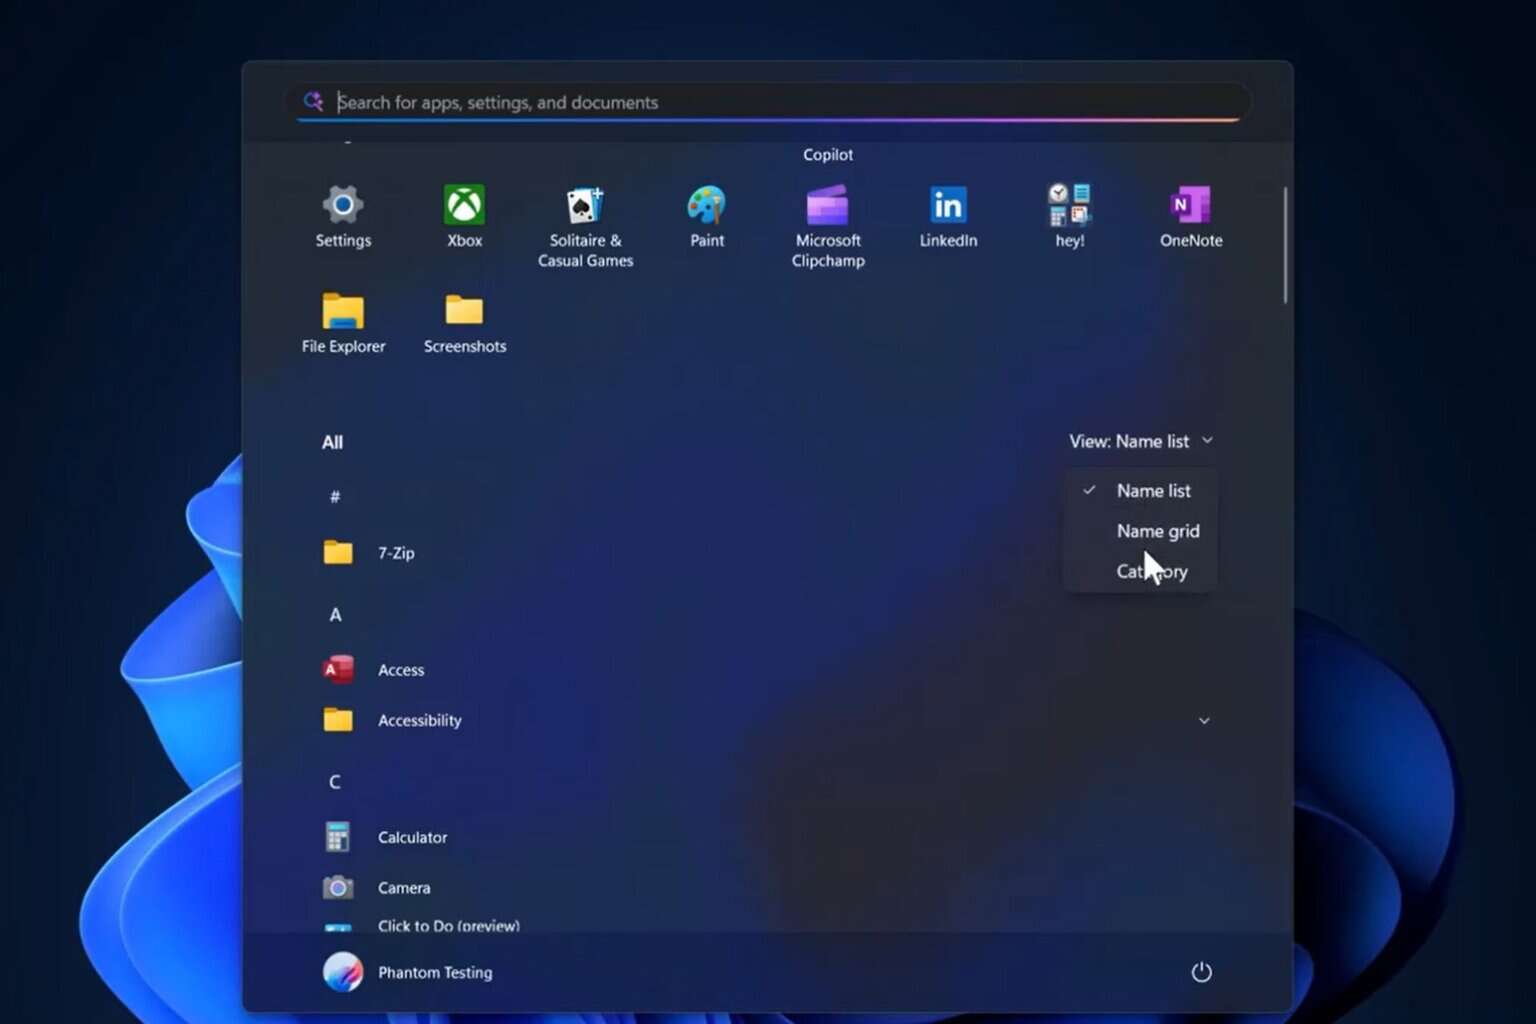
On Windows 11, the Start menu was redesigned and now comes with a simplified set of apps arranged in a grid of pages, unlike its predecessor, which had folders, apps, and groups.
You can customize the Start menu Layout and import & export it to other Windows machines per your preferences.
In this guide, we will discuss step-by-step instructions to Import-StartLayout on Windows 11 to customize the default layout.
What is Import-StartLayout?
The Import-StartLayout is a cmdlet used in Windows 10 and earlier versions to import the customized layout of the Start menu into a mounted Windows image.
Unfortunately, the Import-StartLayout command doesn’t work for Windows 11 as it only supports XML file format, and the Export-StartLayout cmdlet on the latest version of Windows exports the JSON file.
However, you can use Mobile Device Managers, Microsoft Intune, or copy the start.bin file in a user profile to achieve the desired outcome.
Apart from the Start menu layout, many other things have changed with Windows 11, like the Start menu position; if you don’t like the newer arrangement, you can move the Start menu to the left in a few simple steps.
How do I import the start layout in Windows 11?
Before we go to the detailed steps to customize the Start menu, here are some prerequisite checks you need to perform:
- Log in to your computer using admin privileges.
- Keep the JSON file containing the Pinned apps and their order handy.
- Back up important data before performing this action.
- Must have access to Mobile Device Managers like Microsoft Intune.
- Verify the devices on which you want to make the change are enrolled.
1. Create a profile using Microsoft Intune
- Sign in to the Intune admin center.
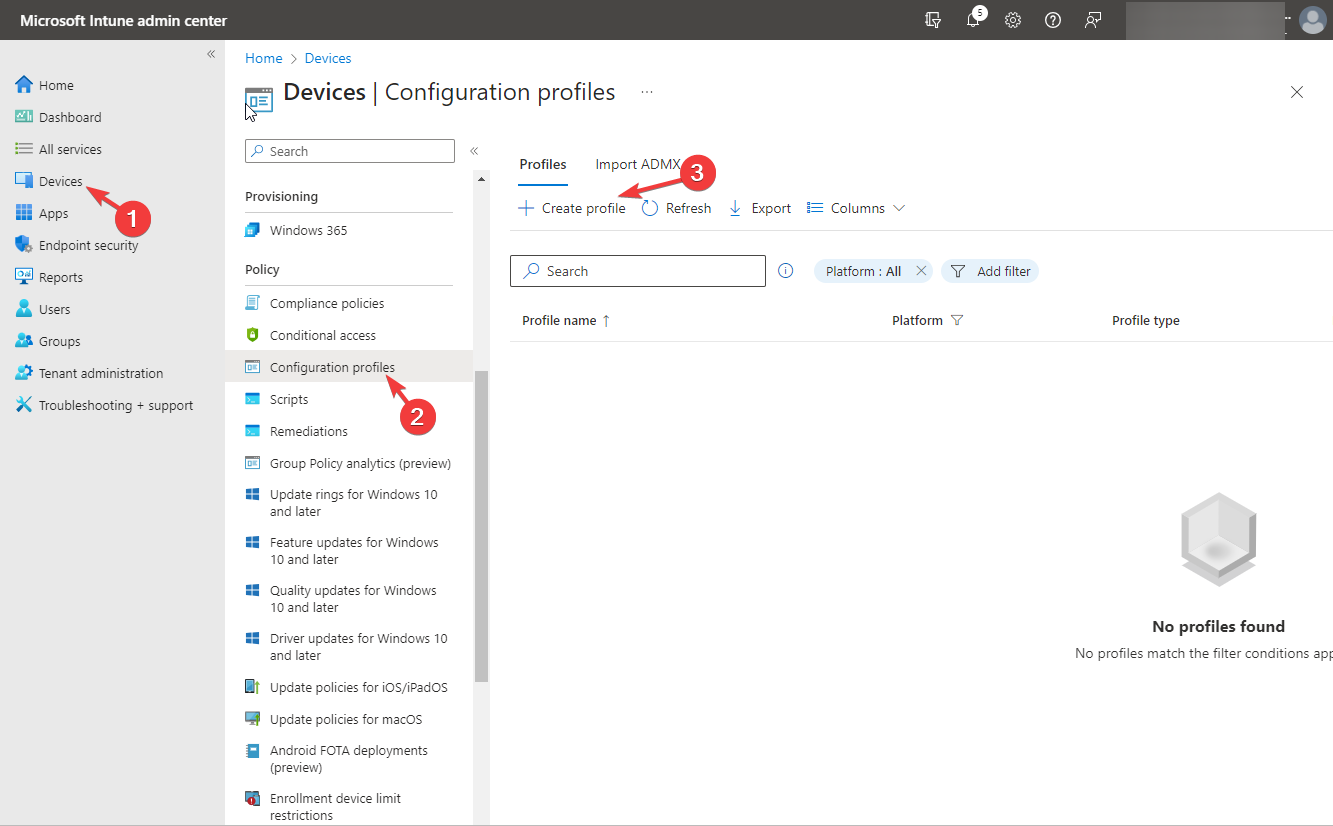
- Go to Devices from the left pane, select Configuration profiles, then click Create profile.
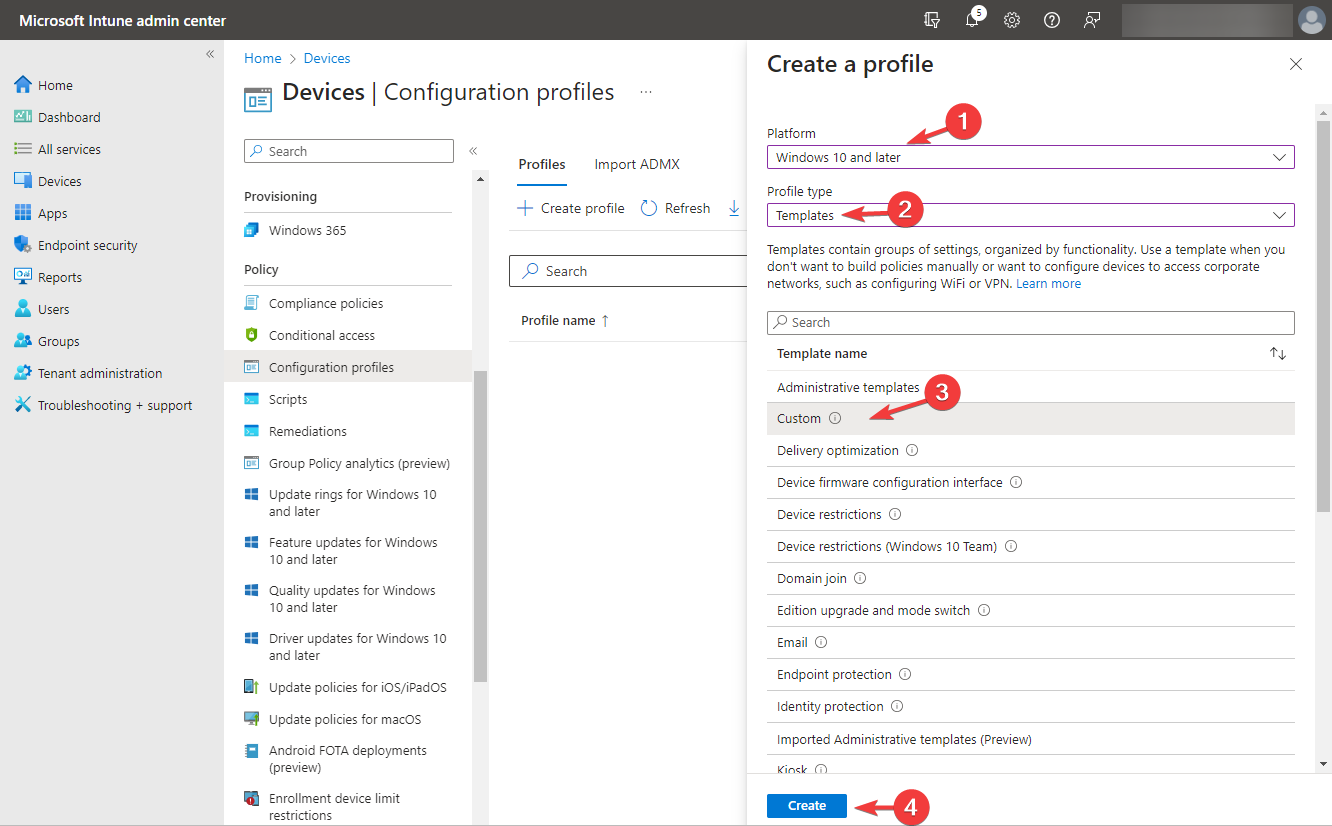
- For Platform, select Windows 10 and later from the drop-down list, and for Profile, choose Templates, then select Custom as the Template name.
- Choose Create.
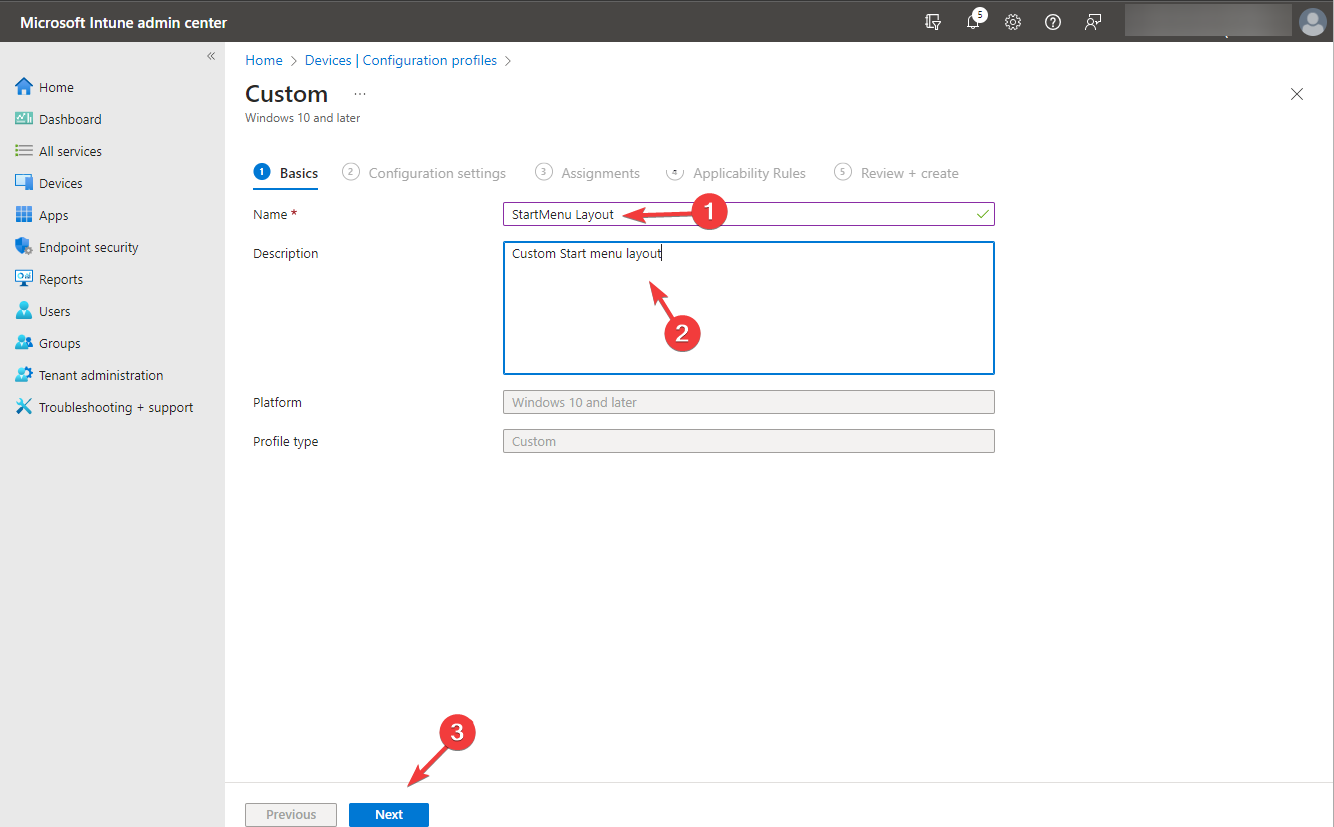
- Next, under Basics, fill in the Name & Description fields and click Next.
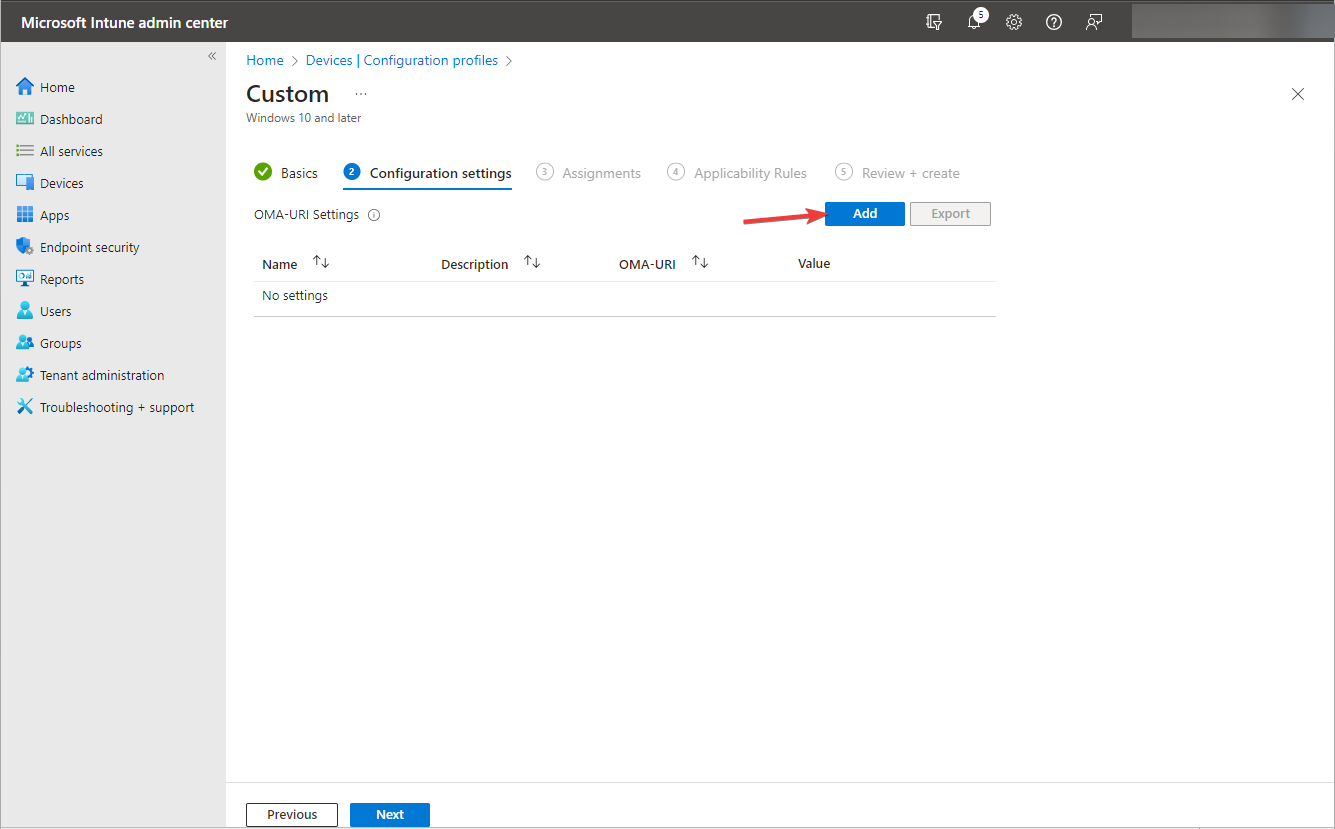
- For Configuration settings, select OMA-URI and click the Add button.
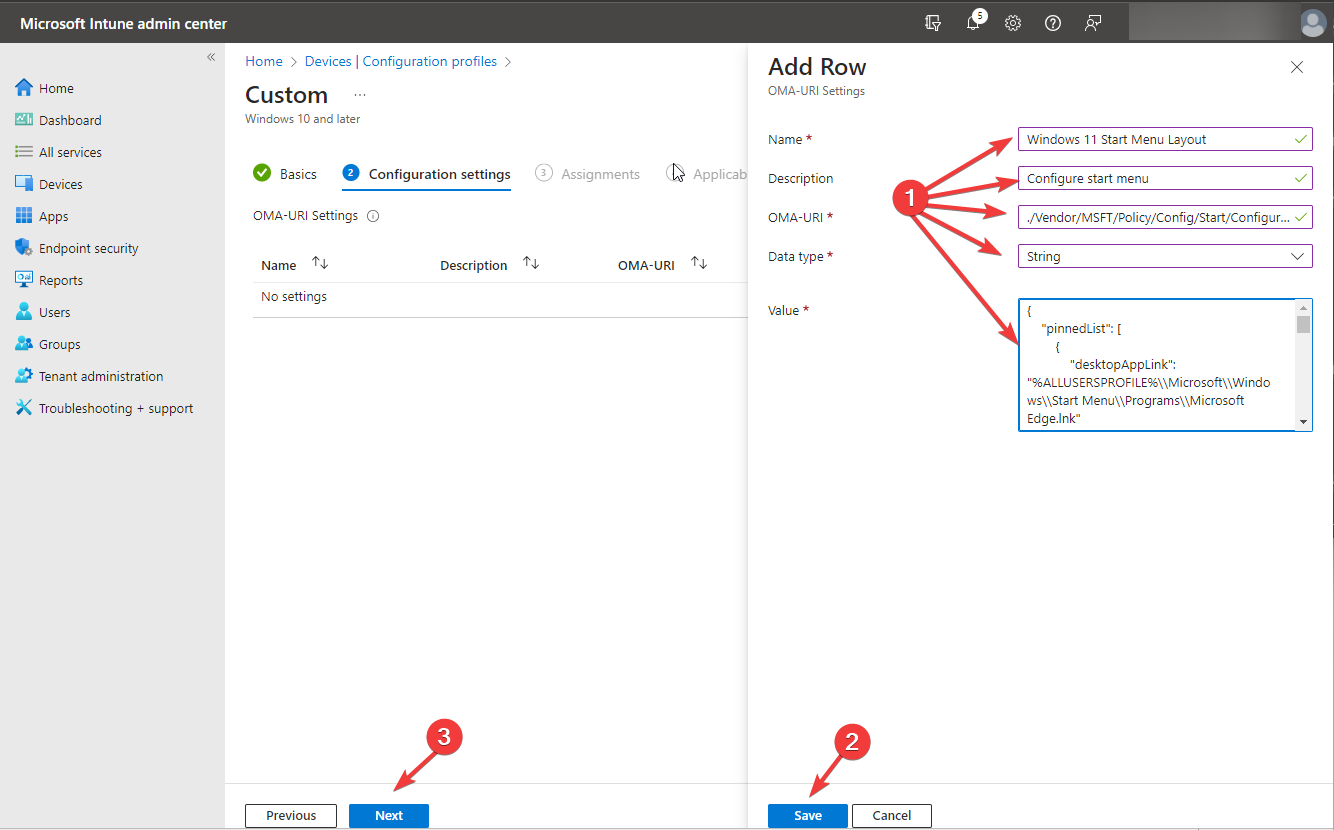
- On the Add Row pop-up, use the following information:
- Name – Windows 11 Start Menu Layout
- Description – Enter the suitable description. This field is optional
- OMA-URI: Enter – ./Vendor/MSFT/Policy/Config/Start/ConfigureStartPins
- Data type – String
- Value – Paste the JSON file content you created or exported
- Choose Save, then click Next.
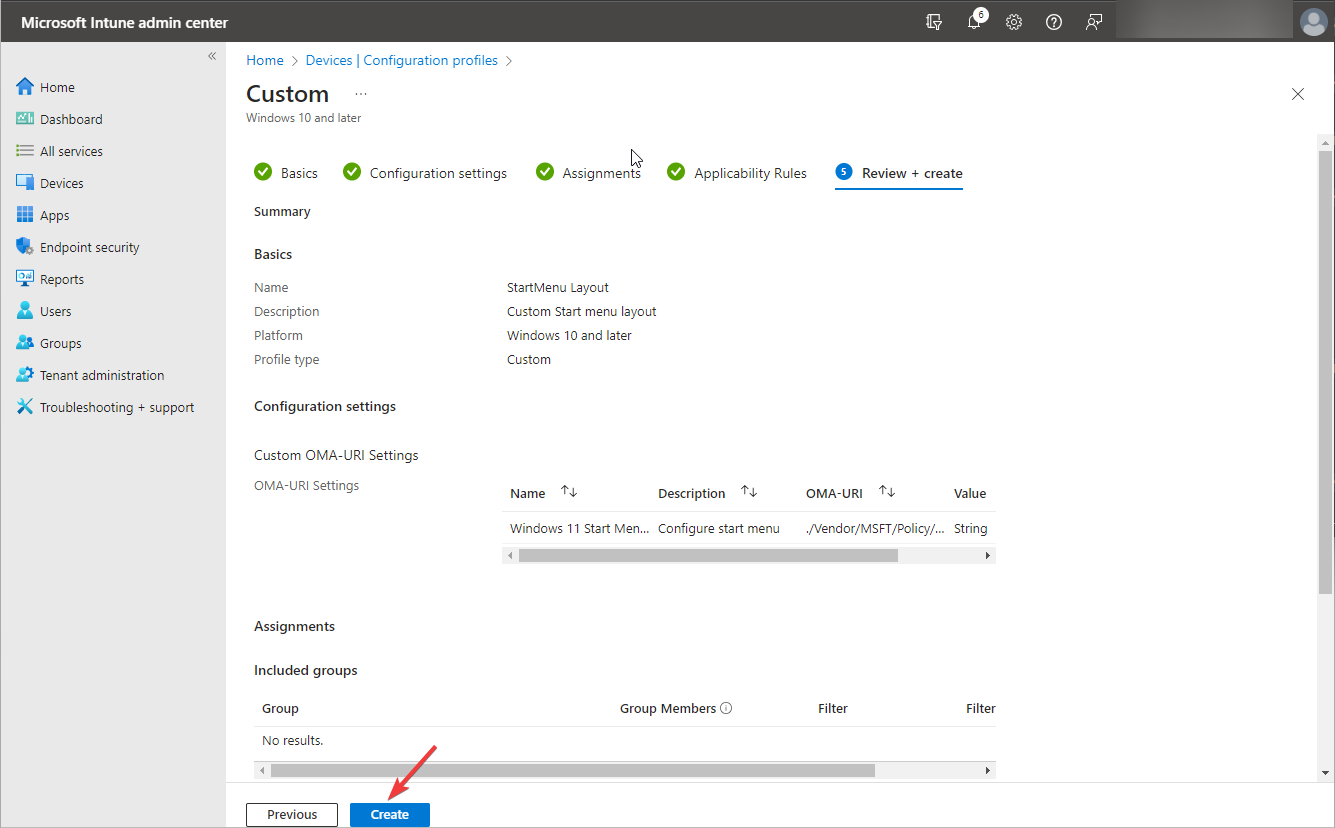
- Configure the rest of the policy to customize the profile settings; once done, click Create to save the custom configuration profile.
You can customize the Start menu layout by turning on or off context menus, hiding apps, etc.
2. Deploying the changes to user profiles
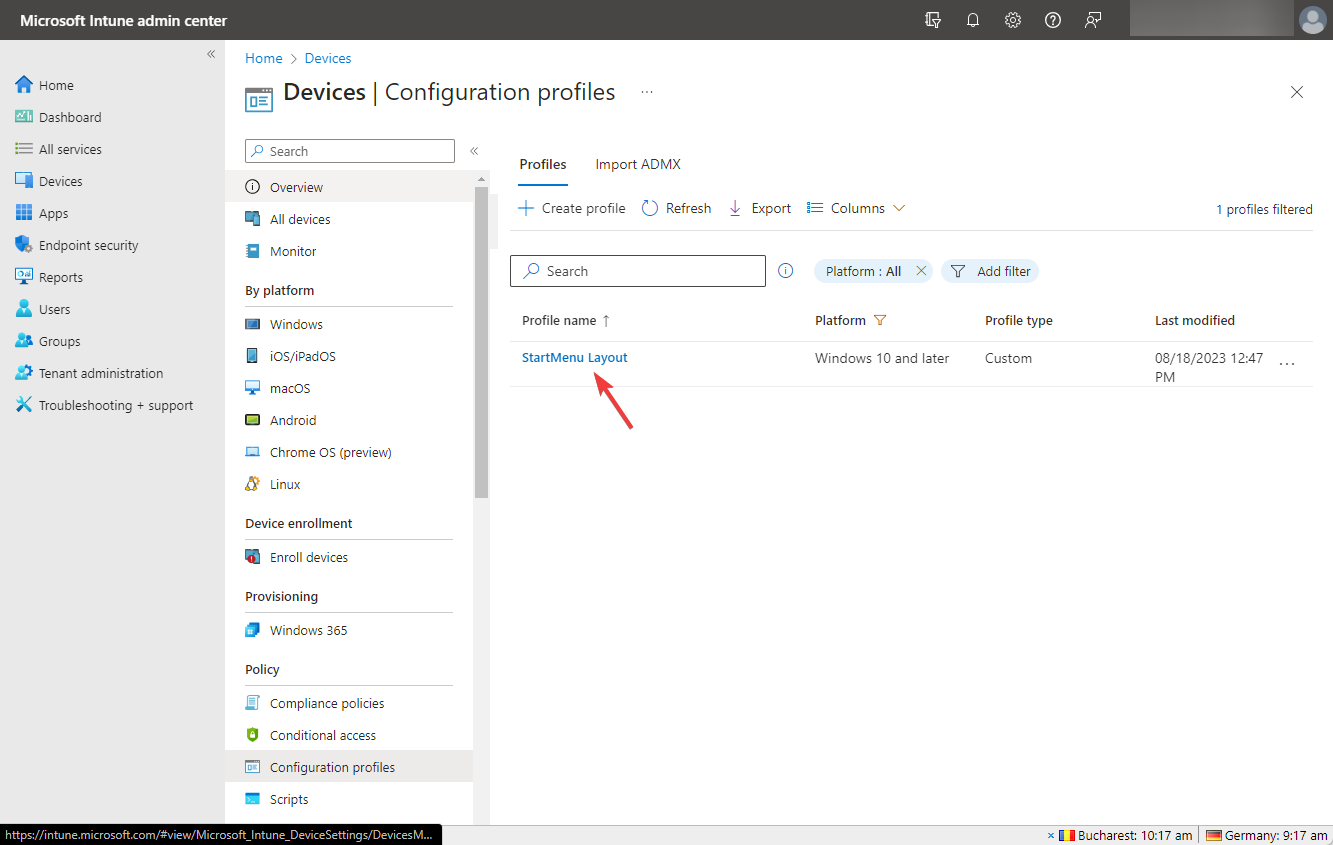
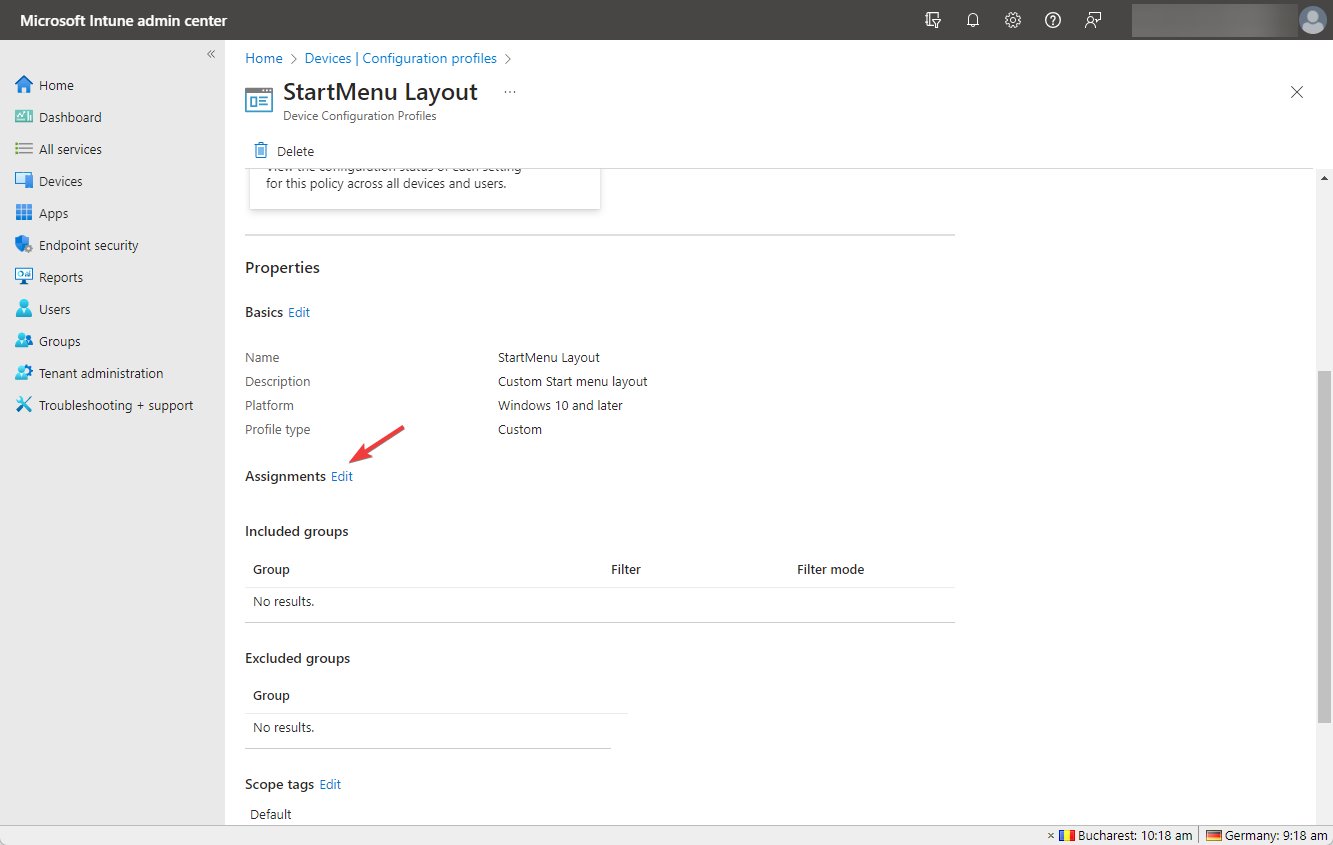
- Once the policy is created, you can deploy it anytime by double-clicking the profile to open Properties.
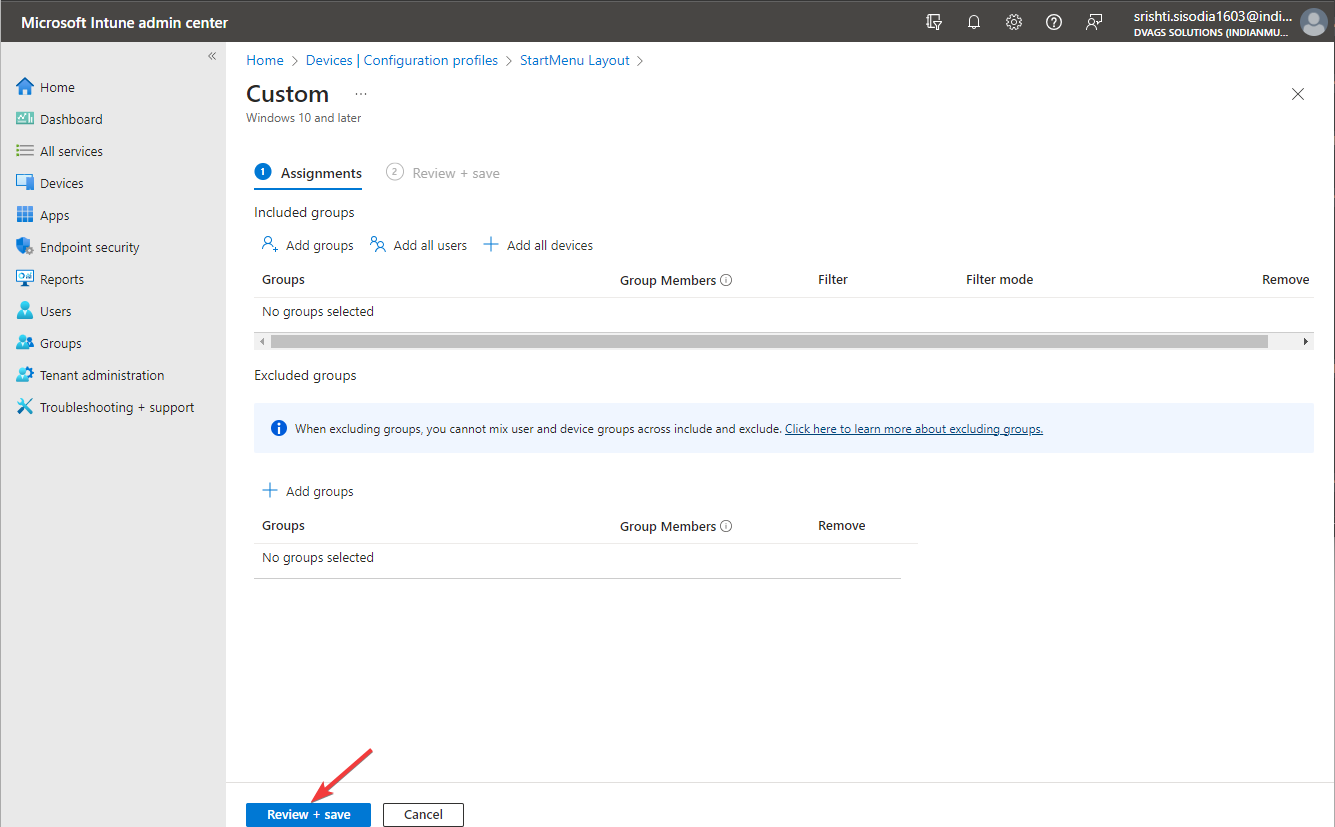
- Go to Assignments, and click Edit.
- Add all users and groups or selected ones and click Review & save to apply.
- When you click save, the policy is assigned, but the groups will receive the settings whenever the devices check in with the Intune service.
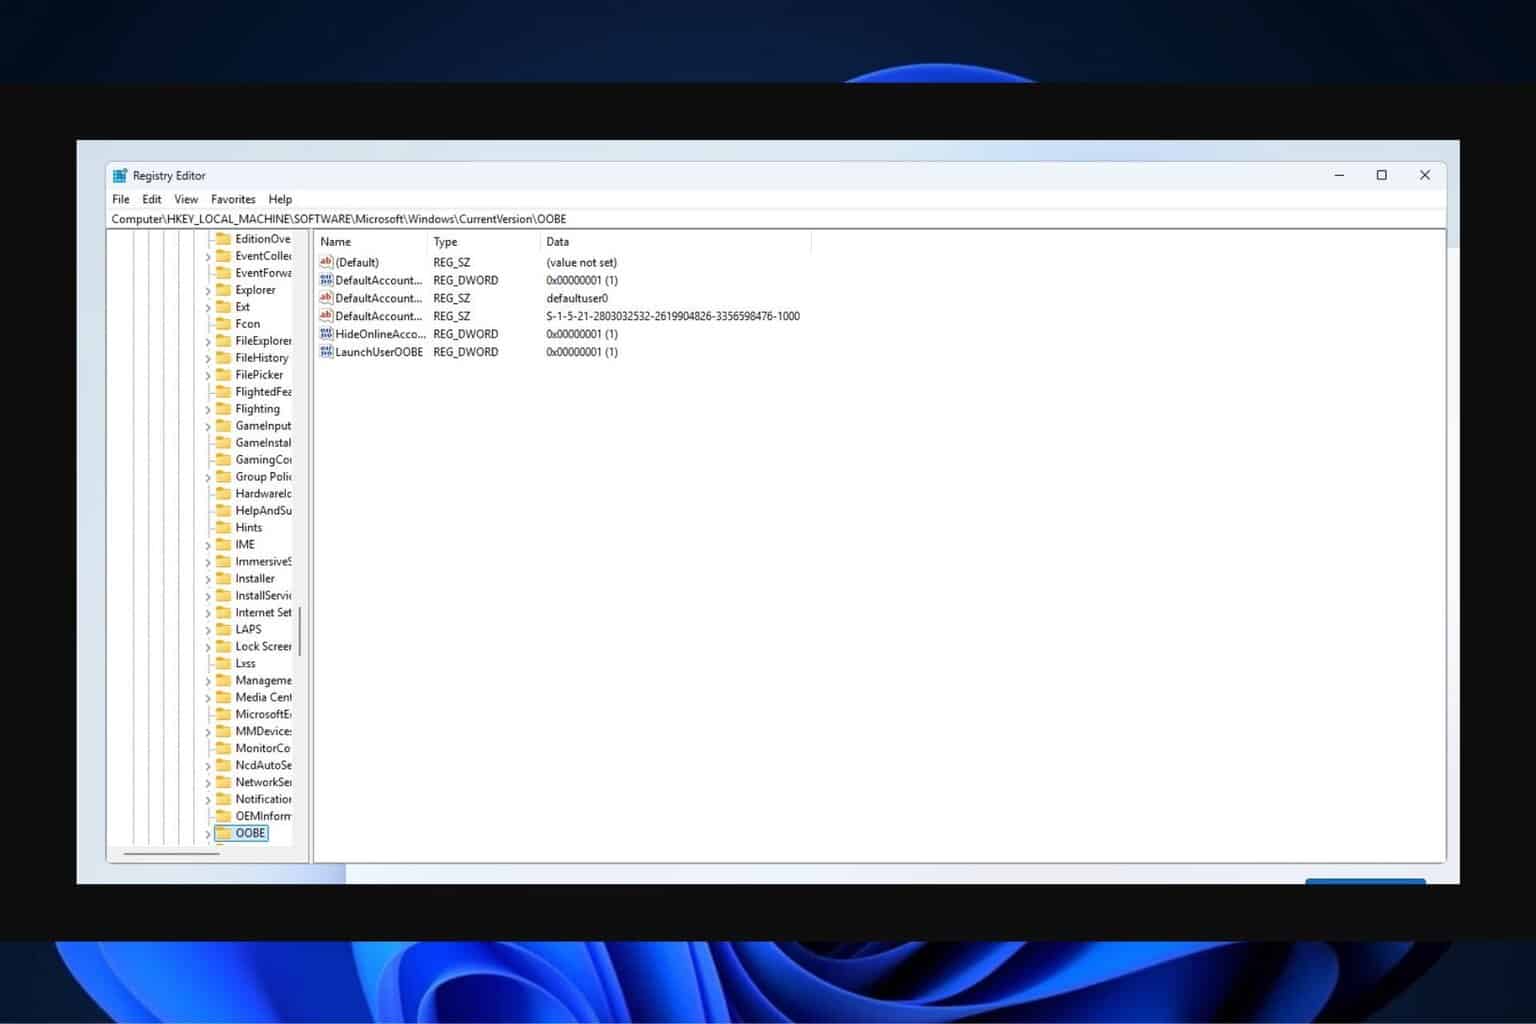
Once you deploy the policy, the existing layout of the Start menu for the default user profile will be replaced with the new one. To ensure everything is in place, you can check the registry entries of the PC.
If these steps are too tricky, you can always get to the Windows 10 classic view on your Windows 11 computer.
How do I export the start layout in Windows 11?
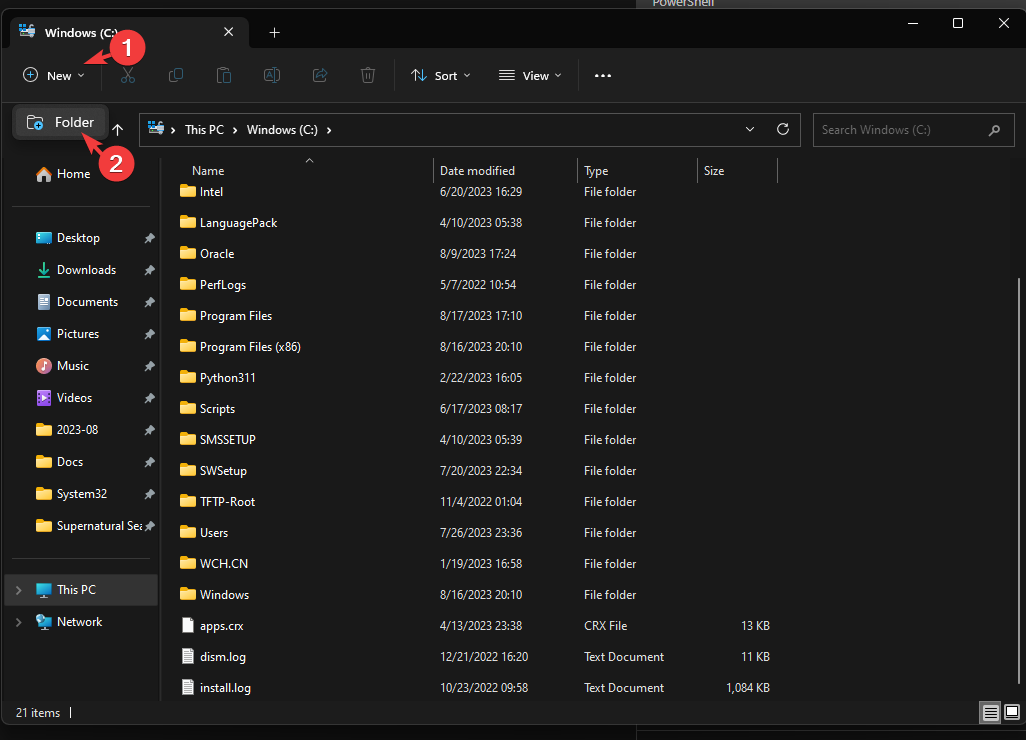
- Press Windows + E to open Windows File Explorer.
- Go to C, or your system drive, click New, then Folder, and name it Layout.
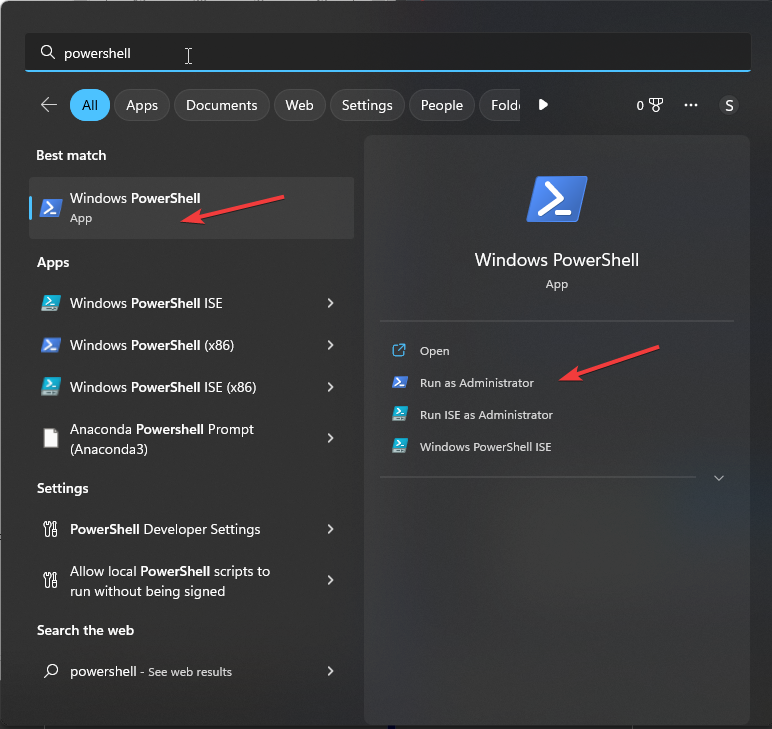
- Next, press the Windows key, type powershell, and click Run as administrator.
- Now copy & paste the following command to export the Start menu layout and hit Enter:
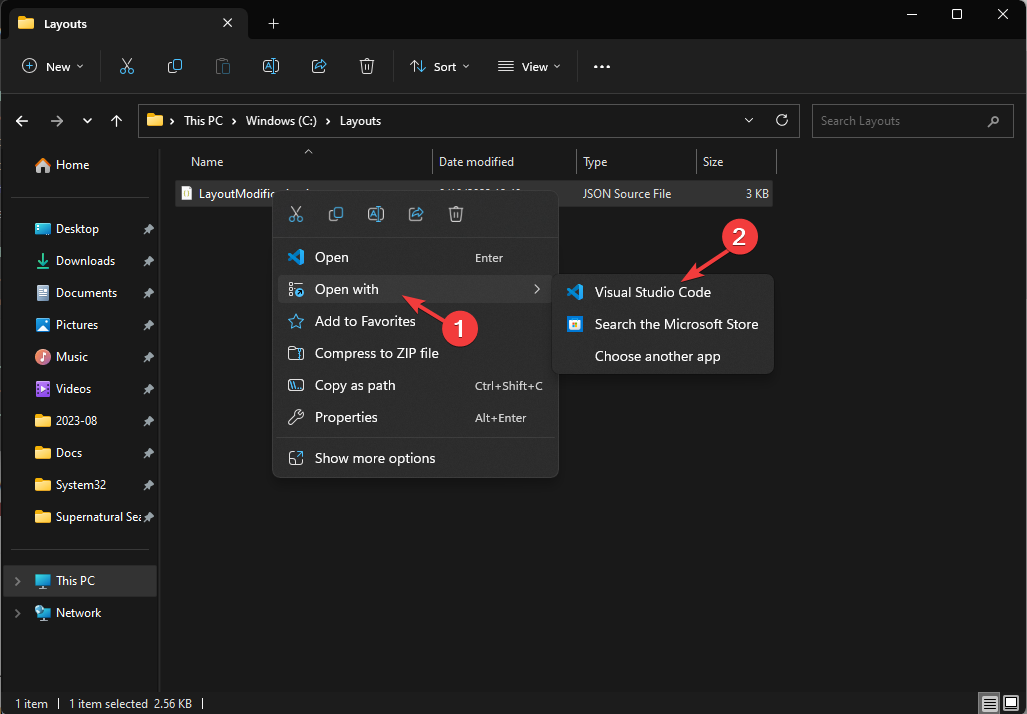
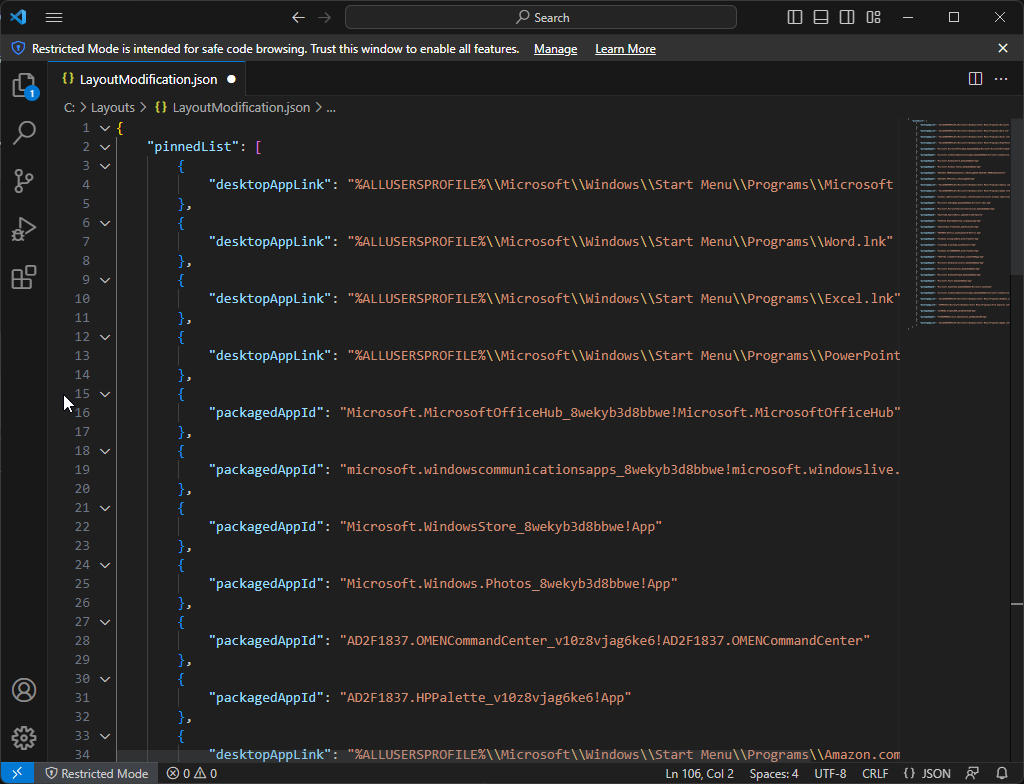
Export-StartLayout -Path "C:\Layouts\LayoutModification.json." - You can access the layout file by right-clicking it and selecting Visual Studio or Notepad ++.
- In the layout file, you can see the Pinned apps on your Windows 11 Start menu; you can add or remove the apps or links or change their order of appearance.
Importing customized Start menu layouts in Windows 11 on single or multiple machines can help you focus on what’s important, giving you a cleaner interface.
However, if you still don’t like it, you can always change it to the classic menu; go back to the simpler times and access all the modern features in a traditional setting, giving the sense of complete control.
Stuck somewhere while following the instructions? Feel free to drop in your query in the comments section below! We will be happy to help!




User forum
0 messages