Install Windows 11 on Legacy Bios: no TPM and Secure Boot
A third-party tool may be the easiest solution
5 min. read
Updated on
Read our disclosure page to find out how can you help Windows Report sustain the editorial team. Read more
Key notes
- Although Microsoft doesn’t allow it, you can install Windows 11 on Legacy BIOS.
- With our workarounds, you will also be able to bypass the TPM and Secure Boot checks if you need that.
- The key is to create bootable media designed specifically for the MBR BIOS settings.

By now, it is no secret that we need TPM 2.0 and Secure Boot to install Windows 11, but we already know that we can enable them from the UEFI BIOS Mode.
However, things get a little complicated if you have a Legacy BIOS because switching to UEFI might get you in trouble and erase your disk, so you might not be OK with that.
And even if you do so, you might still be unable to enable TPM 2.0 because you don’t have the chip on your motherboard.
However, we have a workaround to help you install Windows 11 on Legacy BIOS without TPM 2.0 and Secure Boot checks.
Before starting the procedure, back up all important data on your drive and check the BIOS mode. Although this shouldn’t affect your files, it’s a recommended step before any such tweaking.
Can Windows 11 install without UEFI?
A publicly published standard called the Unified Extensible Firmware Interface details the software protocol for communication between an OS and the platform’s firmware.
The UEFI is an integral element in the new OS, and it is officially required for a smooth installation of Windows 11.
However, to install Windows 11, even if your PC or laptop doesn’t have the necessary hardware specs, TPM UEFI Secure Boot and CPU requirements may be avoided, even though booting from a CSM or legacy bios isn’t officially allowed in Windows 11.
Hence, the answer to the above question is yes. Installation of Windows 11 on a PC with a legacy BIOS is as simple as preparing a USB false drive and the Windows 11 installation ISO file.
How can I install Windows 11 on Legacy BIOS?
1. Use a third-party tool
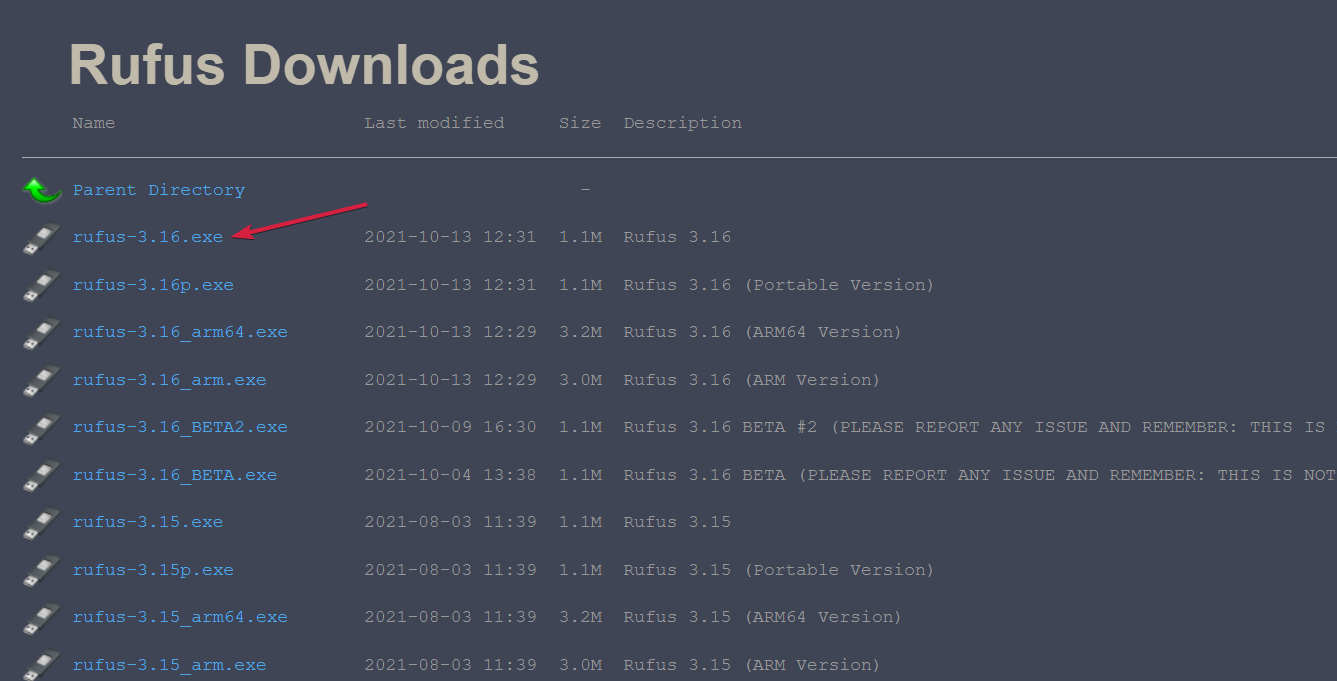
- Download Rufus. Starting with version 3.16, this tool has a unique selection to create a Windows 11 boot media without TPM and Secure Boot checks.
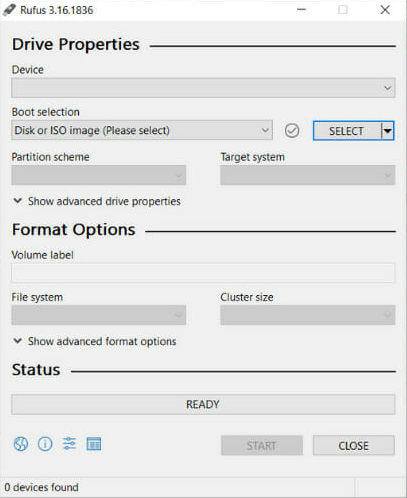
- Run the installer and open the software. You can also download the 3.16p version, which is portable, so you don’t need to install it.
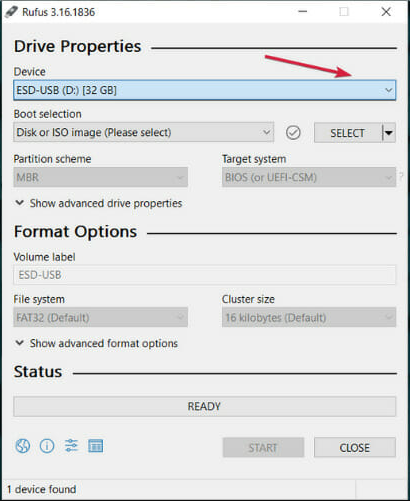
- Connect your USB drive, then select the drive from the drop-down menu. If you only have one, it will detect it automatically.
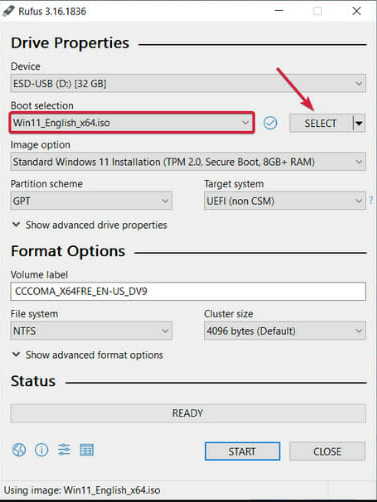
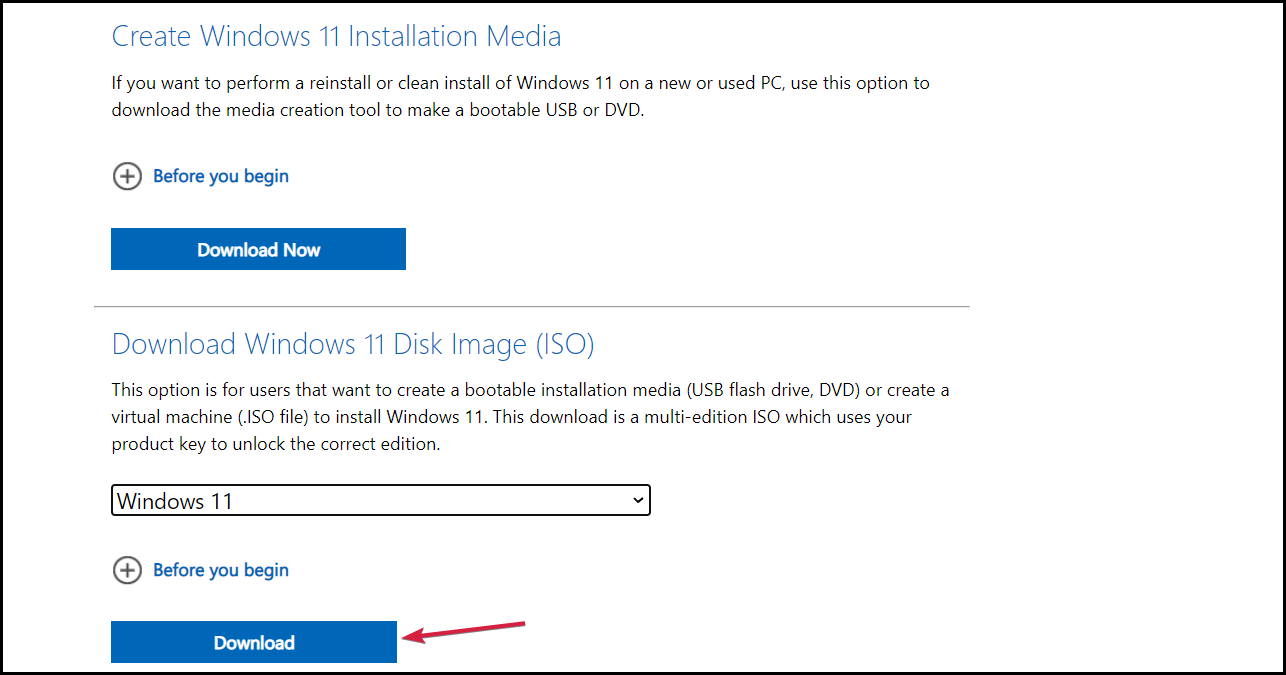
- Now click the SELECT button and browse for the Windows 11 ISO file on your PC. You can get it from the dedicated Microsoft Download page if you don’t have one.
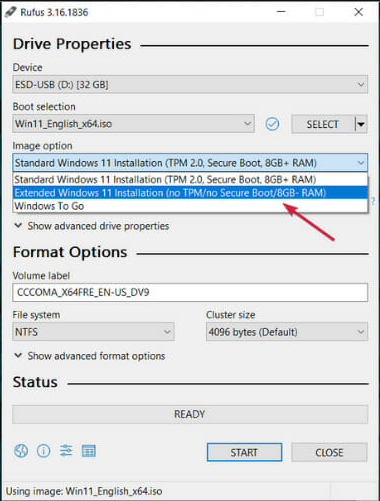
- In the Image option, click the drop-down menu, and select the Extended Windows Installation (no TPM/no Secure Boot).
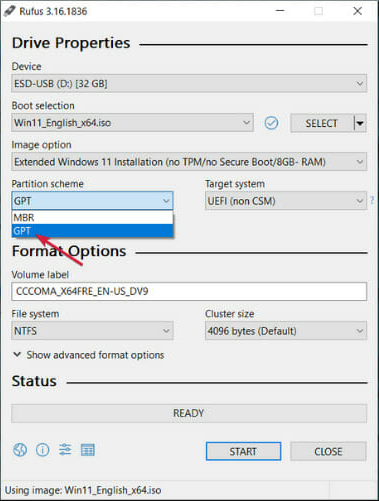
- If you have a Legacy BIOS, you must change the Partition scheme to MBR. If you have UEFI, select GPT.
- Now, you can also change the volume label and partition system but if you’re unsure what to do, leave the options as they are. Hit the START button at the end.
- The tool will create a bootable USB drive that you can use to install Windows 11 on your Legacy BIOS without TPM and Secure Boot checks.
Also, don’t forget to use these Rufus settings for Windows 11 if you want to run it on a legacy machine.
This is the easiest method to install Windows 11 on your Legacy BIOS PC because this tool has the simple option to create the bypass for TPM and Secure Boot checks.
2. Modify your Windows 11 ISO manually
 NOTE
NOTE
- Download the Windows 11 ISO from Microsoft’s dedicated Download page. If you already have one, ignore this step.
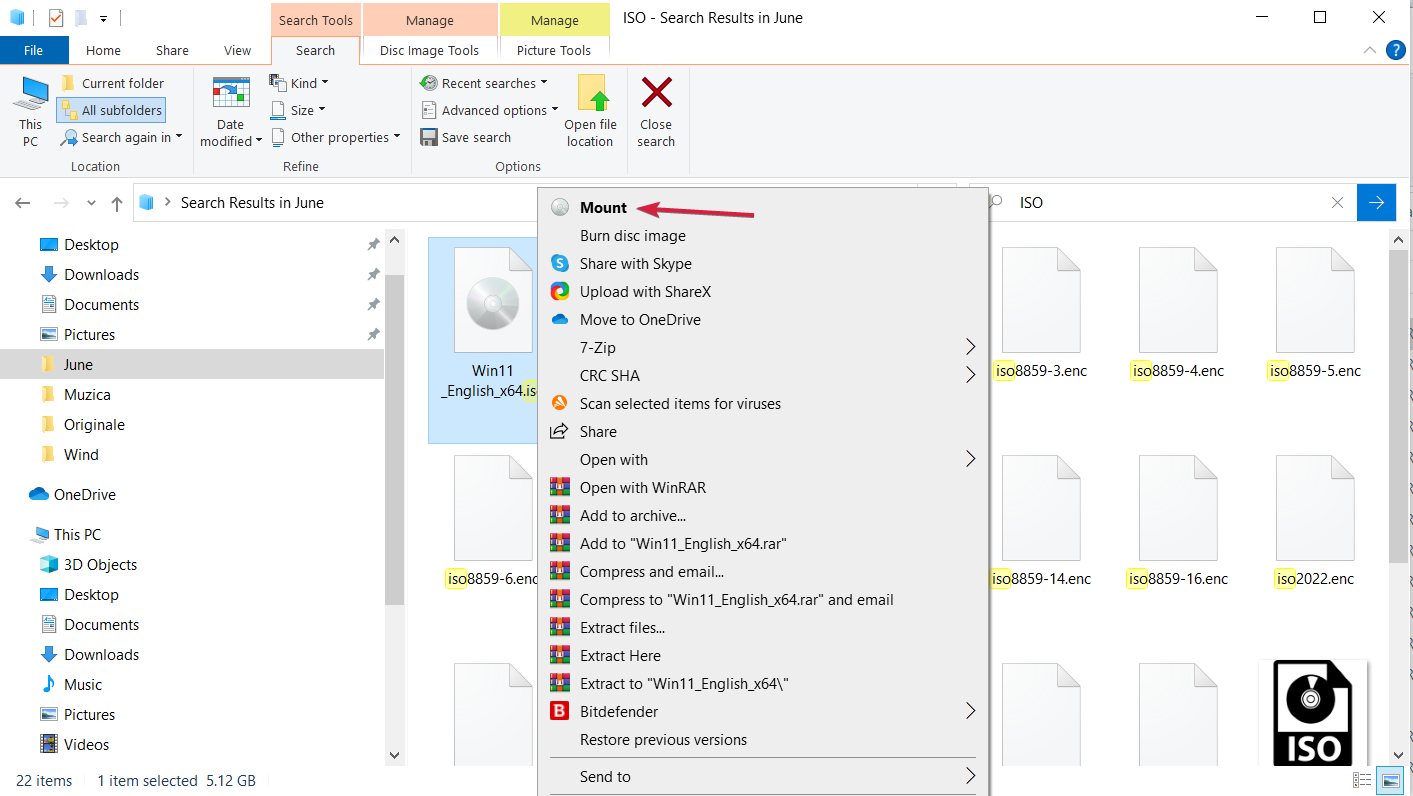
- Press the Windows key + E to start File Explorer, look for the Windows 11 ISO file, right-click it, and select Mount.
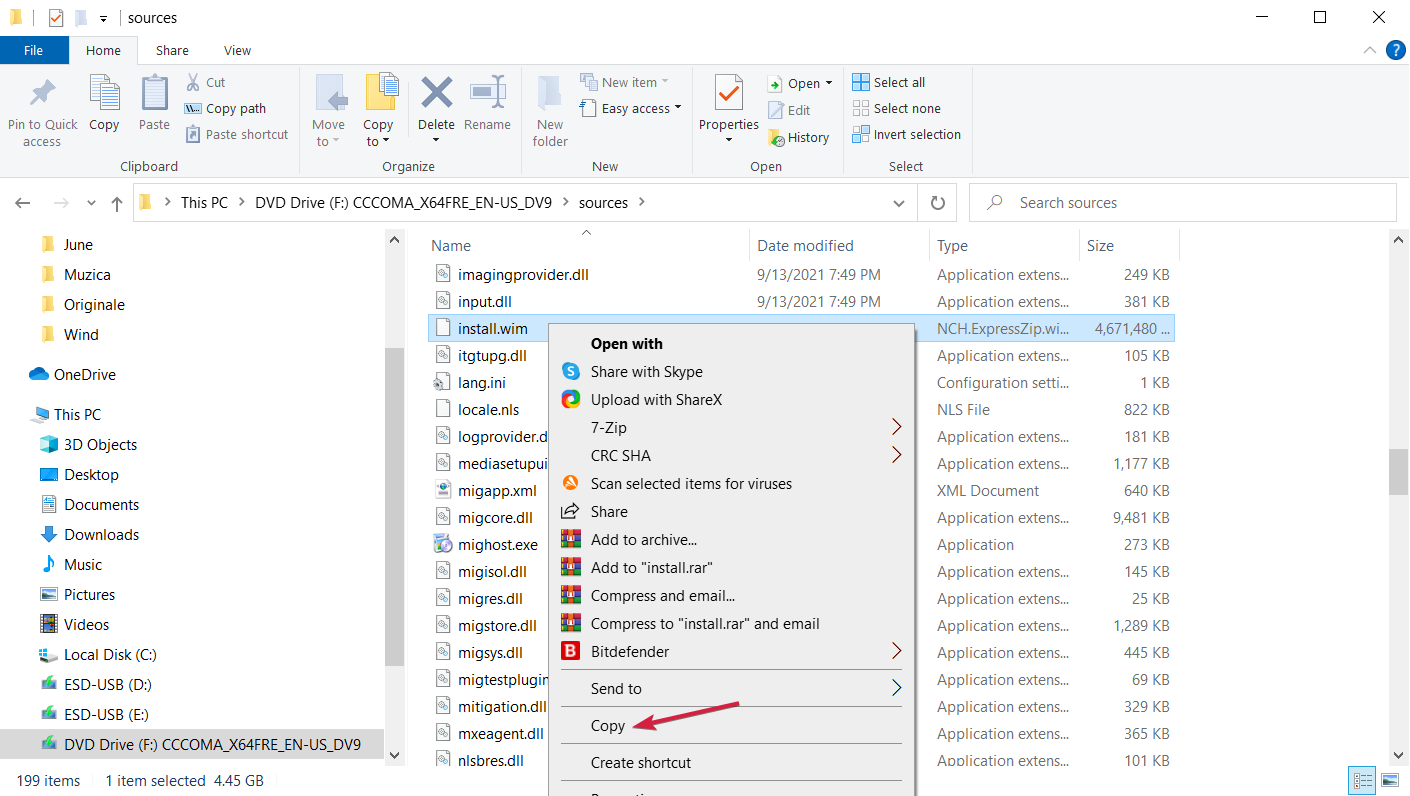
- Browse the new virtual drive, get to the sources folder, right-click on the install.wim file, and select Copy.
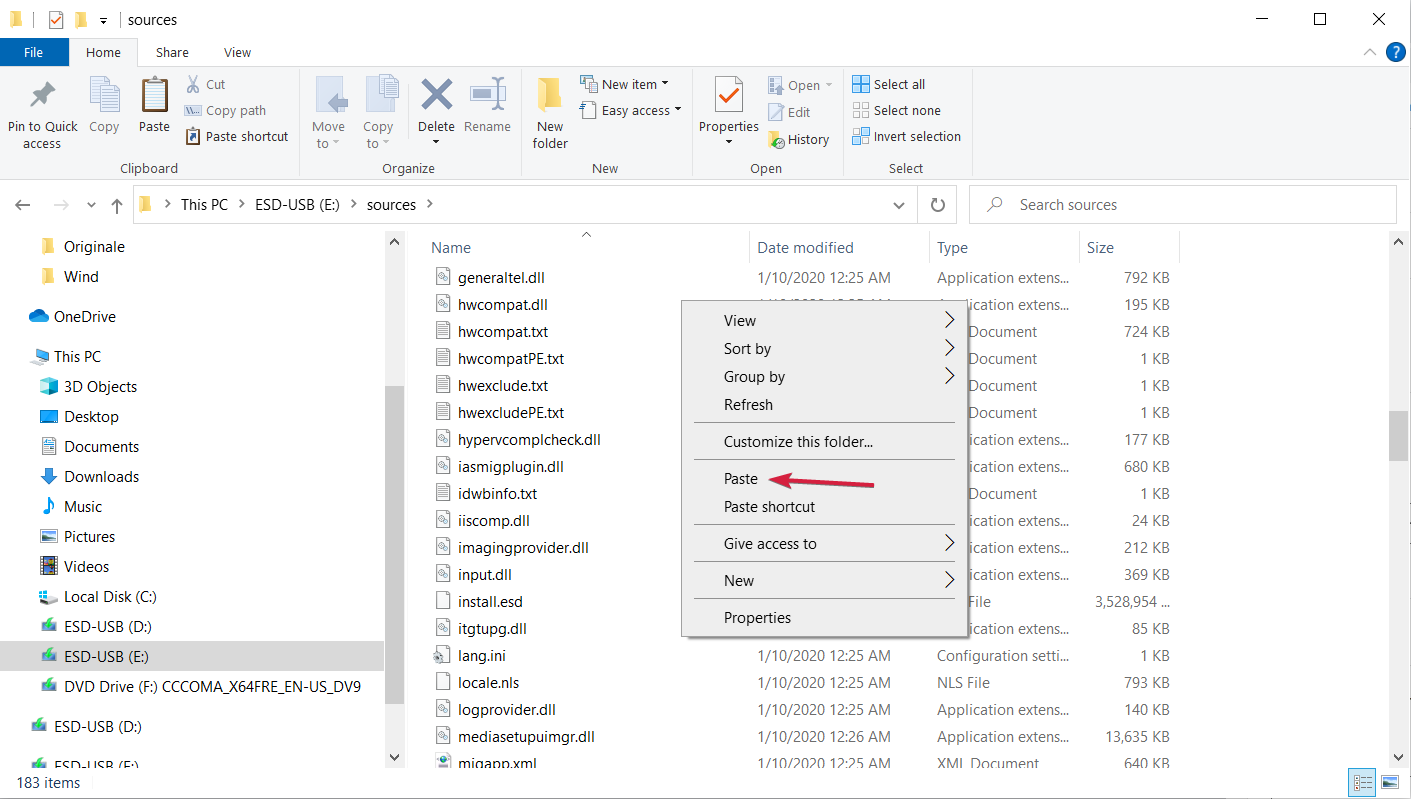
- Connect your Windows 10 USB drive, browse its sources folder, right-click anywhere, and select Paste from the context menu.
- Replace the file in the destination folder, restart your PC, and boot with the Windows 10 drive. Don’t worry; by replacing the wim file, you transformed the drive into a Windows 11 kit.
You won’t need any other modification for this solution because Windows 10 doesn’t check for TPM 2.0 or Secure Boot, so you should be good to go.
3. Bypass TPM 2.0 and Secure Boot checks from the Windows 11 setup
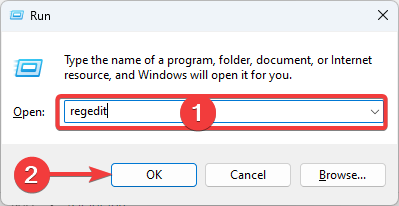
- Press the Windows key + R to start Run, type regedit, and press Enter or click OK.
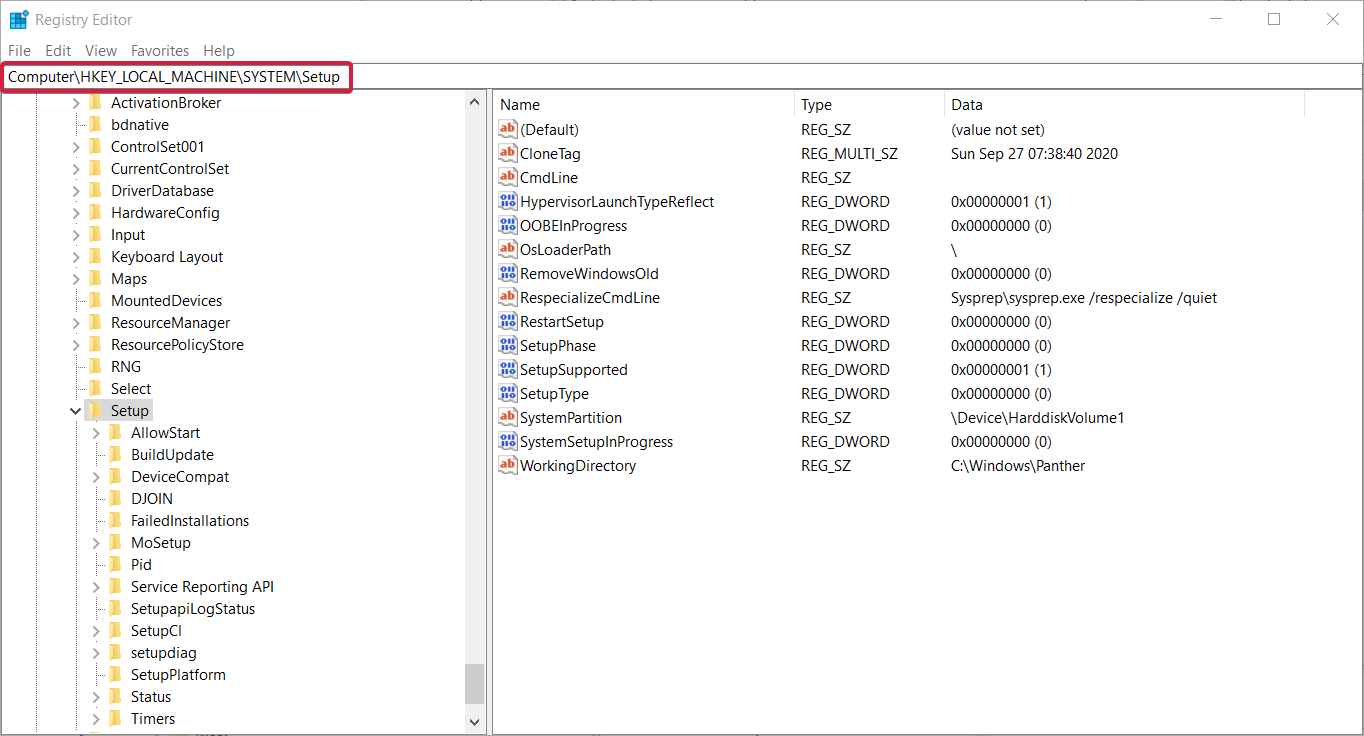
- Navigate to the following directory:
Computer\HKEY_LOCAL_MACHINE\SYSTEM\Setup - Right-click on the right pane, select New, then pick Key and name it LabConfig.
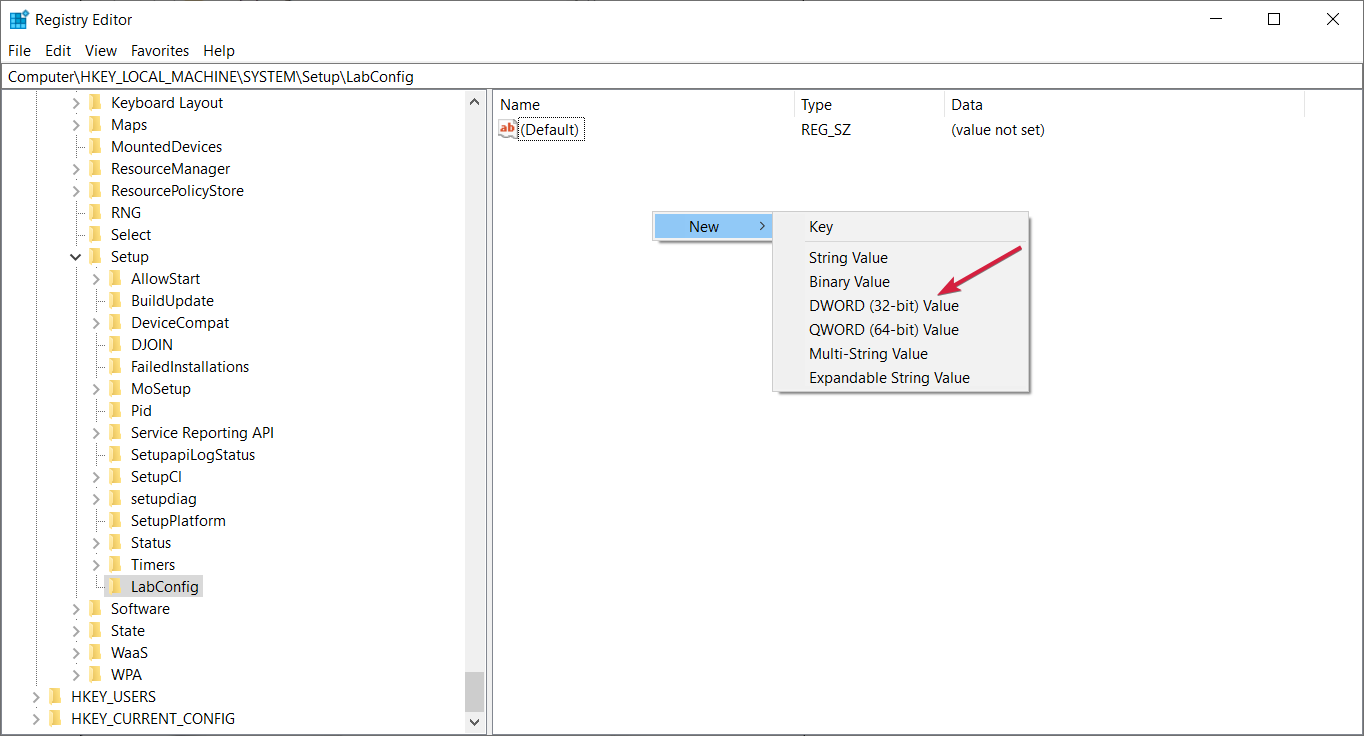
- Access the new key, right-click in the right pane, and select New, then DWORD (32-bit) Value.
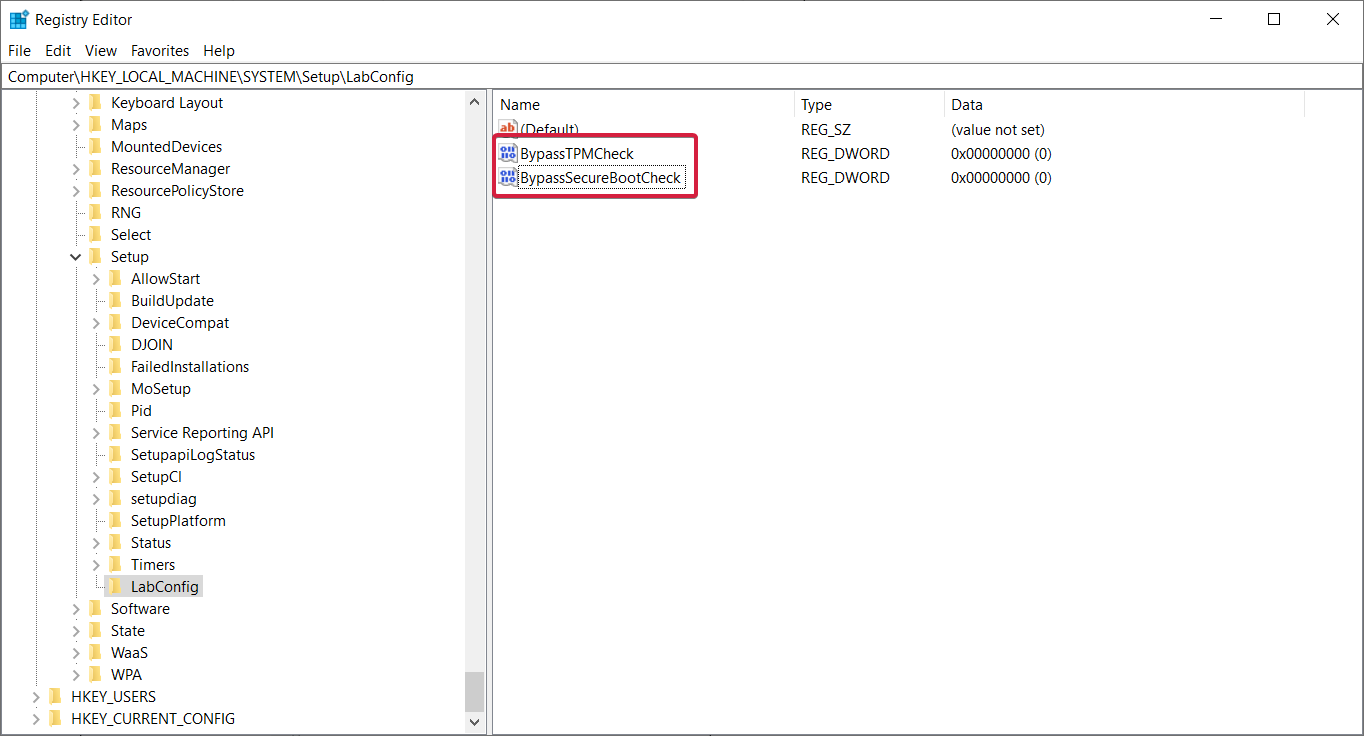
- Name it BypassTPMCheck, create another DWORD (32-bit) Value, and name it BypassSecureBootCheck.
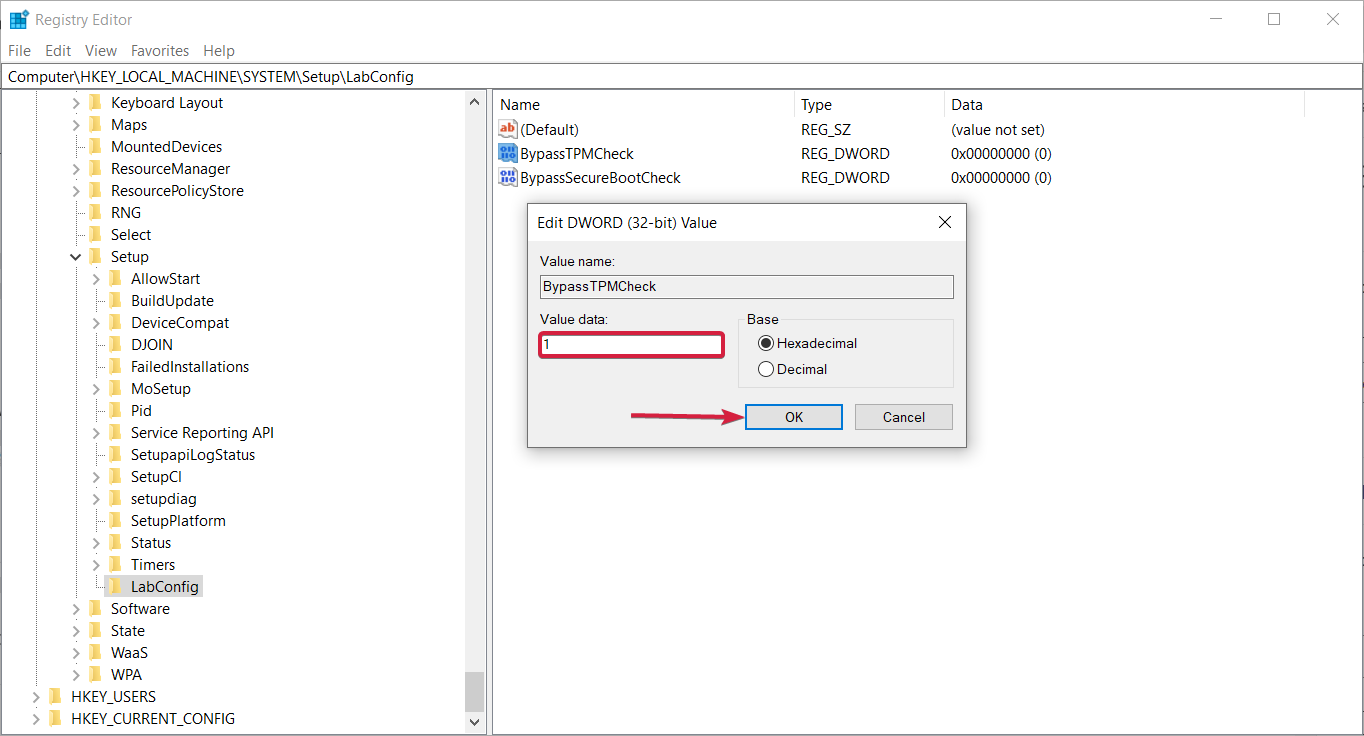
- Double-click each of the keys, type 1 in the value field to both, then click OK.
- Restart your PC and try running the Windows 11 installer.
This should bypass the TPM and Secure Boot checks but will still not get you over the Legacy BIOS problem.
You can overcome that only by creating a booting drive for MBR, just like we did in the first solution using Rufus.
So, this is how you can install Windows 11 without UEFI BIOS and avoid the TPM and Secure Boot checks simultaneously.
We remind you that some of the methods provided here can offer you a clean installation of Windows 11 that will delete all your data on the drive.
History has taught us that anything can happen during an update or installation, so it’s essential to perform a data backup before starting anything. Just use the best backup software in that regard.
If you don’t have a Legacy BIOS, we also have an excellent guide on installing Windows 11 without TPM that will surely help you.
For any other information or suggestions, you can confidently use the comments section below and write us all about it.



User forum
0 messages