Installation Failed in The FIRST BOOT Phase With An Error
Check out these tested methods to resolve the issue
4 min. read
Updated on
Key notes
- You may face this issue when trying to update your Windows, either because of corrupted installation media or incorrect BIOS settings on your computer.
- This guide will discuss all the causes of the issue along with the fixes to resolve the issue.
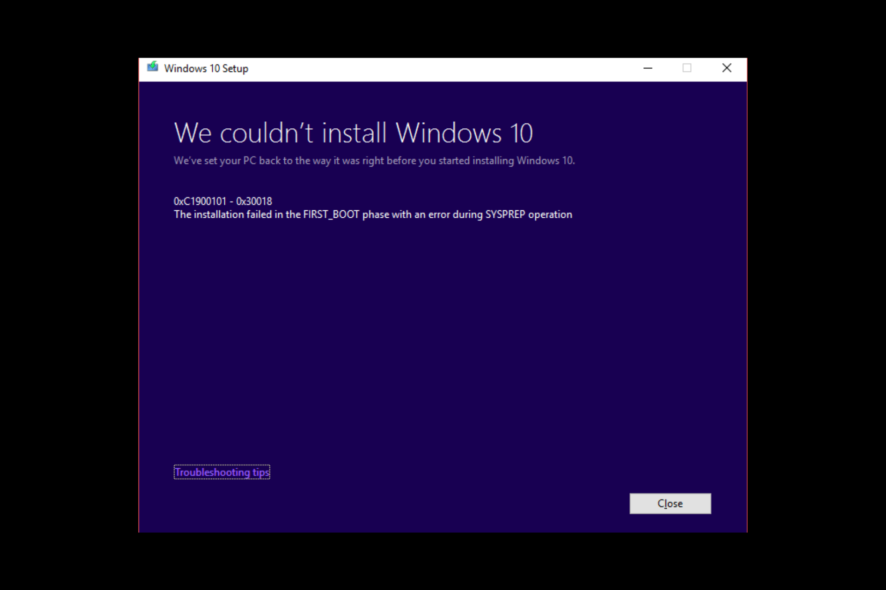
Many people have reported that they were stuck with installation failed in the first boot phase with an error during Sysprep operation while updating their Windows computer. The issue could have been caused due several reasons.
Here, in this guide, we will discuss the available fixes to resolve the Windows 10 first boot error right after examining the reasons for the same.
What causes the installation failed in the first boot phase error?
There could be several reasons for the error to occur; we have mentioned some of the popular ones here:
- Hardware issues – You might get this error if your RAM or hard drive is damaged or faulty.
- Wrong system configuration – If your computer has incorrect BIOS settings or bad drivers installed, you can get this error while updating your PC.
- The installation process was interrupted – If there is a power failure or system crash during installation of the update, you might see this error.
- Installation media is corrupt – The error could have appeared because of the corrupted installation drive or disc used to upgrade your Windows computer.
- Computer infected with malware or virus – The malware or virus infection on your computer might corrupt the system files or configuration, hence the error.
How to fix the installation failed in the first boot phase error?
Before moving ahead with the troubleshooting steps, make sure you go through these preliminary checks:
- First, remove all the external devices except the necessary peripherals.
- Run Disk Cleanup.
- Make sure you have at least 20 GB of space on your hard drive.
- Run your computer in a clean boot environment and try the installation.
- Disable Antivirus.
If none of these worked for you, let us check out the detailed troubleshooting methods to fix the issue:
1. Rename the Software distribution folder
- Go to the Search bar, type CMD and click Run as administrator.
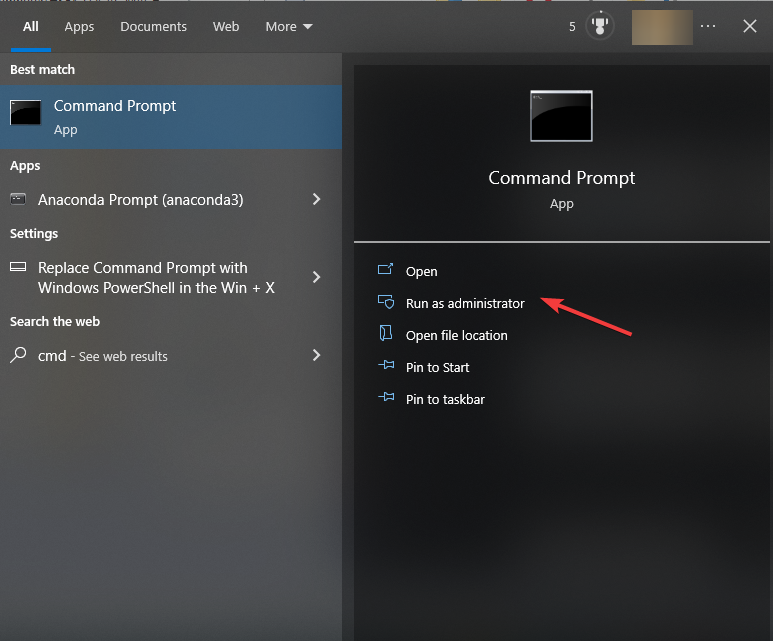
- Copy and paste the following commands one by one and press Enter after every command:
net stop wuauservnet stop cryptSvcnet stop bitsnet stop msiserverrename c:\windows\SoftwareDistribution SoftwareDistribution.baknet start wuauservnet start cryptSvcnet start bitsnet start msiserver - Close the Command Prompt window.
2. Run the Windows Update troubleshooter
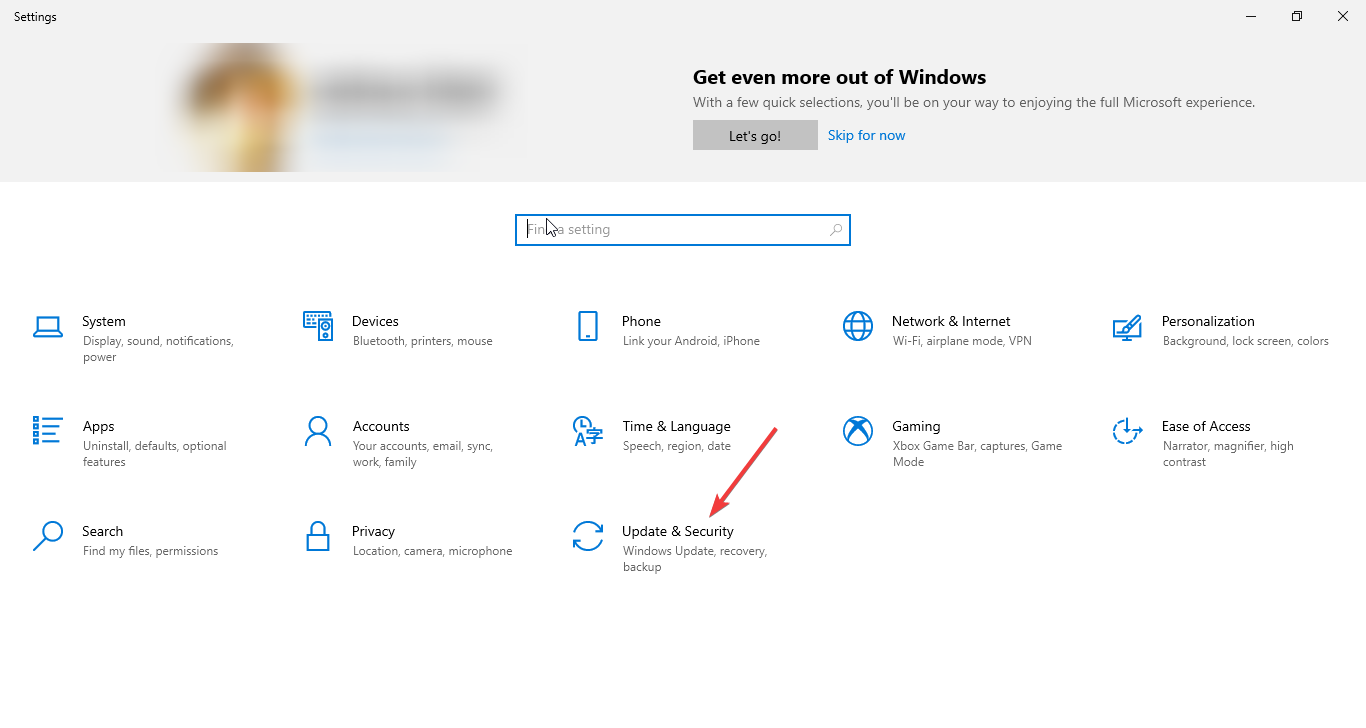
- Press Windows + I to get Settings.
- Go to Update & Security.
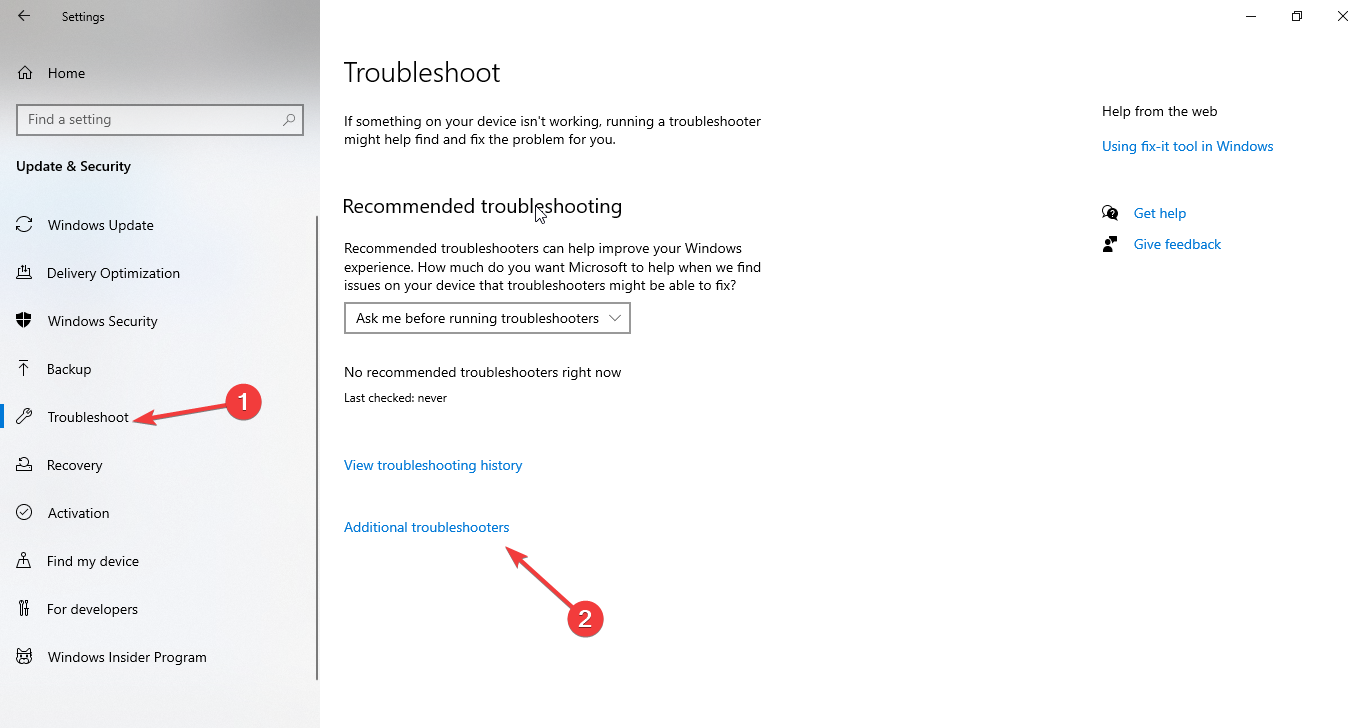
- Now, select Troubleshooting from the left pane, and click Additional troubleshooters.
- Under Get up and running, select Windows Update and click Run the troubleshooter.
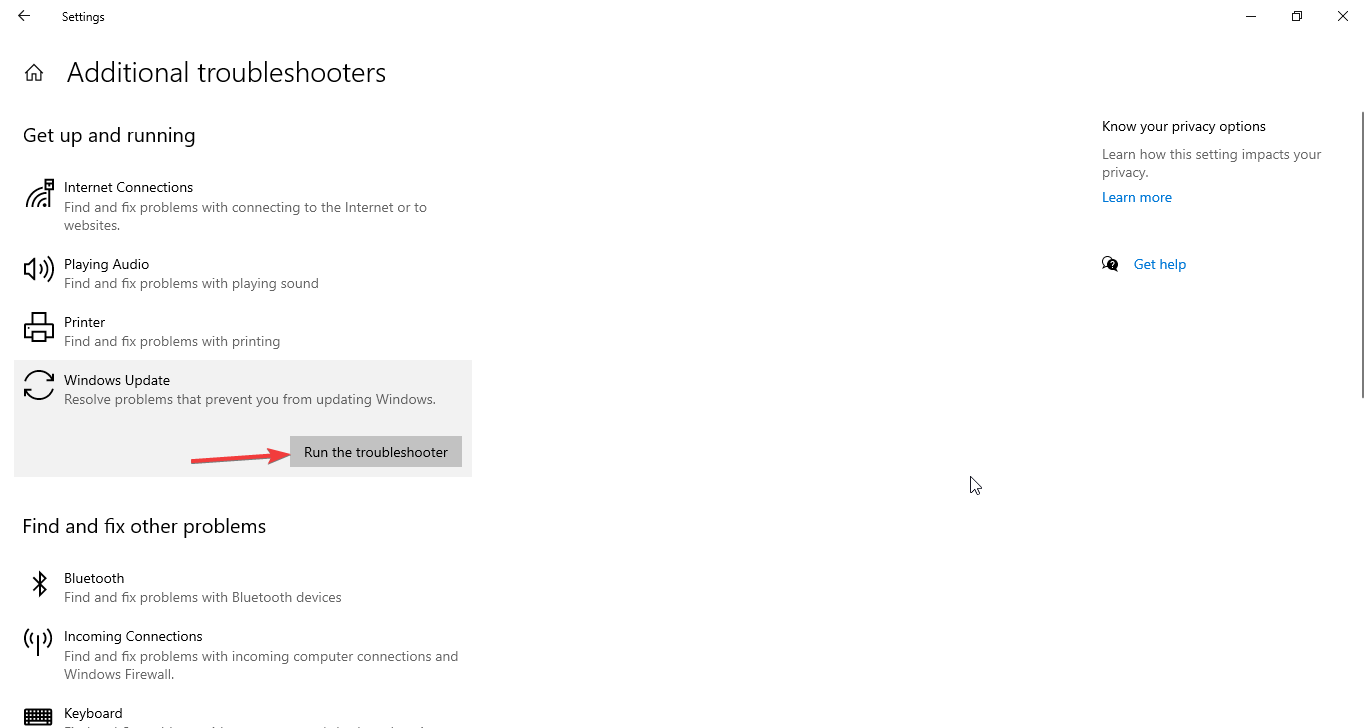
- Follow the on-screen instructions to complete the process.
3. Make changes in Registry Editor
- Press Windows + R to open the Run window.

- Type regedit and press Enter to open the Registry Editor.
- Go to the following path:
Computer\HKEY_LOCAL_MACHINE\SOFTWARE\Microsoft\WindowsUpdate\OSUpgrade - Right-click the OSUpgrade folder, select New, and then click DWORD (32-bit) Value.

- Rename it AllowOSUpgrade. Double-click it and set the Value data to 1 and click OK.

- Close Registry Editor and restart your computer.
4. Disable Secure Boot
- Press Windows + I to open Settings. Go to Update & Security.

- Click on Recovery and go to Advanced startup and click Restart now.

- From the Choose an option page, click Troubleshoot.

- Now click Advanced Settings.

- On the Advanced Settings page, click UEFI Firmware Settings.

- Click Restart from the next page.

- Now select the appropriate option to enter BIOS.
- Go to System configuration, then select Secure Boot and disable it.
5. Scan and fix corrupted files
- Go to the Search bar, type CMD and click Run as administrator.

- Type the following command and press Enter: chkdsk volume:/r

- Once the process is complete, copy and paste the following command and press Enter: sfc/scannow
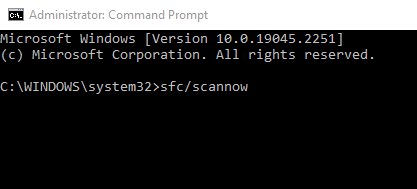
- As the process completes, type the following commands and press Enter after every command:
DISM /Online /Cleanup-Image /CheckHealthDISM/Online /Cleanup-Image /ScanHealthDISM/Online /Cleanup-Image /RestoreHealth
6. Perform old devices and drivers cleanup
- Go to the Search bar, type CMD and click Run as administrator.
- Type the following commands and press Enter after every command:
rundll32.exe pnpclean.dll,RunDLL_PnpClean /DRIVERS /MAXCLEANexit
- Restart your computer and try to update again.
So, you can use these methods to fix the installation that failed in the first boot phase with an error during the Sysprep operation. Try them and let us know what worked for you in the comments below.


User forum
0 messages