Fix: Keyboard not working after Windows 10/11 rollback
8 min. read
Updated on
Read our disclosure page to find out how can you help Windows Report sustain the editorial team. Read more

Microsoft offers Windows 10 as a free upgrade for all Windows 8 and Windows 7 owners, but if you’re not pleased with Windows 10 you can easily roll back to the previous version of Windows. Several users reported that the keyboard isn’t working on their Windows after performing a rollback, so let’s see if we can fix that.
Keyboard not working after Windows 10 rollback
Keyboard issues can be a big problem, and speaking of these issues, here are some problems that users reported:
- Windows 10 keyboard not typing letters – This can be an annoying problem, but you might be able to fix it by entering Safe Mode, so be sure to try that.
- Keyboard and mouse not working Windows 10 – Sometimes both your keyboard and mouse won’t work properly and to fix this problem it’s advised to run the Hardware and Devices troubleshooter.
- Keyboard not working windows 10 Dell, HP, ASUS, Acer, Toshiba laptop, desktop – This issue is usually caused by outdated drivers, so update them when you can and check if that helps.
- Lenovo laptop keyboard not working Windows 10 – This issue occurs usually due to your keyboard driver, but you can fix the problem by reinstalling the problematic driver.
Solution 1 – Start Safe Mode
Users reported issues with the keyboard after rolling back from Windows 10, and if your keyboard isn’t working you might want to try starting Windows in Safe Mode. Safe Mode starts with default applications and drivers, therefore using Safe Mode can sometimes fix these types of errors.
To access Safe Mode, do the following:
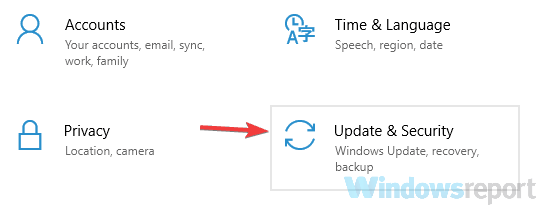
- Open the Settings app by pressing Windows Key + I shortcut. Once the Settings app opens, navigate to the Update & Security section.
- Select Recovery from in the left pane. In the right pane, click the Restart now button.
- Now choose Troubleshoot > Advanced options > Startup Settings. Click the Restart button.
- After your PC restarts, a list of options will appear. Press the appropriate keyboard key to choose the desired version of Safe Mode.
If your keyboard works without any problems in Safe Mode try starting Windows normally and check if the problem persists.
Solution 2 – Reinstall your keyboard driver
If your keyboard isn’t working after rollback from Windows 10, we suggest that you reinstall your keyboard driver. Reinstalling a certain driver is simple and you can do it by following these steps:
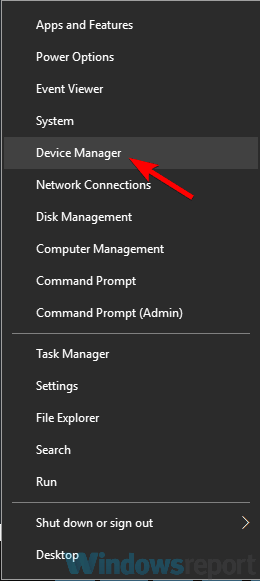
- Start Device Manager. Right-click the Start button and choose Device Manager from the list.
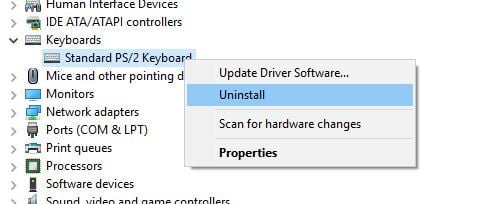
- Locate the Keyboards section and expand it.
- Locate your keyboard, right click it and choose Uninstall from the menu.
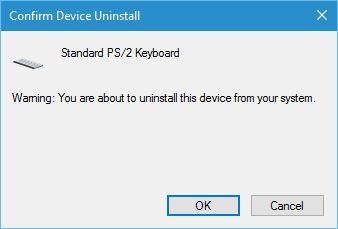
- When the confirmation window appears click OK.
After the keyboard driver is removed you need to restart your computer. When your PC restarts the default keyboard driver will be installed and your keyboard should start working.
Solution 3 – Update your keyboard driver
According to users, sometimes your keyboard won’t work after Windows 10 rollback due to your drivers. Your keyboard drivers might be corrupted or out of date, so it’s advised to update them. You can do that by following these steps:
- Open Device Manager.
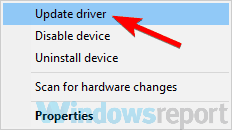
- Locate your keyboard, right-click it and choose Update driver.
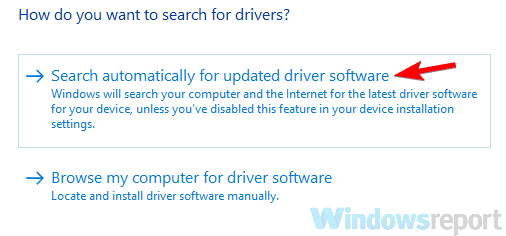
- Now choose Search automatically for updated driver software.
Windows will now try to find and download the best driver for your keyboard. This method doesn’t always work, but you can also try to manually update your keyboard drivers. To do that, just follow these steps:
- Open Device Manager, locate your keyboard and choose Update driver from the menu.
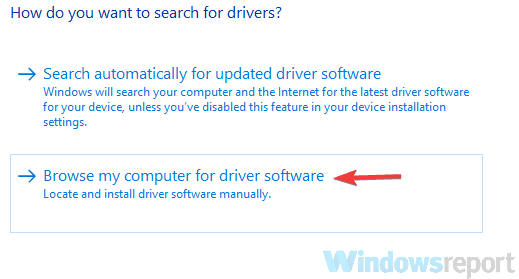
- This time choose Browse my computer for driver software.
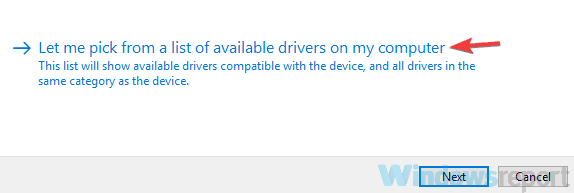
- Now select Let me pick from a list of available drivers on my computer.
- Now you just have to select the driver that you want to use and check if that solves your problem.
Another way to update your drivers is to use third-party software that would allow you to update all your drivers automatically with just a couple of clicks.
Once your keyboard drivers are up to date, the issue should be resolved.
Solution 4 – Copy the Driver folder from a working computer
Few users reported that they managed to fix this problem by copying driver folders from a working PC. Bear in mind that you need a working computer that uses the same operating system that are you currently using. For example, if you’re using the 32-bit version of Windows 7 be sure to copy these folders from another 32-bit Windows 7. To copy these files you need to do the following:
- Go to C:WindowsSystem32 folder and locate the drivers and DriverStore folders and Blue DRVSTORE file. If you can’t find the last file just copy the first two.
- Put those files on a USB flash drive and connect it to your PC.
- Paste those folders to C:WindowsSystem32 folder on your PC and overwrite the existing folders.
We have to mention that this procedure can lead to system instability, therefore it might be a good idea to back up your original drivers and DriverStore folders just in case. If some issues emerge, you might have to restore the original folders in order to fix it. If the keyboard still isn’t working or if you have any issues after copying folders from a different PC, you might have to reinstall Windows in order to fix these problems.
Solution 5 – Run Hardware and Devices troubleshooter
If your keyboard isn’t working, the problem might be a minor glitch on your system. Sometimes these glitches can occur, and the quickest way to deal with them is to run Hardware and Devices troubleshooter. To do that, just follow these steps:
- Open the Settings app and go to the Update & Security section.
- Pick Troubleshoot from the left pane. In the right pane, select Hardware and Devices and click Run the troubleshooter button.
- Follow the instructions on the screen to complete the troubleshooting process.
After the troubleshooter process is finished, check if the problem is still there. This is a simple solution, but it might help you out with this problem, so feel free to try it out.
Solution 6 – Modify your registry
According to users, sometimes your keyboard might not work if there’s an issue with your registry. To fix this problem, it’s advised that you manually edit your registry by doing the following:
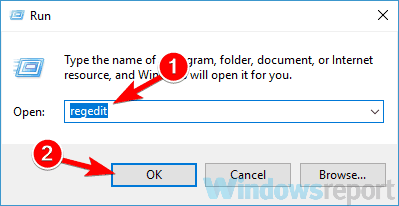
- Press Windows Key + R and enter regedit. Press Enter or click OK.
- When Registry Editor opens, head over to the following locations:
ControlSet001ControlClass{4D36E96B-E325-11CE-BFC1-08002BE10318}
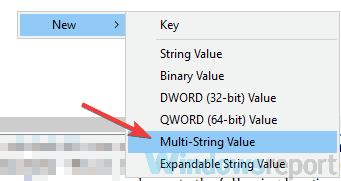
ControlSet002ControlClass{4D36E96B-E325-11CE-BFC1-08002BE10318} - For both of these keys you need to find and edit UpperFilters value. Simply change the value to kbdclass. If there are any other values inside UpperFilters, remove them and leave only kbdclass.In case UpperFilters value isn’t available, simply right-click the empty space in the right pane and choose New > Multi-String Value. Set the name to the UpperFilters and change accordingly.
- After making these changes, restart your PC and check if the problem is resolved.
We have to warn you that modifying the registry can be potentially dangerous, so we advise you to export both these keys before modifying them. If any issue occurs after modifying these keys, use the exported keys to restore the registry to its original state.
We know that this is a bit advanced solution, so if you’re not familiar with Registry Editor and you don’t know how to edit your registry, perhaps you should just skip this solution.
Solution 7 – Perform a System Restore
In case that the problem with the keyboard is still there, you might be able to solve it simply by performing a System Restore. In case you don’t know, System Restore is a useful feature that allows you to restore your system to an earlier date and fix many problems along the way. To do that, just follow these steps:
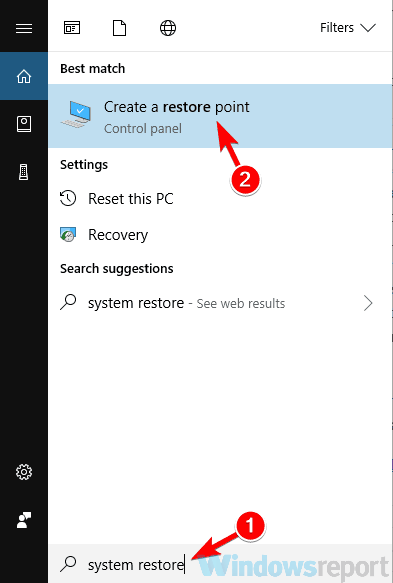
- Type system restore in the search field. Choose Create a restore point from the list.
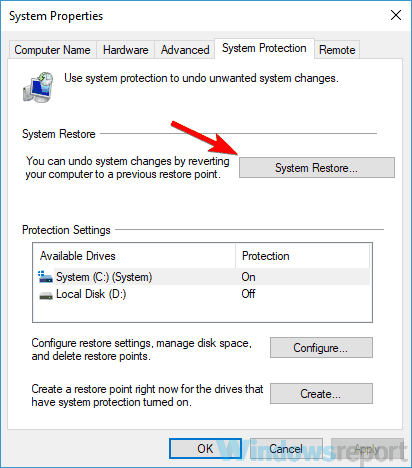
- When the System Properties window appears, click the System Restore button.
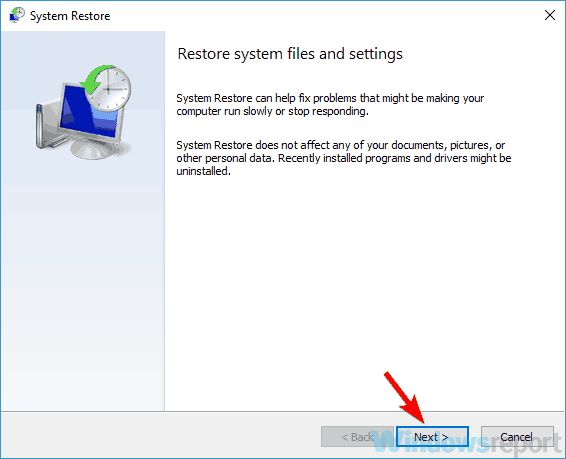
- Click the Next button in the System Restore window to proceed.
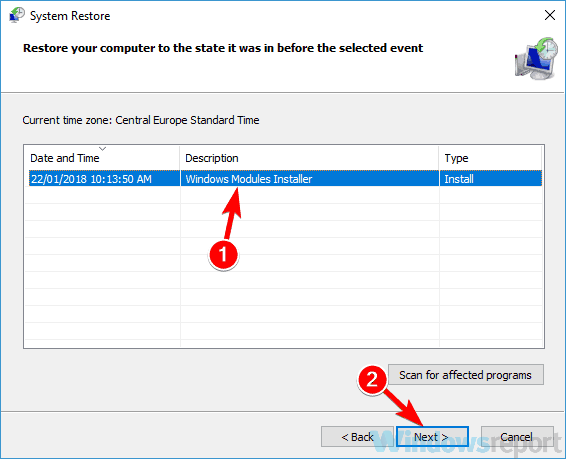
- If available, check Show more restore points option. Now you just have to choose the desired restore point and click Next.
- Follow the instructions on the screen to finish the restoration process.
Once your PC is restored, your keyboard should start working again.
Rollback from Windows 10 can sometimes cause certain issues, but we hope that you managed to fix keyboard issues after using some of our solutions.






User forum
1 messages