Lexar USB not Working: Use These 5 Methods to Recognize It
Check how experts fix things in a jiffy
6 min. read
Updated on
Read our disclosure page to find out how can you help Windows Report sustain the editorial team Read more
Key notes
- Lexar USB drives are usually considered a good option, but for many users, these are not working.
- The most common causes include outdated or problematic USB device drivers.
- To fix things, connect the USB drive to another port or update the drivers, amongst other solutions.
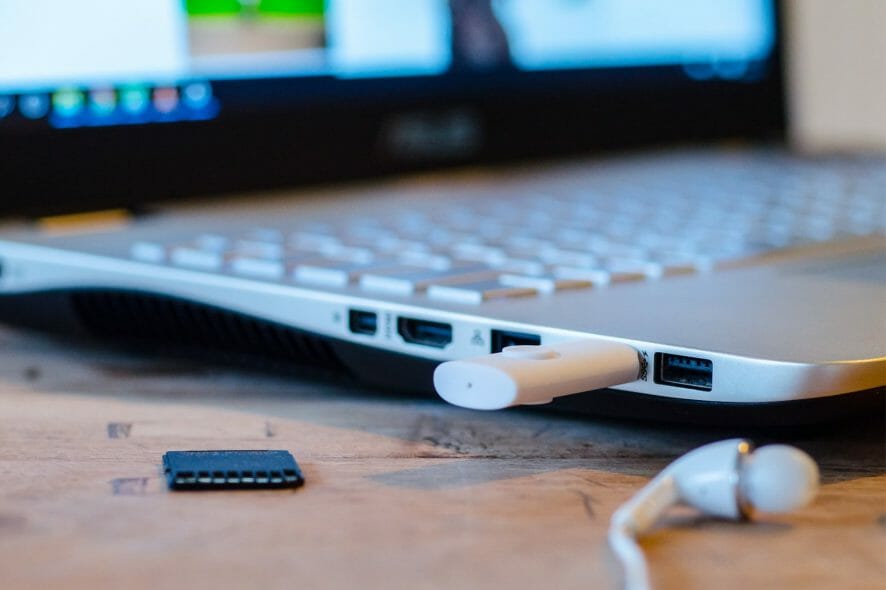
Lexar USB flash drive is popular among people due to its better performance, reliability, affordable price, and high security. But many reported that the Lexar USB drive is not working.
The PC may have trouble detecting a USB drive a few years old or even, sometimes, a new one. Troubleshooting is quick, but there were instances where the drive had run its course, and replacing it was the only viable option. So, let’s find out all about the issue.
Why is my Lexar USB not working?
Here are some of the reasons the Lexar flash drive is not showing up:
- Issues with the connection – If the connection between the USB drive and the PC is not proper, the drive won’t show up.
- Incompatible or outdated drivers – Drivers play a critical part in the effective functioning of the flash drive, and if you have incompatible, corrupt, or outdated drivers, it will throw errors.
- Drive letter not assigned – You have to assign a drive letter to each storage device, in the absence of which, it would cease to work.
- Conflicting hardware – In some cases, another piece of hardware often conflicted with the Lexar USB drive, and, as a result, it was not working.
How can I fix my Lexar USB if it’s not working?
Before you try the slightly complex solutions, here are a few quick tricks that might work:
- Unplug the Lexar flash drive, restart the computer and then plug it back in. This works when Windows cannot automatically fetch the best drivers for a device.
- Try plugging the device into another port. If you have a desktop, connect the Lexar USB to a port on the back since that did the trick for many users.
- Disconnect any non-critical hardware connected to the PC, for instance, the speakers, printers, microphones, or headphones, amongst others. A user reported that it was a webcam that prevented the Lexar USB drive from showing up.
- Recollect if you installed any program around the time the Lexar USB first stopped working, and uninstall the app.
- Make sure the USB port is not disabled in the BIOS. Since the steps differ for every manufacturer, we recommend you refer to the manual that came along with the PC or check the official website for the exact process.
If none of these work, head to the solutions listed next.
1. Run the troubleshooter
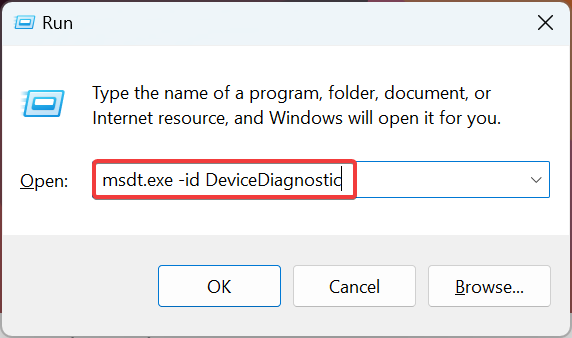
- Press Windows + R to open Run, paste the following command, and hit Enter:
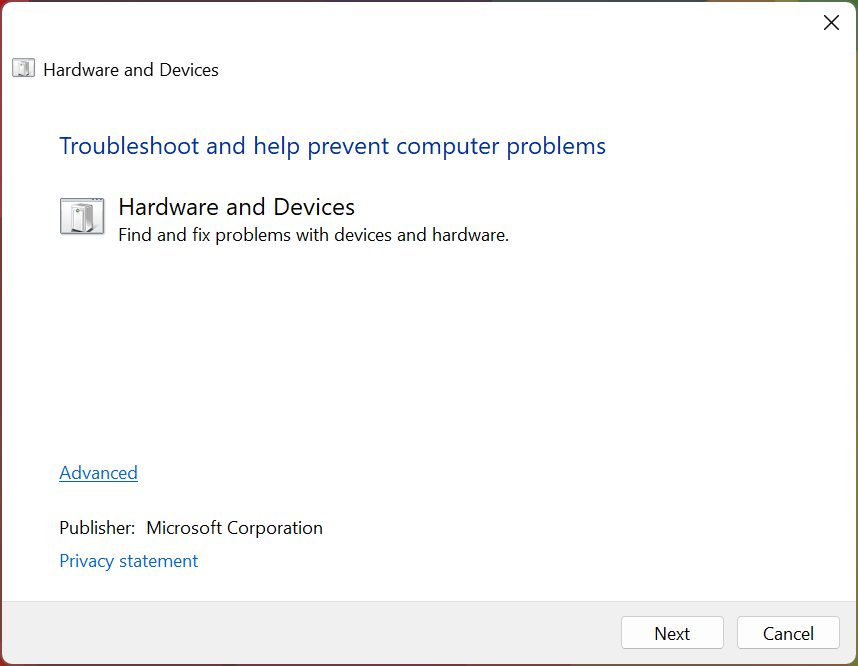
msdt.exe -id DeviceDiagnostic - Now, follow the on-screen instructions to run the troubleshooter.
Running the dedicated Hardware and Devices troubleshooter will seamlessly fix things when Lexar USB is not working. So, this should be the first thing you do.
2. Update the USB Device Driver
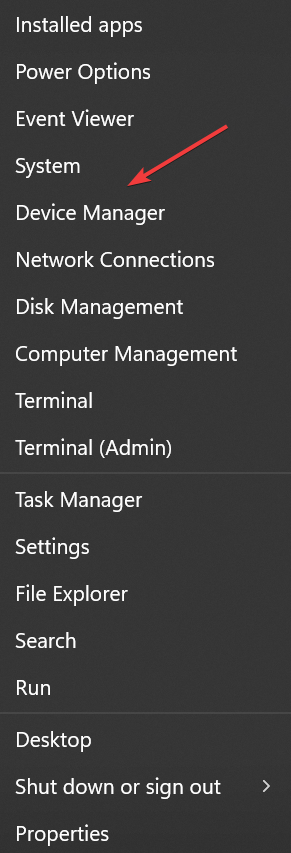
- Right-click on the Start button, then select Device Manager.
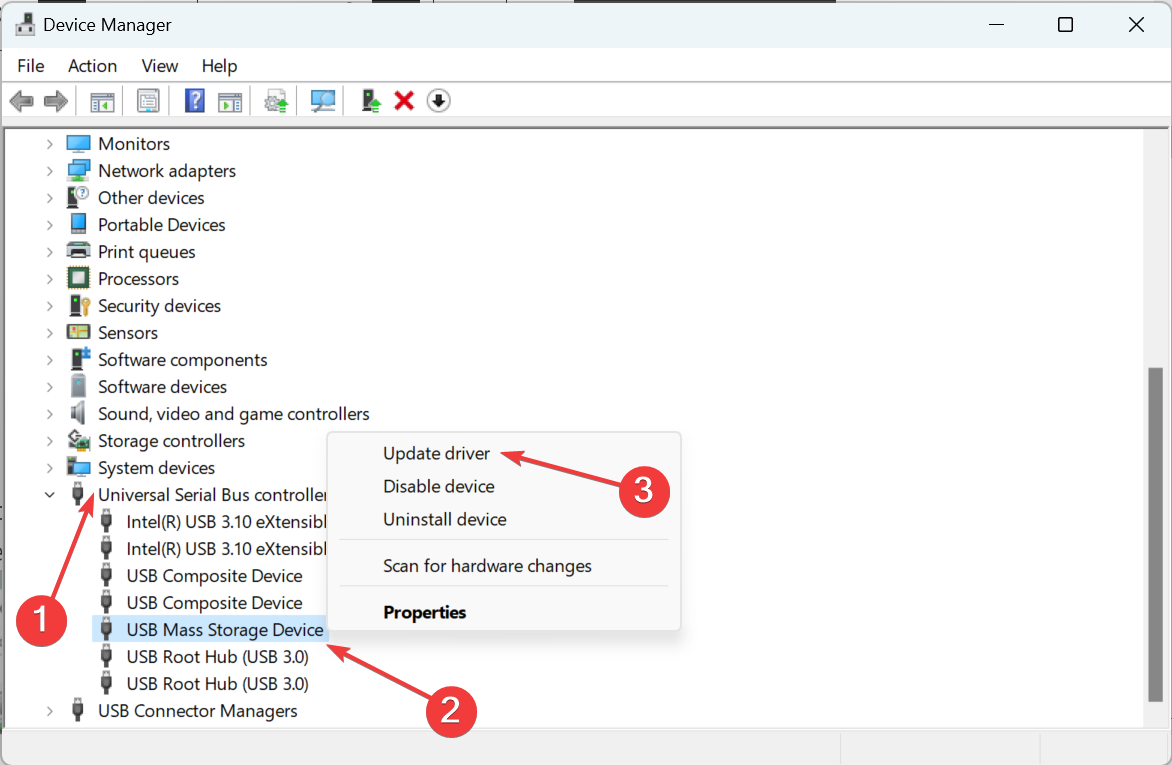
- Expand Universal Serial Bus controllers, right-click on the USB drive, and then select Update driver.
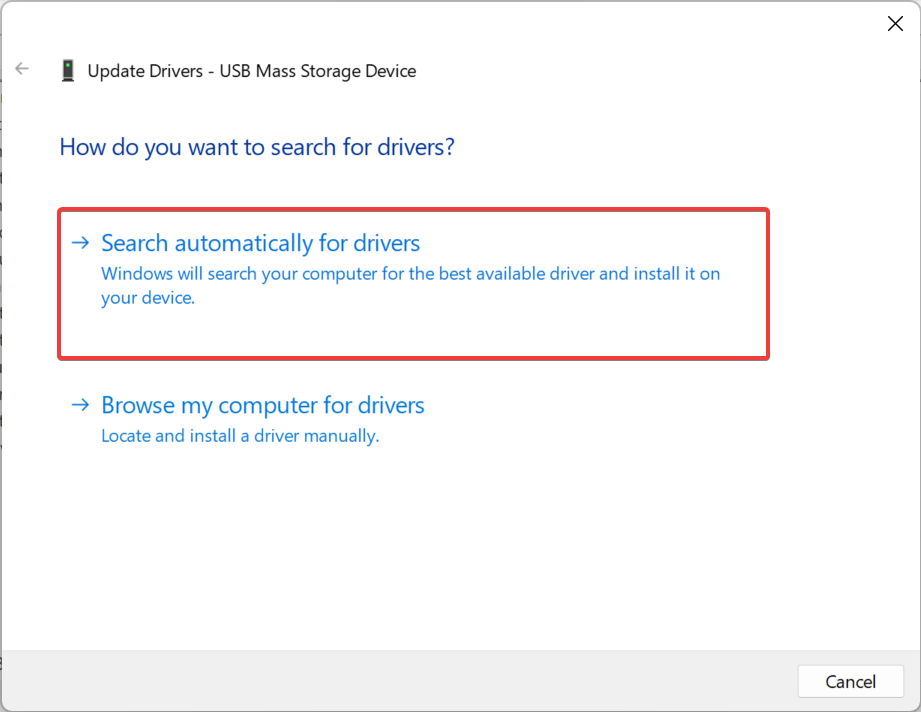
- Select Search automatically for drivers and wait for the installation to complete.
- Once the process completes, restart your PC and then reconnect your Lexar 64GB USB 3.0.
If Windows can’t find a better version, try to manually install the driver for the Lexar USB drive and verify whether it now starts working.
A safer way to deal with updating your USB driver is by choosing a professional driver updater software.
It’s easy to use, reliable, and the best part is yet to come – it is completely automatic, thus you won’t risk any damage to your PC by going through the process manually.
- Download and install the Outbyte Driver Updater app.
- Launch the software and wait for the app to detect all incompatible drivers.
- Now, it will show you a list of all outdated drivers to select the ones to Update or Ignore.
- Click on Update & Apply Selected to download and install the latest versions.
- Restart your PC to ensure the applied changes.

Outbyte Driver Updater
Maintain your device healthy by letting OutByte Driver Updater find the latest driver options.3. Assign a drive letter
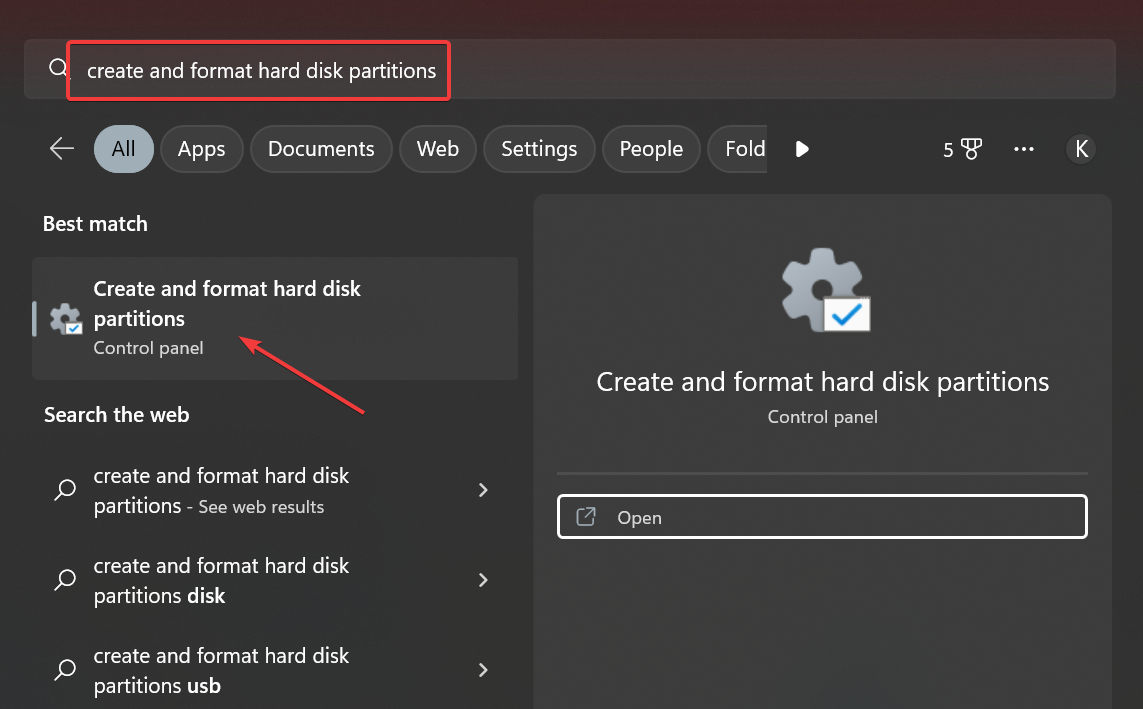
- Press Windows + S to open Search, type Create and format hard disk partitions in the text field, and click on the app from the results.
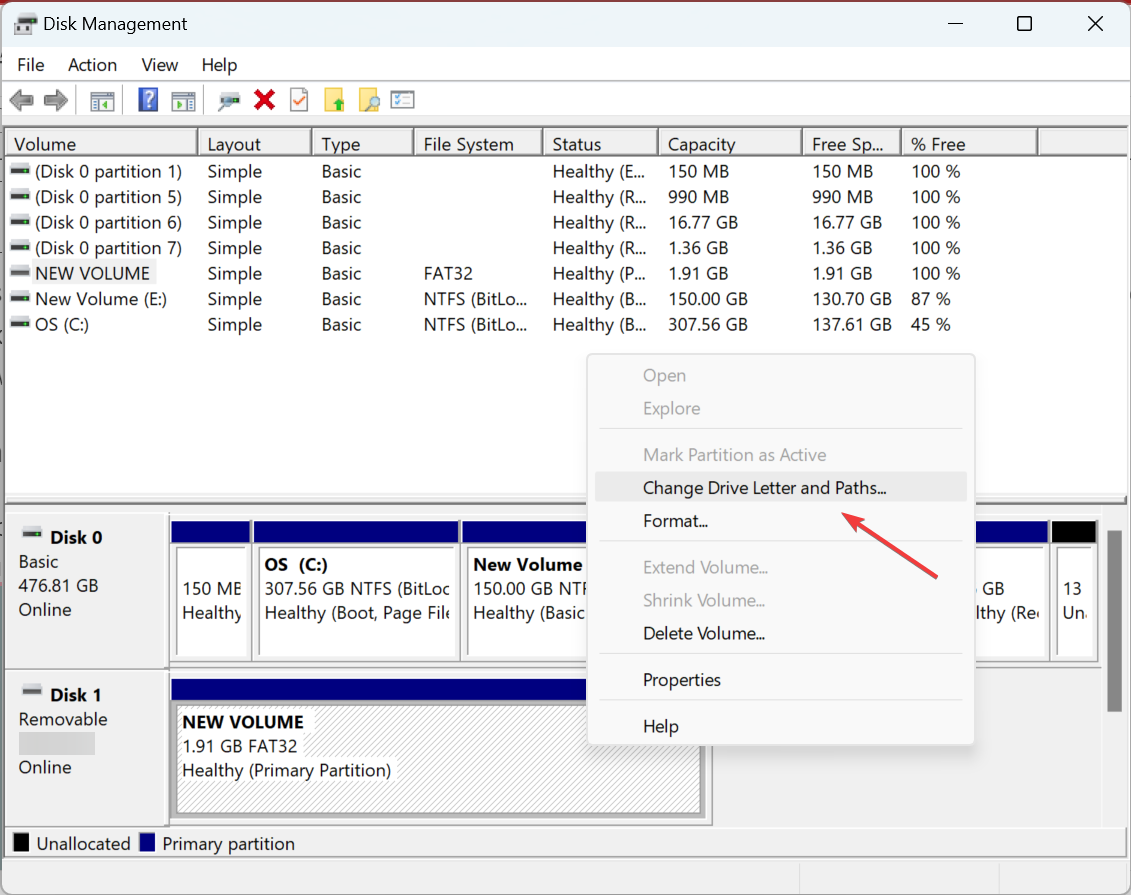
- Now, locate the USB drive, right-click on it, and choose Change Drive Letter and Paths.
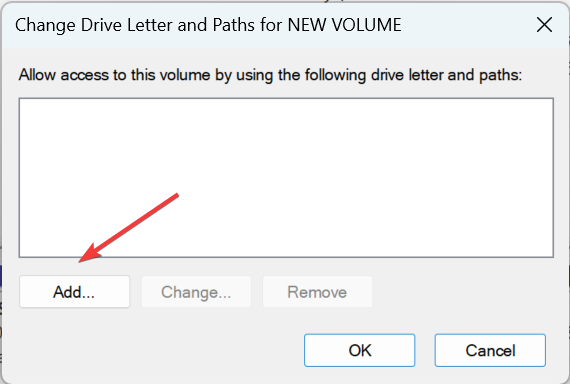
- Click on Add.
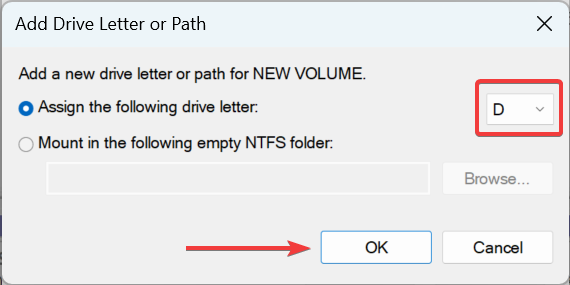
- Next, you can either go with the default drive letter or choose another one from the dropdown menu, and then click OK.
Until a USB drive is assigned a drive letter, it doesn’t show up in File Explorer. Though it would be listed in the Device Manager, which also sometimes helps identify the case. Once you are done assigning a drive letter, check if the Lexar USB is still now working.
4. Change the Power Management settings
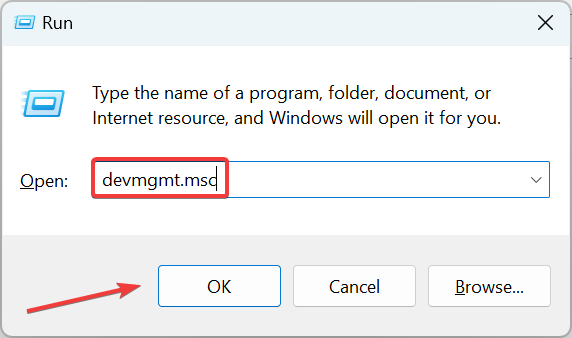
- Press Windows + R to open Run, type devmgmt.msc, and click OK.
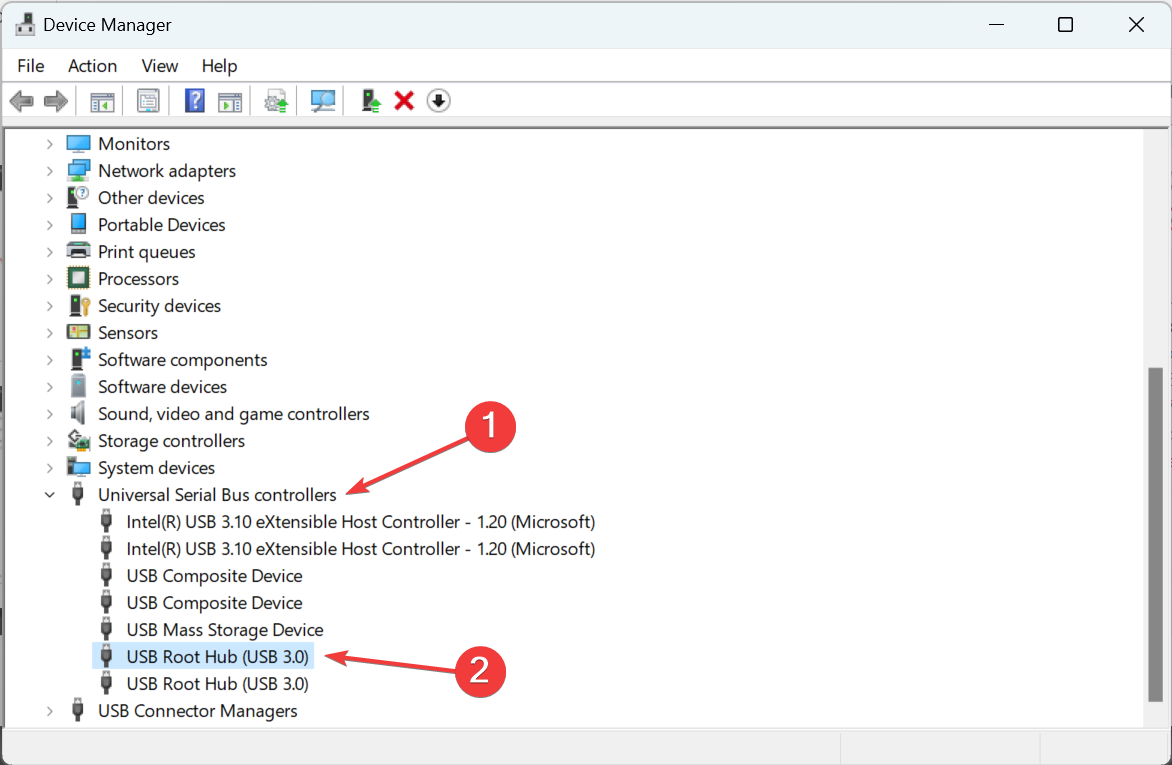
- Expand the Universal Serial Bus controllers category, and double-click on the USB Root Hub device.
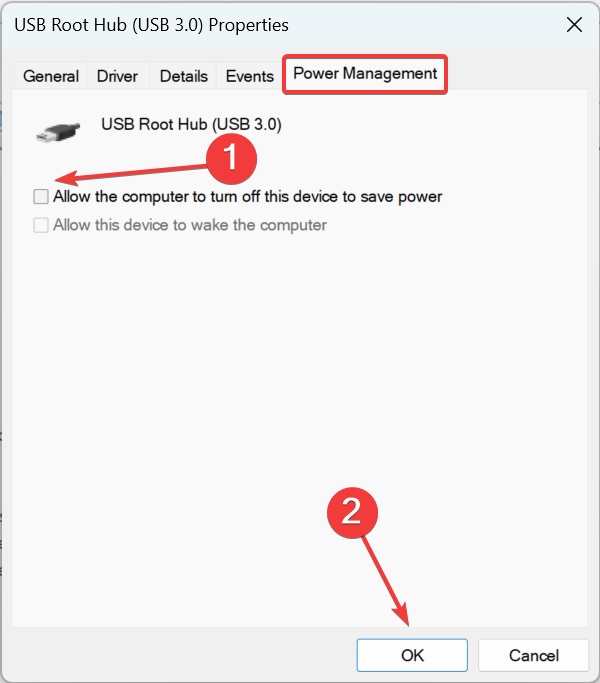
- Navigate to the Power Management tab, untick the checkbox for Allow the computer to turn off this device to save power, and click on OK to save the changes.
- Repeat this for every USB Root Hub from the list.
5. Format your USB flash drive
If all the above methods fail to work, a USB format is required to repair the Lexar 64GB USB 3.0 if it’s not working.
It’s highly recommended that you use a dedicated software to format the flash drive, as there’s simply no room for error when dealing with such a delicate process.
We’ve put our trust in an amazing tool mentioned below as it allows you to quickly and thoroughly format virtually any USB flash drive with your choice of FAT, FAT32, exFAT, or NTFS partition types.
This software will erase all data and delete space on flash drives that cannot be removed in the traditional way, and it will restore your flash drive back to its original storage form.
⇒ Download USB Disk Storage Format Tool
If the Lexar USB is still not working, go ahead and contact Lexar Support. They may be able to help identify hardware malfunctions and provide a resolution for that.
Also, if you were wondering why your Lexar USB keeps flashing, it’s probably because data transfer is underway. If the LED stops blocking, that’s when you have to worry about things.
Besides, before you leave, check the best flash drive file recovery software in case you ever have to retrieve data from one when it’s not accessible.
If you have any queries or know another solution, drop them in the comments section below.

