How to Remove Windows Live Mail Duplicate Folders and Emails
Removing duplicates will save you a lot of space
3 min. read
Updated on
Read our disclosure page to find out how can you help Windows Report sustain the editorial team. Read more
Key notes
- If you remove Windows Live Mail duplicate folders, you will free that necessary space you needed.
- However, check if the time and date of your computer are correctly set.
Microsoft’s now discontinued but popular email client, Windows Live Mail, has an annoying issue that results in the client creating duplicate folders and emails for Sent Items, Drafts, Deleted Items, and Junk Emails.
So, if you’re wondering how to remove Windows Live Mail duplicate folders and emails, then you’ve come to the right place.
This issue occurs because the Windows Live Mail client automatically creates special folders to store emails on the mail server, which leads to duplication issues.
If you are troubled by this issue and want to get rid of duplicate folders and emails, here is how to do it.
How can I remove Live Mail duplicate folders and emails?
1. Manually delete duplicate folders
- Start Windows Live Mail client if not running already.
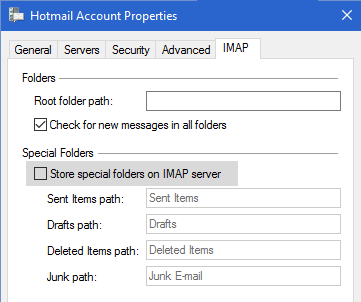
- Right-click on the email account header and select Properties.
- In the Properties window, open the IMAP tab.
- Uncheck Store special folders on IMAP server option under the Special Folders section.
- Click OK to save the changes. You will be prompted to Refresh the folder, click on Yes.
- Windows Live Mail will take a few minutes to download and refreshing the folders list.
- Now that you have disabled the Special Folders feature, it is time to delete the existing duplicate folders manually.
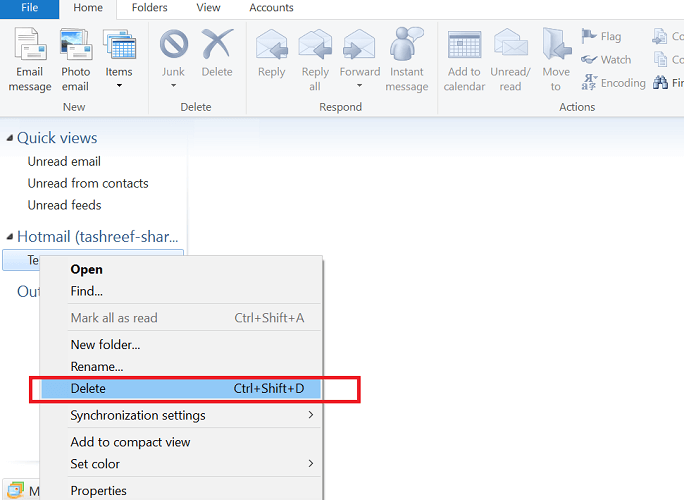
- Under your email account, right-click on each duplicate folder one by one and click on Delete.
- Do it for all the duplicate folders and you are done. Windows Live Mail will not create duplicate folders again until you enable the Special Folder feature again.
2. Check system date and time
- Right-click on the Time and Date option on the Taskbar.
- Select Adjust Time/Date option from the context menu.
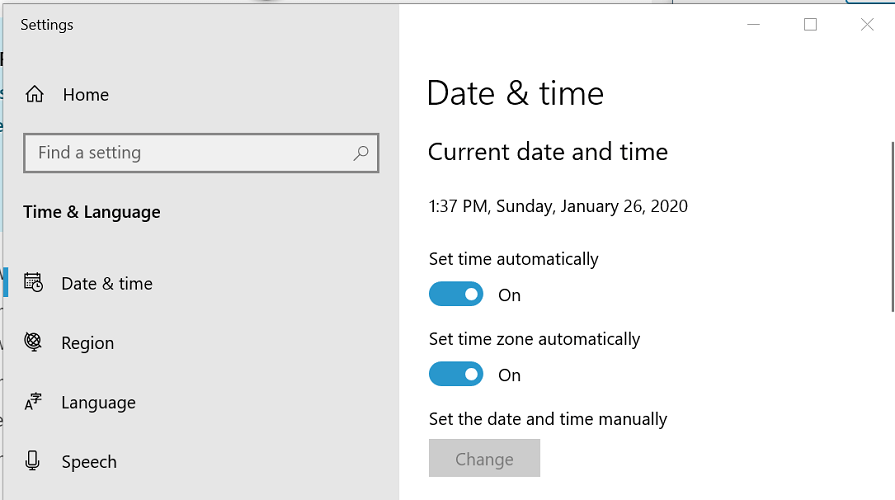
- In the Date and Time window, check if the date and time is set correctly.
- If not, turn off Set time automatically and Set time zone automatically option.
- Click the Change button under Set the date and time manually.
- Click on Change to save the changes.
- Make sure you turn on Set time automatically and Set time zone automatically option again and close the Settings window.
- Start Windows Live Mail and check for any improvements.
3. Manually sort and delete duplicates
3.1 Sort emails
- Make sure Windows Live Mail is closed.
- Open File Explorer and navigate to the following location:
C:Users<your username>AppDataLocalMicrosoftWindows Live Mail - Copy all the files in the location and paste it in a separate folder as a backup.
- Now delete all the files in the Windows Live Mail folder.
- Delete the following Windows Live Mail program related files:
Mail.MSMessageStore
edb.chk
ebd*.txt
edb*.jrs
Mail.pat
oeconfig
RssFeeds XML
tmp.edb
WindowsLiveMail.txt
3.2 Import sorted mail
- Start Windows Live Mail. The app will create all the necessary files and folders that were deleted in the earlier steps.
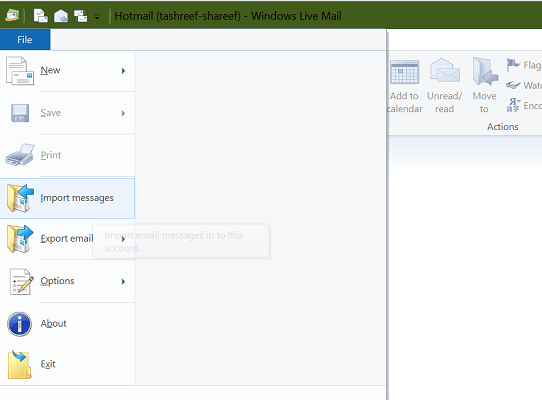
- Click the Tools icon and select Import Messages. Or Click File > Import Messages.
- Select Windows Live Mail in the new window and click Next.
- Click the Browse button and navigate to the Messages folder. Select the folder and click OK.
- Select All folders and then click Next.
- Click Finish to import all the emails.
The Windows Live Mail duplicate folders and email issues occur if you have the Special Folder feature enabled. By following the steps in this article, you can fix the problem with ease.
Don’t forget to leave any other questions or suggestions that you may have in the comments section below.



User forum
0 messages