Lusrmgr.msc: Enable Local User and Group Management
Use the third party tool to enable lusrmgr.msc
Key notes
- The ulsrmgr.msc command lets you access the Local Users and Groups Management interface on Windows pro, edu, and Enterprise editions.
- However, you cannot manage the local users and groups via the lusrmgr.msc command in Windows Home edition.
- A third-party tool, lusrmgr.exe, will let you access a similar console to manage the local users and groups on the Home edition of the OS.

Microsoft offers a shell application Local Users and Groups Management (lusrmgr.msc) for managing the users on local and remote computers. However, this application is not accessible in the Home edition for Windows using the lusrmgr.msc command.
If you are looking for ways to enable local user and group management to manage users and groups, this guide will explain the complete method of doing so.
What is lusrmgr.exe?
Local Users and Groups Management, just like Local Group Policy Editor, is an advanced feature and is only part of Windows Pro, Education, and Enterprise Edition of the operating system.
Hence, if you are a Windows Home Edition user, you will find Local Users and Groups missing. Subsequently, you will need a third-party program known as lusrmgr.exe to manage local users and groups via a console similar to Local Users and Groups Management.
What are the system requirements for lusrmgr.exe?
The minimum system requirements to be able to install lusrmgr.exe are as follows:
- .NET Framework version 4.6 or above
- Operating system Windows Vista/Windows Server 2008 or above
How do I download lusrmgr.exe from GitHub?
- Visit the GitHub lusrmgr.exe download page.

- Scroll down the Code tab and click the Download link in the Download section to download the latest version.
- Once the download is completed, navigate to the download location of the lusrmgr.exe file in File Explorer and double-click to run the program.
- Click Yes on the User Action Control prompt to allow the application to make changes on the computer.
When the Lusrmgr application launches successfully, you will see that it resembles the Local Users and Groups Management interface that is accessible via the lusrmgr.msc command.
How do I manage local users on Windows Home edition using lusrmgr.exe?
1. Create a new user account using Lusrmgr.exe
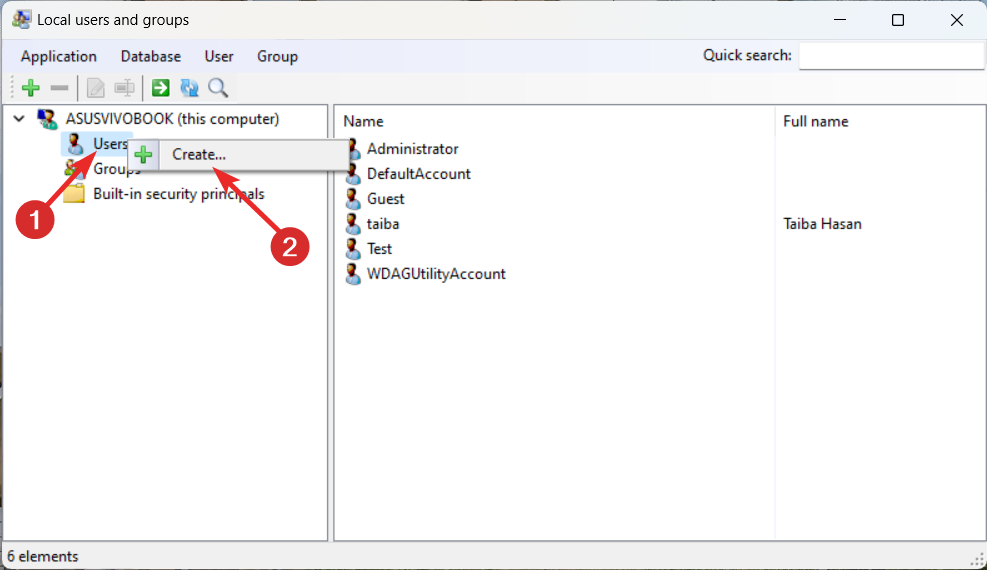
- Press the Windows key, type lusrmgr in the search bar, and click the Run as administrator option in the search results.

- Right-click the Users option in the left sidebar and select Create from the context menu.
- Assign Username, set the Password, and Confirm the password in the relevant fields.
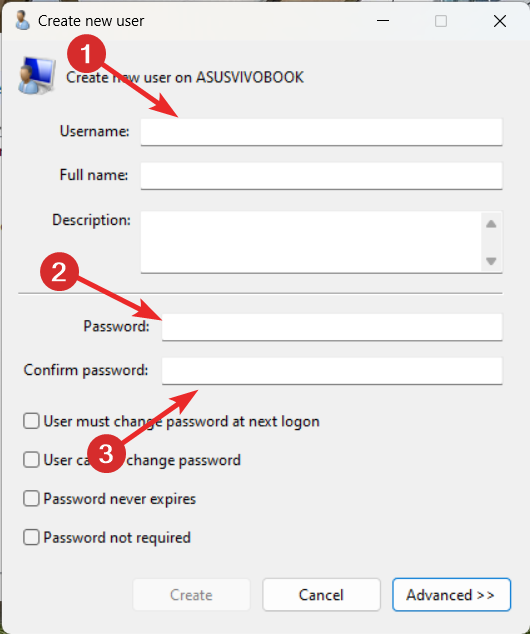
- Click the Advanced button to access the advanced settings and configure the local path, remote path, and account expiration date, if necessary.
- Press the Create button after assigning the necessary fields to create a new user account.
Creating a new user account is a straightforward process using the Lusrmgr.exe tool a replacement for lusrmgr.msc on Windows Home Edition. It’s worth noting you can configure the logon times of the user and account expiration details using this third-party workaround.
2. Manage user accounts using lusrmgr.exe
1. Change the user password
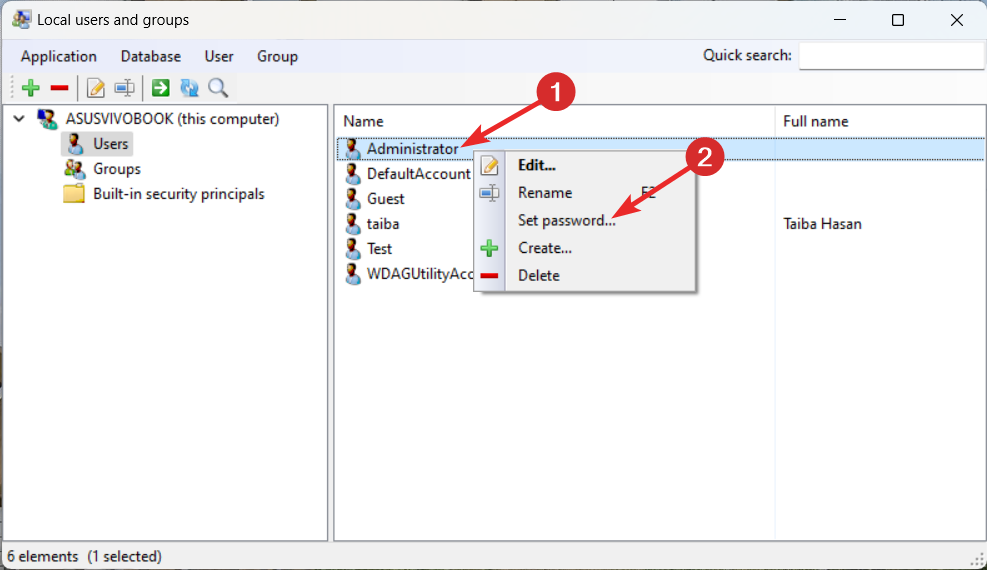
- Launch the lusrmgr.exe tool on Windows PC and select the User option from the left navigation bar.
- Right-click the user name for which you want to change the password, and select Set Password.
- In the popup window that opens, enter the new password twice in the New password and Confirm password fields.

- Press the OK button to save the changes.
2. Delete the user account
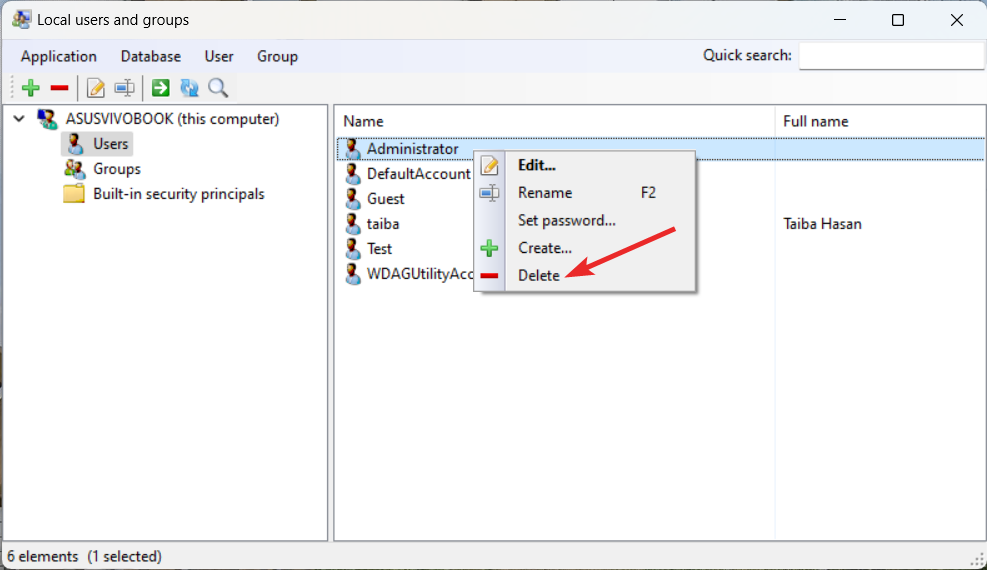
- Launch Lusrmgr on your Windows PC and switch to the User from the left navigation bar.
- Right-click the user account you want to delete, and select Delete from the context menu.
- Press the Delete button on the confirmation popup to permanently delete the user account.
Apart from changing the password and deleting the user account, you can also change the user settings like user name and group membership, prevent the user from changing the password, and even set the password expiration date.
How do I manage groups on Windows Home edition?
1. Create a new group using lusrmgr
- Press the Windows key, type lusrmgr in the search bar, and click Run as administrator from the results section.

- Switch to the Groups section from the left navigation pane, right-click it, and select the Create option.

- Assign a relevant Group name in the new window that opens and click the + icon to add a user to the newly created group.
- Choose the user you need to add to the group and press the Select button.
- Finally, press the Create group button to create a new user group on your PC.
2. Add or remove a user from the group
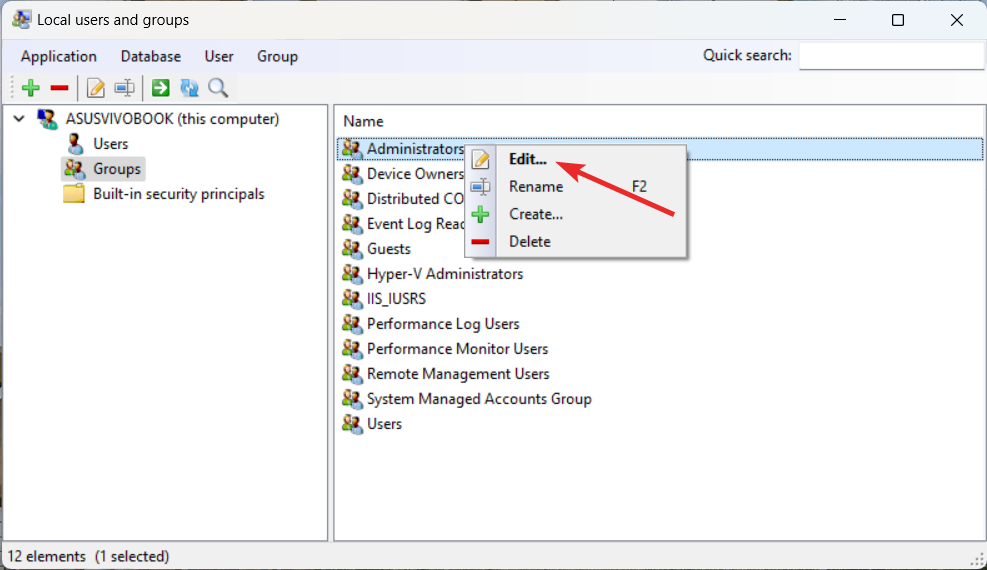
- Launch the Lusrmgr tool on Windows PC and select the Groups option from the left navigation pane.
- In the right section of the window, right-click the group name from which you want to add or remove a user account and select the Edit option.
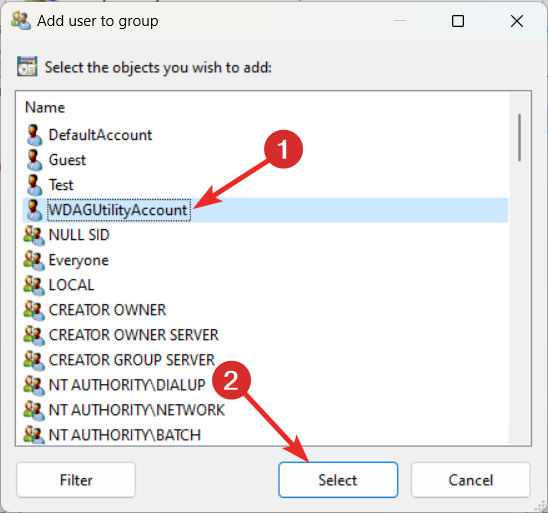
- Press the + icon located at the bottom to add a user.
- Choose the user you wish to add from the new popup that opens and press the Select button.
- You can press the Filter button and then choose one out of the two options – Show users or Show built-in security principals based on your preference.
- To delete a user from a specific group, simply select that user account and press the – icon.
That’s pretty much it! Hopefully, you now have a pretty good idea about how you can enable and use the Local User and Group Management using the lusrmgr tool on a Windows Home edition PC.
Refer to this guide in case you are curious to enable and use the group policy editor on Windows Home edition.
In case you have any queries or feedback for us, feel free to reach out in the comments section.
Read our disclosure page to find out how can you help Windows Report sustain the editorial team. Read more


Improve this guide


User forum
0 messages