Miracast for Windows 11: How to Install & Set Up
Miracast can be easily installed as an optional feature on Windows
3 min. read
Updated on
Read our disclosure page to find out how can you help Windows Report sustain the editorial team. Read more
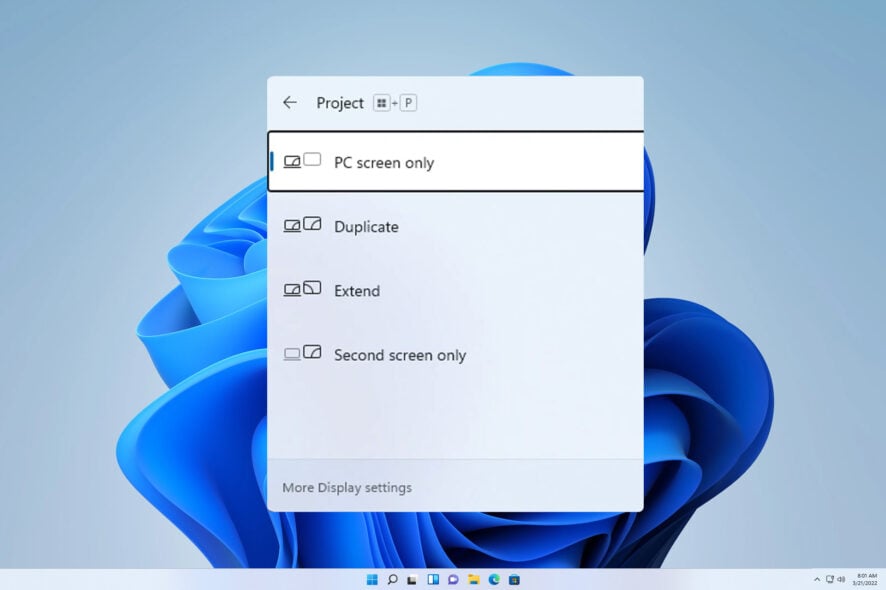
If your devices are compatible with Miracast, you can easily download and use it on your Windows 11 PC. Today we’ll walk you through the whole process: from checking compatibility to downloading the drivers and projection methods.
How do I add Miracast to Windows 11?
1. Check to see if your PC supports Miracast
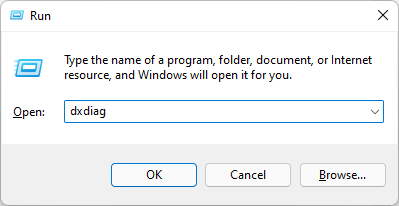
- First, press Windows + R keys to open the Run dialog box on your computer.
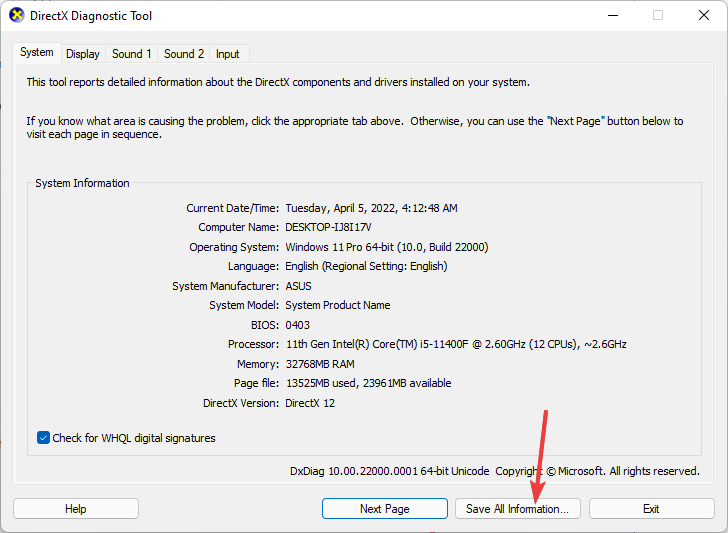
- Type dxdiag in the box, and hit Enter to open DirectX Diagnostic Tool.
- Wait for it to finish analyzing your PC.
- Then, click on Save All Information.
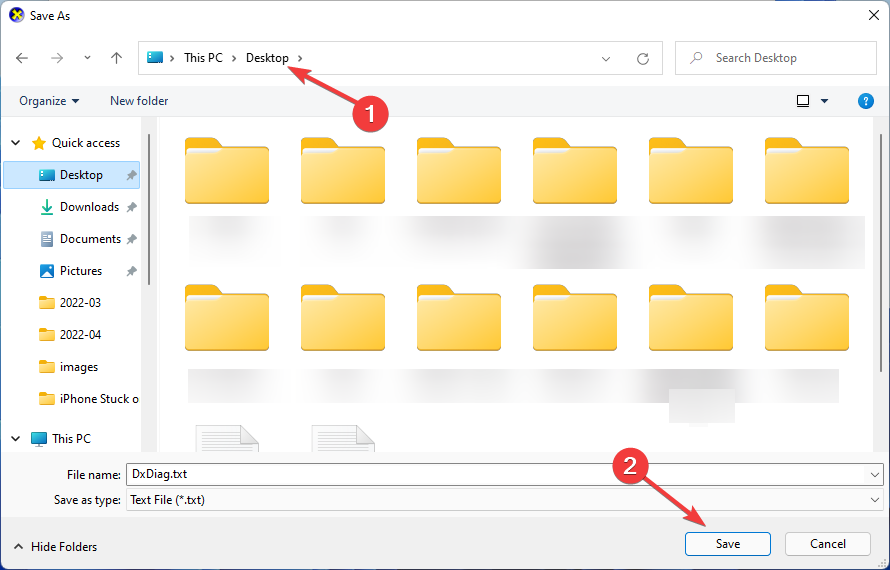
- Following that, choose the location you want to save the information. Select Desktop for more comfort, and click on Save to save the file.
- Open the text file with the text editor of your choice, e.g., Notepad.
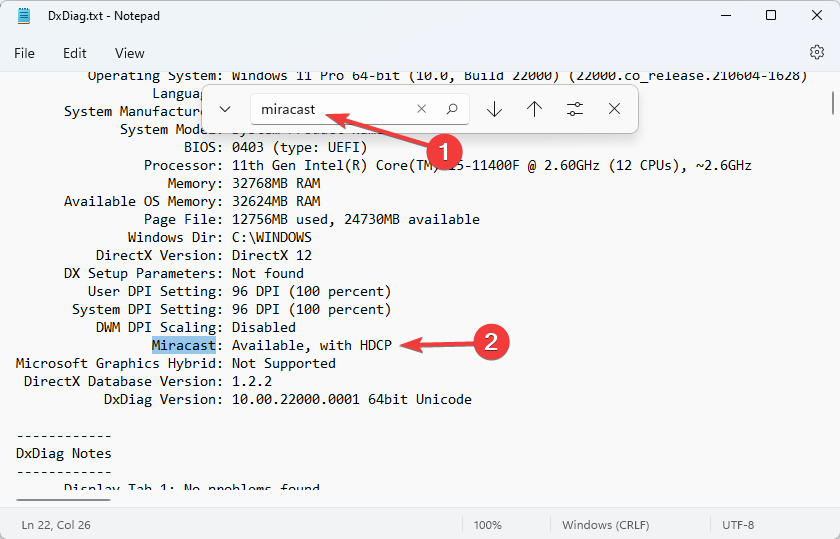
- Press Ctrl + F and type Miracast to see if it is available.
Although there are a few ways to check for Miracast’s availability, this method is the most convenient to see if your PC supports this feature.
2. Get the Latest Miracast Drivers
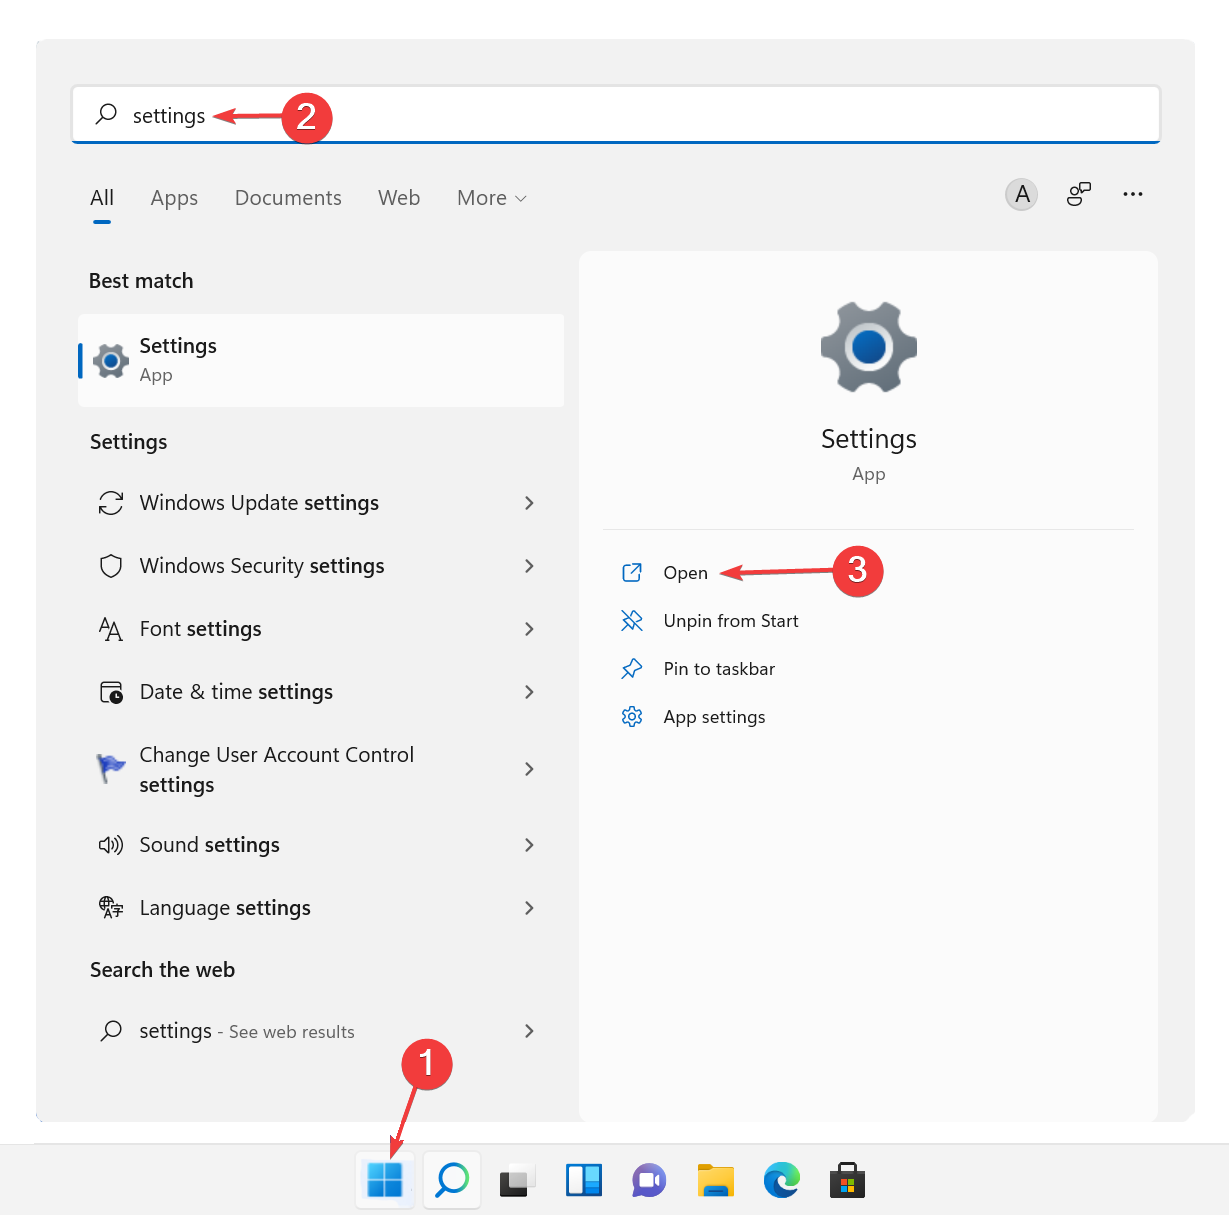
- Search for Settings in the Start Menu and open it.
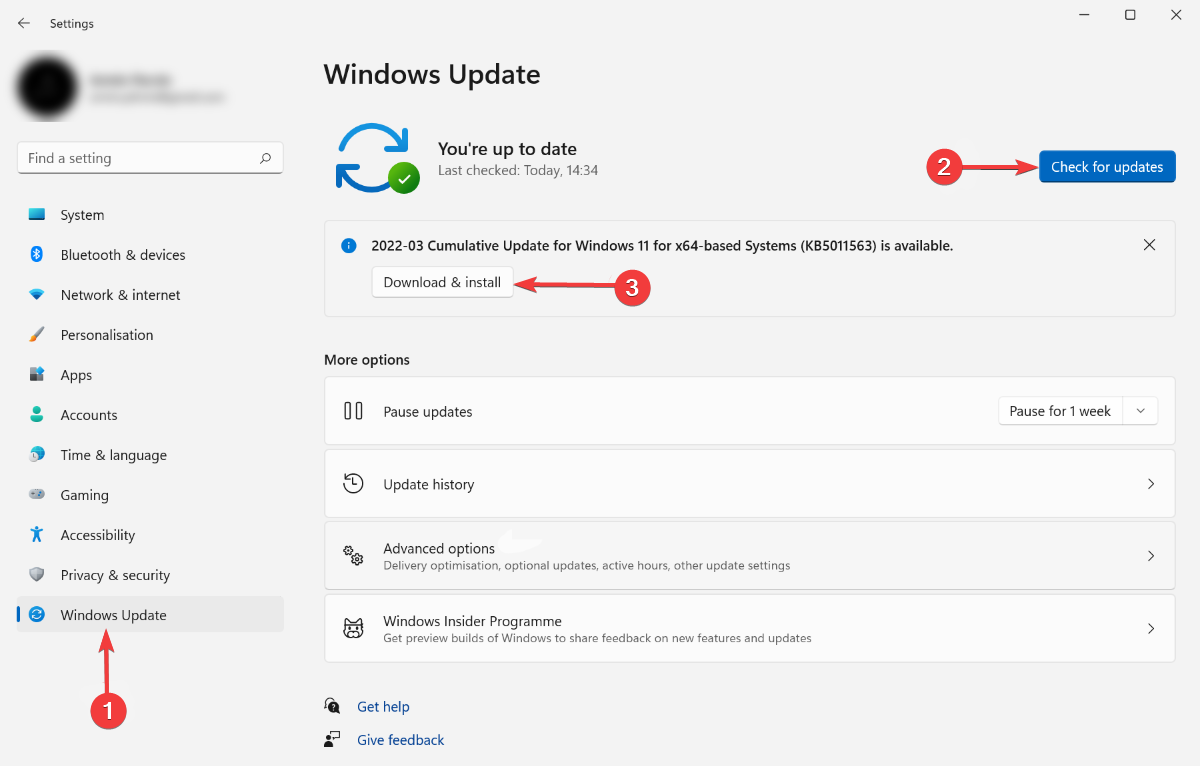
- After that, click on Windows Update on the left-hand panel, then on Check for Updates, and finally on Download and Install.
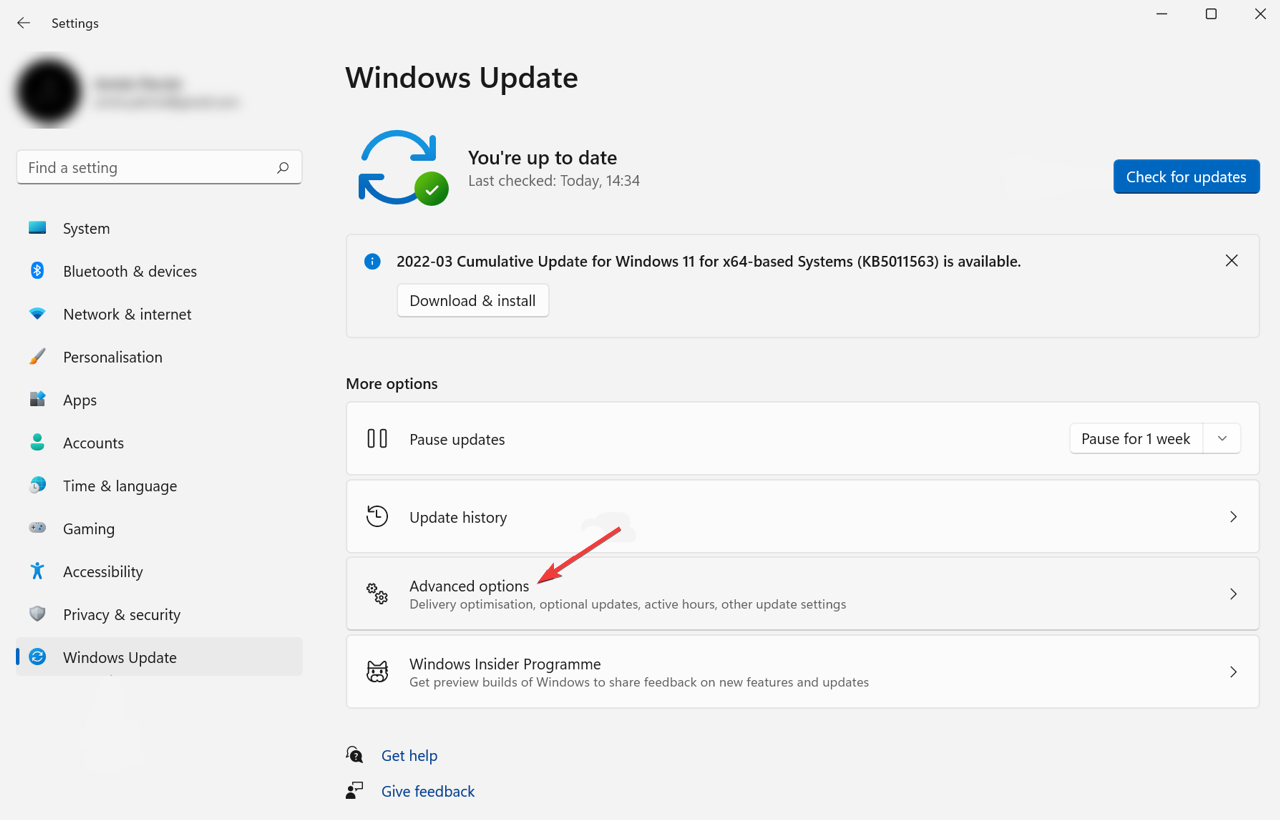
- Click on Advanced Options, then head over to Optional Updates, and download and install them as well.
- Restart your computer afterward.
If using the Device Manager looks like too much trouble, you can alternatively install them using PC HelpSoft Driver Updater. This tool automates the task so there’s no effort on your end.
If your display does not support Miracast, you can use USB transmitters such as Actiontec ScreenBeam USB Transmitter to cast your screen on your TV.
3. Wirelessly Project Your Windows 11 to an HDTV
- Plug in the Miracast adapter into your TV’s HDMI port.
- Select the right HDMI channel on your TV.
- Press Windows + I keys to open Settings.
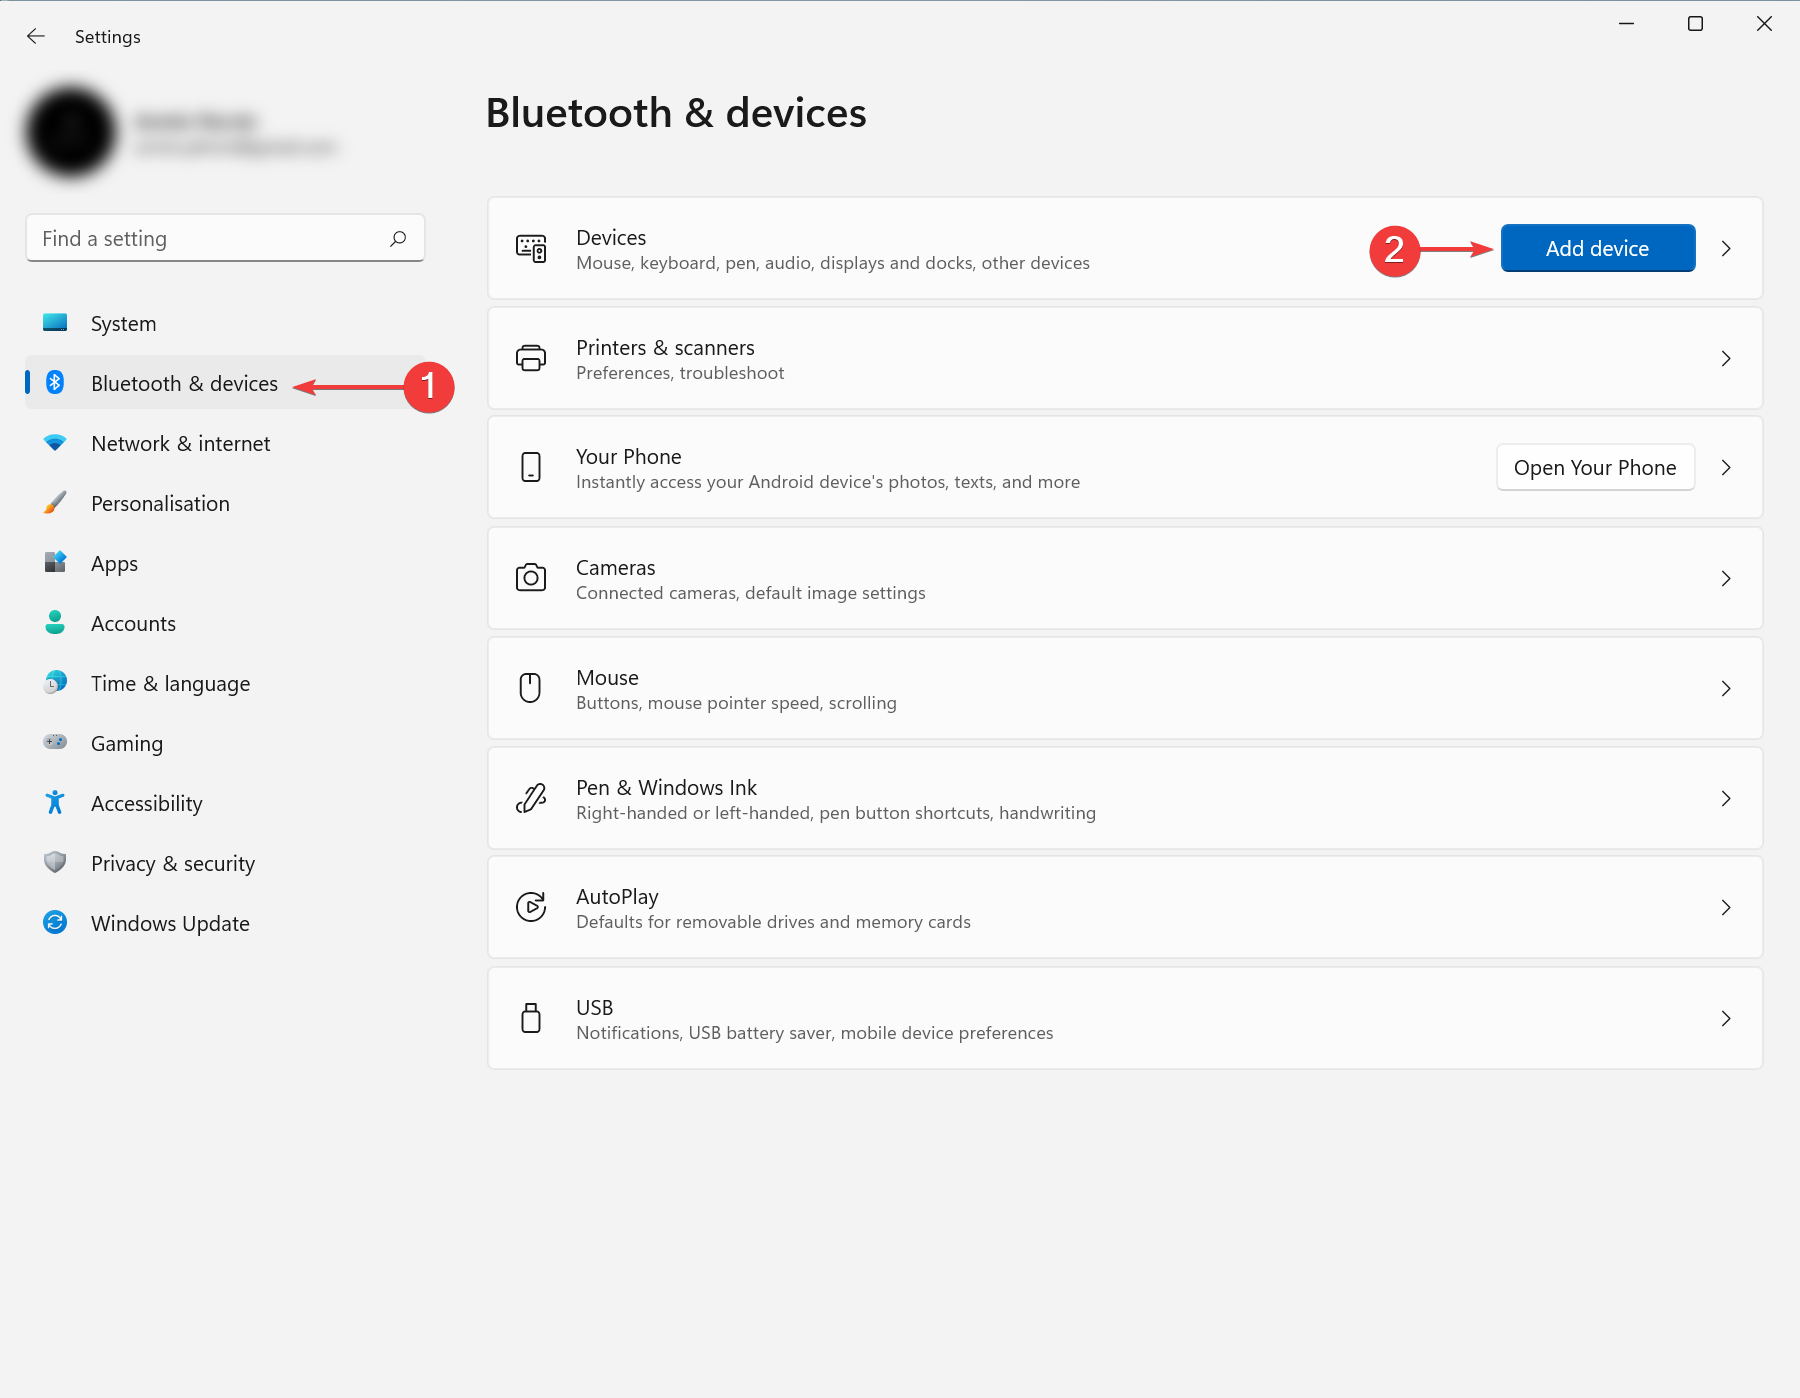
- Select Bluetooth & Devices on the left-side panel, then click on Add Device.
- Your Windows 11 PC will now look for new displays within the range.
- Choose your TV from the list of devices that appear. If you are using a Miracast adapter, click on it.
What should I know after downloading Miracast for Windows 11?
Another benefit of using Miracast is securing your connection with WPA2 encryption. As a result, you do not need to worry about the privacy of your protected/private content.
If your graphics card does not support Miracast, check our article. You can verify Miracast compatibility with your graphics card.
Also, if you face other issues, you might need to try reinstalling your network drivers.
Why doesn’t my computer support Miracast?
- You don’t have a Miracast adapter on your PC. Many PCs and TVs don’t have this adapter built-in, so you’ll need to purchase them separately.
- Miracast isn’t properly installed on your PC.
- Issues with the network connection.
Furthermore, you may have forgotten to turn on your Wi-Fi, or your adapter may not be connected.
Sometimes, the issue can be resolved by unplugging and replugging the adapter and restarting your devices.



User forum
0 messages