FIX: No items match your search in Windows 10/11 File Explorer
![]() 5 min. read
5 min. read
![]() Updated on
Updated on
Share this article

Improve this guide
Read our disclosure page to find out how can you help Windows Report sustain the editorial team Read more

The File Explorer search tool should find the vast majority of files and folders searched for providing that you enter clear and specific keywords. Yet, File Explorer’s search results might still state “no items match your search” for some users even when they are entering specific keywords for files and folders that are saved on HDDs.
If Explorer isn’t finding files and folders that you’re sure are saved on HDD, you might need to fix its search tool. This is how you can fix the File Explorer search tool when it isn’t working in Windows 10.
How to Fix File Explorer’s Search Tool
- Open the Search and Indexing Troubleshooter
- Restart Cortana
- Check Your Indexed Locations
- Rebuild the Search Index
- Check the Windows Search Service is Enabled
- Select the Always Search File Names and Contents Option
- Select the Allow Indexing Service Option
1. Open the Search and Indexing Troubleshooter
- Windows 10 includes a Search and Indexing troubleshooter that you can utilize to fix the File Explorer search tool. To open that troubleshooter, press the Windows key + X hotkey and select to open Settings.
- Enter the keyword ‘troubleshoot’ in the Settings app’s search box, and select Troubleshoot to open a list of troubleshooters.
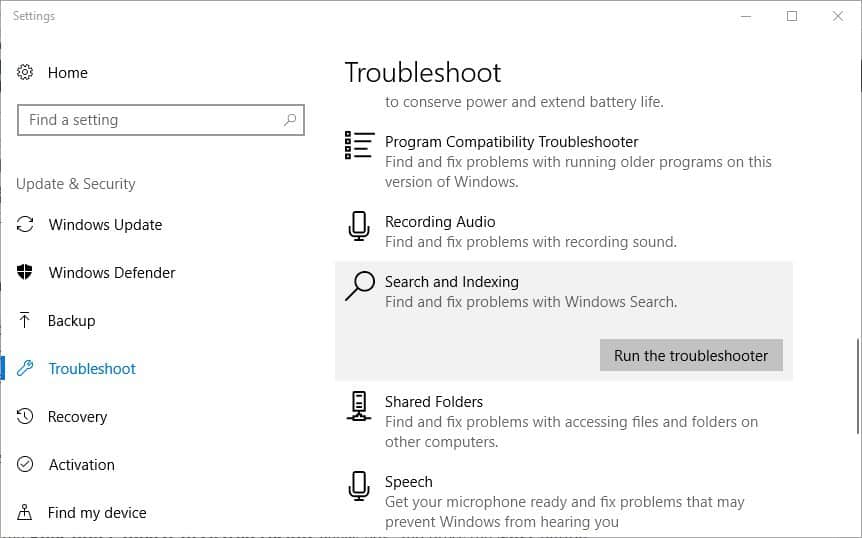
- Select Search and Indexing and press the Run the troubleshooter button to open the window in the image below.
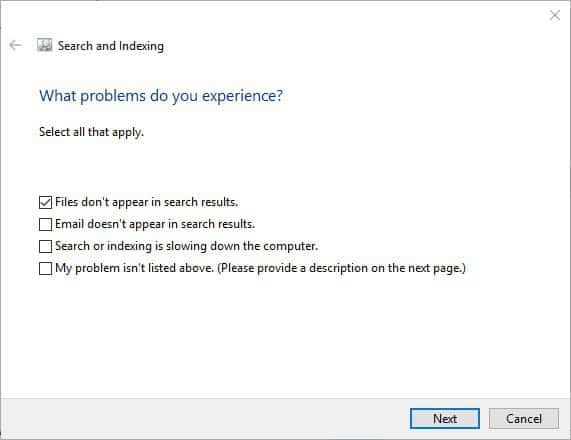
- Then select the Files don’t appear in search results check box, and press the Next button.
2. Restart Cortana
- Some users have found that restarting Cortana, which powers search in Windows 10, can fix numerous search issues. You can do that by right-clicking the Taskbar and selecting Task Manager.
- Select the Processes tab in Task Manager.
- Select Cortana under Background Processes.
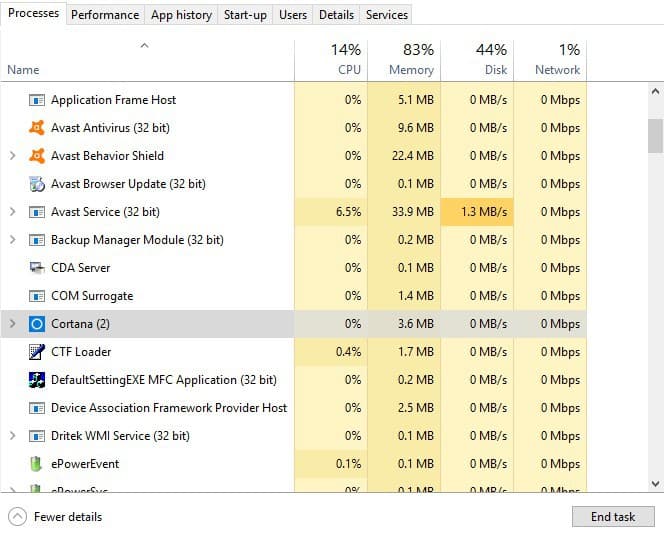
- Then press the End Task button to restart Cortana.
3. Check Your Indexed Locations
- File Explorer searches for files in indexed folder locations. So it might be the case that you need to add a few folders to the indexed locations. This is how you can check indexed locations in Windows 10.
- Press the Windows key + R, enter ‘Control Panel’ in the Open text box and click OK to open the Control Panel.
- Click Indexing Options to open the window in the shot below.

- Press the Modify button to open the Indexed Locations window.
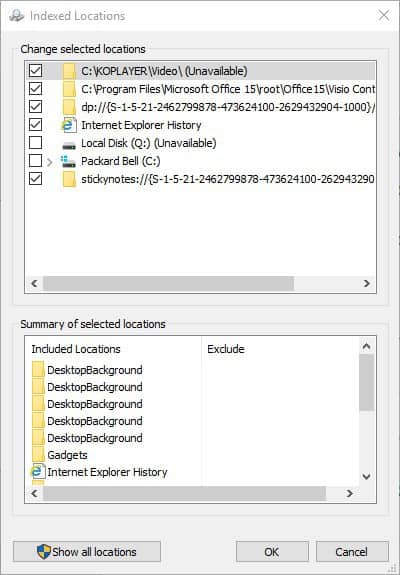
- Then click the C: drive there to expand folders.
- Select the folders that you need to add to indexed locations.
- Press the OK button to index the newly selected folders.
4. Rebuild the Search Index
File search errors are often due to corrupted search index. As such, rebuilding the index is one of the best resolutions for fixing the File Explorer and Cortana search tools. You can rebuild the search index as follows.
- Open Indexing Options as outlined above.
- Press the Advanced button to open the window shown directly below.
- Press the Rebuild button on the Index Settings tab.
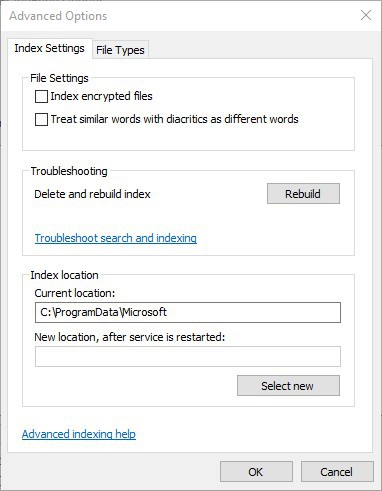
- A Rebuild Index dialog box window will open. Click the OK button on that window to confirm.
5. Check the Windows Search Service is Enabled
The Windows Search service provides content indexing. So you might need to switch that service on, if it’s disabled, to fix the File Explorer search tool. You can check the Windows Search service status as follows.
- Press the Windows key + X hotkey.
- Click Run to open the Run accessory.
- Input ‘services.msc’ in the Open text box, and press the OK button.
- Double-click Windows Search on the Services window.
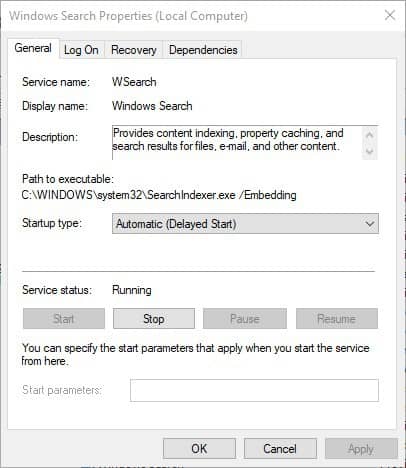
- Select Automatic from the Startup type drop-down menu.
- Press the Start button if Windows Search is not running.
- Click the Apply and OK options to close the window.
- If Windows Search is already running, restart the service by right-clicking Windows Search and selecting Restart.
6. Select the Always Search File Names and Contents Option
File Explorer’s Always search file names and contents option is not one selected by default. However, selecting that option will ensure that the File Explorer search utility will always search file names and contents when searching non-indexed locations. You can select that option in Windows 10 as follows.
- Press the File Explorer on the Windows 10 taskbar.
- Select the View tab.
- Press the Options button, and select Change folder and search options on the menu.
- Then click the Search tab shown in the shot directly below.
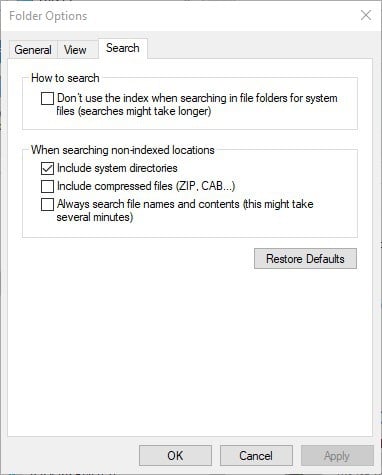
- There you can select the Always search file names and contents option.
- Press the Apply button.
7. Select the Allow Indexing Service Option
If the File Explorer search tool doesn’t find any files or folders on a USB drive, you might need to select the Allow files on this drive to have contents indexed option for the USB storage device. That option should already be selected for the C: drive. This is how you can select the Allow files on this drive to have contents indexed option.
- First, insert your USB flash storage device into a USB slot.
- Open File Explorer in Windows 10.
- Click This PC on the left of File Explorer.
- Right-click the USB drive and select Properties to open the window shown below.

- Select the Allow files on this drive to have contents indexed.
- Then click the Apply and OK buttons to confirm the newly selected option.
Apart from these options, we recommend using professional third-party software with built-in character recognition technology that can help you find the data you’re searching for within seconds.
This type of tool creates an initial index of your hard disk and gives an easy-to-use search interface that returns results immediately after you enter your term.
The results are organized by file type, and they contain image thumbnails for image matches as well as highlighted keywords in the document preview.
Those are a few of the resolutions that might fix File Explorer’s search tool so that it doesn’t return “no items match your search” in its search results for saved files. Remember that there are numerous third-party search tool software that you can also utilize for searches, and some of those utilities might be better than File Explorer’s search box.