5 Quick Ways to Turn off Indexing in Windows 10
Follow the steps below to successfully disable Windows indexing
Key notes
- By turning on specific components of the index service, you can speed up file searches in Windows 10&11.
- Turning indexing off may be a good idea if you seldom use search, have a slow CPU, and use an SSD.
- Follow the steps below to find out how to turn off indexing in Windows 10/11 quickly.

First, let us say that this post doesn’t refer to the Windows Experience Index but rather to the indexing feature in Windows 10/11, which is related to file search. Then, we’ll briefly go through its features and explain how to enable or disable it.
For those who don’t know what exactly indexing does in Windows 10/11, here’s a short explanation: by turning on specific components of the index service, you can speed up file searches, or you can choose to disable it, in case you suspect it might be the culprit for your computer’s slow performance.
To access the indexing options service in Windows 10/11, open the search bar or press the Windows key and W together. Then, just type indexing there, and you will find it.
What is Search indexing in Windows 10?
The search indexing feature of Windows 10 aims to make it easier to discover files on your computer by creating an index of your files.
It’s similar to the index found at the end of a vast book; it makes it much easier and quicker to discover what you’re looking for since Windows doesn’t have to go through each file.
Indexing files are somewhat important, and in this article we’re going to cover the following topics:
- What is file indexing – Indexing is a built-in feature of Windows that allows you to quickly and easily find specific files or applications.
- Indexing options Windows 10 – Indexing is a customizable feature, and in this article we are going to show you how to change basic indexing options.
- Indexing windows 10 SSD – File Indexing fully supports SSDs, and in this article we are going to show you how to index your entire drive.
- Windows indexing external hard drives, removable drives – Indexing fully supports external hard drives and removable drives so you can easily index files on any removable storage device.
- Windows indexing exclude – As we mentioned, Windows Indexing supports customization, and you can easily exclude any directory from being indexed. This is rather useful if you have a directory or a drive that you rarely access.
- Windows indexing rebuild, repair, reset – Sometimes your index can get corrupted and that can negatively impact your performance. However, you can easily repair your index with just a few clicks.
- Windows indexing turns off, and on – Some users want to completely disable Windows Indexing. There are a few ways to do that, and we’re going to cover them all in this article.
- Windows indexing file contents – Indexing also allows you to index file contents. This is rather useful iyou’rere working with text files and you need to find a file that has a specific word in it.
- Speed up indexing windows 10
- Turn off indexing windows 10 SSD
Should I turn off indexing in Windows 10?
Windows will take more time to search for files without an index if the files are stored on a hard drive, which is sluggish to read.
In addition, if you have a powerful central processing unit, you won’t need to be concerned with continual background indexing.
If, on the other hand, you don’t use search very often, have a slow CPU, and are working with an SSD, turning indexing off could be a smart option for you.
How can I enable or disable indexing in Windows 10?
1. Disable the Windows Search service
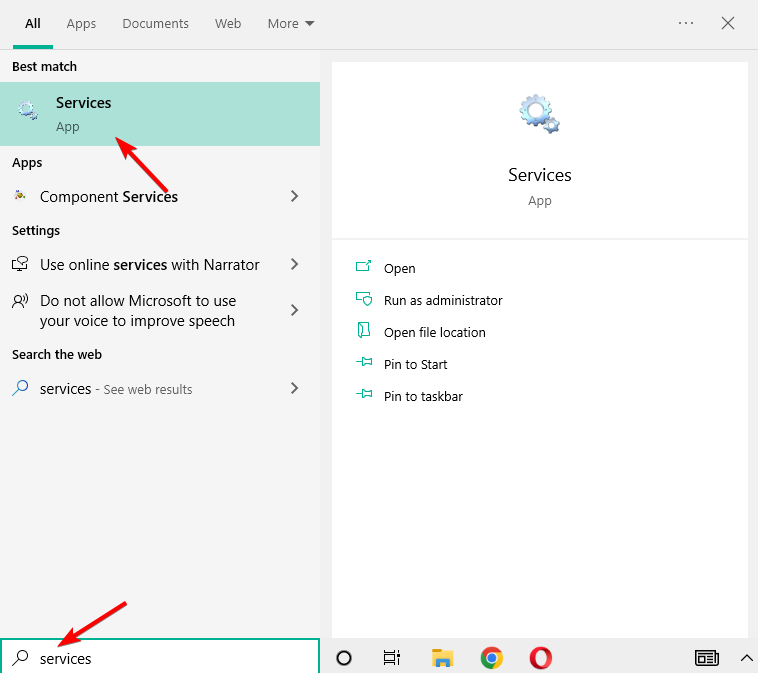
- Press the Windows key then input services inside the search bar and open the first result.
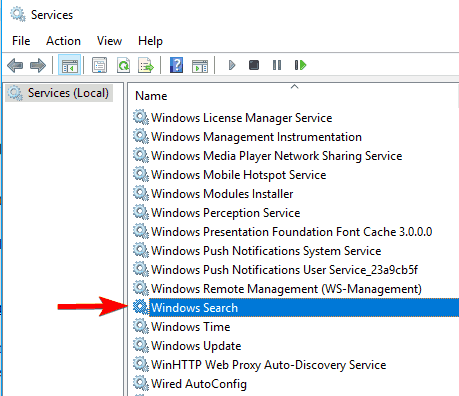
- Find the Windows Search service and double-click it.
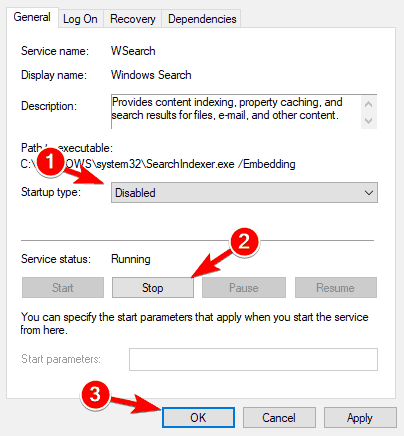
- Find Startup type: and select Disable from the pull-down menu. Now click the Stop button to stop the service. Finally, click the OK button to save the changes.
- Now restart your PC. If you are using SSD, this will turn off SSD indexing in Windows 10/11.
After your PC restarts, the Windows Indexing feature should be completely disabled on your PC. To turn it back on, undo the changes you made in this solution.
As you can see, Windows Search is responsible for content indexing, property caching, and search results for files, emails, and other content.
So, by enabling or disabling it, you will turn on or turn off the features mentioned above. You can easily stop or restart the service, in case you have problems with it.
If you’re dealing with the Windows Search Indexer’s high CPU utilization, you can fix it by following our guide.
2. Turn off Indexing using Command Prompt
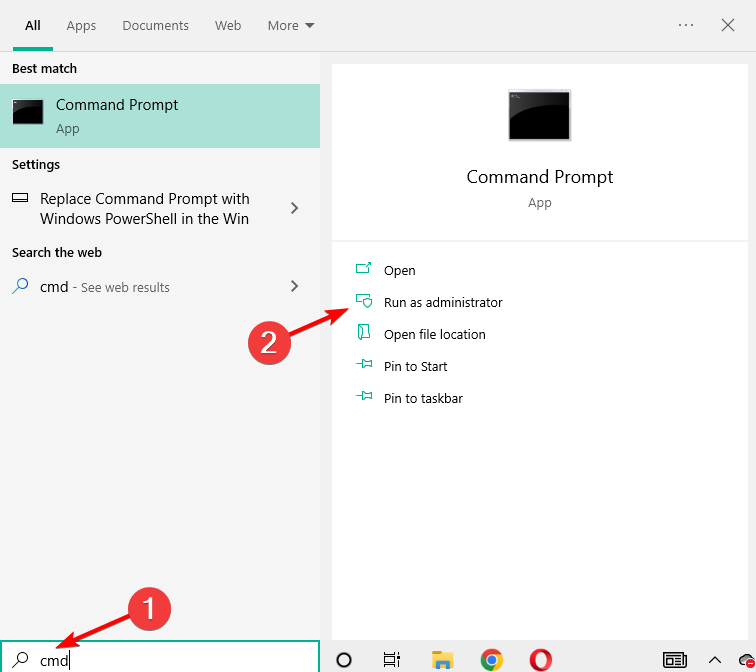
- Press Windows then type cmd and choose the Run as administrator option from the right side.
- When Command Prompt opens, you need to enter the following command and press Enter to run it:
sc stop "wsearch" && sc config "wsearch" start=disabled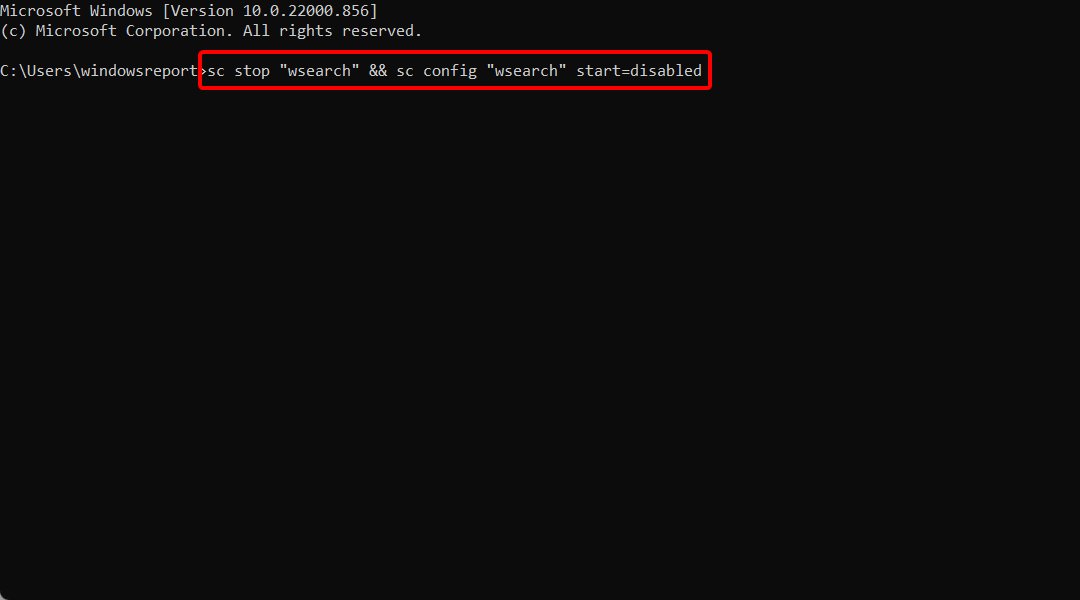
- To enable Indexing, you just have to use:
sc config "wsearch" start=delayed-auto && sc start "wsearch"
After doing that you’ll stop the Windows Search service instantly and the Indexing feature should be disabled.
As you can see, this is a fast and simple way to disable Indexing, so if you’re an advanced user and you want to disable this feature quickly, be sure to try this method.
If you are having issues accessing Command Prompt as an admin, then you should check out our guide on how to fix it.
3. Change Indexing options
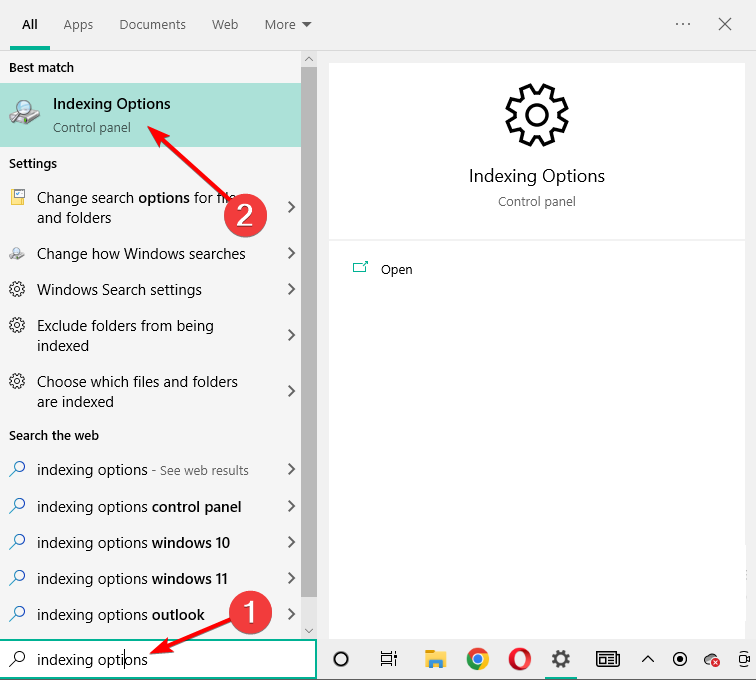
- Press Windows then type indexing options and click the top result to open it.
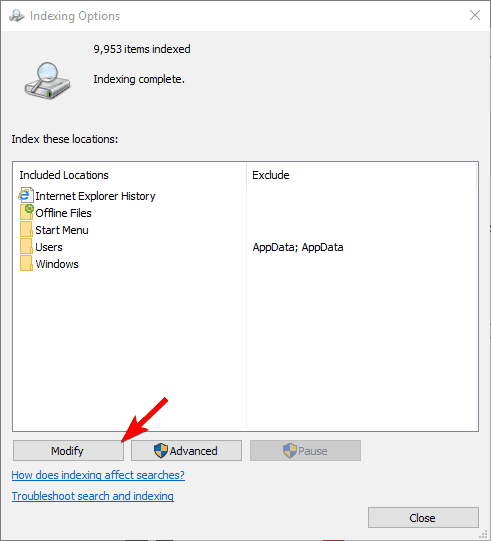
- Now, you’llll see the list of indexed locations. Click the Modify button.
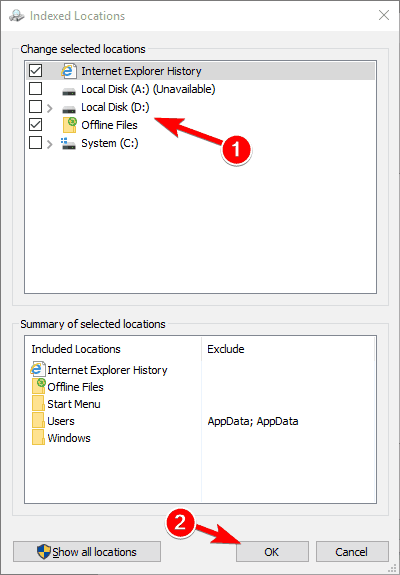
- Uncheck the locations that you don’t want to index and click OK to save changes. If needed, you can also check a new location from the file tree to add it to your index.
If you want to change your indexing options, you can choose which locations you want to index. By disabling certain locations from indexing, you might improve your performance.
By doing this you can optimize your PC and improve your performance by disabling indexing for the directories that you rarely use.
4. Turn off Indexing for a specific partition
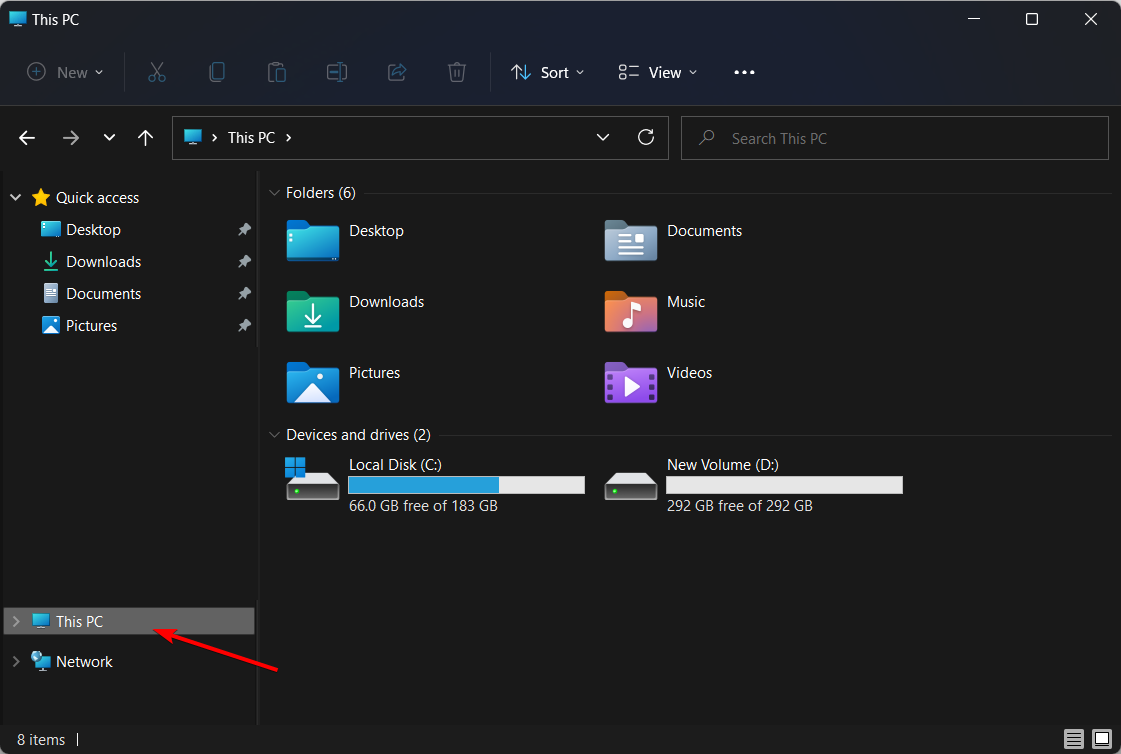
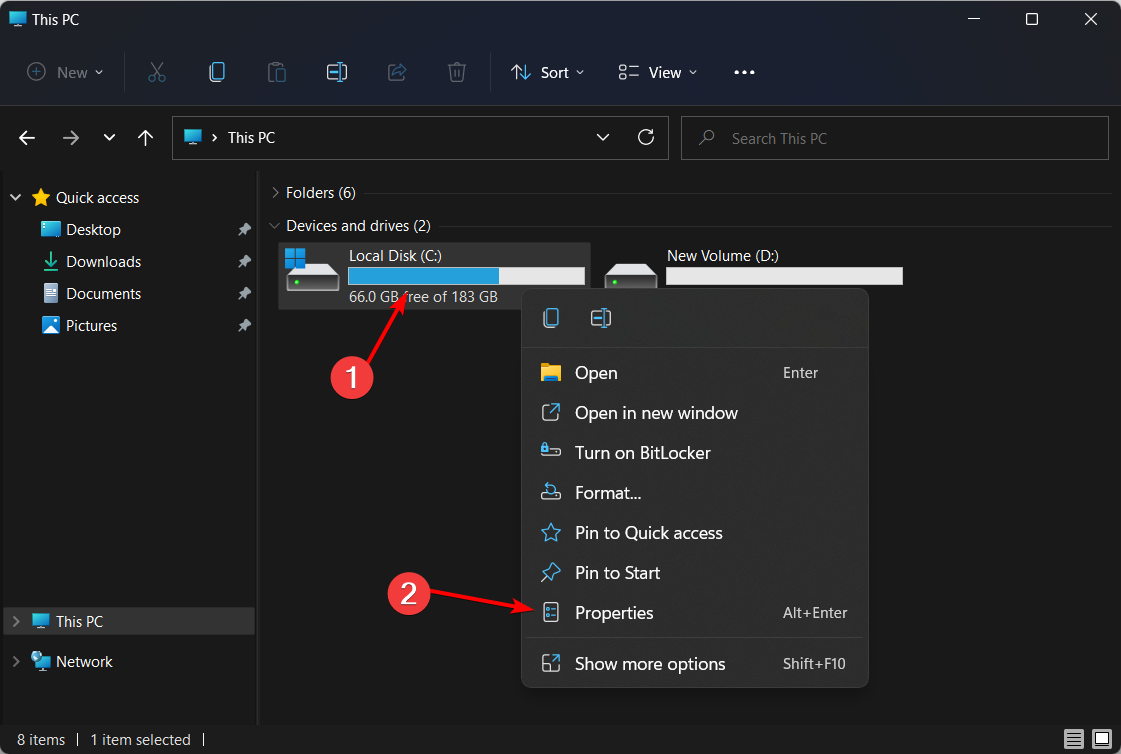
- Open File Explorer by pressing Windows + E, followed by This PC, and locate your hard drive. Right-click the desired drive and choose Properties from the menu.

- When the Properties window opens, navigate to the General tab. Now uncheck Allow files on this drive to have context indexed. Click OK to save the changes made.

- After doing that, you’ll get a confirmation dialog asking you to change these settings only for the root directory or for all subdirectories on the drive. Choose the desired option and click on OK.
If you want to improve your performance, you can disable indexing for an entire partition or hard drive. After doing that, your partition and files on it will be indexed and you’ll be able to search through them.
5. Rebuild Search Index
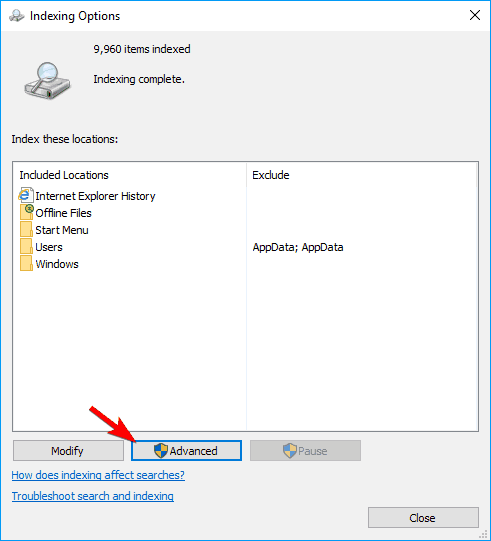
- Tap Windows then input indexing options and click the top result.

- When the Indexing Options window opens, click Advanced.
- Now click the Rebuild button.
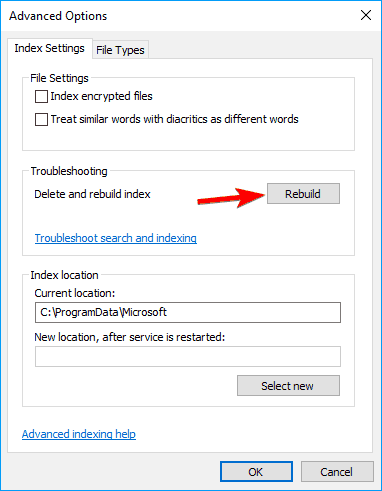
Sometimes issues with indexing can occur, and your search might become slow or unable to find the desired files. If this happens, your Search Index is most likely corrupted, but you can easily fix that.
After doing that, you just need to wait for a couple of moments while Windows rebuilds your Search Index.
How to turn off indexing Windows 10?
- Press Windows + E then go to This PC.
- Right-click your C drive, or the one that you are using, and select Properties.
- Here, unselect the box next to Allow files on this drive to have contents indexed in addition to file properties. Then click OK to save the changes made.
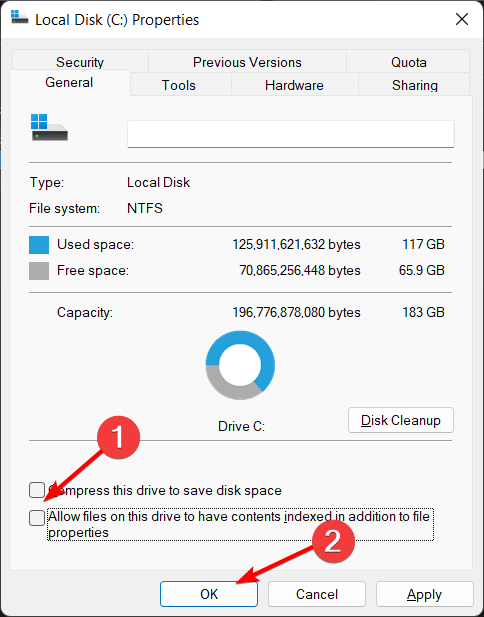
Indexing will be turned off for all the files in your specific drive. If you are using multiple drives, you can repeat the same steps for each one of them.
Should I disable indexing windows 10?
The frequent writing to disk that indexing performs will ultimately slow down SSDs, therefore turning off indexing can increase your performance even if you have an SSD drive.
This is because indexing causes the disk to be written constantly. You will need to entirely disable indexing if you want to experience the full potential of Windows 10/11.
Most users don’t know what to do when the Windows search box goes missing. Read our article to learn how you can get it back in just a couple of steps.
Windows Indexing is a useful feature, and we hope that this article helped you understand how to configure or turn off indexing in Windows 10/11 without the registry, which is another long story.
If you have any other questions, feel free to leave them in the comments section below.
Read our disclosure page to find out how can you help Windows Report sustain the editorial team. Read more


Improve this guide


User forum
12 messages