NO MORE SYSTEM PTES error in Windows 10/11 [Safe FIX]
![]() 10 min. read
10 min. read
![]() Updated on
Updated on
Share this article

Improve this guide
Read our disclosure page to find out how can you help Windows Report sustain the editorial team Read more
Key notes
- NO_MORE_SYSTEM_PTES is a BSoD error that can be triggered by a faulty driver or hard drive.
- This error can also be caused by hardware incompatibilities so you should check the RAM and motherboard.
- A good solution for this error is to use a dedicated solution to fix the BSoD.
- You can also check the hard drive using a command-line software on your PC.

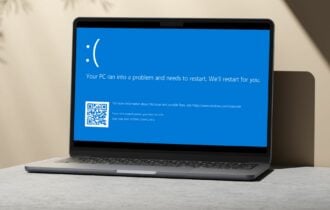
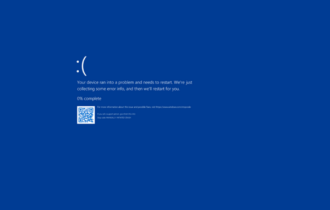
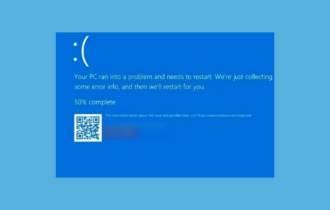
Blue Screen of Death errors are one of the most problematic errors on Windows 10. These types of errors are often caused by a certain software or in the worst-case scenario faulty hardware.
BSOD errors can be a big problem, so today we’re going to show you how to fix the NO_MORE_SYSTEM_PTES BSoD error.
How do I fix NO MORE SYSTEM PTES BSoD error on Windows 10?
- Make sure your drivers and Windows 10 are up to date
- Run the BSOD Troubleshooter
- Run the SFC scan
- Run DISM
- Use System Restore or reset Windows 10
- Check the hard drive
- Uninstall problematic software and your antivirus
- Uninstall any recently installed software
- Check your hardware
1. Make sure your drivers and Windows 10 are up to date
1.1 Update the drivers manually
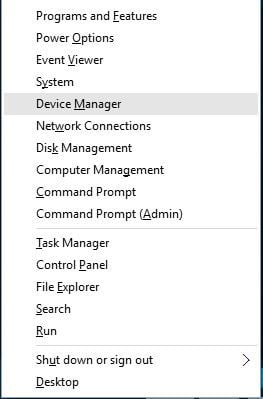
- Open Power User Menu by pressing Windows Key + X and select Device Manager from the list.

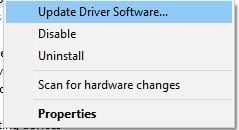
- Locate the driver you wish to update, right-click it and choose Update Driver Software.

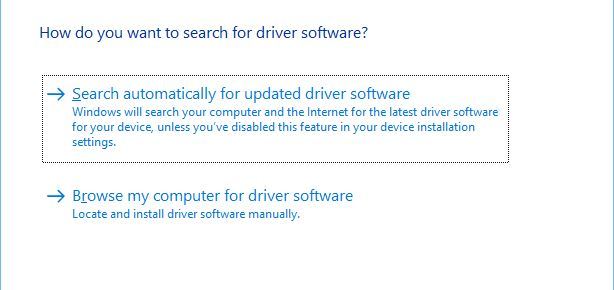
- Select Search automatically for updated driver software. Windows 10 will download all the necessary drivers for this device.

- Repeat these steps for all the drivers you wish to update.
As previously mentioned, many BSoD errors can be caused by a software issue or incompatible hardware.
In order to eliminate most of the hardware and software issues, we advise you to regularly perform Windows update.
Microsoft is constantly releasing new updates for Windows 10, and many of these updates offer bug fixes for many software and hardware issues.
In order to make sure that Windows 10 is running without any incompatibility issues, be sure to download Windows updates regularly.
Downloading updates is rather important, but it’s crucial to keep your drivers up to date as well.
Certain hardware isn’t fully compatible with Windows 10, and this is why it’s mandatory to update your drivers.
Updating drivers is relatively simple, and in order to update a specific driver, you just need to visit your hardware manufacturer’s website and download the drivers for your device.
Alternatively, you can download the necessary drivers by using Device Manager. To update your drivers with Device Manager follow the steps above.
If you have a CD with drivers that you got along with your hardware, you can also use it if you haven’t installed any recent drivers.
Drivers on your CD might be outdated a bit, but they might work better than the default Windows 10 drivers.
1.2 Update drivers automatically
Searching for drivers on your own can be time-consuming. So, we advise you to use a tool that will do this for you automatically.
Using an automatic driver updater will certainly save you from the hassle of searching for drivers manually, and it will always keep your system up to date with the latest drivers.
The solution recommended below will help you update drivers automatically and prevent PC damage caused by installing the wrong driver versions.
After several tests, our team concluded that this is the best-automatized solution.
2. Run the BSoD troubleshooter
- Open the Settings app and go to Update & Security section.
- Select Troubleshoot from the menu on the left.
- Select BSoD from the right pane and click Run the troubleshooter.

- Follow the instructions on the screen to complete the troubleshooter.
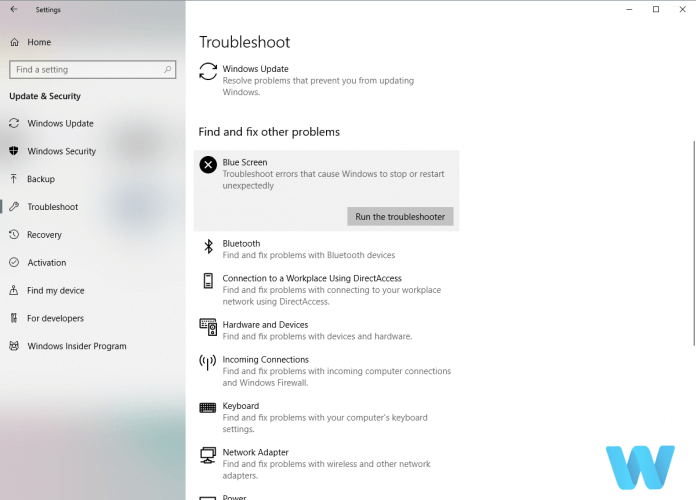
If updating your drivers didn’t resolve the problem, we’re going to use Windows 10’s troubleshooting tools.
The first tool we’re going to use is the built-in troubleshooter that can be found in the Settings app.
You can use this tool to resolve all sorts of issues within the system, including BSoDs.
3. Run the SFC scan
- Right-click on the Start Menu button, and open Command Prompt (Admin).
- Enter the following line and press Enter: sfc/scannow

- Wait until the process is done (it may take a while).
- If the solution is found, it will automatically be applied.
- Now, close the Command Prompt and restart your computer.
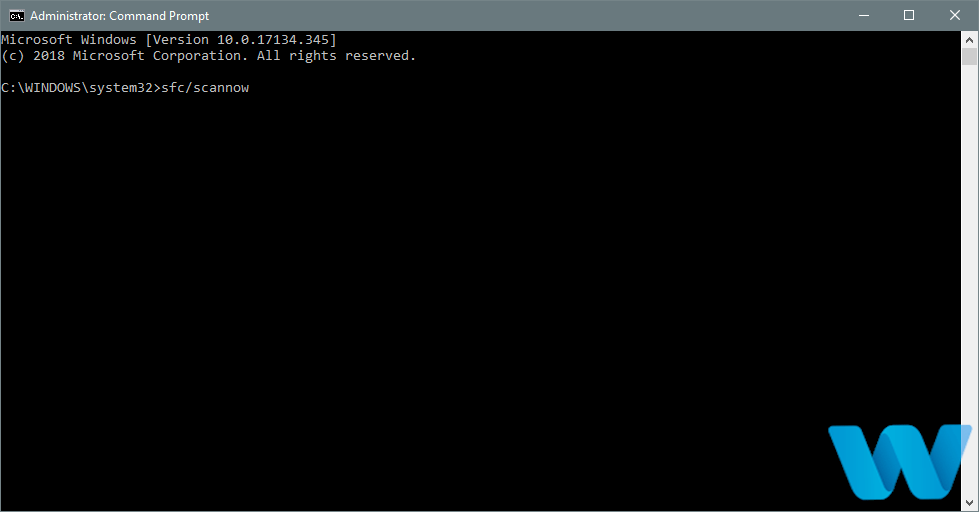
The next troubleshooter we’re going to try is the SFC scan. This tool scans your system for potential issues and resolves them.
If the solution is possible, of course. The SFC scan can be helpful when resolving BSOD problems, as well.
4. Run DISM
4.1 Run DISM the standard way
- Type cmd in the search windows and click on Run as administrator to start Command Prompt with full privileges.
- Paste the following command and press Enter:
DISM /Online /Cleanup-Image /RestoreHealth - Wait until the scan is finished.
- Restart your computer and try updating again.

4.2 Run DISM using the Windows installation media
- Insert your Windows installation media.
- Start Command Prompt as administrator as shown in the previous solution.
- In the command line, type the following commands and press Enter after each:
dism /online /cleanup-image /scanhealthdism /online /cleanup-image /restorehealth
- Now, type the following command and press Enter:
DISM /Online /Cleanup-Image /RestoreHealth /source:WIM:X:SourcesInstall.wim:1 /LimitAccess
- Make sure to change an X value with the letter of the mounted drive with Windows 10 installation.
- After the procedure is finished, restart your computer.
And the third troubleshooter we’re going to use is DISM. Deployment Image Servicing and Management (DISM) is a powerful tool that reloads the system image.
So, it can also resolve potential BSOD errors. We offered you both standard and the procedure that utilizes the installation media above.
5. Use System Restore or reset Windows 10
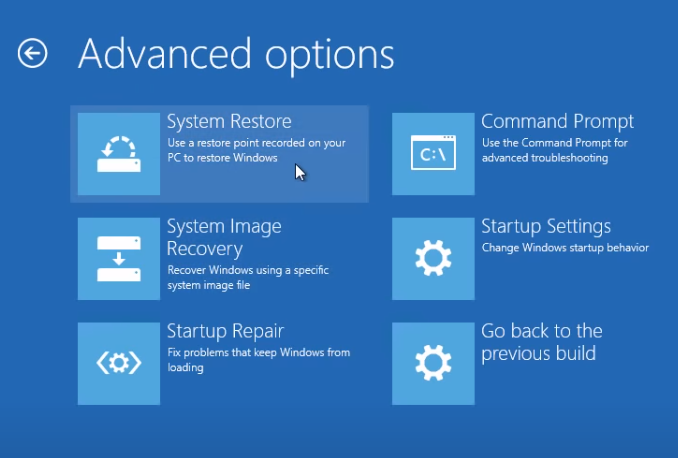
5.1 Perform a System Restore
- Restart your computer a couple times while it boots. This should start Automatic Repair.
- Select Troubleshoot, select Advanced options, and click on System Restore.
- Select your username and enter your password and choose the restore point.
- Follow the steps carefully to complete the process.
If the issue is caused by certain software, you can easily fix it by using System Restore. To use System Restore, perform the steps above.
If the System Restore didn’t fix the NO_MORE_SYSTEM_PTES BSoD error, you might have to reset Windows 10.
Bear in mind that this process will delete all files and folders from your C drive, so be sure to back them up.
5.2 Reset your PC
- Start Automatic Repair by restarting your PC while it boots.
- Choose Troubleshoot and select Reset this PC.
- Select Remove everything and click on Only the drive where Windows is installed.
- Wait for the reset process to complete.
If the problem still persists, the NO_MORE_SYSTEM_PTES BSoD is most likely caused by a hardware problem.
5.3 Use a dedicated solution
All these solutions worked for some users so you should definitely try them but you can also fix this BSoD error by using a dedicated, third-party solution.
This tool recommended below is light, and fast and it only needs a couple of clicks to fix any Windows 10 error, including BSoD like the NO MORE SYSTEM PTES error.
More so, an efficient method to resolve corrupted systems is with dedicated tools that are capable of repairing serious screen errors on your PC.
Plus, with repositories of millions of files, these tools will surely fix malfunctioning or missing software files and stop BSOD issues effectively.
6. Check the hard drive
- Enter the Advanced Startup (Restart your computer while holding the Shift key).
- Choose Troubleshoot and click on Advanced Options.
- Select Command Prompt from the list of options.
- When Command Prompt appears, enter the following lines and press Enter after each line in order to run it:
bootrec.exe /rebuildbcd
bootrec.exe /fixmbrbootrec.exe /fixboot
- Some users are also suggesting that you need to run additional chkdsk commands as well. To perform these commands, you need to know drive letters for all your hard drive partitions. In Command Prompt you should enter the following (but remember to use the letters that match your hard drive partitions on your PC):
chkdsk /r c:chkdsk /r d:This is just our example, so keep in mind that you have to perform chkdsk command for every hard drive partition that you have.
- Restart your computer and check if the issue is resolved.
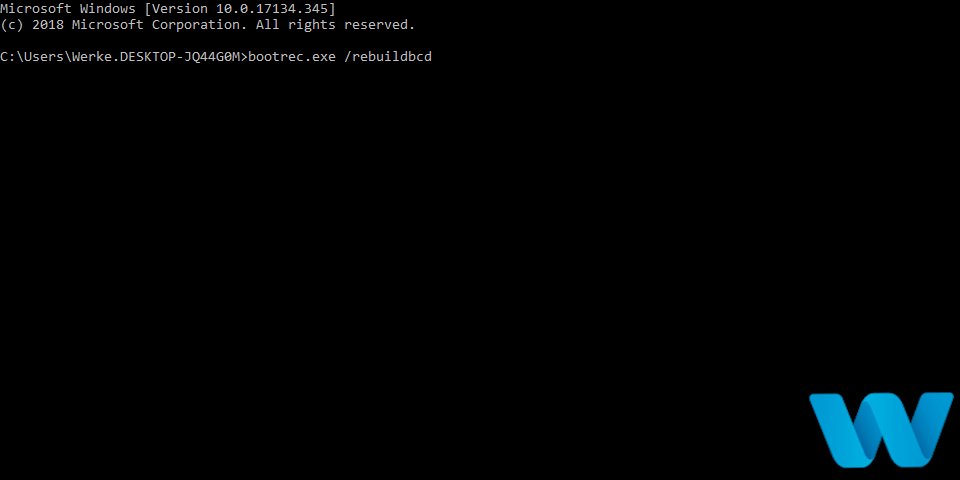
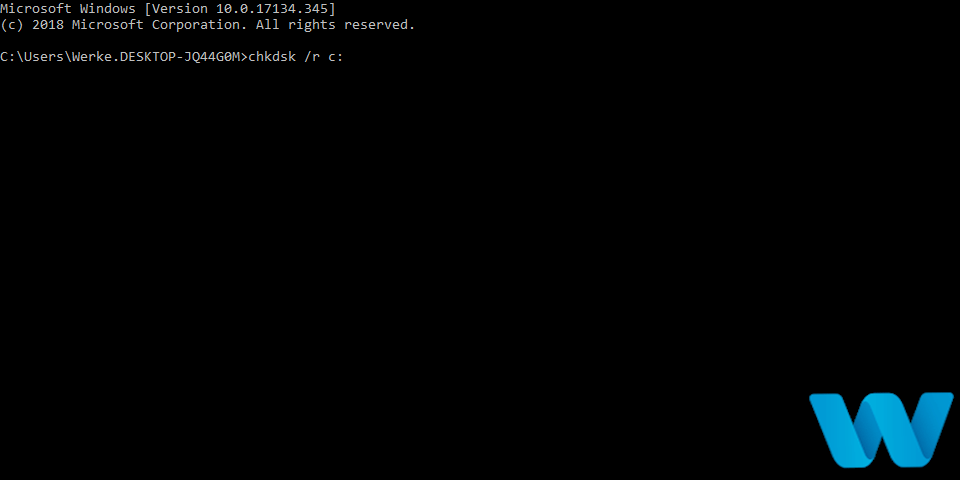
Unfortunately, the hard drive can be the main culprit for this error so make sure you check it by using the chkdsk command as shown above.
If the hard drive is malfunctioning, check our list with the best hard drives for Windows 10.
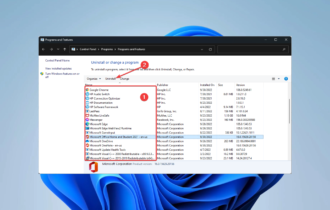
7. Uninstall problematic software and your antivirus
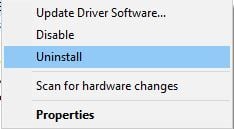
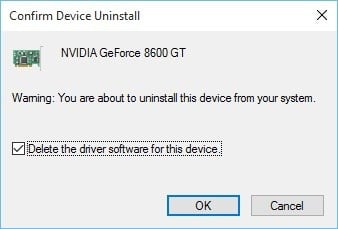
- Press Windows + X and choose the Device Manager.
- When Device Manager opens, locate your graphic card, right-click it and choose Uninstall.

- Check Delete the driver software for this device and click OK.

- Restart your PC.
NO_MORE_SYSTEM_PTES error can be caused by problematic software, therefore it’s recommended to locate and uninstall the software.
Common causes for this error are graphics card drivers and backup programs, so if you have any backup programs installed, be sure to uninstall them.
Regarding the graphic card drivers, you can uninstall them by following the steps above.
After you uninstalled the driver, you need to download it again. If you had the latest version of the driver installed, be sure to download and install an older version this time.
In addition to backup software and display drivers, sometimes your antivirus software can cause NO_MORE_SYSTEM_PTES error, so it’s recommended that you uninstall it.
Almost any antivirus program can cause this error to appear, so be sure to uninstall all antivirus software from your computer.
If you’re worried about your computer safety, you should know that Windows 10 comes with Windows Defender antivirus software, so your computer won’t be completely vulnerable.
Bear in mind that uninstalling your antivirus software isn’t always enough since there might be some registry keys or files left after the uninstallation process.
Therefore it’s always recommended to use dedicated uninstaller tools. Many security software companies offer these tools for their software, so be sure to use one of these tools to completely remove antivirus software.
8. Uninstall any recently installed software
- Restart your computer while it boots. Repeat this until the Automatic Repair process starts.
- Select Troubleshoot, select Advanced options, click on Startup Settings, and then on Restart.
- When your computer restarts, you’ll see a list of options. Select Safe Mode with Networking by pressing 5 or F5.
Sometimes NO_MORE_SYSTEM_PTES BSoD is caused by a recently installed software, so in order to fix it, you need to remove any software you installed in the last couple of days or weeks.
To check if the BSOD error is caused by software, you can always use the Windows 10 Safe Mode.
This mode starts with only the necessary software and drivers, and if the problem is caused by certain software, your computer should work without any problems in Safe Mode.
Once you enter Safe Mode, check if your computer works without any issues. If everything is in order, you might want to uninstall certain software or drivers and check if that fixes the issue.
9. Check your hardware
Recently installed hardware can cause NO_MORE_SYSTEM_PTES error to manifest since the new hardware might not be fully compatible with your PC.
If so, try removing or replacing the newly installed hardware to see if your computer works without it.
If no new hardware is installed, your RAM or motherboard might be faulty, so you might want to replace them.
It’s worth mentioning that almost any hardware can cause this error, so you might need help from an expert to locate the faulty hardware.
NO_MORE_SYSTEM_PTES BSoD error is usually caused by software, and you can fix this problem easily by using one of our solutions.
If you have any other suggestions or solutions in mind, don’t hesitate to leave them in the comments section below.