OBS Studio for Windows 11: How to Download, Install & Use
6 min. read
Updated on
Read our disclosure page to find out how can you help Windows Report sustain the editorial team. Read more
Key notes
- OBS Studio for Windows 11 is among the most highly-rated recording software tools you can enjoy on this platform and not only.
- Feel free to download and install OBS Studio in Windows 11 in just a few minutes.
- Selecting OBS Studio’s Display Capture option gives you the chance to record desktop activity for tutorial videos.
- There are also loads of handy plugins available for OBS on the Open Broadcast Software Studio website.
Now that Microsoft has officially released Windows 11, more users are embracing the latest desktop platform. Note that it retains the same built-in recording feature as its predecessor, namely Game Bar DVR.
Yet, some users might be disappointed it doesn’t have an enhanced recording utility. For starters, you can’t record the Windows 11 desktop or File Explorer with Game Bar DVR, which has primarily been designed for game recording.
Game Bar is restricted to recording one full-screen app at a time. Furthermore, the built-in recorder’s configuration settings are somewhat limited.
Therefore, some users will no doubt prefer to find a better alternative to Windows 11’s Game Bar DVR. If you’re among them, look no further than OBS Studio. This is one of the best open-source recording software for Windows.
What do I need OBS Studio for?
To put it simply, you need OBS Studio for recording anything on your PC’s monitor. Aside from its video and audio capturing, the software enables users to mix audio, set up scenes with custom transitions, and broadcast live streams to different servers.
As mentioned, the Game Bar DVR isn’t much good for recording the Windows desktop. So, you’ll need OBS Studio for recording videos that include some desktop activity.
Live game streaming is prevalent on the likes of YouTube and Twitch. OBS Studio is the software of choice for many players who stream their gaming. With the software, players can switch between cams and games and even incorporate comments in their streams.
Those who want more options to pick from can also take a look at this list including the best game recording software for low-end PCs. Even if this is a Windows 10 guide, the options presented work without problems on Windows 11 too.
So, OBS Studio is a pretty cool piece of kit for recording software on your PC live or not. You can run that software on Windows 11 if you need something more advanced than the Game Bar DVR and find the best OBS settings for recording.
This is how you can download and install OBS Studio in Windows 11.
How can I download and install OBS Studio in Windows 11?
1. Download OBS Studio
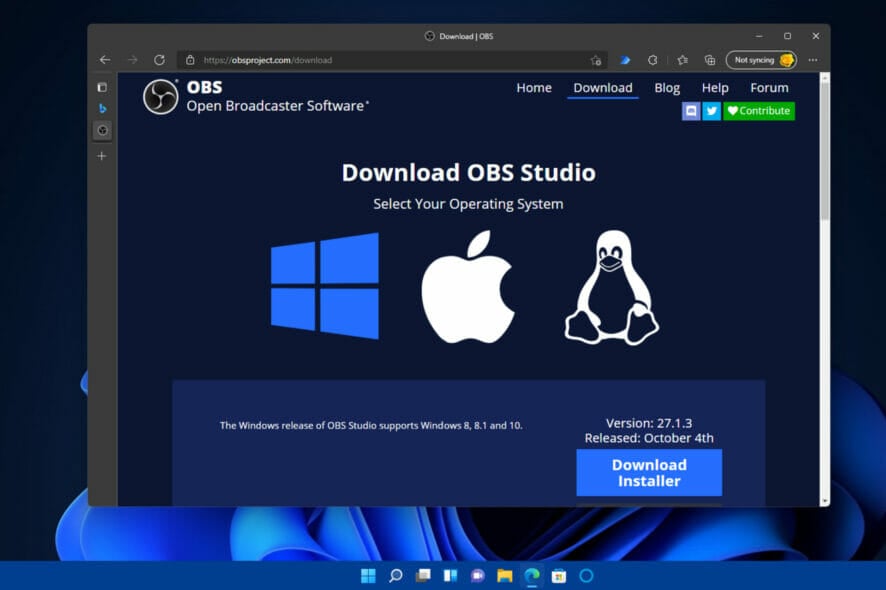
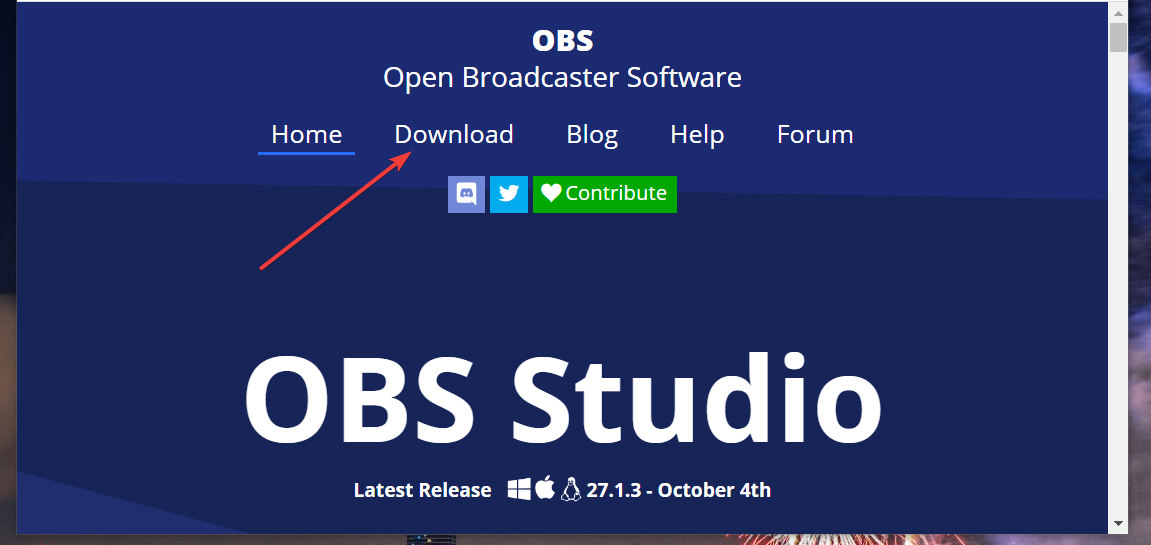
- First, open the OBS Studio homepage.
- Click the Download link on that website.
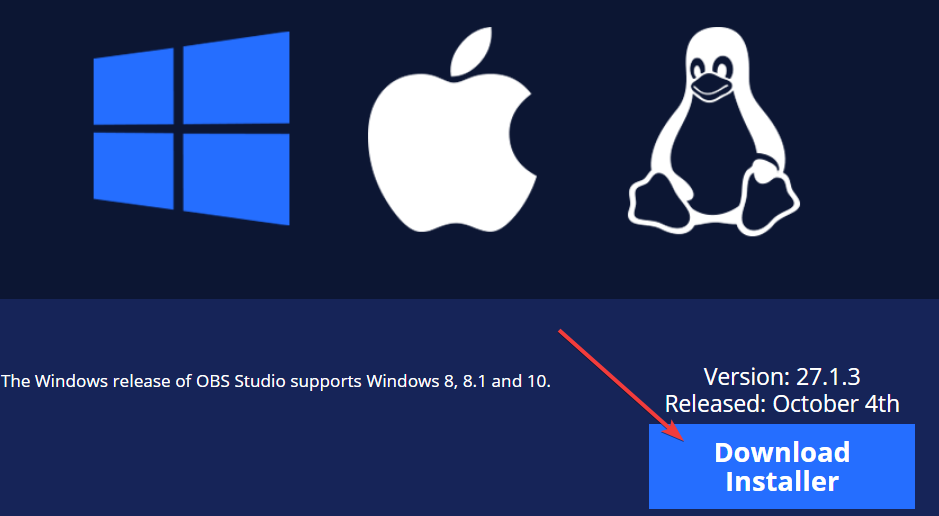
- Select the Windows logo on the download page if it’s not selected.
- Then press the Download Installer button (for the 64-bit version installer).
- Next, choose a folder to download the OBS Studio installer in.
- Press the Save button to download OBS Studio’s installer to the chosen folder.
2. Install OBS Studio
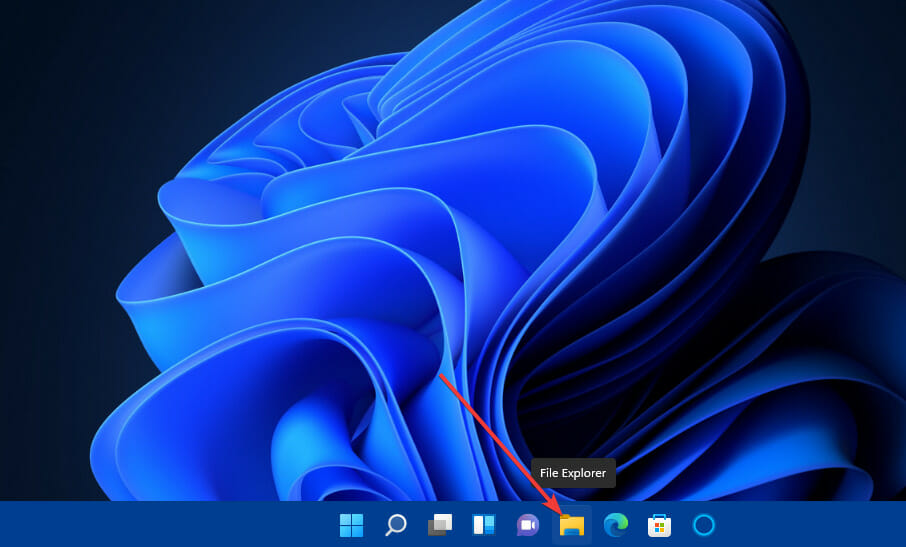
- To open File Explorer’s window, click its folder taskbar button.
- Next, open the folder you downloaded OBS Studio’s installer to.
- Click Next on OBS Studio’s setup window to bring up the license info.
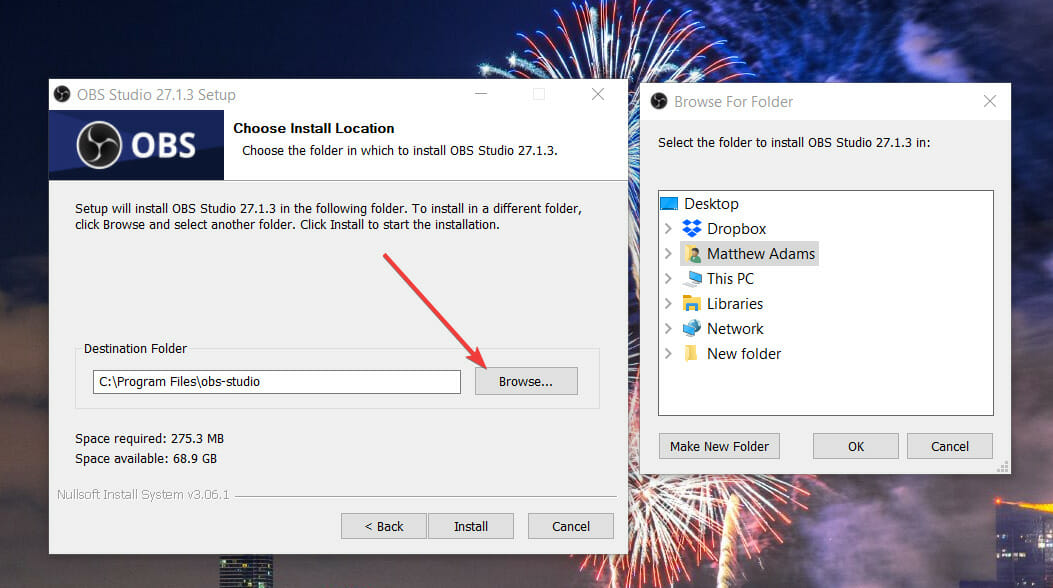
- Select Next again to proceed to the directory selection options.
- To choose a folder to install the software, click the Browse button. Then select a directory for the software on the Browse for Folder window, and click the OK option.
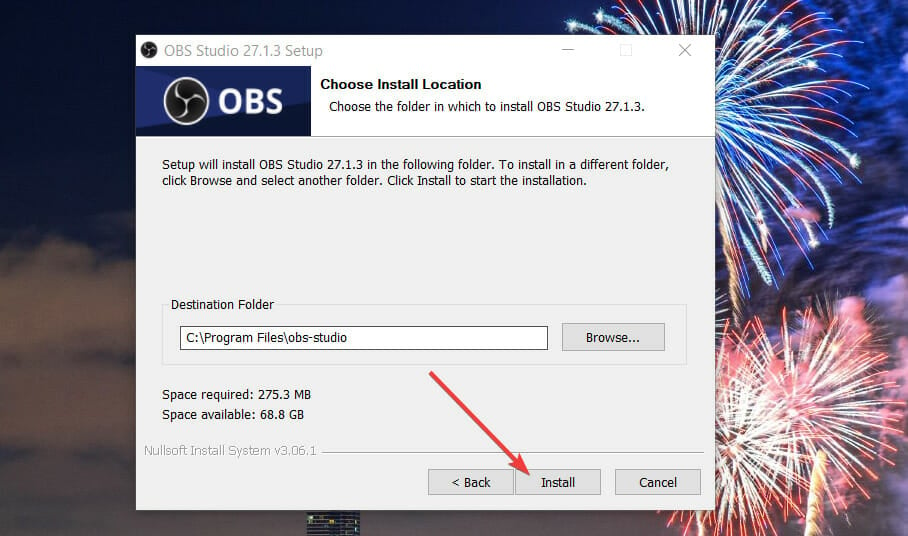
- Press the Install button.
- Thereafter, select the Launch OBS Studio checkbox.
- Click Finish to confirm.
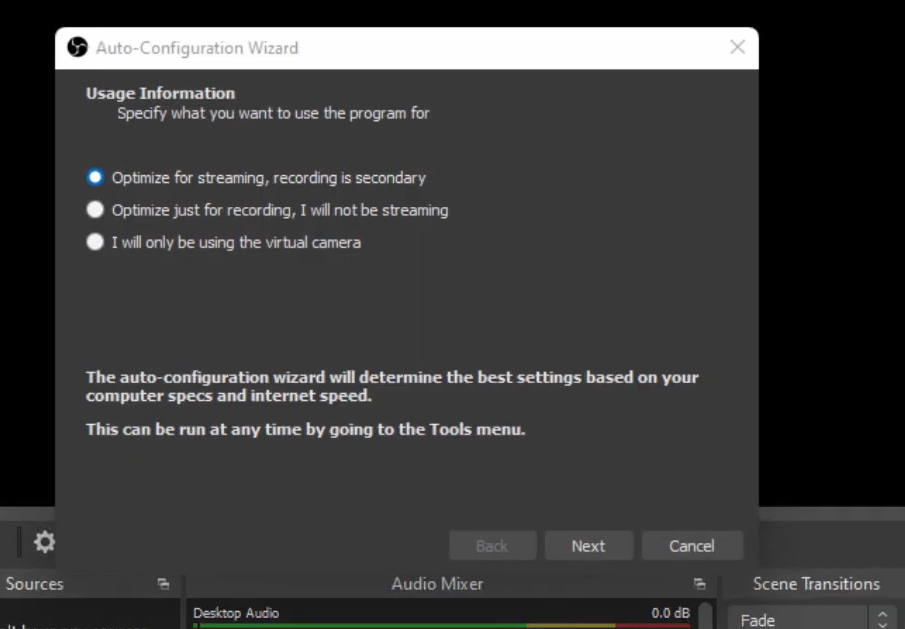
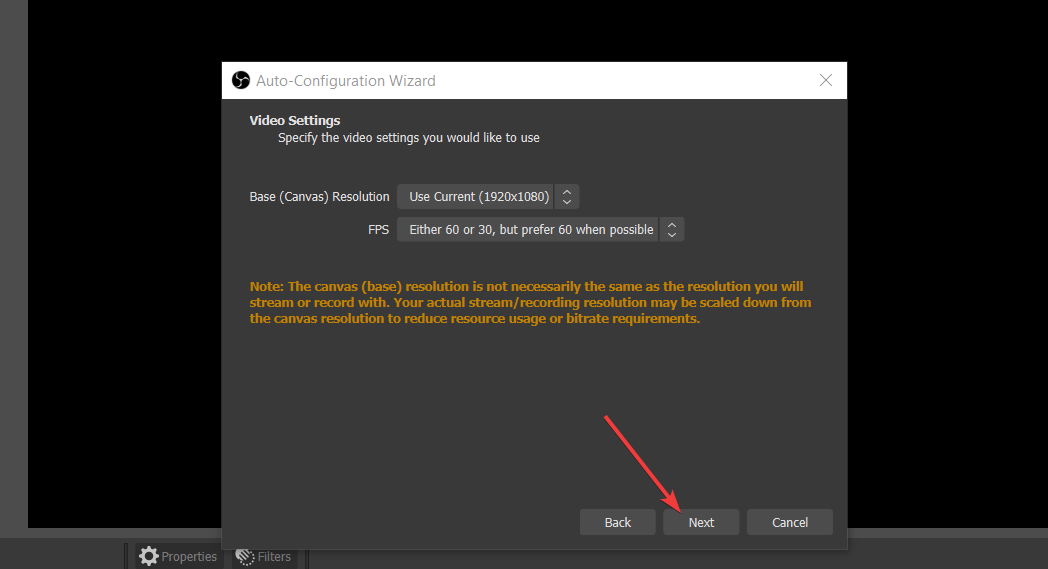
- When OBS Studios starts, an Auto-Configuration Wizard window will also open. Select either Optimize for streaming or Optimize just for recording depending on your user requirements.
- Select the Next option.
- Then choose your preferred video settings on the window that you can see below, and click the Next button.
- Finally, select the Apply Settings option.
How can I record my PC’s screen with OBS Studio?
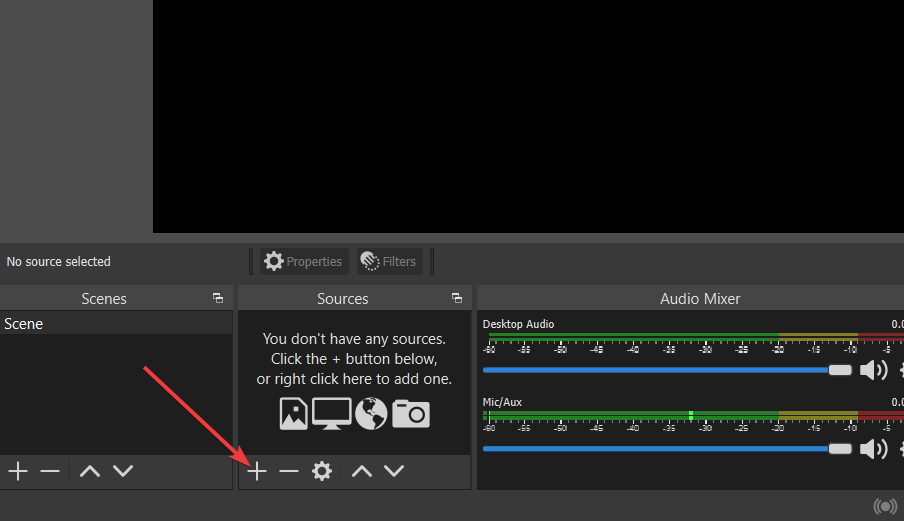
When you’ve installed OBS Studio as outlined above, you can start recording to your heart’s content! The standard recording for non-live videos is relatively straightforward in OBS Studios. This is how you can record the Windows 11 desktop with that software:
- Click the + button for sources in OBS Studios.
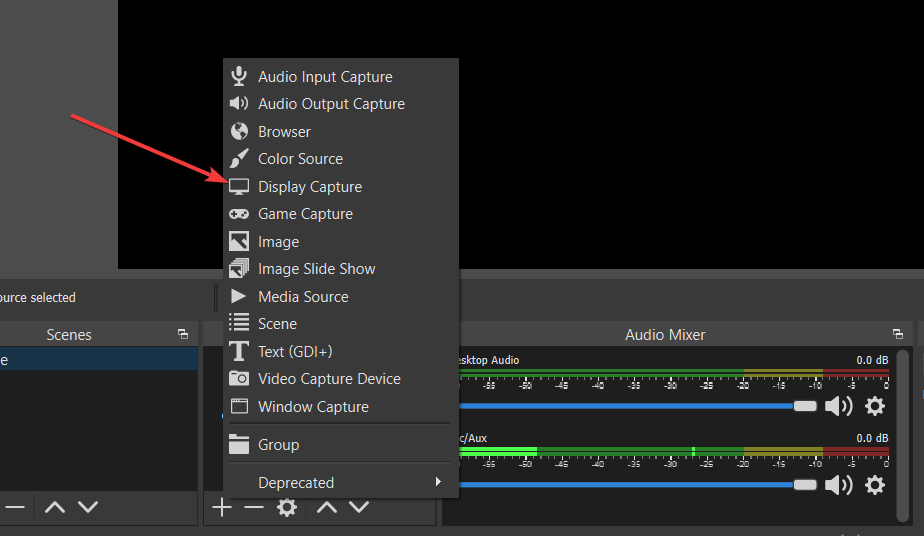
- Select the Display Capture option on the menu.
- Enter a source name in the Create source window that pops up, and press the OK button.
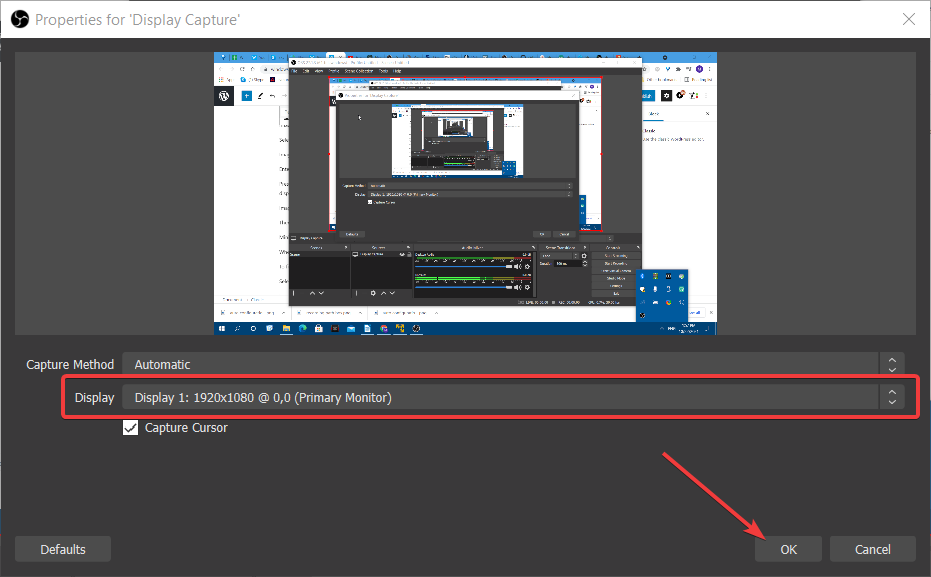
- Press the OK button on the Properties window that opens. Users with multiple monitors can also select alternative displays with the Display setting on that window.
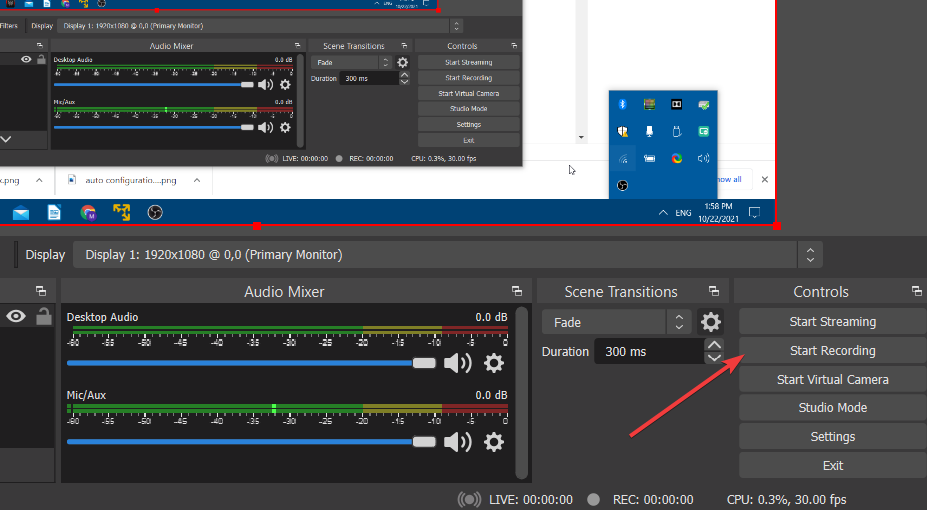
- Then press the Start Recording button to begin.
- Minimize the OBS Studio window, and record everything you need to.
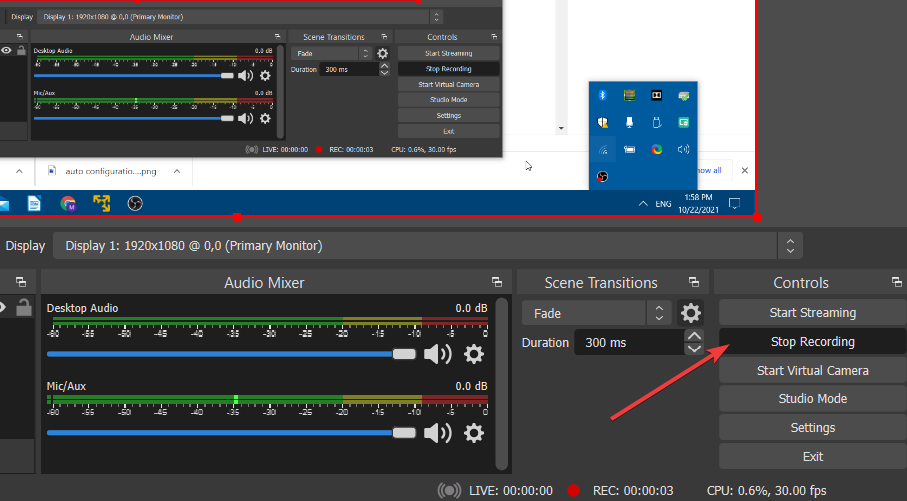
- When you’re done, press the Stop Recording button in OBS Studio.
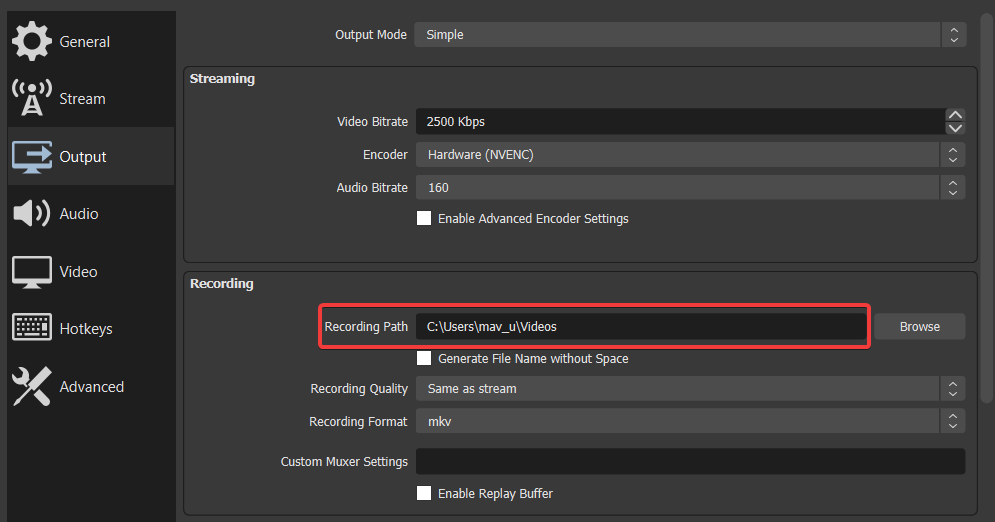
- To find where you’re recorded output is saved, click the Settings button.
- Select the Output tab on the Settings window. Your video will be saved in the recording path specified on that tab.
Where can I get plugins for OBS Studio?
As its open-source software, there are plenty of useful plugins for OBS Studio. Those plugins add additional features and options to take advantage of.
The Resources section on the OBS Studio website is the best place to find plug-ins for the software. The OBS Studio Plugins section there includes several pages of plug-ins for the software. Click a link for a listed plugin there to read further details for it.
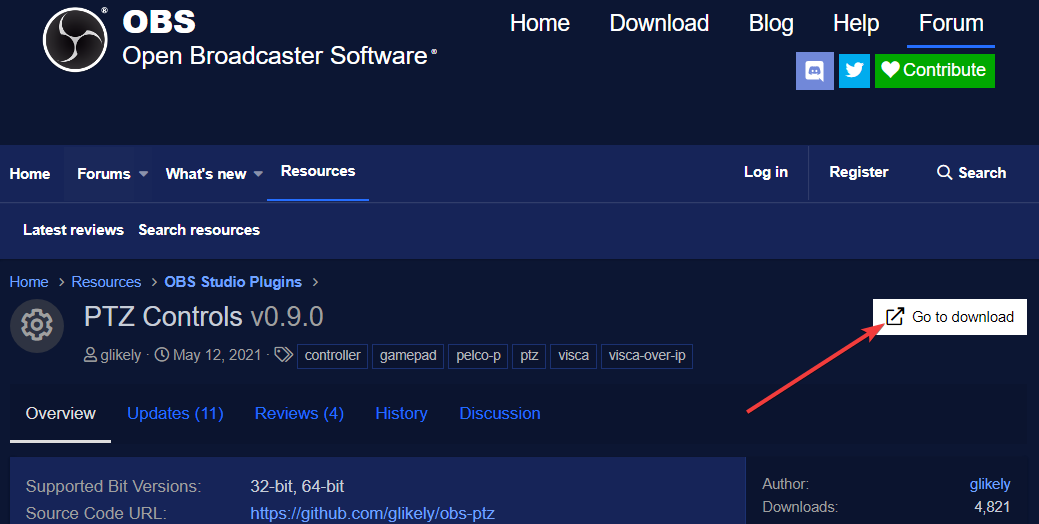
To download a plugin, click the Go to download button for it on its details page. Then either a Save As window or a GitHub download page will open. If a GitHub page opens, select to download an EXE installer file from there if you can.
However, you’ll have to download some plugins as ZIP archives, which you’ll need to extract within File Explorer. Then you’ll need to drag and drop the plugin’s obs-plugins folder into your OBS Studio installation folder. Make sure it merges with the obs-plugins folder there.
Overall, the installation for OBS Studio is a very quick and straightforward process. You can have it up and running in Windows 11 in just a few minutes. As it takes up about 261 megabytes of drive storage space, you probably won’t need to make any space for it.
OBS Studio has all the tools you’ll need to record appealing software videos on your desktop or laptop. You probably won’t find any better freely available recording tools for Windows 11 at the moment. So, it’s certainly worth installing OBS Studio if you need to record something on your PC.
Worried about OBS crashing issues? They are often caused by the graphics card app or outdated versions so don’t hesitate to apply the tips found in this guide on how to fix OBS crashing issues in Windows 10. Rest assured that all of them may be taken into consideration by Windows 11 users too.
Things are no different when it comes to OBS not recording game audio. We’ve got a few confirmed solutions to start resolving this annying problem.
What do you think about OBS Studio? Feel free to use the comments section below and tell us your opinion.


User forum
0 messages