How to Set OneDrive Files to Always Keep on This Device
Follow our easy steps to use the Always on this device feature
3 min. read
Updated on
Read our disclosure page to find out how can you help Windows Report sustain the editorial team. Read more
Key notes
- The OneDrive always keep on this device feature enables users to access their files for offline use.
- To enable this feature, turn on your files' on-demand settings.
- You can work your way through the step-by-step process to enable the always keep on this device setting.
Some of our readers have requested to know how to access their OneDrive always keep on this device. This is because there are times when you would like to keep some files for offline use so they can be accessed anywhere and anytime regardless of internet connection issues.
We will show you how to tweak this setting in this article.
What does always available on this device mean?
The OneDrive always available on this device setting helps you download files/folders to your device for offline use.
It is one of the OneDrive Files On-Demand features which can be enabled by default in OneDrive settings to reduce storage consumption or OneDrive is full of errors aside from the OneDrive sync feature.
With the OneDrive always keep on this device feature, your files are stored and can be accessed from the personal cloud without downloading them on your device. Further, once you are signed into the OneDrive app, this feature enables you to access your files from any PC anywhere in the world.
In addition, once the feature is enabled, the data for the selected files are not physically downloaded, which means, the files show on your device, but they take up almost no space, regardless of how big they are.
However, only files stored in OneDrive can be set to always keep on this device.
How do I set OneDrive files to always keep on this device?
Before engaging in advanced settings tweaks, you should perform the following:
- Make sure you have a strong internet connection.
- Make sure you are signed into OneDrive on your device.
The above checks are essential to making OneDrive files always stay on your device. Having confirmed the above checks, you can explore the steps.
1. Turn on Files On-Demand
- Sign into OneDrive on your device.
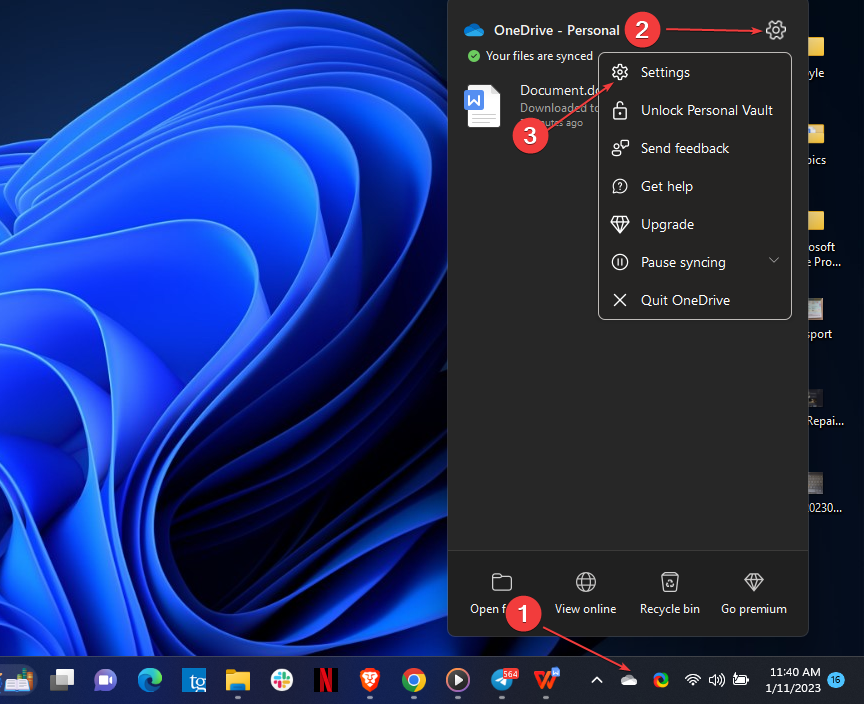
- Next, click the OneDrive Cloud icon in your system tray, select the gear icon, and click on Settings.
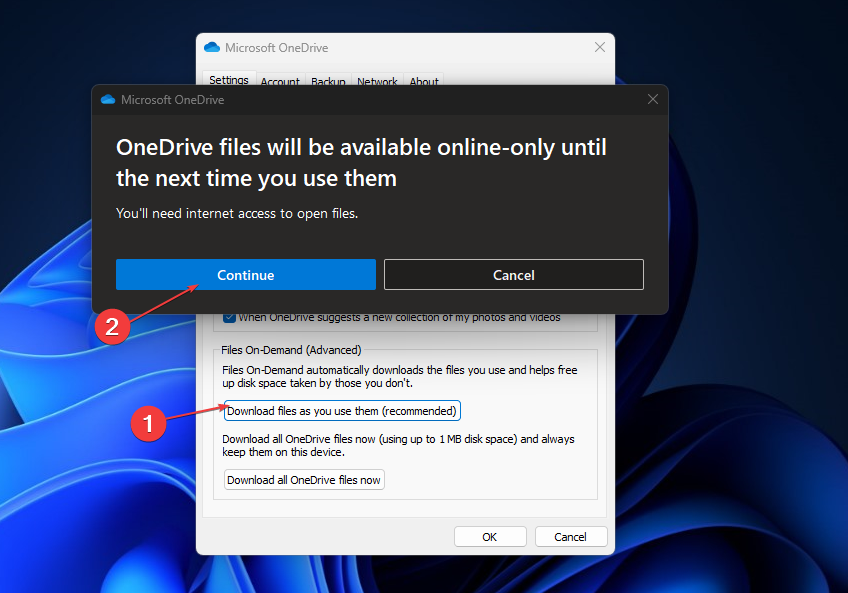
- Then, click on the Settings tab and click on Download files as you use them under Files on-Demand.
- Select Continue to confirm the process.
OneDrive Files On-Demand enables users to access files in their cloud storage in OneDrive without downloading them or consuming the PC’s storage space.
However, users should note that each device has its Files On-Demand settings, so make sure you enable them for each one you intend to use.
2. Set Always keep on this device via OneDrive folder
- Sign into OneDrive on your device.
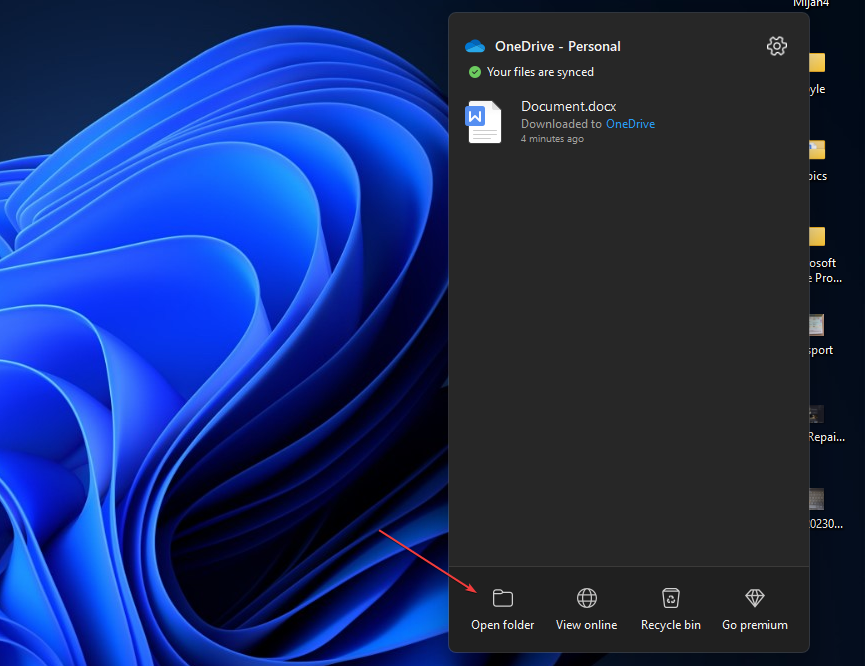
- Next, click the OneDrive Cloud icon in your system tray and select Open folder.
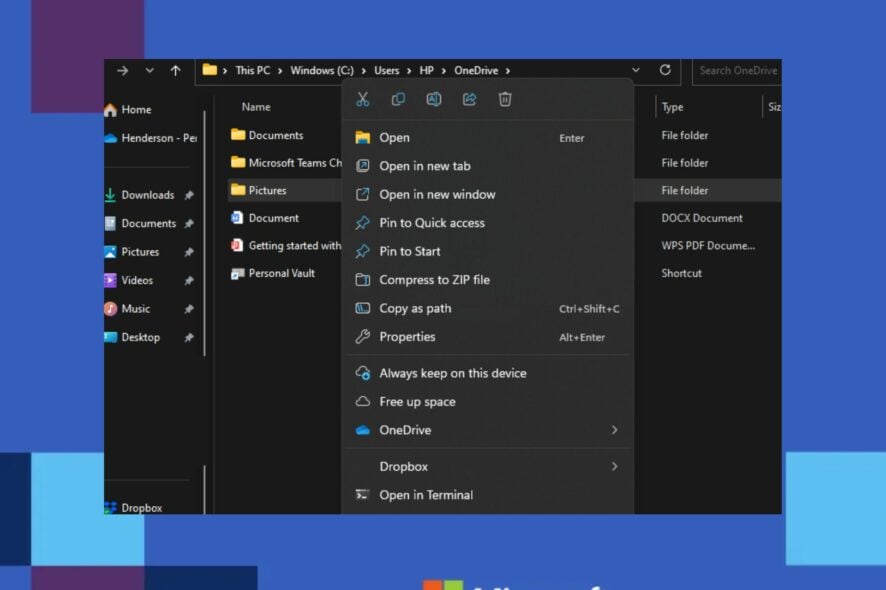
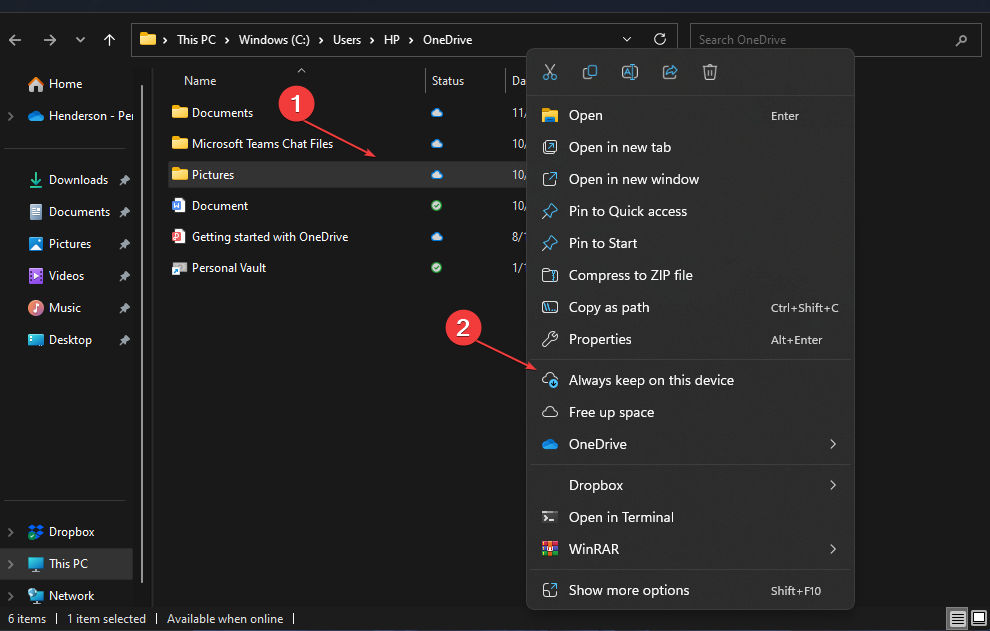
- Locate all the files or folders with the online-only or locally available status, right-click them, and select Always keep on this device.
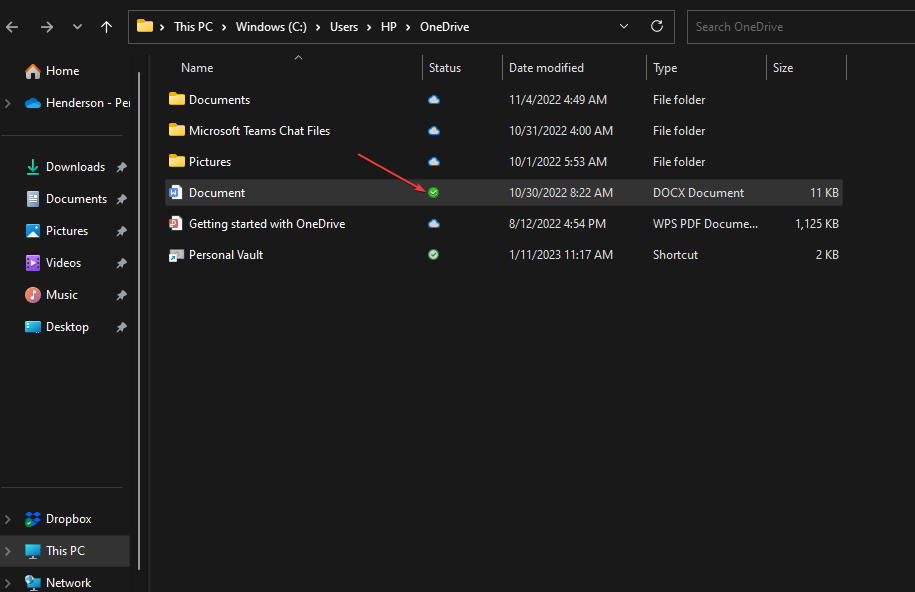
- Wait for the syncing. After that, the file or folder will now display a dark green tick.
Alternatively, if you want to change all of your OneDrive files to Always keep on this device at the same time, simply right-click on the OneDrive folder in the navigation pane of File Explorer and click on Always keep on this device to adjust to all of your OneDrive files at once.
In case your OneDrive keeps crashing you can check how to fix it here. Some of our readers have requested how to fix the 0x80070194 error on OneDrive cloud issues. You can bookmark the fixes in case you encounter the same situation.
And that’s it on how to set OneDrive files to Always keep on this device. If you have any questions or suggestions, please use the comments section below.

User forum
0 messages