8 Easy Ways to Fix Photoshop Problems on Windows 10
Encompassing solutions to fix most Photoshop issues on your PC
9 min. read
Updated on
Read our disclosure page to find out how can you help Windows Report sustain the editorial team. Read more
Key notes
- Photoshop issues aren’t uncommon, and many reported that Photoshop is not responding on Windows 10.
- To prevent most Photoshop issues, you must always keep the software up to date.
- Sometimes, you might have to make some changes to your registry to get Photoshop working again.
- If Photoshop is not installed on your Windows 10 PC, remove all conflicting applications beforehand.
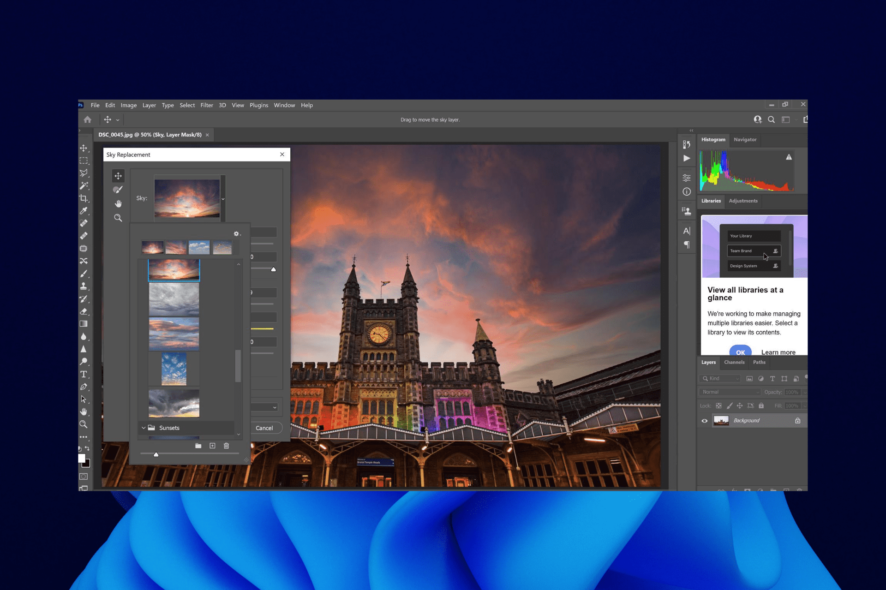
Photoshop is one of the most-used image editing tools on Windows 10/11. It offers many superb features with ease of use to boot.
However, it is not perfect, and many users reported various Photoshop problems on Windows 10. These issues spread across a wide area with varying causes.
This guide will show you how to fix the common problems with Photoshop and help you get the best out of the rather excellent photo editing tool.
Why is photoshop crashing so much?
Photoshop crashes are caused by problematic issues that prevent you from editing your images. Below are some of the common problems and their causes:
- Photoshop not working after Windows update: Sometimes Photoshop issues can occur after a Windows update. To fix this problem, it’s advised to remove any recent updates and block them from installing.
- Photoshop preferences error: Sometimes the preferences file can get corrupted, and that will lead to various issues with Photoshop. However, you can reset your preferences with a single keyboard shortcut.
- Photoshop not opening in Windows 10: The photoshop not opening or working issues can sometimes occur due to third-party applications. Many users reported issues with Lavasoft software, so if you’re using any Lavasoft applications, be sure to remove them.
- Photoshop Windows 10 blue screen: Blue screen errors can sometimes occur in Photoshop, and we already covered one blue screen Photoshop error before, so be sure to check that article for more information.
- Photoshop in Windows 10 is slow, and keeps freezing: These are some common problems that can appear in Photoshop, but you might be able to solve them using one of our solutions.
- Photoshop in Windows 11 is slow: Follow the solutions below in order to optimize Photoshop and fix any errors that slow it down.
Why is my Adobe Photoshop not responding?
The primary reason Photoshop not responding on Windows 10 issue is insufficient resources. This means your computer does not have enough memory and processor resources to run the program at the time.
This happens when you run multiple resource-hogging programs simultaneously with Photoshop.
How can I fix Photoshop issues on Windows 10?
1. Modify the registry
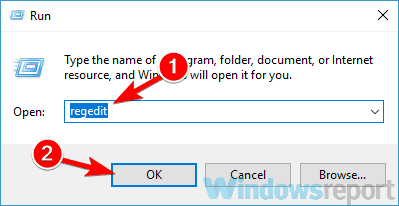
- Press Windows key + R, type regedit, and click OK.
- Once the Registry Editor opens, navigate to the following key in the left pane:
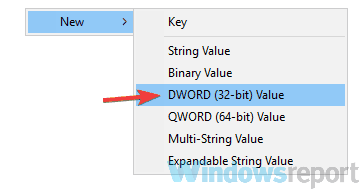
HKEY_CURRENT_USERSOFTWAREAdobePhotoshop120.0 - In the right pane, right-click the empty space and choose New > DWORD (32-bit) Value. Enter OverridePhysicalMemoryMB as the name of the new DWORD.
- Double-click the OverridePhysicalMemoryMB DWORD to open its properties.
- Now enter the amount of RAM that you have. For detailed instructions, check out this list:
- 4096 for 4 GB
- 8192 for 8 GB
- 16384 for 16 GB
- 24576 for 24 GB
- Click OK to save changes. ThePhotoshop not installing on Windows 11 issue will be fixed.
After making these changes, close the Registry Editor and check if the problem is resolved.
There are reports that this issue was fixed in the latest version of Photoshop, so if Photoshop is up to date, you can remove the OverridePhysicalMemoryMB value from the registry.
According to users, many Photoshop problems can occur due to your registry, and making these changes should help you if Photoshop stops working on your Windows 10 PC.
2. Update your display drivers
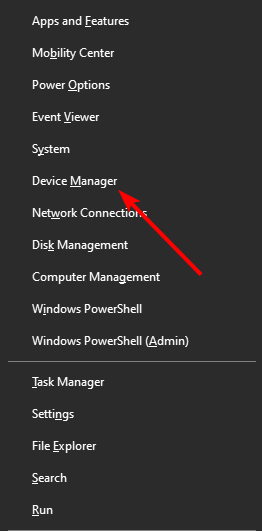
- Press the Windows key + X and select Device Manager.
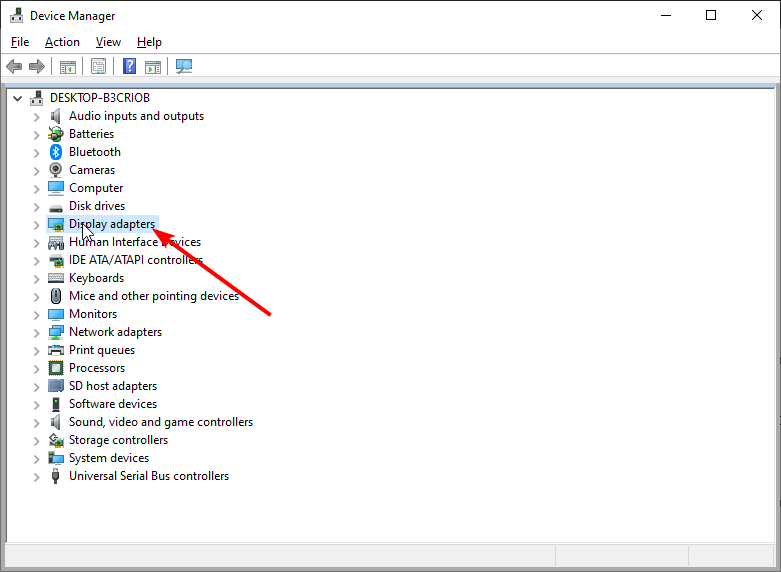
- Click the arrow next to the Display adapters option to expand it.
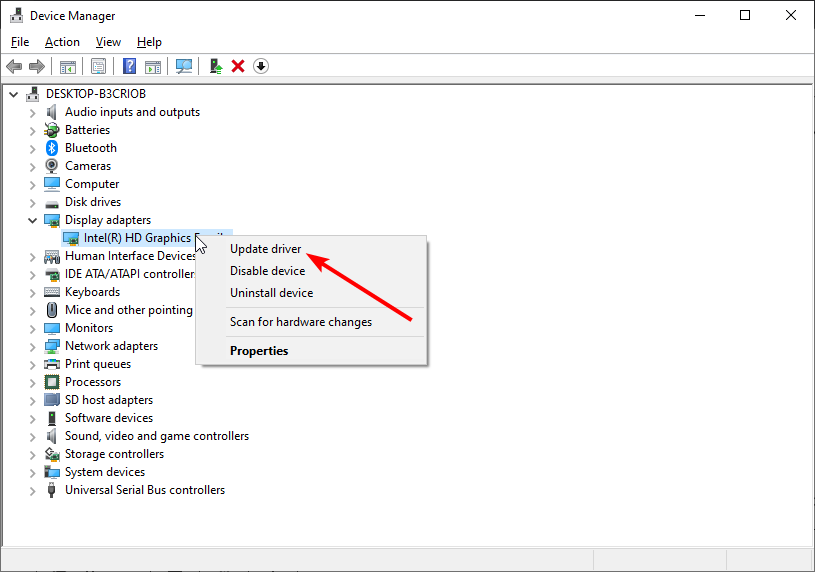
- Now, right-click the driver there and choose Update driver.
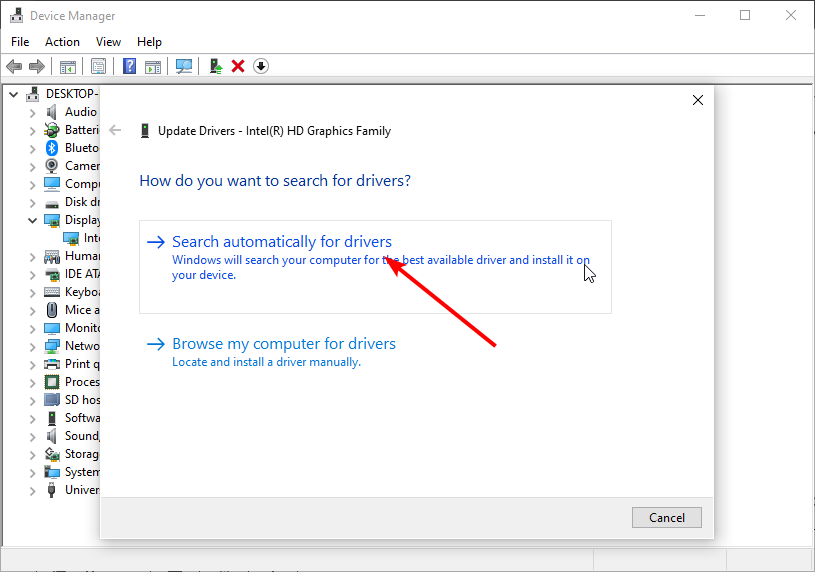
- Click the Search automatically for drivers option.
- Wait for the scan to complete and install the available updates.
If your drivers are outdated, Photoshop problems can sometimes occur on Windows 10. To fix the problem, users suggest updating graphics card drivers to the latest version and checking if that helps.
Aside from using the built-in driver updater, as shown above, you can visit your graphics card manufacturer and download the latest drivers for your model.
You can automatically update your drivers if this seems a bit complicated. But, again, this is pretty simple to do with a Outbyte Driver Updater tool.
This tool allows you to automatically update all your drivers with just a couple of clicks, so if you don’t feel like downloading drivers manually, be sure to try this tool.
Disclaimer: Some features of this tool are not free
Once your graphics card drivers are up to date, check if the problem is still there.
3. Install Creative Cloud Application Manager
If Photoshop is not installing on your Windows 10 PC, the cause can be Application Manager. Several users reported that an old Application Manager caused the problem.
However, you can fix the issue simply by installing the Creative Cloud Application Manager. After doing that, the problem should be resolved entirely.
4. Reinstall Microsoft Visual C++ 2010 Redistributable
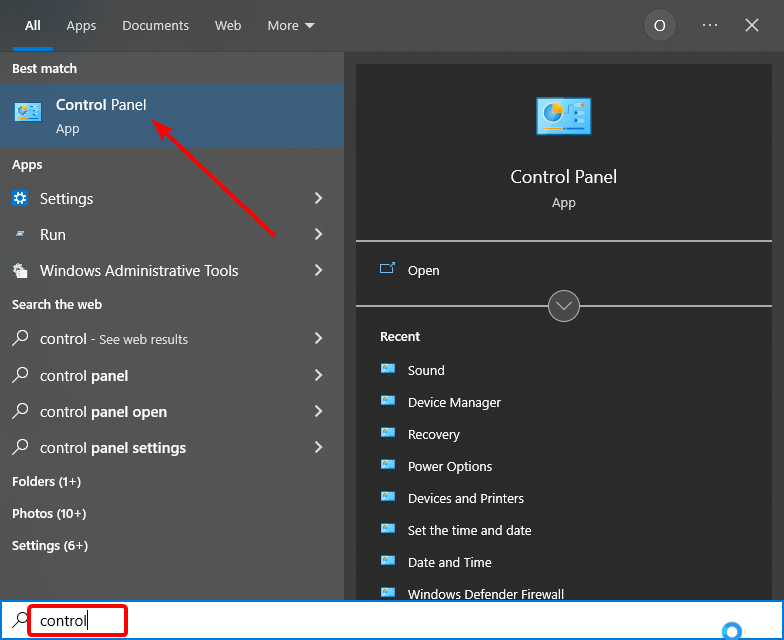
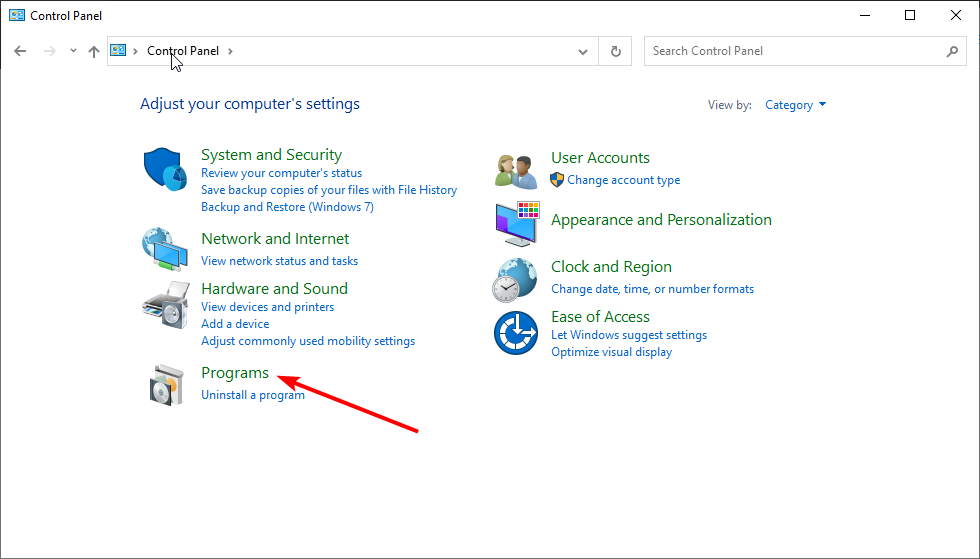
- Press the Windows key + S, type control, and select Control Panel from the list.
- Select the Programs option.
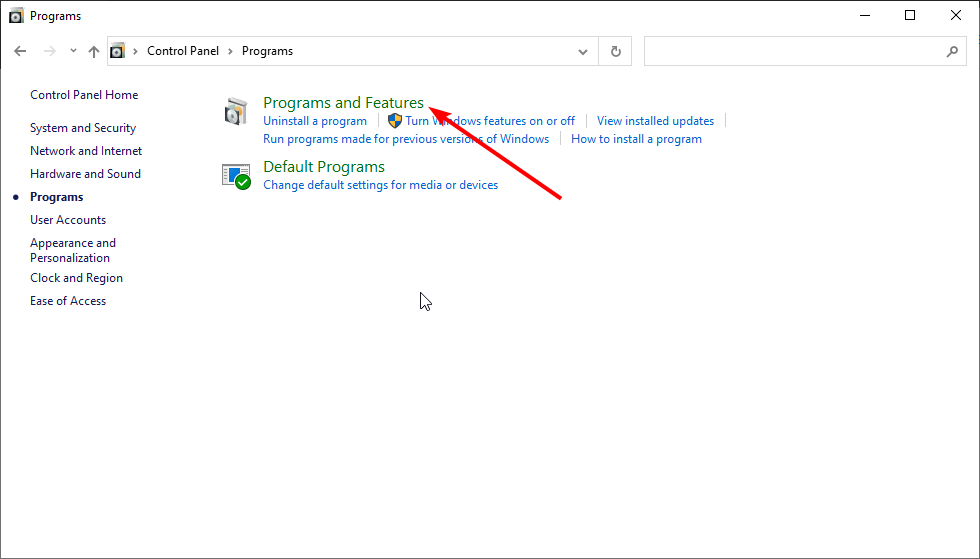
- Choose Programs and Features.
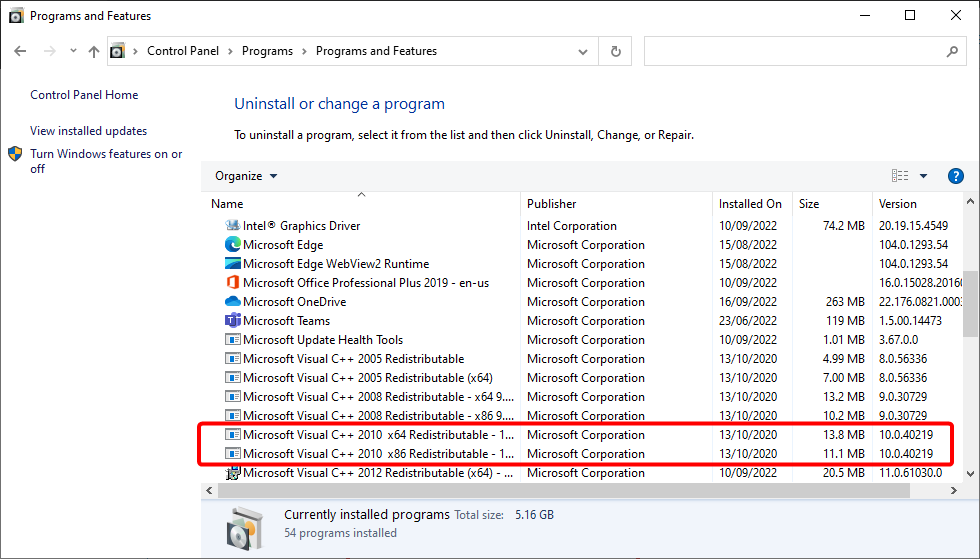
- Locate Microsoft Visual C++ 2010 Redistributable on the list. You should have two versions available x86 and x64.
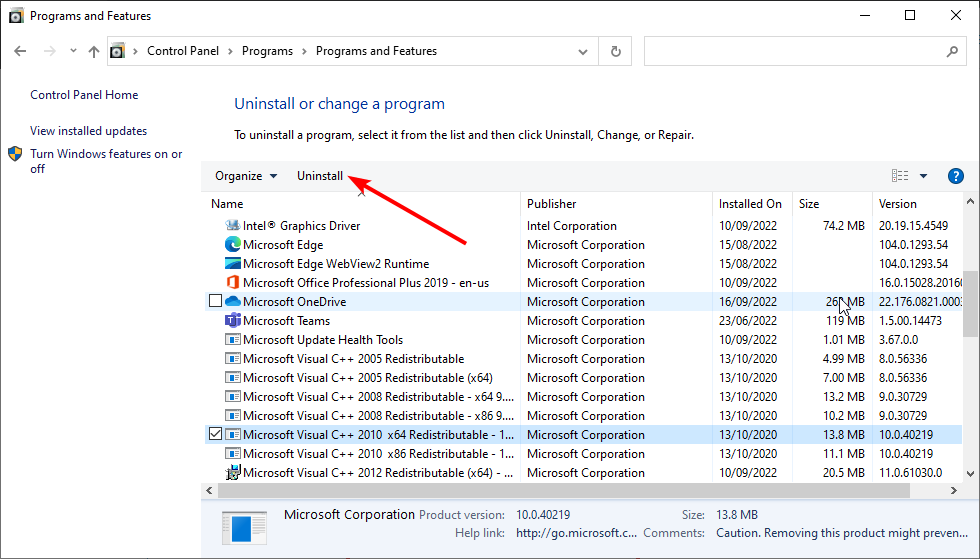
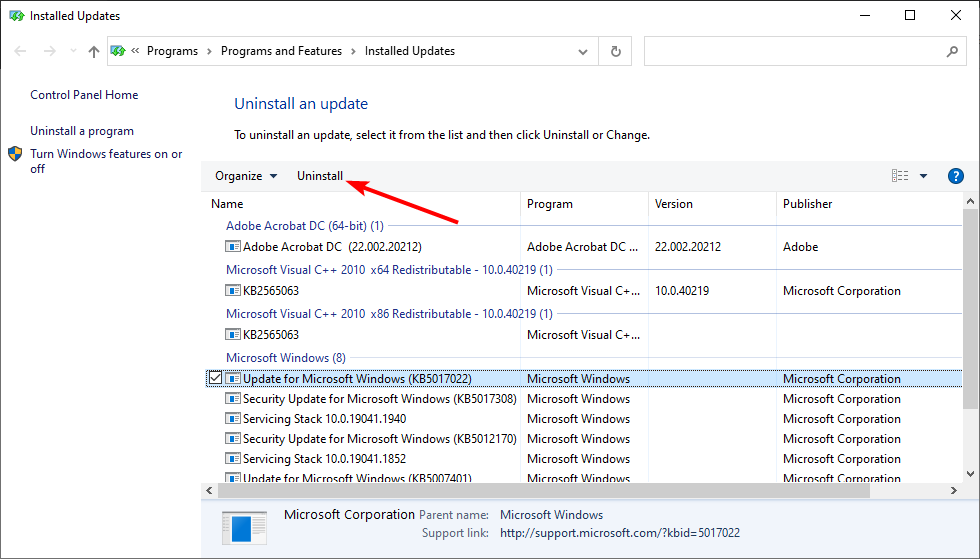
- Select each of them and click the Uninstall button at the top.
- After that, visit Microsoft’s website and download 32-bit and 64-bit versions of Microsoft Visual C++ 2010 Redistributable.
Many applications rely on Microsoft Visual C++ Redistributables to work correctly. However, if there’s an issue with Microsoft Visual C++ Redistributable installation, you might encounter problems with Photoshop.
If Photoshop is not working on your Windows 10 PC, it’s advised that you reinstall Microsoft Visual C++ 2010 Redistributable.
Remember that you might have to reinstall a different version of Microsoft Visual C++ Redistributable to fix this problem, so it might take a few tries to fix this error.
5. Reset Photoshop preferences
- Start Photoshop.
- As soon as you start Photoshop, press Alt + Ctrl + Shift. By doing so, you’ll reset Photoshop preferences.
- You’ll see a confirmation dialog if you perform the previous step properly. Click Yes to proceed.
According to users, sometimes your Photoshop preferences can become corrupted, which can lead to many other errors. Note that this solution also works for Photoshop not working on Mac.
To fix this problem, it’s advised that you reset your Photoshop preferences. After doing that, check if the problem is still there.
6. Use Command Prompt to modify the registry
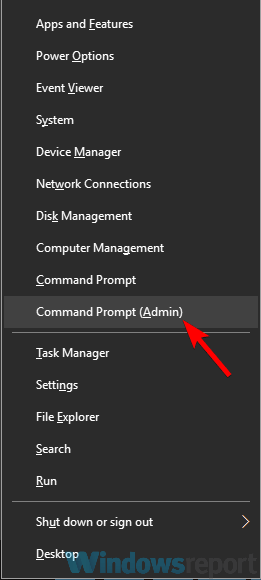
- Right-click the Start button and choose Command Prompt (Admin) or PowerShell (Admin).
- Now run the following command:
reg add HKEY_CURRENT_USERSoftwareMicrosoftWindowsCurrentVersionPen /v LegacyPenInteractionModel /t REG_DWORD /d 1 /f
After running this command, check if the problem with Photoshop is still there.
Sometimes, Photoshop problems can occur due to issues with your registry, and to fix the problem, you need to make this tweak shown above.
7. Remove the problematic updates
- Press the Windows key + I to open the Settings app.
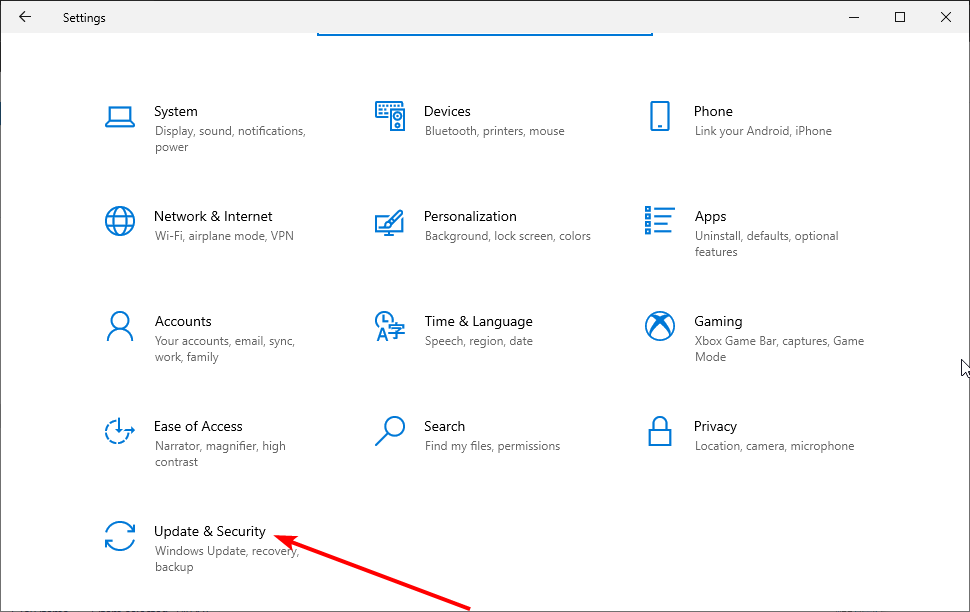
- Select the Update & Security option.
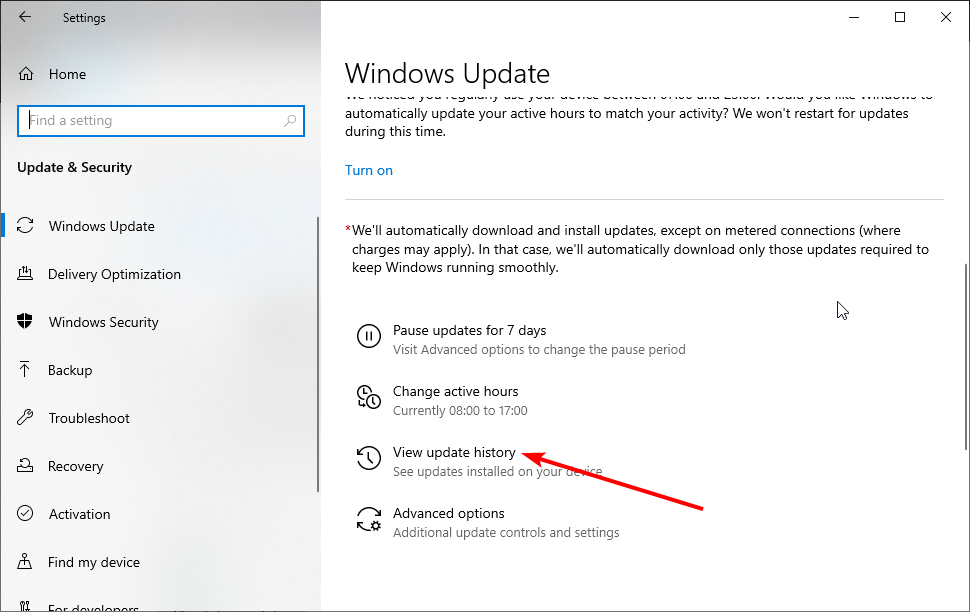
- Click the View update history option.
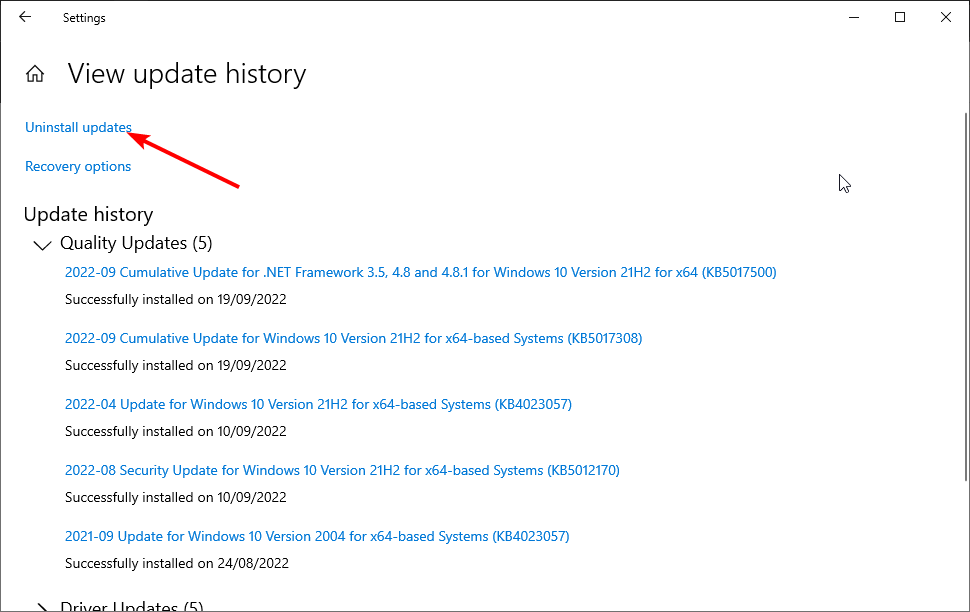
- A list of updates will now appear. Memorize or write down the codes of recent updates.
- Click Uninstall updates. This will open Control Panel with a list of the recent updates.
- Click on each of them and select the Uninstall option at the top.
- Finally, follow the simple onscreen instructions to complete the process.
According to users, if Photoshop is not installing, you’ll need to remove the problematic update.
Once you remove the problematic update, check if the problem is still there. If not, you’ll need to prevent Windows 10 from automatically installing updates.
8. Remove problematic applications
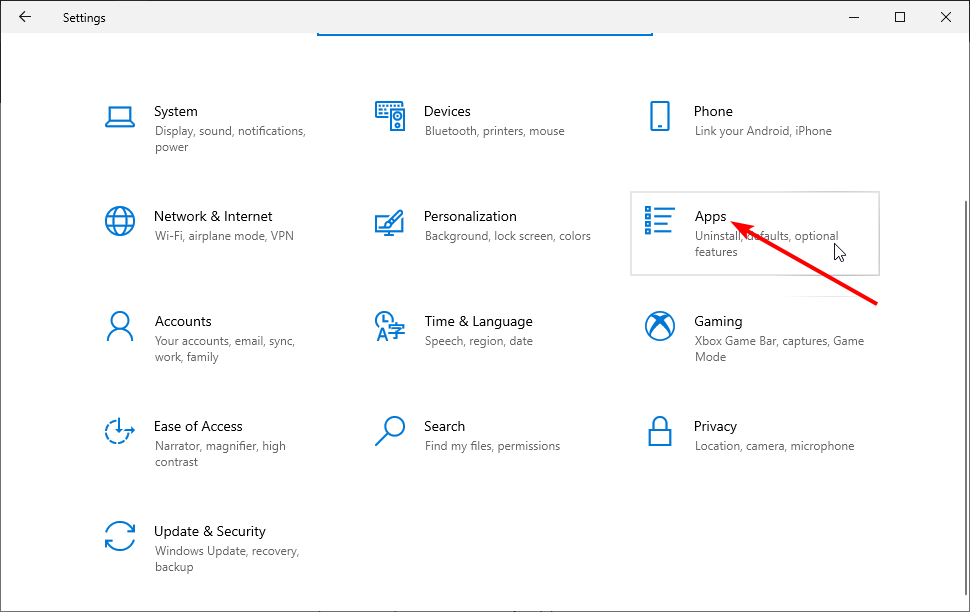
- Open the Settings app and select the Apps option.
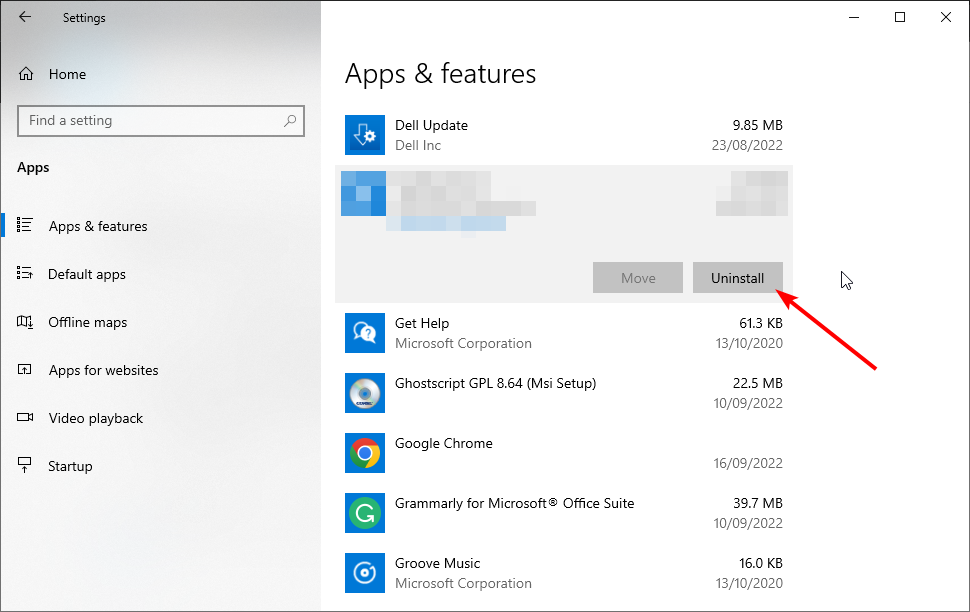
- Click on the problematic app.
- Finally, click the Uninstall button and follow the onscreen instructions to complete the process.
According to users, if Adobe Photoshop is not opening, you must find and remove the problematic applications from your PC.
Many users reported that Lavasoft software caused Photoshop issues on their PC, so in order to fix the problem, it’s advised that you find and remove Lavasoft applications from your PC.
There are several ways to do this, but the most effective would be to use dedicated uninstaller software in CCleaner. If you uninstall from Windows settings, there are high chances that there will be some left behind files that Windows will not be able to automatically detect.
CCleaner, on the other hand, is built to remove all traces of your apps. Moreover, in case you have malicious apps that won’t uninstall whatsoever, you can use the forced uninstall feature which is integrated into most noteworthy uninstallers.
After removing the problematic application using this uninstaller software, check if the problem with Photoshop is still there.
⇒ Get CCleaner
How do I fix Photoshop problems on Windows 11?
The common photoshop problems on Windows 11 like Photoshop crashing or not responding are caused by similar issues on Windows 10.
To solve the problem, you can reset your Photoshop preferences. Also, you can remove any problematic Windows 11 update if you started noticing the problem after installing a new release.
How do you reset Photoshop?
- Press the Ctrl key + K to open the preferences window.
- Click on the Reset Preferences on Quit button.
- Finally, click the OK button to confirm the action.
Also, you can reset Photoshop preferences by using the Ctrl + Alt + Shift shortcut as shown earlier in this guide. But this requires a bit of a fast finger when the app is loading up.
Photoshop is a great tool, but there are many problems you can face on it on Windows 10 and 11. But with the info in this guide, you should be able to fix most issues easily.
Do you need a guide for a specific issue like not enough RAM for Photoshop error? Then, check our carefully written guide for the surefire fixes to apply.
Feel free to let us know the issues you are facing on Photoshop and how you were able to solve them with our solutions in the comments below.

User forum
0 messages