How to fix Epson printer 0xf errors with ease
Key notes
- The printer errors 0xf1/ 0xf2/ 0xf3/ 0xf4 can be results of hardware or software issues.
- To easily fix the Epson error 0xf1, reset the printer to its manufacturer's settings.
- Updating the printer driver manually and automatically will also fix the 0xf1 printer error.
- Open up your Epson device, check its ink, and make sure it is not jammed.

Some Epson printer users have posted on the Microsoft forum about a 0xf1 error. While there are 4 similar errors, specifically 0xf1/ 0xf2/ 0xf3/ 0xf4, they all can be solved with the same steps. One user stated:
When I switch on my Epson XP-435, I get a message: Printer error, turn power off and on again. Error code 0xf1.
Consequently, users can’t print when that error arises on Windows 10 PCs. To fix that issue, check out some of the potential resolutions below.
How can I fix the Epson printer error 0xf?
1. Reset the printer
- First, try resetting the printer as the 0xf1 error message suggests. Turn off the printer.
- Unplug the printer’s USB power cable from both wall and printer.
- Turn off your desktop or laptop, if it’s on, as well.
- Wait for about 10 minutes.
- Then plug the printer back in.
- Turn the printer on.
2. Update the printer’s driver
Use Device Manager to manually update your drivers
- Go to the Search bar and type device manager.
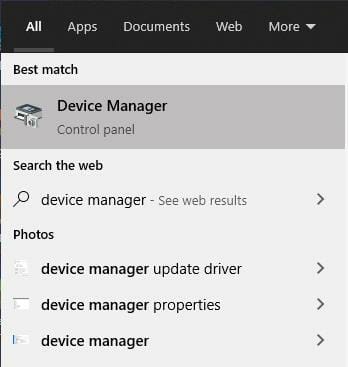
- Click and open Device Manager.
- You’ll be opening a list of devices where you must click on Print Queues.
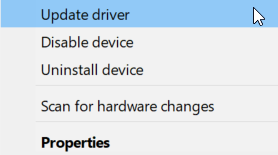
- Select your printer device, and right-click on it.
- Select Update driver.
The 0xf1 error might also be due to an incompatible or antiquated printer driver.
You can manually update your drivers from Device Manager, but you can simplify your work by updating your drivers with the help of a driver updater software.
Update you drivers automatically with a third-party driver updater tool
Updating the drivers may not be your favorite easiest activity. That’s why a professional driver updater tool is one of the most efficient options to take into consideration in order to install the latest drivers on your Windows 10 PC.
You can save time, stress, and causing even more problems to your PC by choosing to update the drivers automatically with specialized software.
- Download and install the Outbyte Driver Updater app.
- Launch the software and wait for the app to detect all incompatible drivers.
- Now, it will show you a list of all outdated drivers to select the ones to Update or Ignore.

- Click on Update & Apply Selected to download and install the latest versions.
- Restart your PC to ensure the applied changes.

Outbyte Driver Updater
Maintain your device healthy by letting OutByte Driver Updater find the latest driver options.3. Remove jammed printer
- Turn off the printer first.
- Remove all the paper from the paper feed tray.
- Open the printer’s scanner unit to check if there’s any jammed paper from inside.
- Remove any jammed sheets you find.
- Close the printer.
- Then remove the duplexer at the rear of the printer.
- Remove any jammed paper from the duplexer.

- Place the duplexer back in the printer.
The 0xf1 error can often be due to a printer paper jam.
4. Remove debris from the paper feed
Some users have said they’ve fixed the 0xf1 error by removing debris, such as paperclips, from their printers’ paper feeds.
So, turn off your printer; and then check if there is any debris stuck in the paper feed. If so, remove the debris from the paper feed.
5. Move the Printer Head Assembly to the left
- Trn off the printer.
- Then unplug the printer’s USB cable.
- Next, open up the printer.

- Carefully move the Printer Head Assembly to the far left. Don’t force the Printer Head Assembly if it doesn’t easily move.
- Then move the Printer Head Assembly to the right to restore it to the original position.
- Plug the printer back in, and turn it on.
- Repeat the steps above three to four times if required.

Moving the Printer Head Assembly might resolve the 0xf1 error for some users
6. Run the Printer troubleshooter
- To open that troubleshooter, click the Type here to search button.
- Input the keyword troubleshoot in Windows 10’s search box.
- Click Troubleshoot settings to open the Troubleshoot tab in Settings.

- Select the Printer troubleshooter.
- Press the Run the troubleshooter button to open the Printer troubleshooter.
- Select the printer to fix the 0xf1 error for.
- Then click Next to go through the troubleshooter.
Windows 10’s Printer troubleshooter might also come in handy for fixing error 0xf1.
If, however, other fixes are needed, check the warranty period for your printer to see if you can return it to Epson for repairs without additional charges.
For any other questions or suggestions, don’t hesitate to reach for the comments section below.
Read our disclosure page to find out how can you help Windows Report sustain the editorial team. Read more


Improve this guide


User forum
1 messages