Projector Says No Signal on Windows 10? How to Recognize it
Check the connection and projection settings to fix this issue
3 min. read
Updated on
Read our disclosure page to find out how can you help Windows Report sustain the editorial team. Read more
Key notes
- This issue occurs on Acer and other projector brands while using an HDMI connection.
- Adjusting the settings and checking your cables can help fix this issue on your PC.
If your projector is giving you No signal on Windows 10, it means that it’s not properly configured or there’s another issue.
This can be a big problem and interrupt your presentation since the projector won’t show the computer screen or anything at all. Luckily, there are a few ways you can fix this issue.
Why is my computer projector saying no signal?
- Temporary glitches with the PC or projector can cause connection errors.
- Features such as Auto Source on the projector can cause this issue.
- Some older projectors can’t handle higher resolutions properly.
How do I get Windows 10 to recognize my projector?
1. Disconnect and reconnect
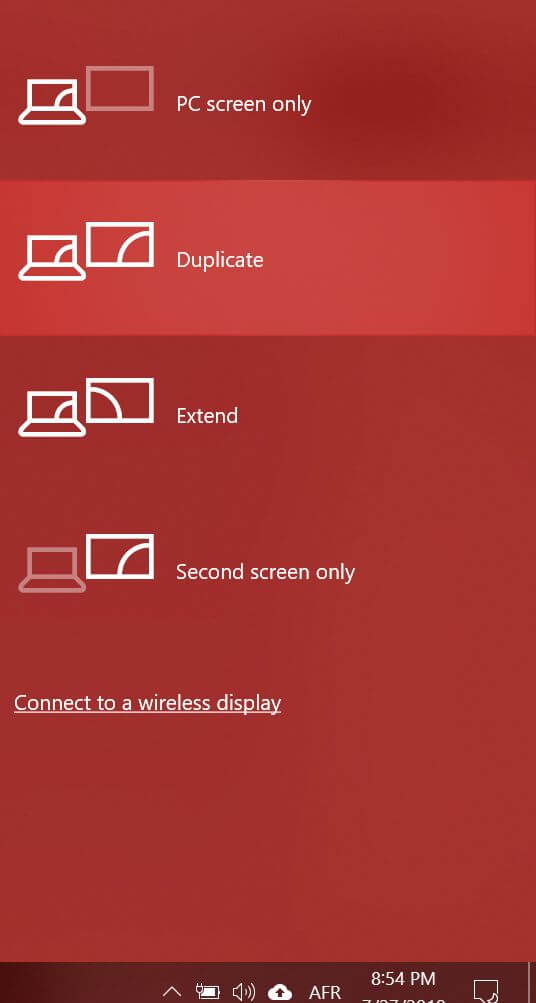
- Click the Actions center icon from the taskbar.
- Click on Project option.
- Now select PC Screen Only.
- Disconnect the HDMI / VGA cable from the projector.
- Restart your computer.
- Reconnect the Projector to the computer.
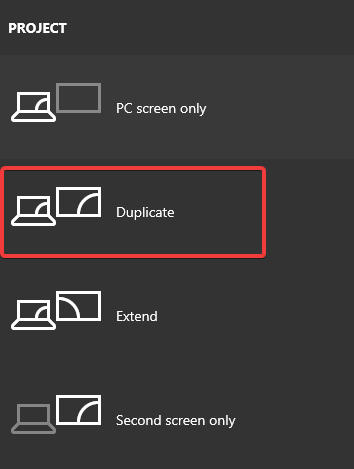
- Press Windows key + P.
- Click on Duplicate.
- This should help you resolve No Signal error.
2. Disable auto source selection
- If you have enabled Auto Source selection on the projector, it might be creating conflict with the source device.
- Begin with turning off the auto source selection in the Projector menu.
- Use the Project menu and select your Windows 10 device manually as the source.
- Now press Windows key + P on your Windows computer.
- Select Duplicate from the options.
- Check if the projector is showing your Windows screen. If not, proceed with other steps.
Check source display resolution for resource
- Click on Start and select Settings.
- Click on System.
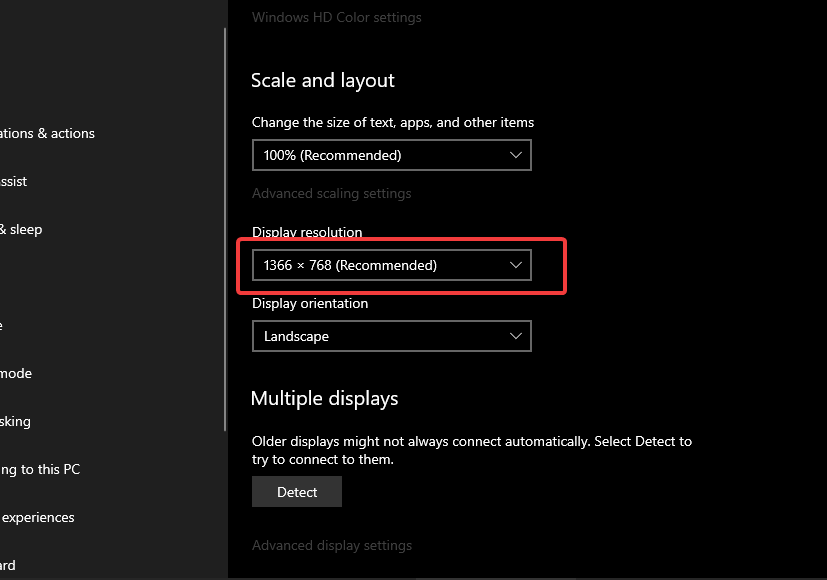
- From the Display tab, scroll down to Scale and Layout section.
- Click the Drop-down menu for Resolution.
- Select HD resolution 1024×768.
- Check if that works. If not change the Display resolution to Full HD 1920 x 1080.
- Make sure the resolution is supported by your projector.
After doing that, check if the problem is still there.
3. Other solutions to try
- Check if the cable you are using to connect the Projector to the Source device is supported.
- Press the Home Search button and wait for a few seconds for the projector to display the image.
- Press the Home button on the remote control to select from a list of available sources.
- If you are using a longer HDMI cable, if possible try to replace it with a shorter HDMI cable. This is one of the official recommendations from Epson.
- Try to connect the projector to the video source directly in case you are using any third-party device to create a connection between the projector and the source device.
- Reset the Projector settings to factory default. Refer to your projector’s user guide for clear instructions on how to do it. Resetting your projector can fix any issues due to a corrupted configuration.
If the projector is giving a No signal message on Windows 10, our solutions should be able to help fix that.
In case the issue is still there, we have a great guide on what to do if a VGA projector is unable to display properly, so be sure to check it out.
Did you use a different solution? If so, share it with us in the comments section below.




User forum
0 messages