6 Easy Ways to Disable or Turn off OneDrive in Windows 11
Unlinking the account may be the fastest solution
4 min. read
Updated on
Read our disclosure page to find out how can you help Windows Report sustain the editorial team. Read more
Key notes
- If you have better alternatives to cloud backup, you can easily remove OneDrive from Windows 11.
- We also covered a few ways to disable the app, stop it from running, or pause syncing on your PC.
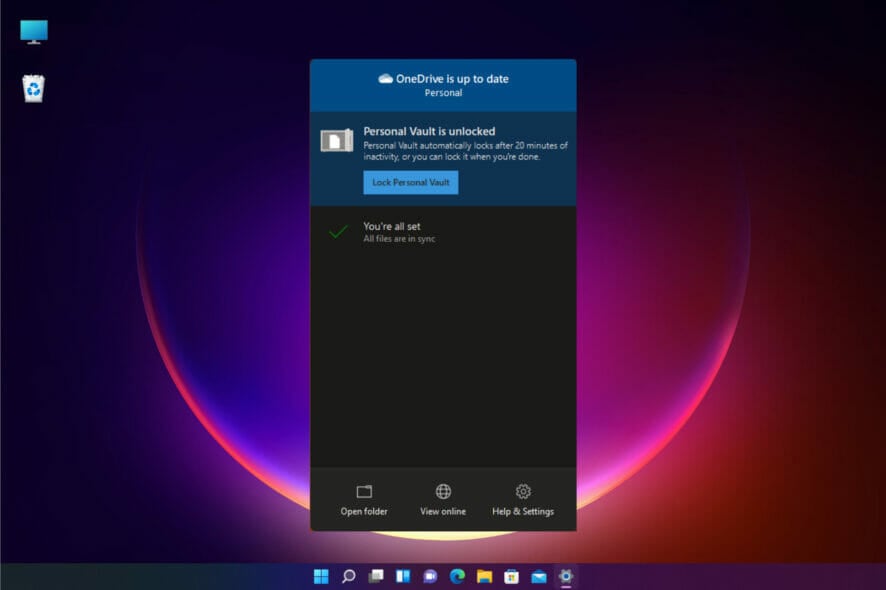
Microsoft has implemented OneDrive as a native cloud service in Windows 11, but not all users want it on their PCs.
Whether you prefer other cloud backup services like Google Drive and Dropbox, or you don’t intend to save your data in the cloud, you look for a way to remove or disable OneDrive in Windows 11.
There are many options here; you can pause the synchronizing option for a certain period and think things over.
Does Windows 11 require OneDrive?
No, the new OS does not require OneDrive.
Although OneDrive is a pre-installed cloud service in Windows 11 that offers storage space for online file storage and access from any computer, tablet, or smartphone, you may delete it entirely from a Windows 11 PC without affecting any other aspect of Windows 11.
Some users may want to eliminate OneDrive because it has sync issues. However, you may fix sync issues rather than Disable the service.
Alternatively, you may sync it to an external hard drive. However, if you are adamant about getting rid poof the service, read the following solutions.
How can I disable or remove OneDrive in Windows 11?
1. Unlink the PC from OneDrive
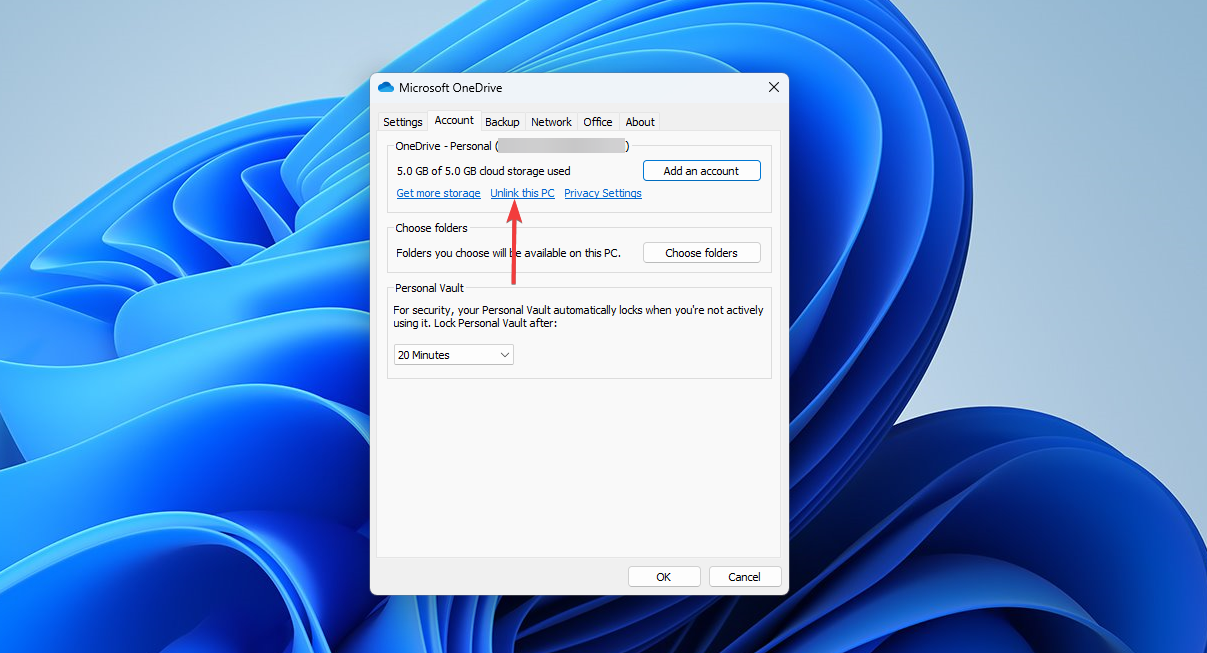
- Click the OneDrive icon in the status bar, click the Settings icon, and select Settings from the options.
- In the next window, click on Unlink this PC.
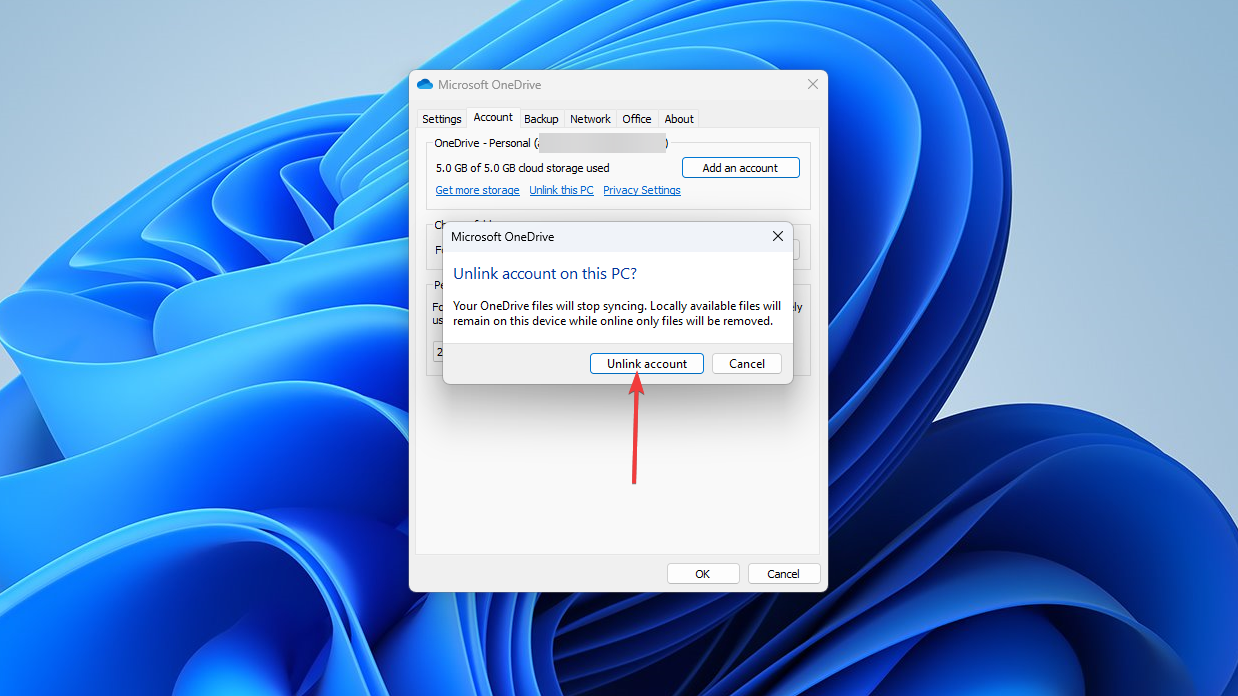
- Confirm the selection by choosing Unlink account.
If you change your mind and decide to keep it, learn how to disable OneDrive pop-ups in Windows 11 and keep it from interrupting your work.
That is how to turn off OneDrive in Windows 11 by unlinking it.
2. Uninstall OneDrive
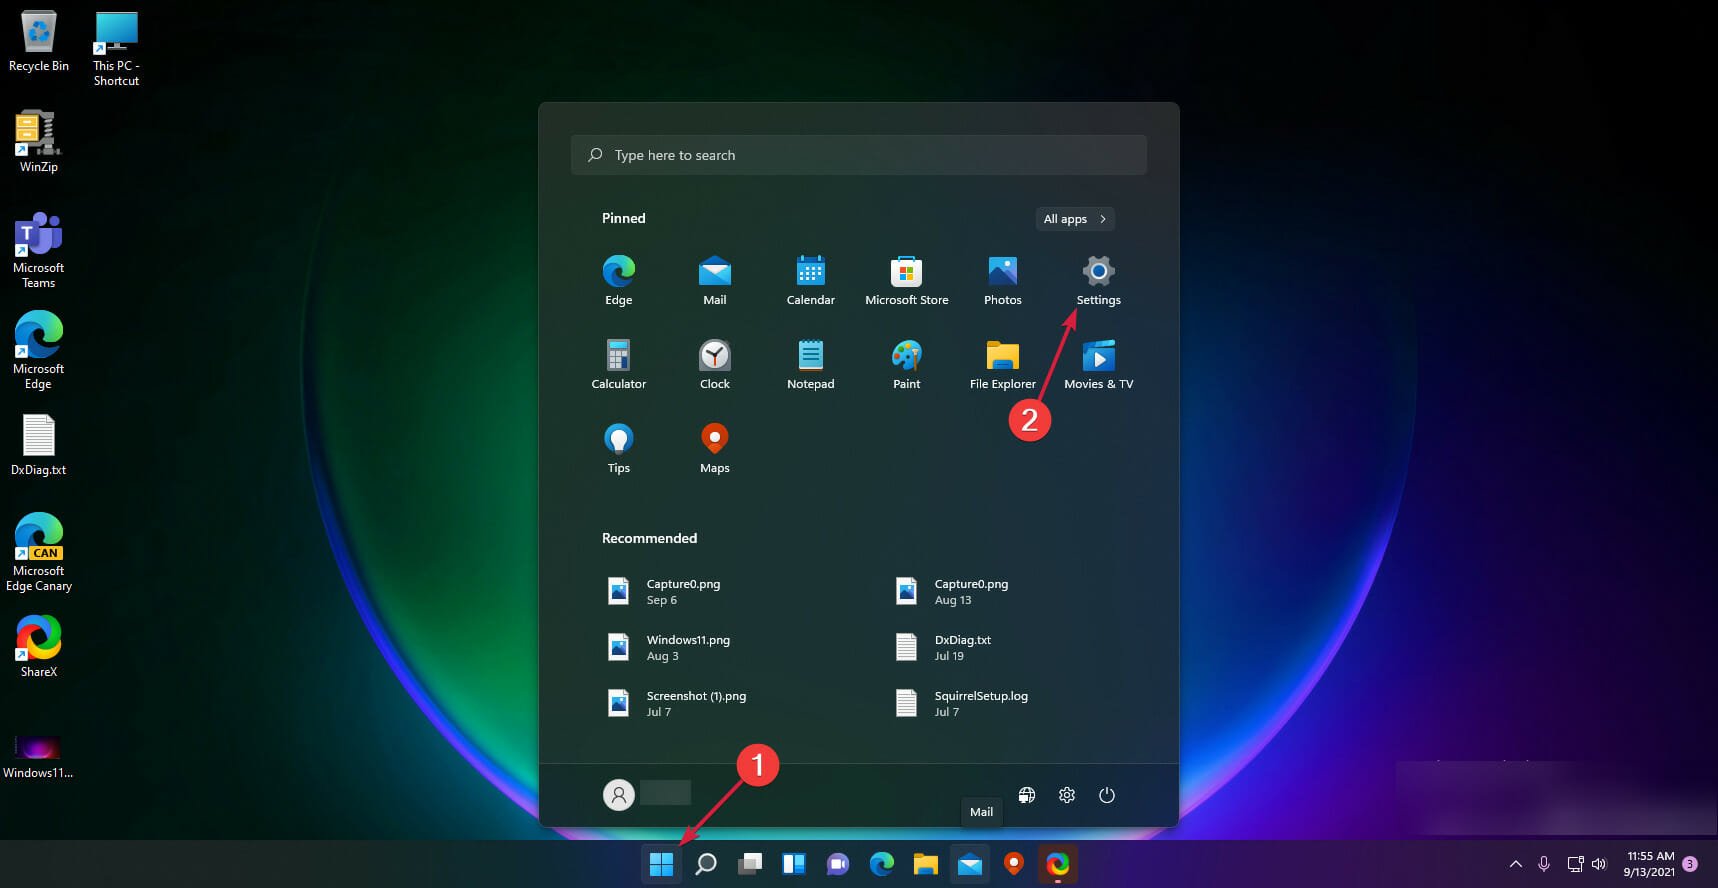
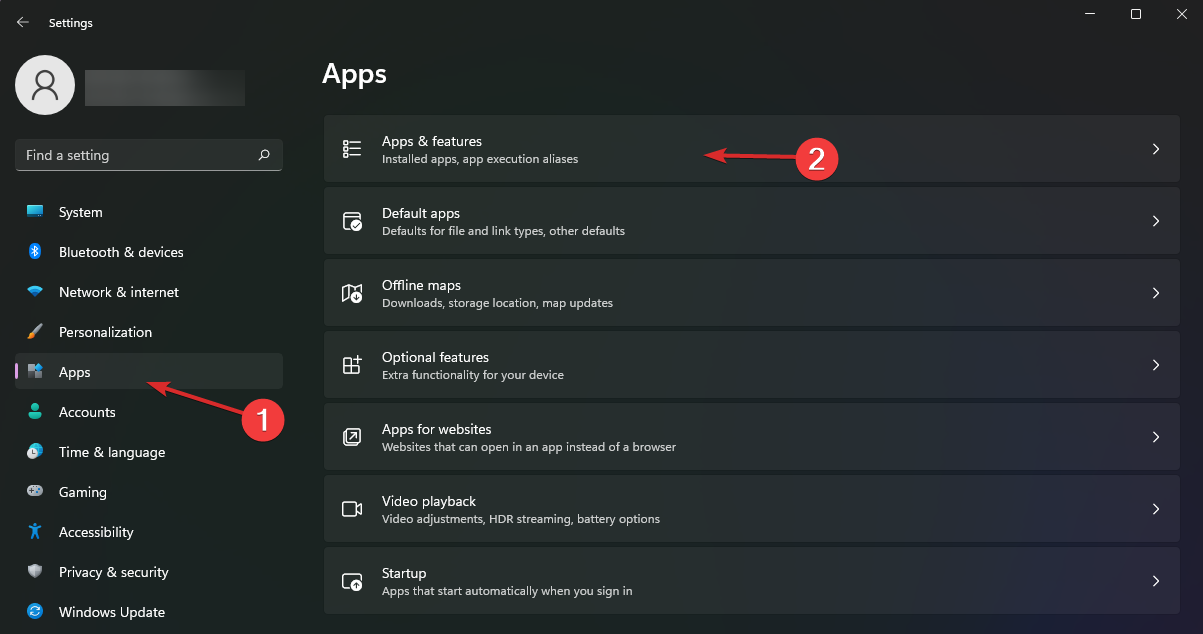
- Click the Start button and select Settings.
- Now choose Apps from the left pane and click on Apps & features from the right.
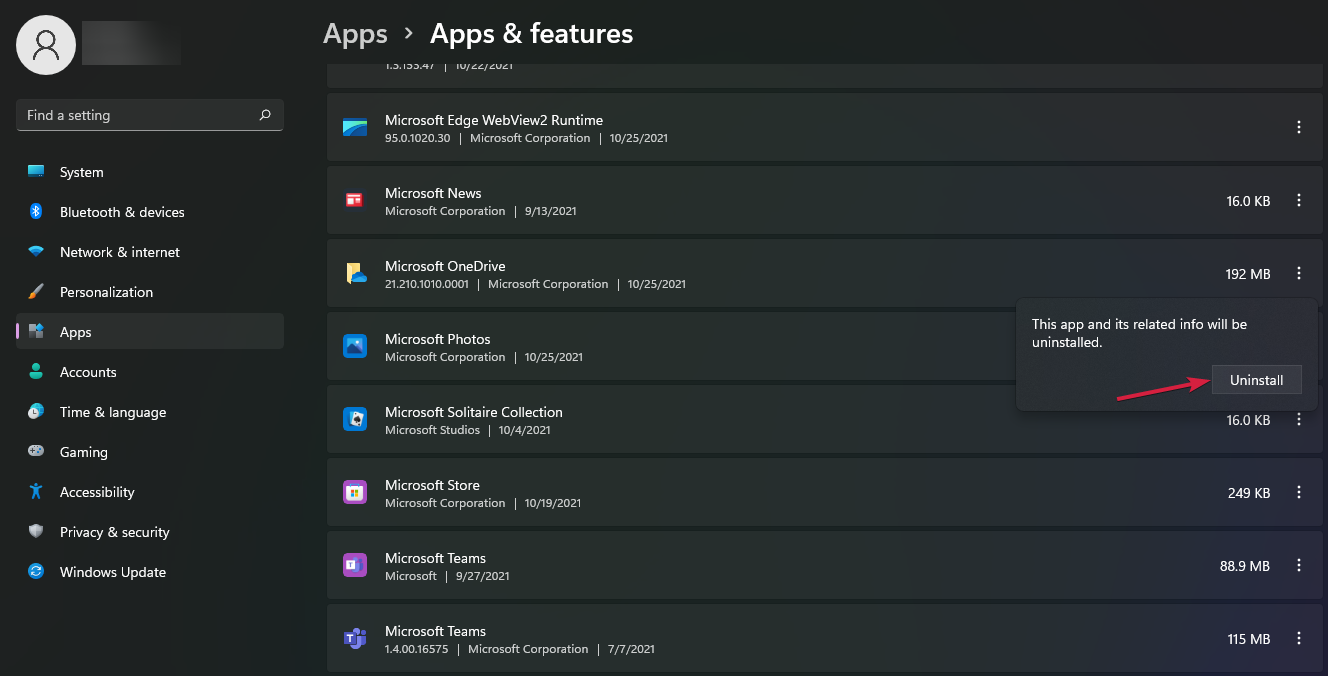
- Wait until the list of apps is populated, then look for Microsoft OneDrive, click the three dots button from its right, and select Uninstall.
- Hit the Uninstall button again to confirm your selection.
- When you’re prompted if you want OneDrive to make changes to your PC, click the Yes button, then reboot your PC for the changes to take effect.
After that, the system will uninstall OneDrive from your PC, and you will no longer be bothered with any possible dialogues to sync your data.
3. Disable OneDrive using the Group Policy Editor
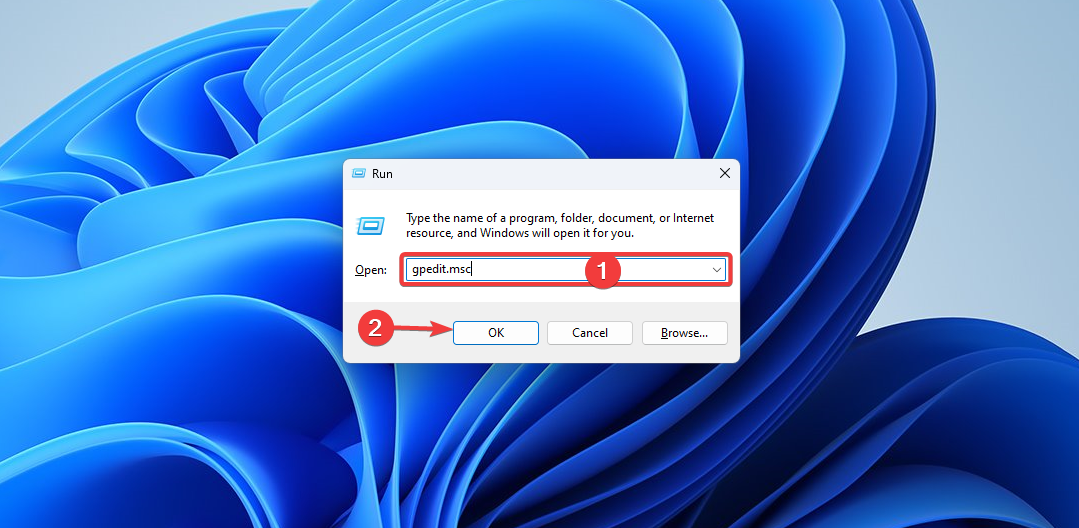
- Press the Windows key + R to launch a Run console, type gpedit.msc, and press Enter or click OK.
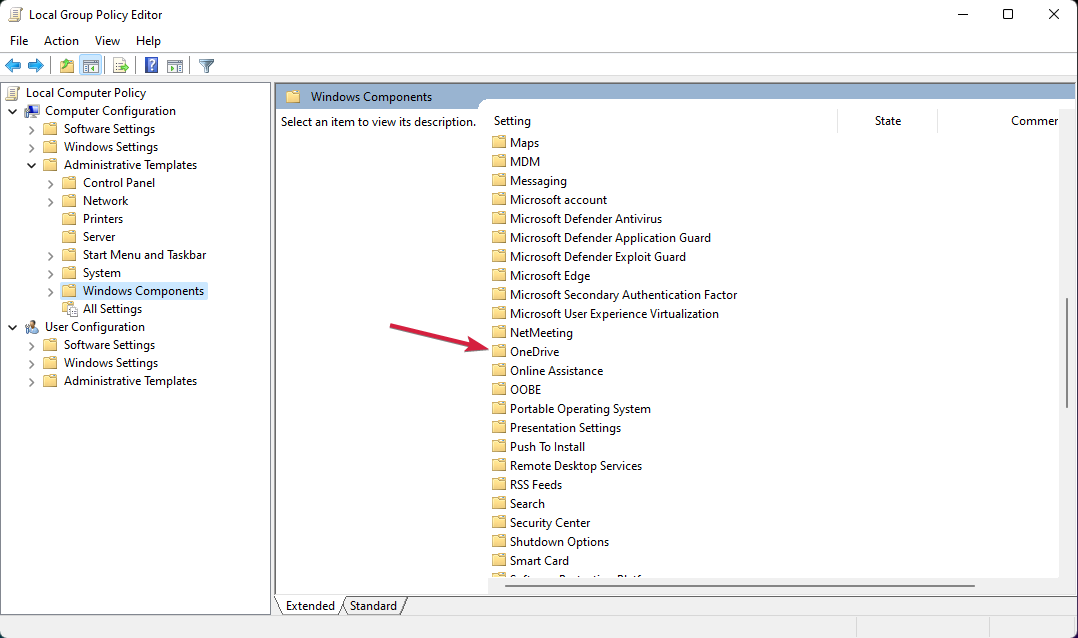
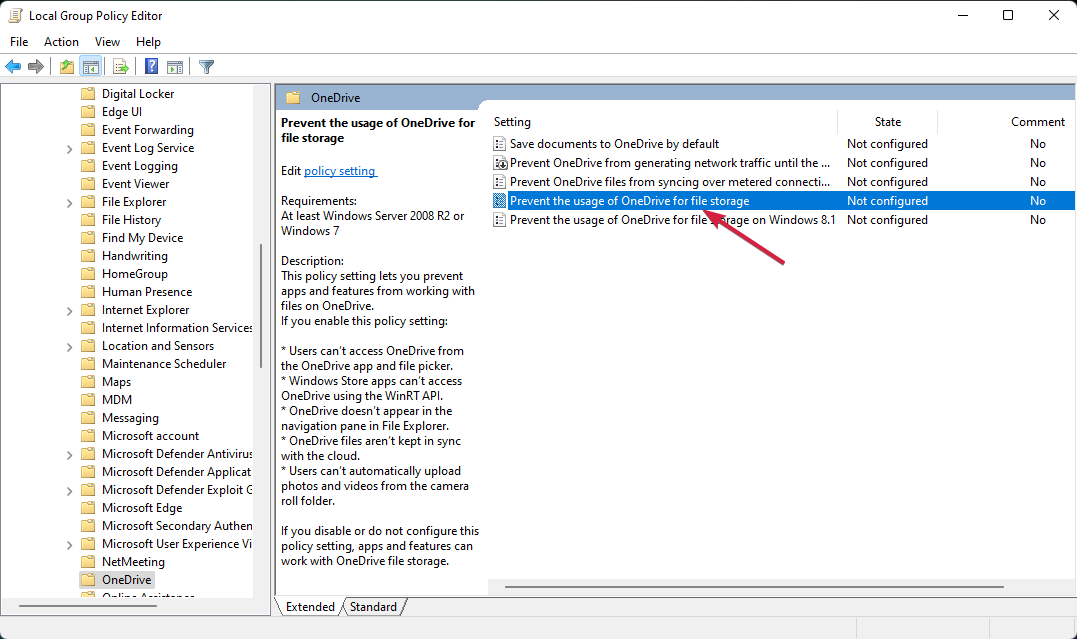
- Navigate to the following policy:
Computer configuration\Administrative Templates\Windows Components\OneDrive - Double-click the Prevent the usage of OneDrive for file storage key to open it.
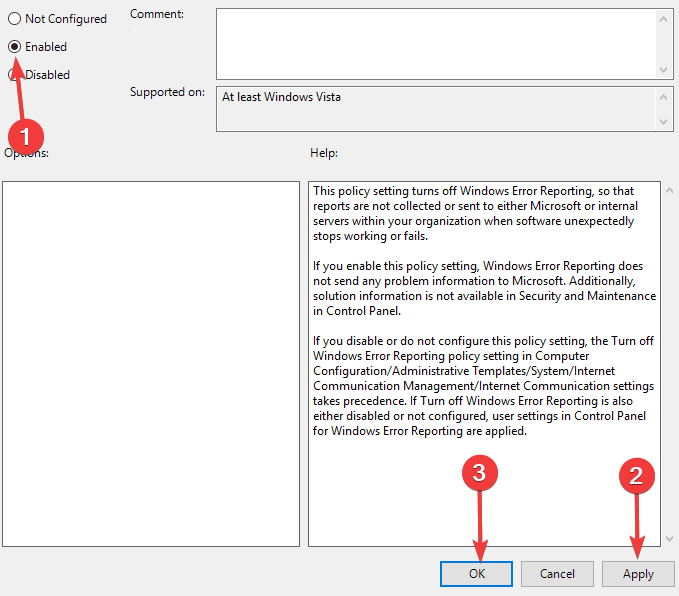
- Select Enabled from the top left corner, then click Apply and OK.
That is how to turn off OneDrive in Windows 11 using the Group Policy Editor.
4. Disable OneDrive using the Registry Editor
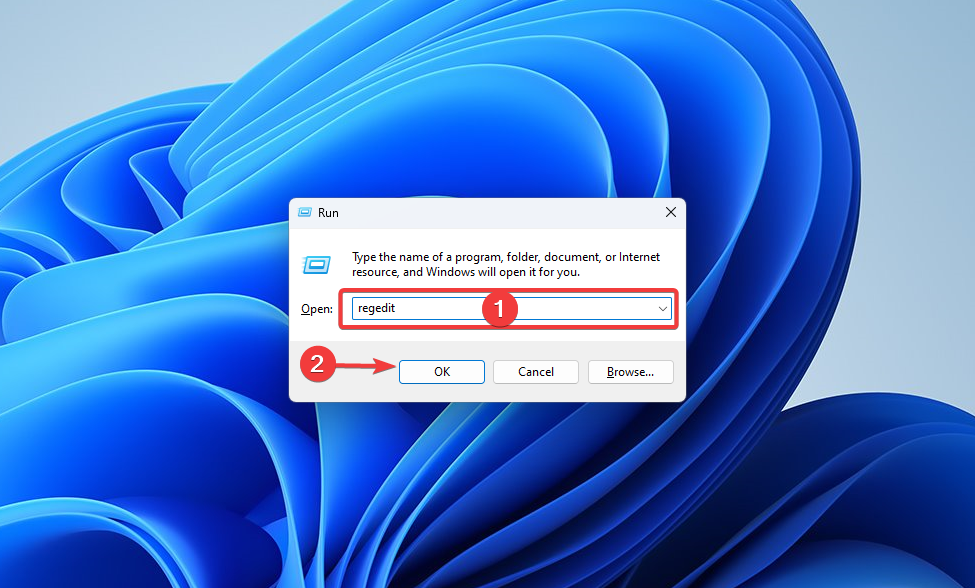
- Press the Windows key + R to start the Run console, type regedit, and press Enter or click OK.
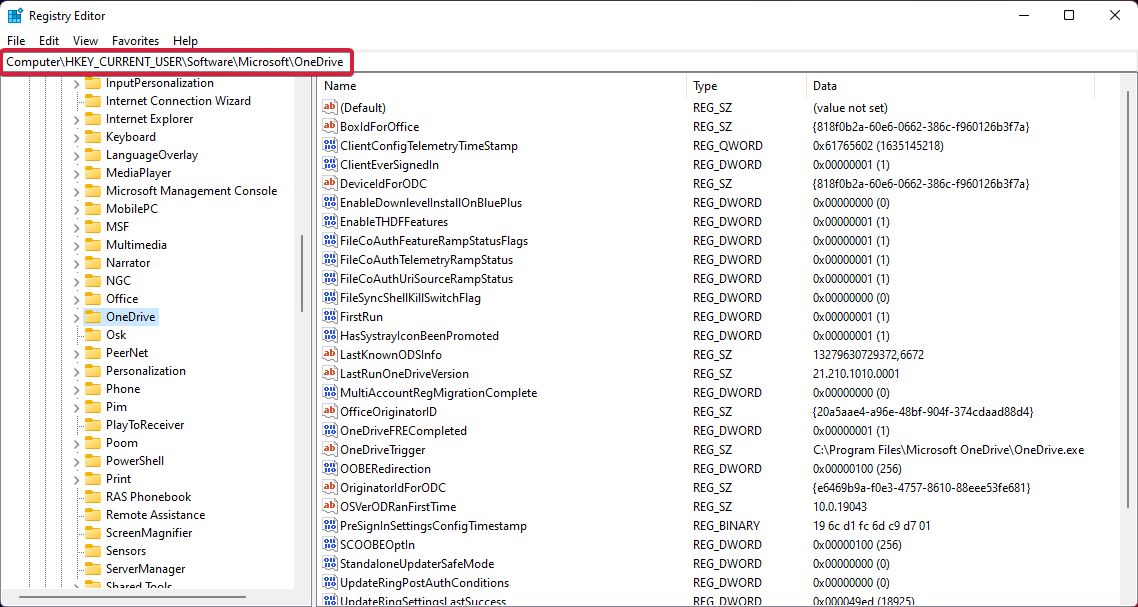
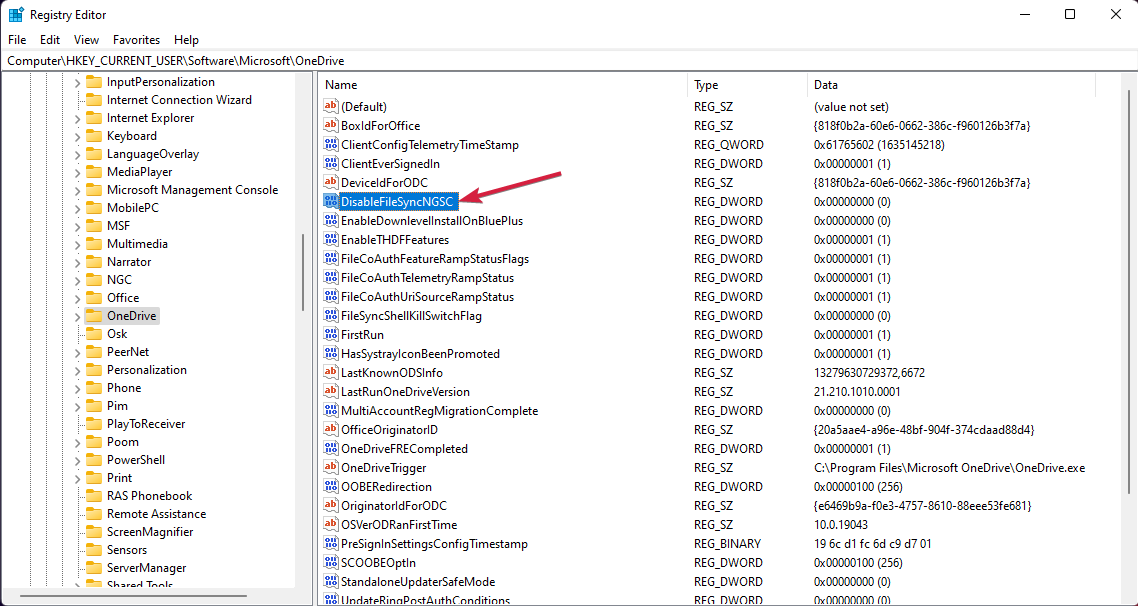
- Navigate to the following key:
Computer\HKEY_CURRENT_USER\Software\Microsoft\OneDrive - Double-click the DisableFileSyncNGSC key. If you don’t find it in the list, right-click in the right window, select New, then choose DWORD (32-bit) Value and name it DisableFileSyncNGSC, then double-click it.
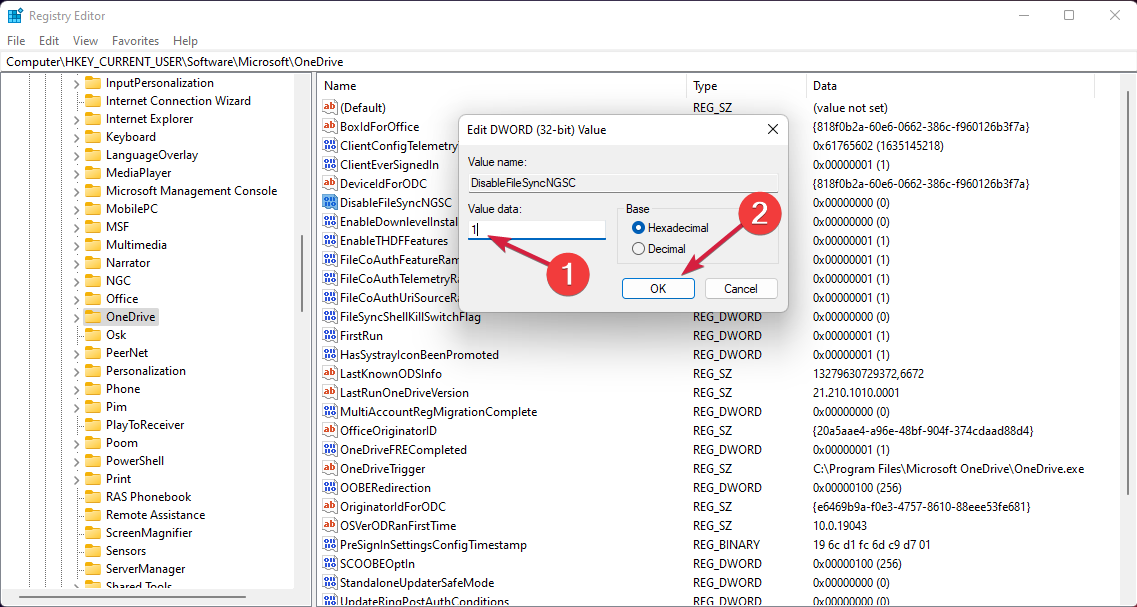
- Now enter 1 in the Value data field and click OK.
- Restart your computer for the changes to take effect.
If the situation gets out of hand, we also have an article on how to fix broken Registry items in Windows 11.
5. Disable and uninstall OneDrive using Command Prompt
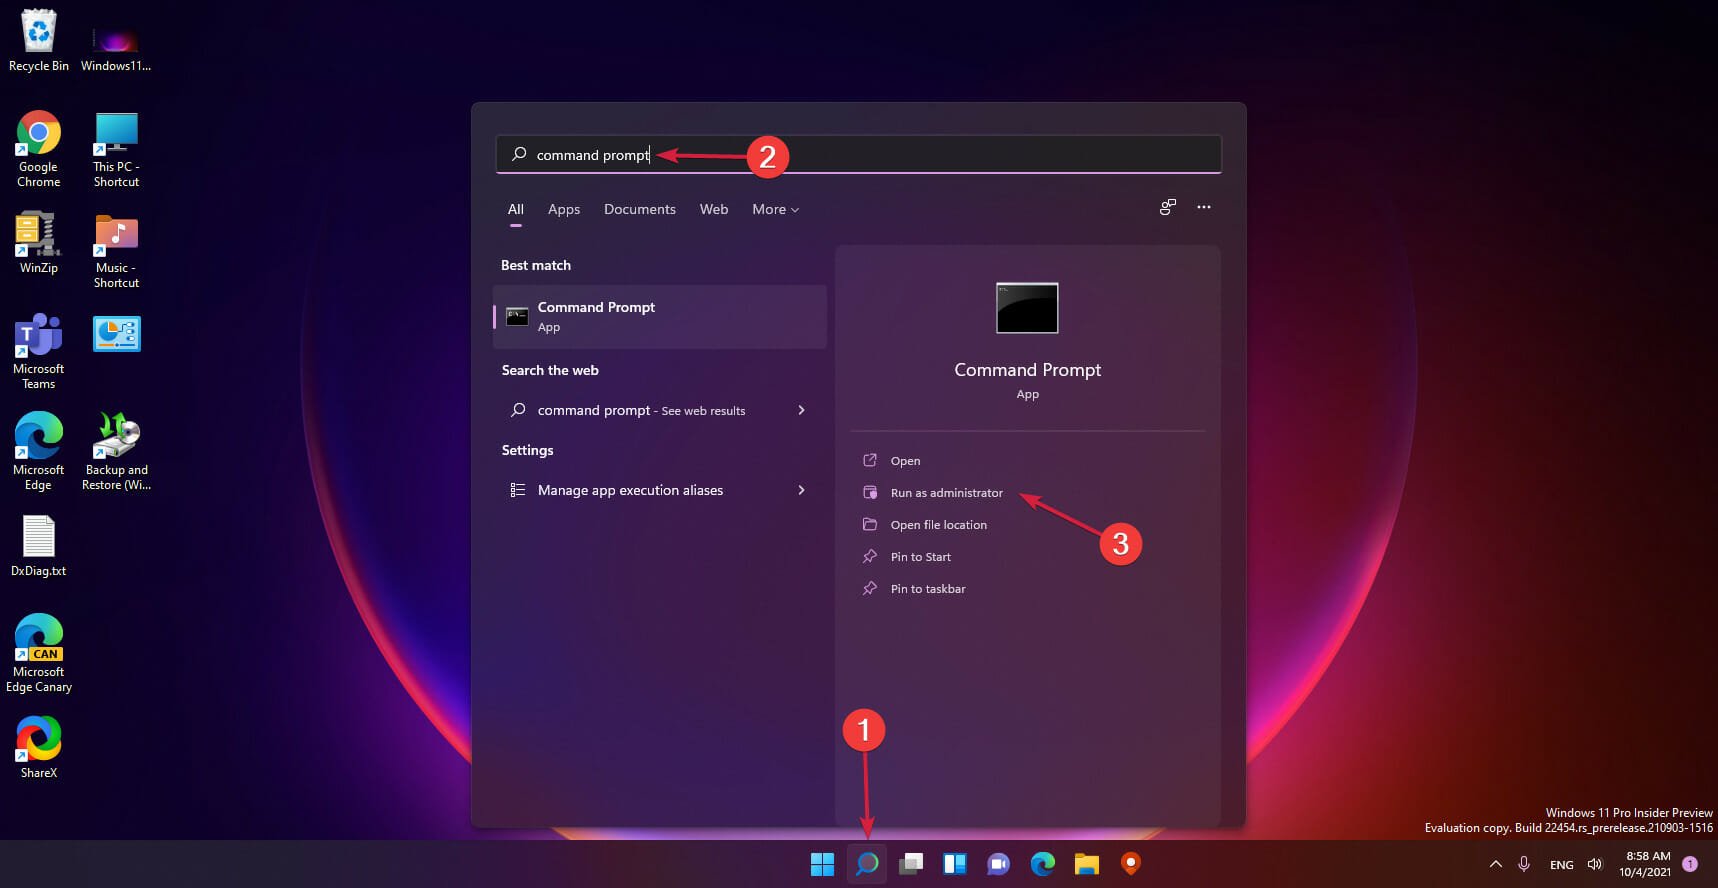
- Click the Search icon from the Taskbar, type command prompt, and click on Run as Administrator to start Command Prompt with full privileges.
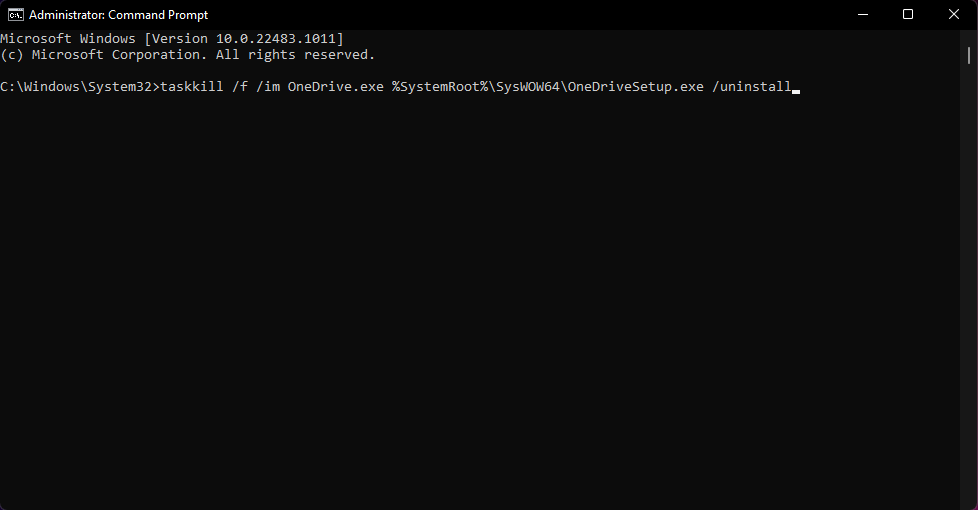
- Type or paste the following command and press Enter to run it:
taskkill /f /im OneDrive.exe %SystemRoot%\SysWOW64\OneDriveSetup.exe /uninstall
That is how to turn off OneDrive in Windows 11 using your Command Prompt.
6. Prevent OneDrive from starting
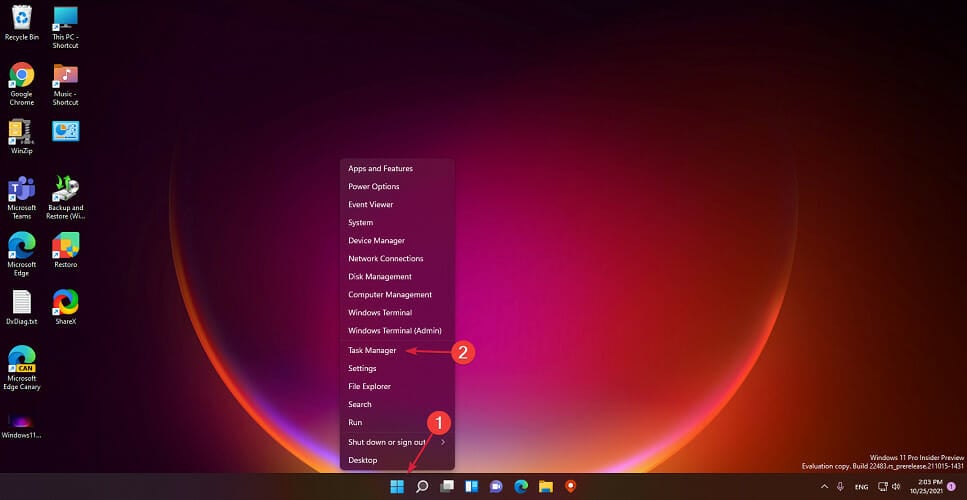
- Right-click the Windows button from the Taskbar and select Task Manager from the list.
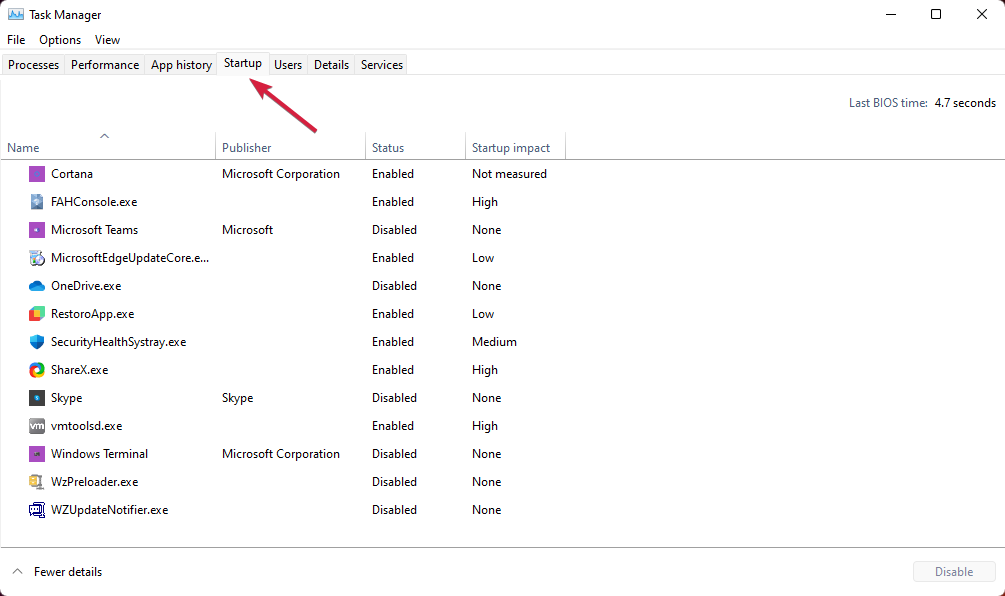
- Now click the Startup tab.
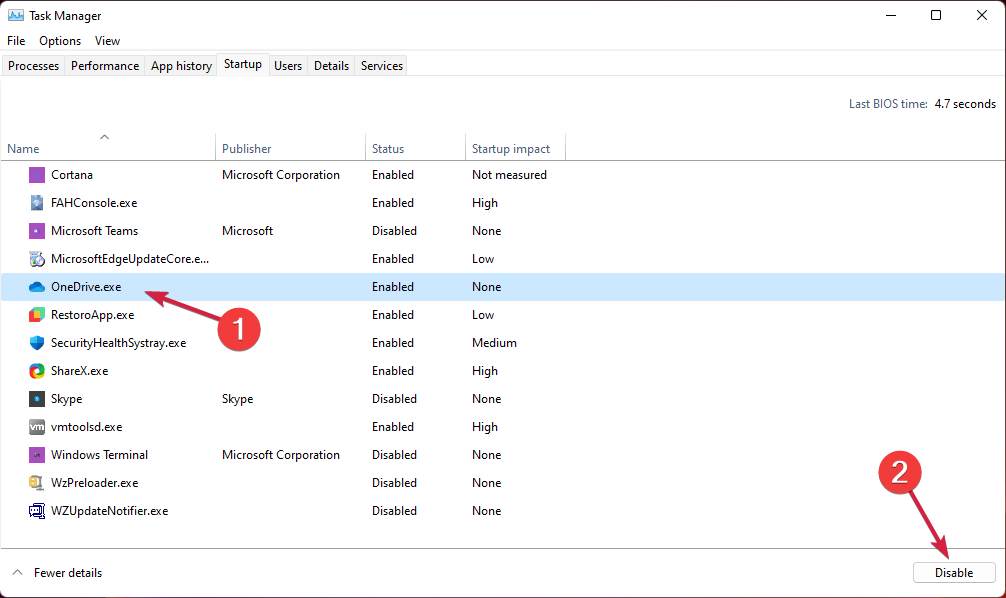
- Click on OneDrive from the list and hit the Disable button from the bottom right corner.
If Microsoft OneDrive doesn’t start in the first place and doesn’t connect to your account, it won’t be able to perform any syncing.
And that is how to turn off OneDrive on Windows 11. While we have presented different solutions, you should choose whatever seems best. In most cases, all of the above methods should work perfectly.
The solutions in this guide will also stop OneDrive from syncing on your desktop, fix things when OneDrive opens two instances, and remove it from File Explorer.
If you have any suggestions or questions, comment in the dedicated section below, and we will reply.







User forum
3 messages