Fix: Rotation Lock Greyed Out in Windows 10 & 11
Key notes
- Windows 10 is an operating System that has been optimized for both PC and Tablet devices, so the Rotation Lock button is crucial for when switching between the two modes.
- Sometimes, issues can prevent the Rotation Lock button from becoming accessible, and that is where the steps in our guide can become extremely handy.

If you own 2 in 1 Windows 10 device, the rotation is one of the basic features that you’re going to use.
Unfortunately, users have reported that Rotation Lock option is grayed out and that rotation isn’t working on their devices, so let’s fix that.
- Windows 10 rotation lock missing
- Windows 10 auto rotate not working
- Lenovo Yoga rotation lock greyed out
- Lenovo Yoga Screen rotation not working
- Lenovo Yoga auto rotate not working
How do I fix a greyed-out Rotation Lock button in Windows 10?
1. Turn on portrait mode on your device
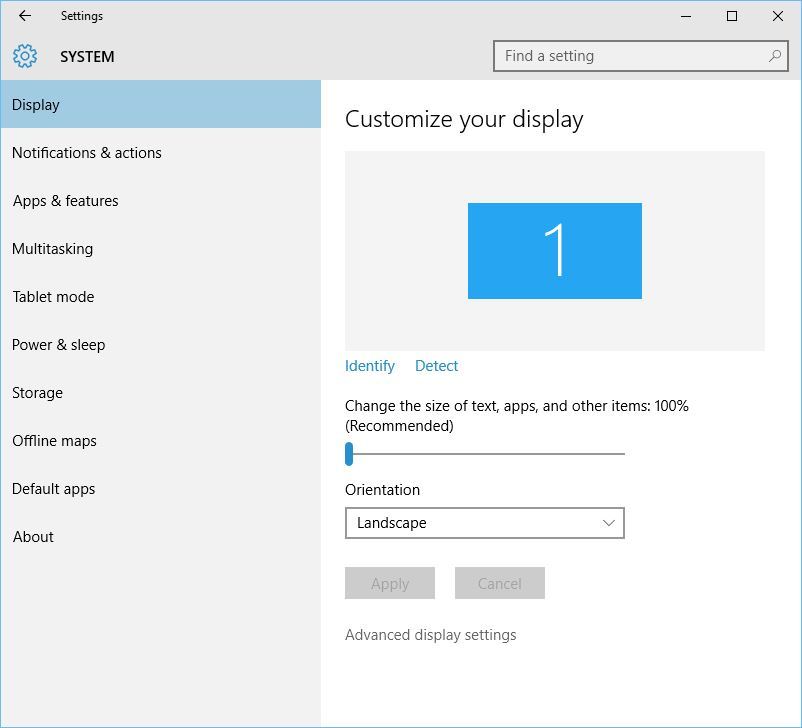
- Open Settings App and go to System > Display.
- Find Orientation and choose Portrait from the menu.

- Your device should automatically switch to portrait mode.
If Rotation Lock is grayed out or missing on your device, sometimes you just need to rotate it to portrait mode. After rotating your device, rotation lock should be clickable again.
2. Reset your device
- Turn off your device.
- When the device turns off, hold Volume Up and Power button.
- Choose reset and save option and exit.
Users have reported that Rotation Lock function isn’t even showing in the notification area on their Microsoft Surface, and if you have the same problem on your Surface device, you can try to reset your device.
After you’ve done that, Rotation Lock should now appear in the Notification area, and it should work properly.
It seems that this issue is caused by connecting your Surface to an external display, so in order to avoid future problems, maybe you should avoid connecting your device to external displays until Microsoft releases a patch that fixes this issue.
3. Uninstall / Update your display drivers
Sometimes, problems with Rotation Lock can be caused by your display drivers, so you might need to update them or uninstall them.
To uninstall your drivers, do the following:
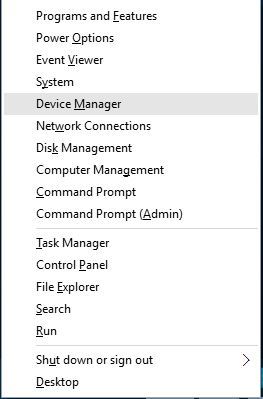
- Press Windows Key + X and choose Device Manager from the list.
- When Device Manager opens, navigate to Display adapters section and locate your driver.
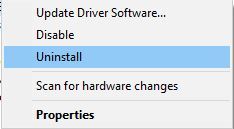
- Right-click the driver and choose Uninstall.
- After you have uninstalled the driver, restart your device.
If the problem still persists, you might have to update your display adapters. To do that, follow these steps:
- Open Device Manager and locate your display adapter driver.
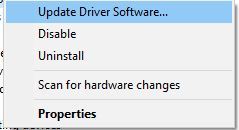
- Right-click it and choose Update Driver Software.
- Choose one of the options and follow the instructions.
In addition, you can always go to your device manufacturer’s website and download the latest drivers for your device.
Update drivers automatically
If this solution doesn’t work or you do not have the necessary computer skills to update the right driver version (wrong drivers can damage your system), we strongly suggest doing it automatically by using a professional driver updater tool.
Once installed, the program will start scanning your PC for outdated drivers automatically.
A driver updater will check your installed driver versions against its cloud database of the latest versions and recommend proper updates. All you need to do is wait for the scan to complete.
4. Use your device in tent mode
- Put your device in tent mode. If your display is upside down, don’t worry.
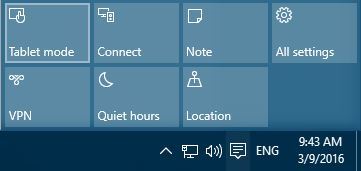
- Click the Action Center icon in your Taskbar and Rotation Lock should be available.
- Now you can turn off the rotation lock and your display should rotate to a proper position.
Users have reported that Rotation Lock is grayed out on their Dell Inspiron 11, and the only way to fix this is to use the tent mode. To enable Rotation Lock, perform the steps above.
5. Disconnect your keyboard
If Rotation Lock is grayed out on your Surface Pro 3 or Dell XPS 2-in-1 device, you might want to try disconnecting your keyboard.
Users have reported that after the keyboard is disconnected Rotation Lock button starts working normally.
Of course, if you own a different 2-in-1 device, you can still try this solution.
6. Switch to Tablet Mode
Some users claim that problems with grayed out or missing Rotation Lock button can be fixed simply by switching to Tablet Mode.
If your device doesn’t switch automatically to Tablet Mode, you can do the following to access Tablet Mode manually:
- Click the Action Center button in the Taskbar.

- When Action Center opens, click the Tablet Mode.
You can also enter Tablet Mode using the Settings app:
- Open Settings > System > Tablet Mode.
- Make sure that Make Windows more touch-friendly when using your device as a tablet is turned On.
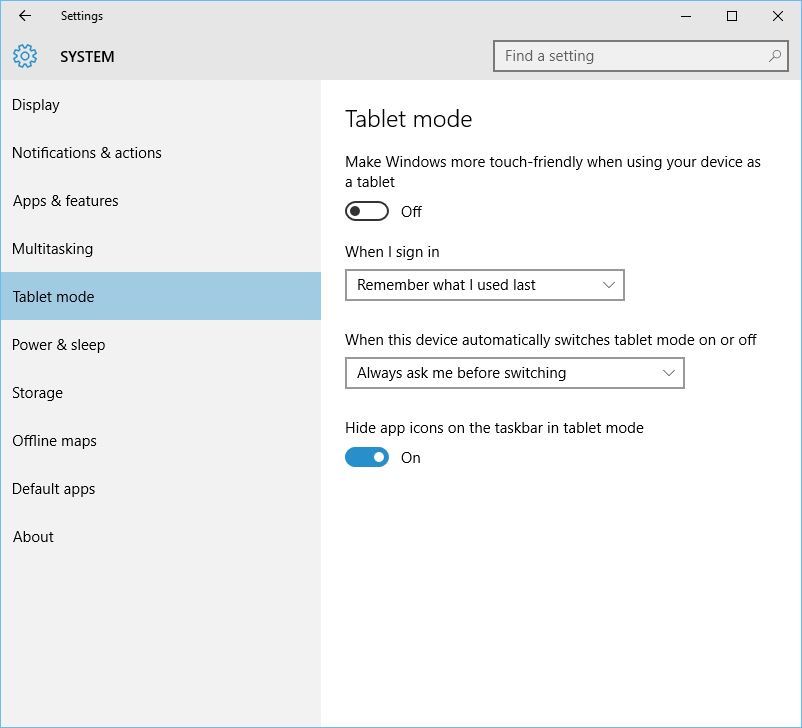
- If you want, you can also change how your device will work when you automatically switch Tablet Mode on or off.
7. Change LastOrientation registry value
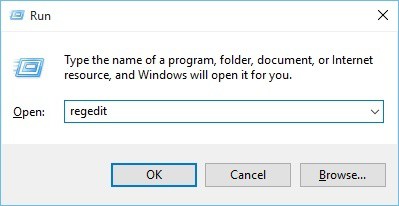
- Press Windows Key + R and type regedit.
- Press Enter or click OK.
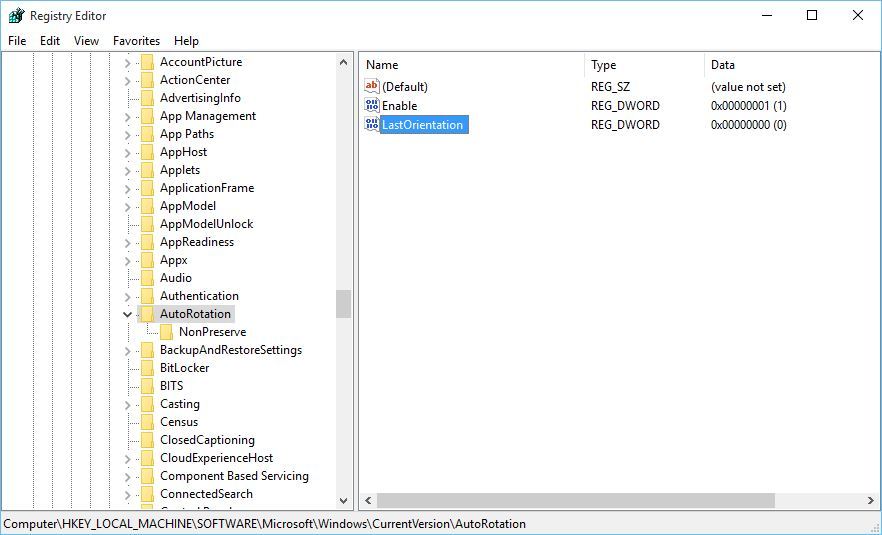
- When Registry Editor opens, you need to navigate to the following key in the left pane:
- HKEY_LOCAL_MACHINESOFTWAREMicrosoftWindowsCurrentVersionAutoRotation
- In the right pane, find LastOrientation and double-click it.
- In Value data box enter 0 and click OK to save changes.
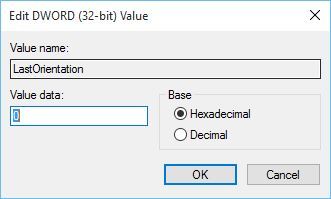
- If you see SensorPresent DWORD available, double-click it and make sure that its value is set to 1.
If you have problems with Rotation Lock and if the rotation isn’t working on your device, you might have to change some registry values.
- READ ALSO:Can’t access Registry Editor? Don’t panic! Check out this guide and solve the issue quickly.
8. Make sure that your screen is allowed to auto-rotate
If your screen isn’t allowed to auto-rotate, this can be one of the causes for Rotation Lock problems. To fix this issue, you need to check if your screen is allowed to auto-rotate. To do that, follow these steps:
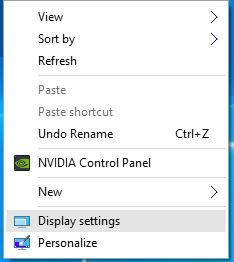
- Right-click your desktop and choose Display settings.
- When Display settings open, click on Advanced display settings.
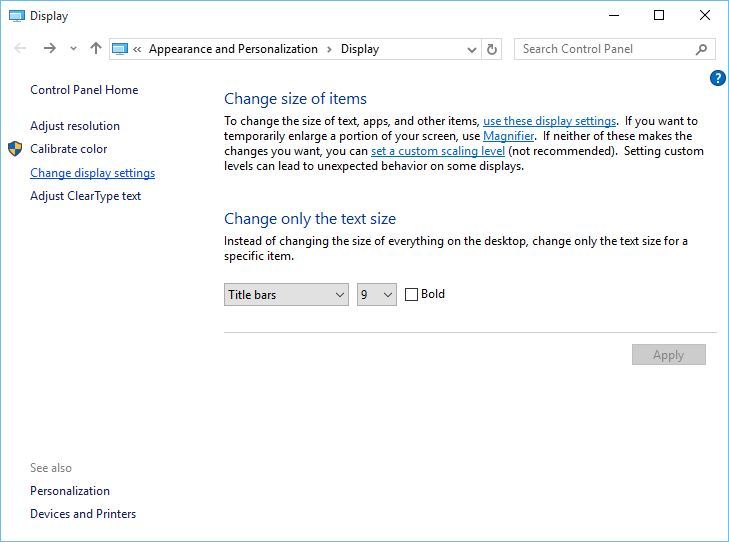
- Now click on the Advanced sizing of text and other items.

- On the left side choose Change display settings.
- Check Allow the screen to auto-rotate.
- Click Apply and OK to save the changes.
- After you’ve done that, restart your computer in order to apply the changes.
9. Check Sensor Monitoring Service
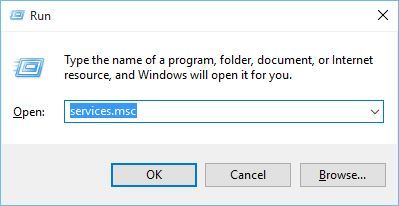
- Press Windows Key + R and type services.msc.
- Press Enter or click OK.
- When Services window opens, locate Sensor Monitoring Service and double-click it.
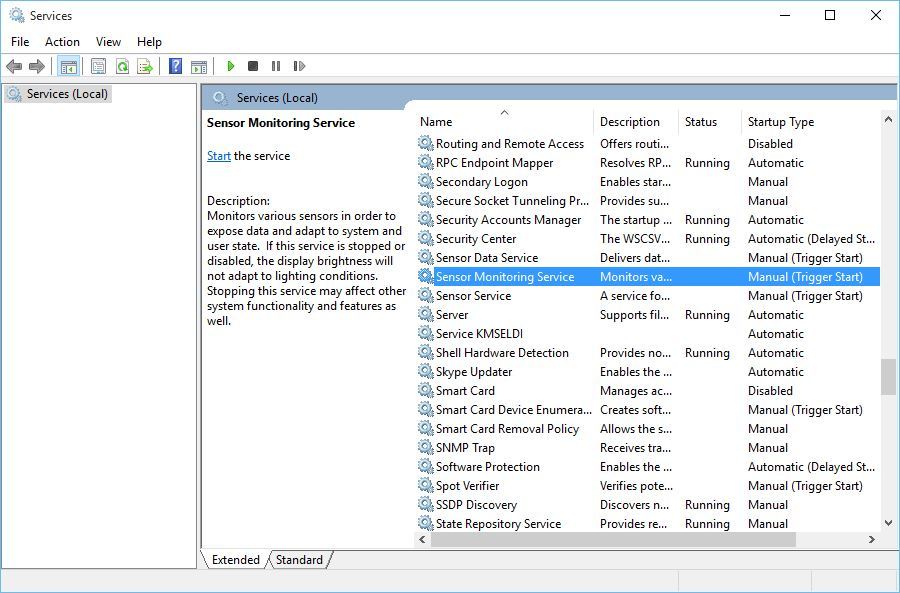
- Change the Startup type to Automatic and click Start to start the service.
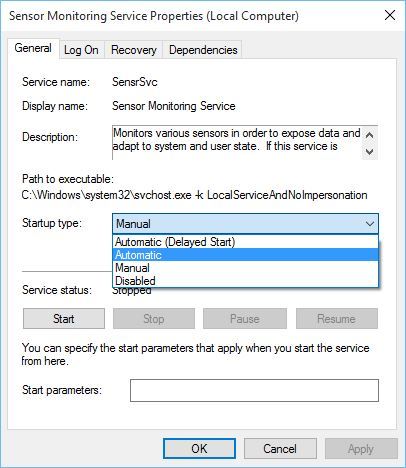
- Click Apply and OK to save the changes.
Problems with Rotation Lock and rotation can be caused by certain services, so let’s check if those services are working properly.
10. Disable YMC service
- Open Services window and locate YMC service.
- Double click the service to open its properties and set the Startup type to Disabled.

- Click Apply and OK to save the changes.
If you own Lenovo Yoga device and you have problems with rotation and Rotation Lock button, you can fix these problems by disabling the YMC service.
11. Remove Intel Virtual Buttons Driver
- Open Device Manager. You can open Device Manager by pressing Windows Key + X and choosing Device Manager from the list.
- Once Device Manager opens, locate Intel Virtual Buttons driver.
- Right-click it and choose Uninstall.
It has been reported that Intel Virtual Buttons driver causes problems with rotation and it also makes the Rotation Lock button grayed out.
After the driver has been removed, rotation and Rotation Lock button should be working normally.
12. Disable sensors from Device Manager and enable them again
- Start Device Manager.
- Find Sensor sections and disable all sensors by right-clicking them and choosing Disable from the menu.
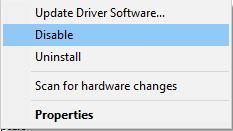
- After you’ve disabled all the sensors, you need to enable them again. To do that, just right-click the disabled device and choose Enable from the menu.
Problems with rotation can be caused by your sensors, and you might have to temporarily disable them from Device Manager.
If the issue still persists, it’s advised that you restart your computer after you’ve disabled the sensors. After Windows 10 starts, you need to go back to Device Manager to enable the sensors again.
13. Download latest firmware, drivers, and Windows updates
Often these issues can be resolved by downloading the latest drivers from the manufacturer’s website, so if you have problems with missing or grayed out Rotation Lock button, try downloading and installing all latest drivers for your device.
Yoga 3 users have reported that problems with rotation and Rotation Lock have been fixed after ITE sensor firmware update, so make sure that you download and install the latest firmware for your device.
Other users have reported that these problems have been resolved by downloading latest Windows updates, so if you’re having this problem, it won’t be a bad idea to update your Windows 10.
14. Update your BIOS
If Rotation Lock is grayed out or missing, you might be able to fix that by updating your BIOS. To update BIOS, you need to go your device manufacturer’s website and download the latest BIOS.
Before you perform a BIOS update, make sure that you read the instruction manual carefully in order to avoid any potential damage.
15. Restart Windows 10
In some cases, the most obvious solution is the best solution, and few users have reported that they have managed to fix missing Lock Rotation button by simply restarting their device.
We have to mention that turning off and turning on your device won’t work since Windows 10 uses hybrid shutdown (that is similar to Hibernate feature from previous versions of Windows).
Instead, you’ll have to choose Restart option from the Power menu in order to perform a proper restart.
16. Reset this PC
- Press Windows key + I to open Settings.
- Choose Update & security.
- Select Recovery from the left pane.
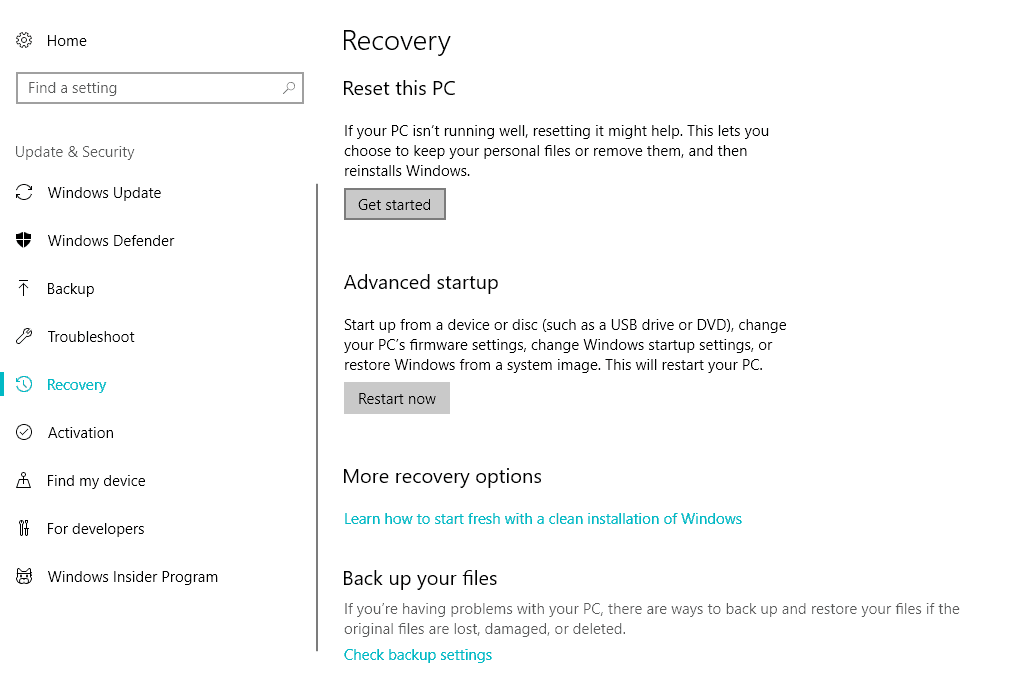
- Under the ”Reset this PC” section, click Get Started.
- Choose whether to preserve your data or to delete it and wait for the procedure to end.
Finally, if none of the available solutions provided a terminal solution for your problem and you’re still experiencing inconsistency with the Rotation Lock, we advise you to reset your PC to factory settings.
This is a nifty recovery option introduced in Windows 10. You can preserve your data in the process, which is great in comparison to a clean reinstallation.
There are many reasons why the Rotation Lock button might be grayed out or missing on your Windows 10 device, but we hope that you’ve managed to fix this issue by following our solutions.
If you have any comments, questions or suggestions, just let us know in the comments below.
Read our disclosure page to find out how can you help Windows Report sustain the editorial team. Read more


Improve this guide


User forum
10 messages