How to Schedule Windows 11 Defragmentation [2 Ways]
Set the Windows 11 Disk Defragmenter to run regularly

Let us show you how to schedule disk defragmentation on Windows 11 so you keep tabs on your drive’s memory and performance.
As you add more files to your drives, your computer might start to slow down.
Defragmentation can help fix this, and if you automate it, you won’t have to worry about this part of PC maintenance. Ready? Let’s dive in!
How to schedule disk defrag in Windows 11
1. From the built-in app’s settings
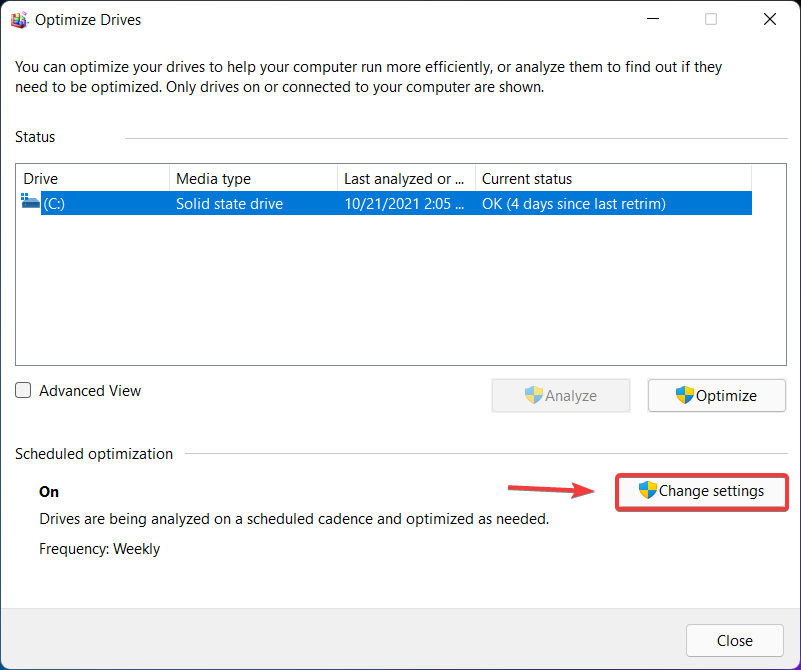
1. Open the Start bar and type disk defragment, then click on the result to open the app.

2. Press the Change settings button.
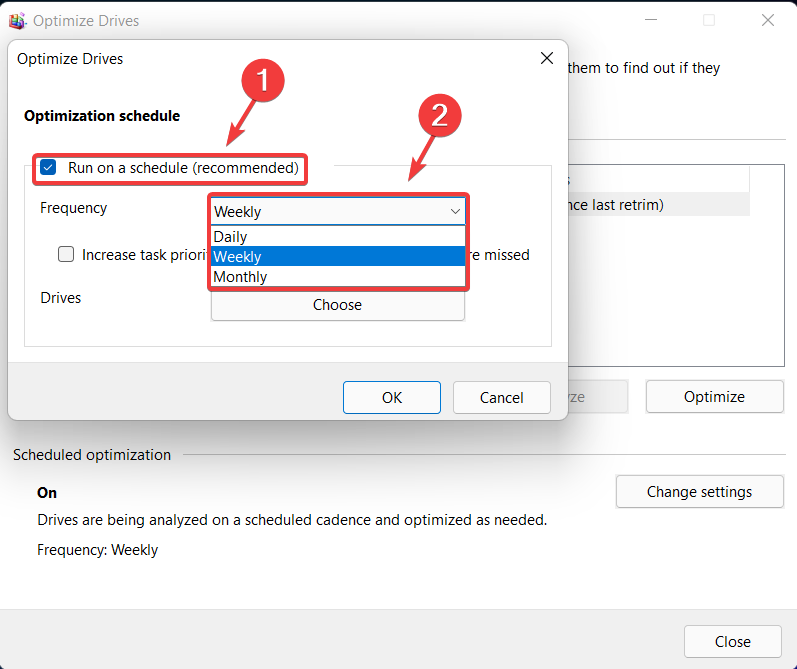
3. Tick the box next to Run on a schedule (recommended) and then choose the desired frequency.
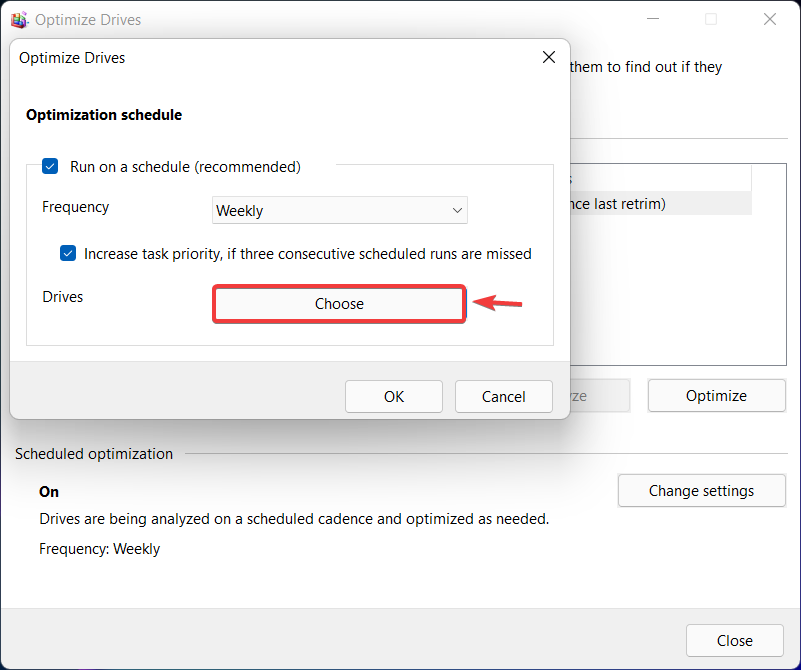
4. Click on the Choose button.
5. Select on what drives you would like the defragmentation tool to act on.
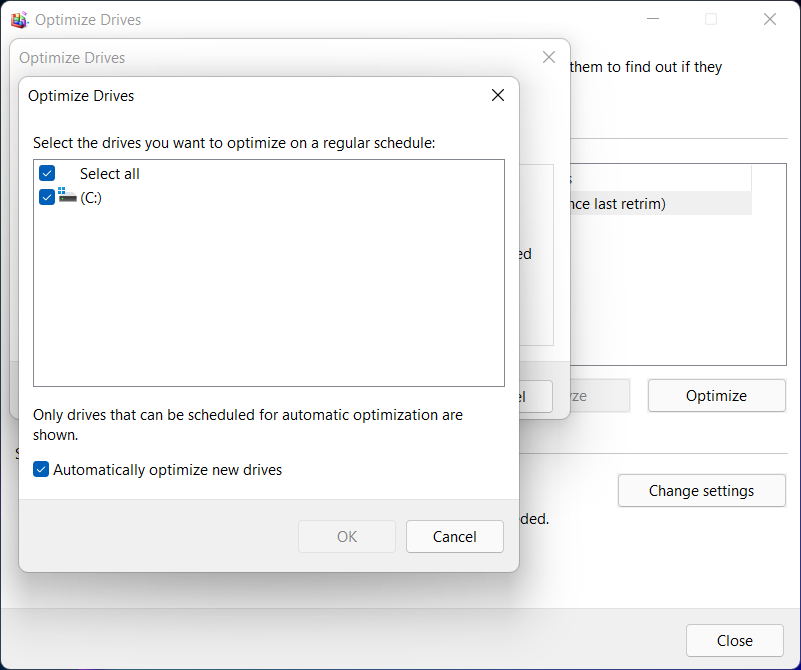
6. Press the Ok button to start the defragmentation process.
How to schedule Disk Fragmentation on Windows 11
The built-in Defragment and Optimize Drives app within the Windows operating system allows you to better sort files on their devices.
Using it is an easy and quick method to schedule a defragmentation on your Windows 11:
2. Using the Task Scheduler
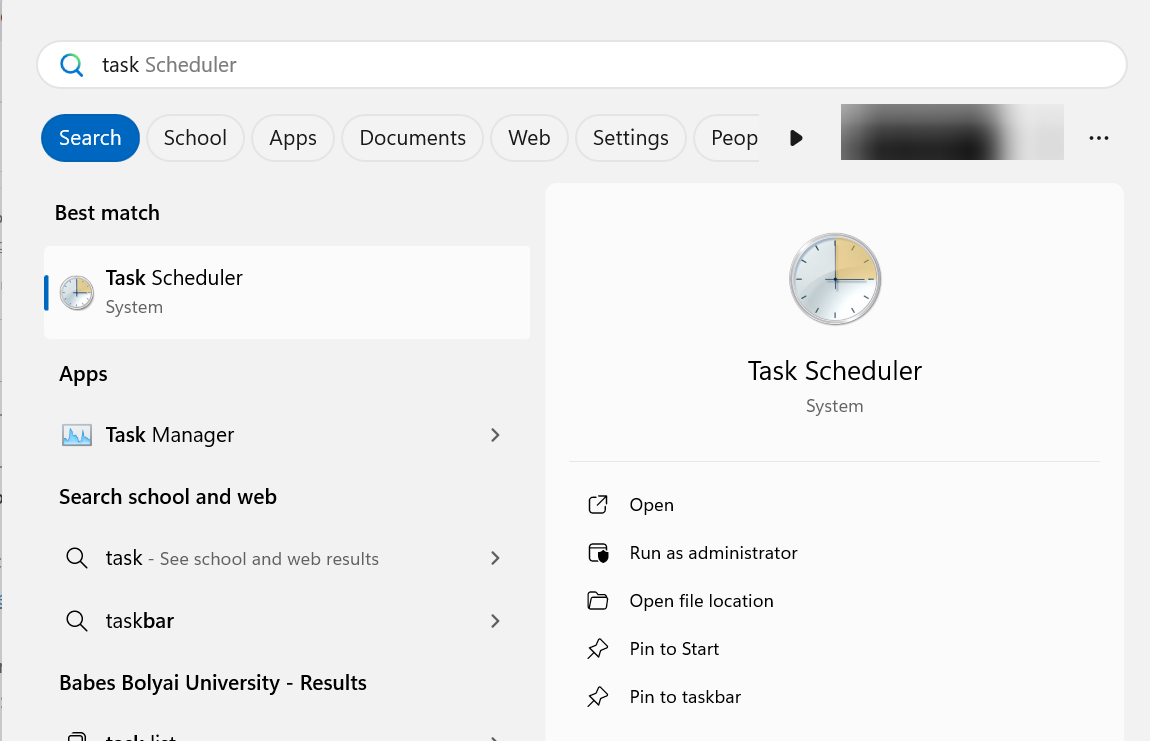
- Type Task Scheduler in the Start bar and open it.
- From the left menu, expand Task Scheduler Library> Microsoft> Windows.
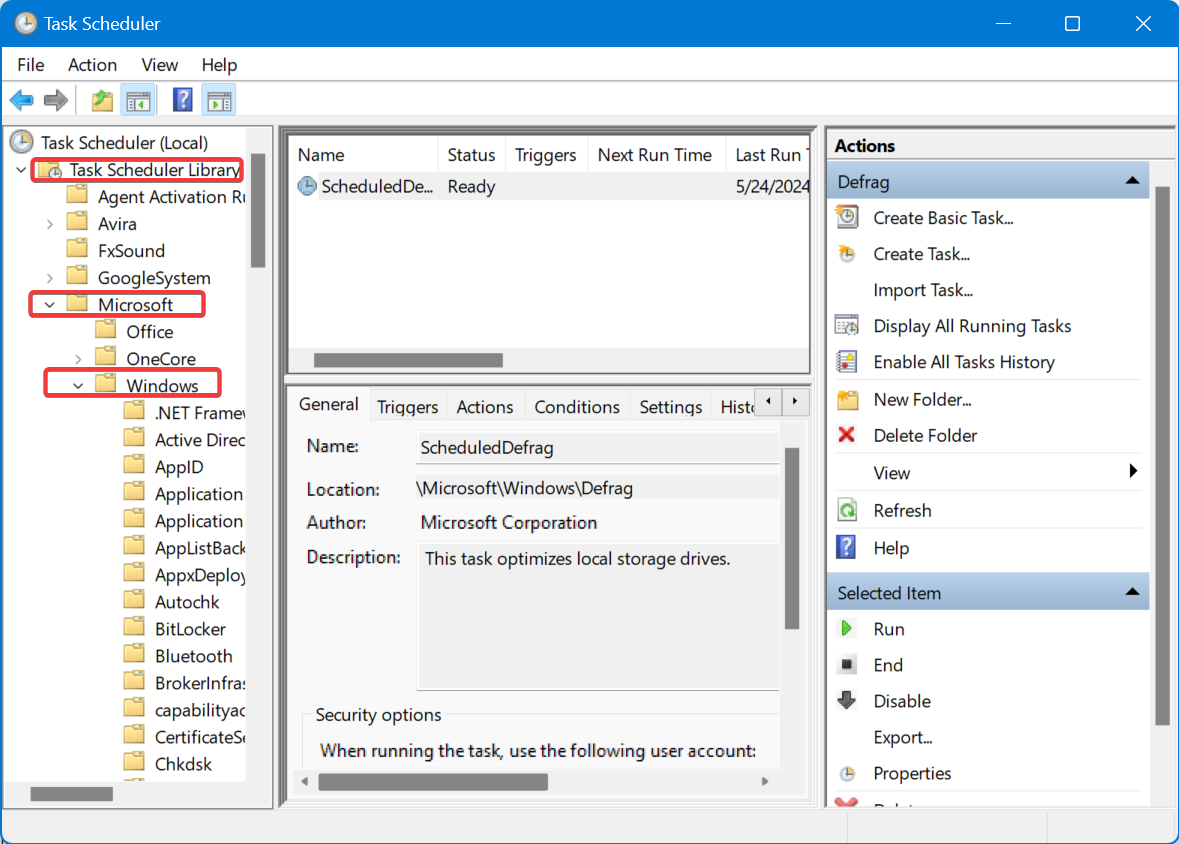
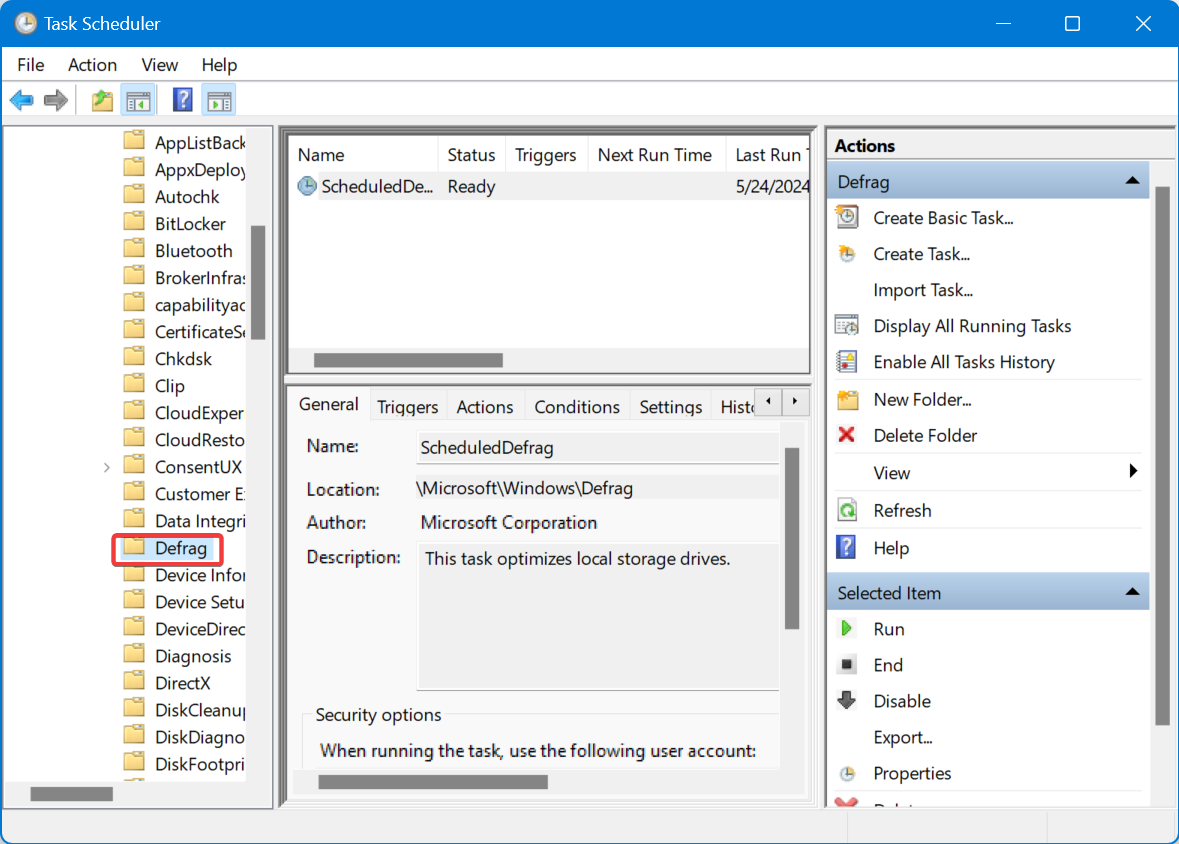
- Locate the Defrag folder and click on it.
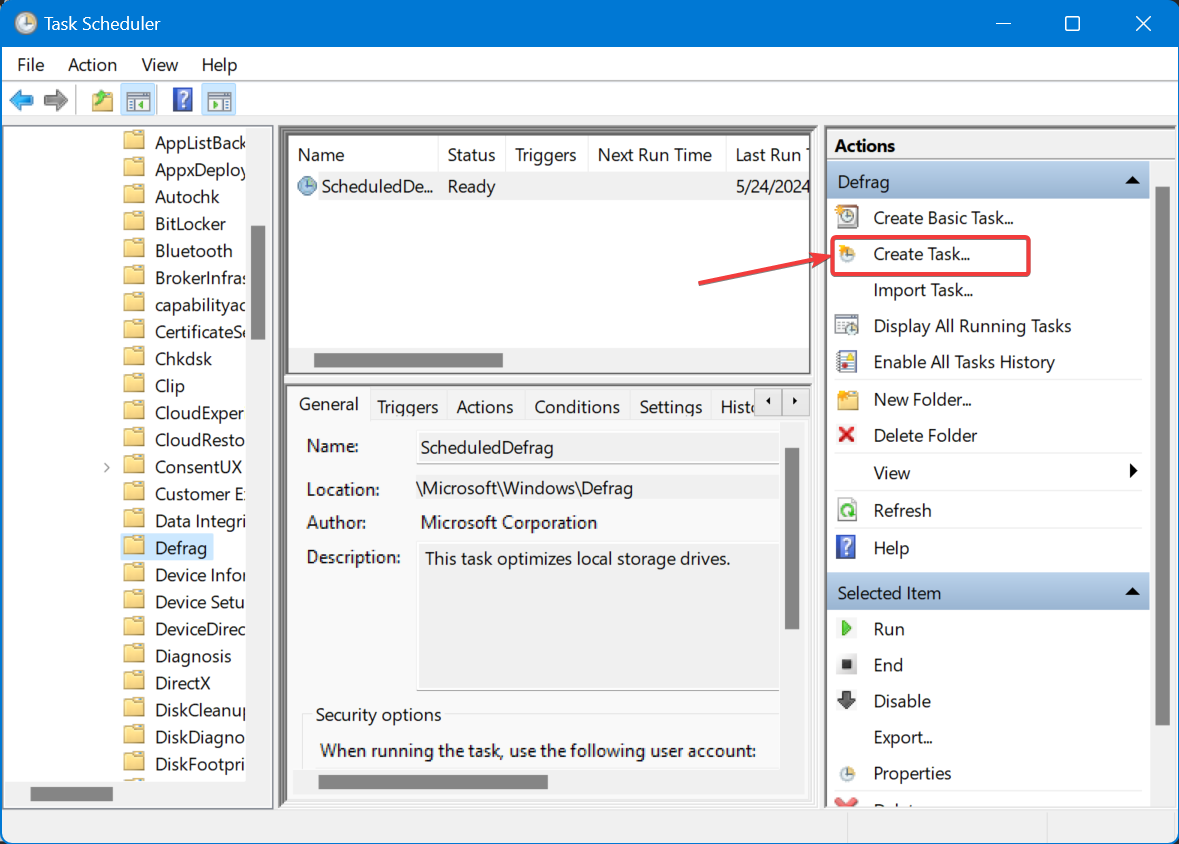
- Click on the Create Task option on the right menu.
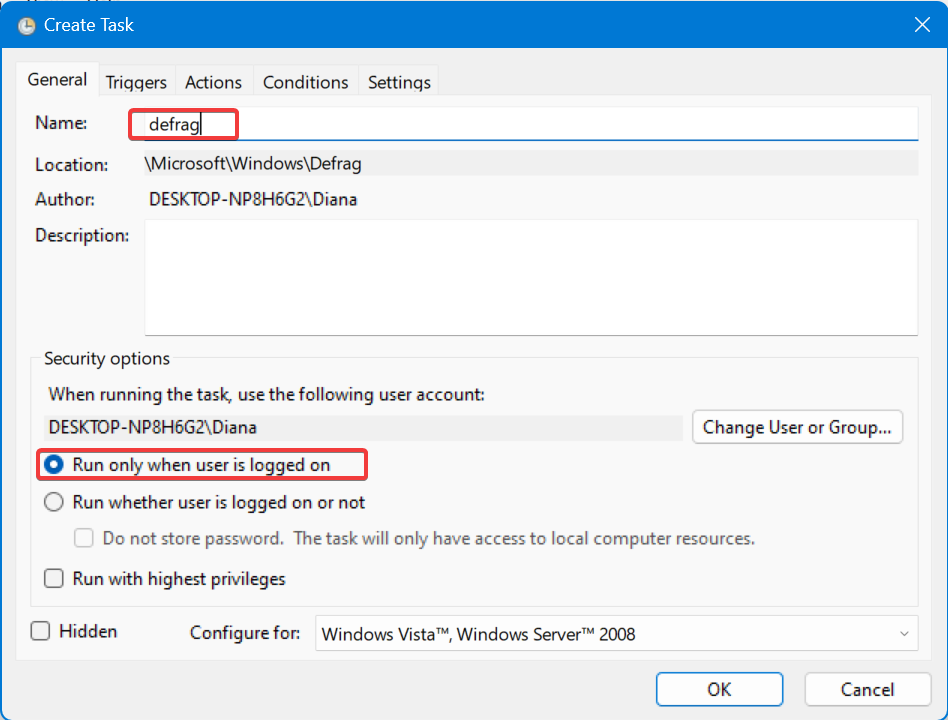
- Name the task and check Run only when user is logged in.
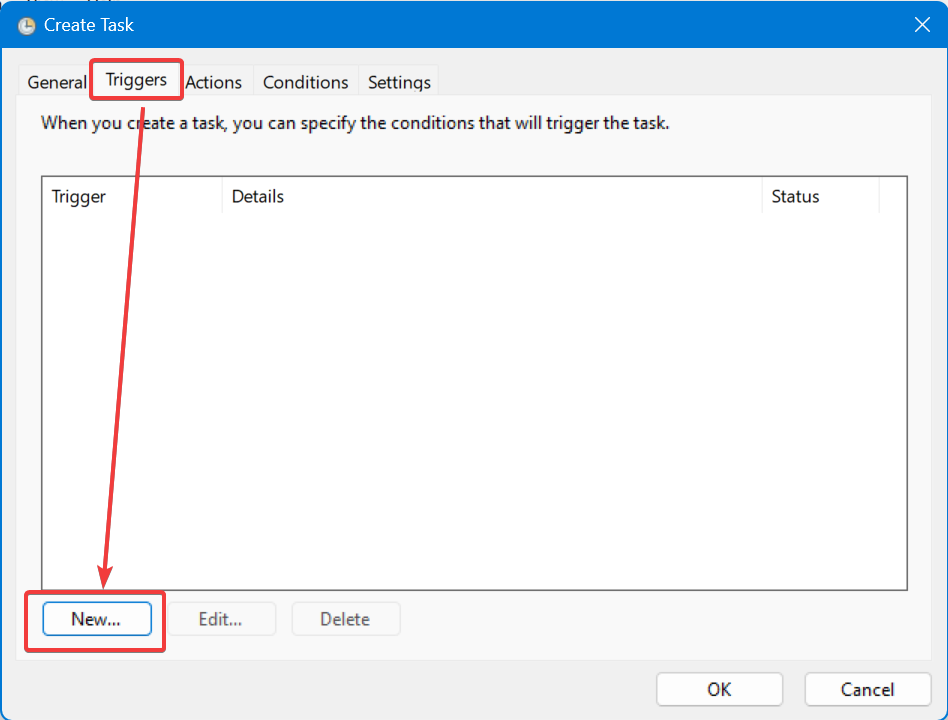
- Go to the Triggers tab and click on New… .
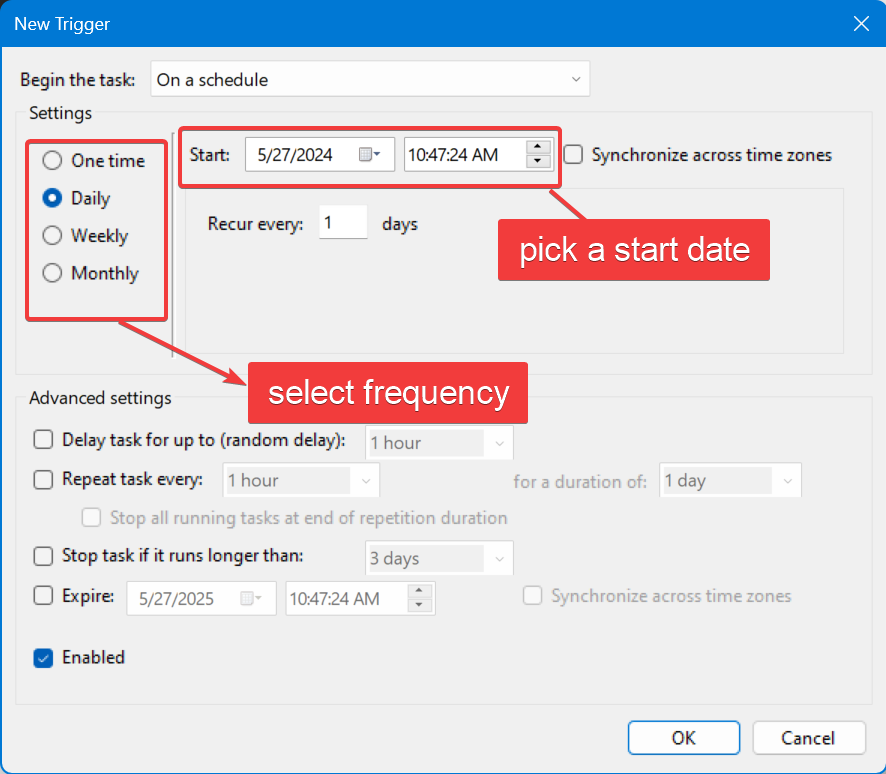
- Pick a start date and select frequency (daily, weekly, monthly, or one time). Click Ok to save your settings.
- Go to the Actions tab and click New.
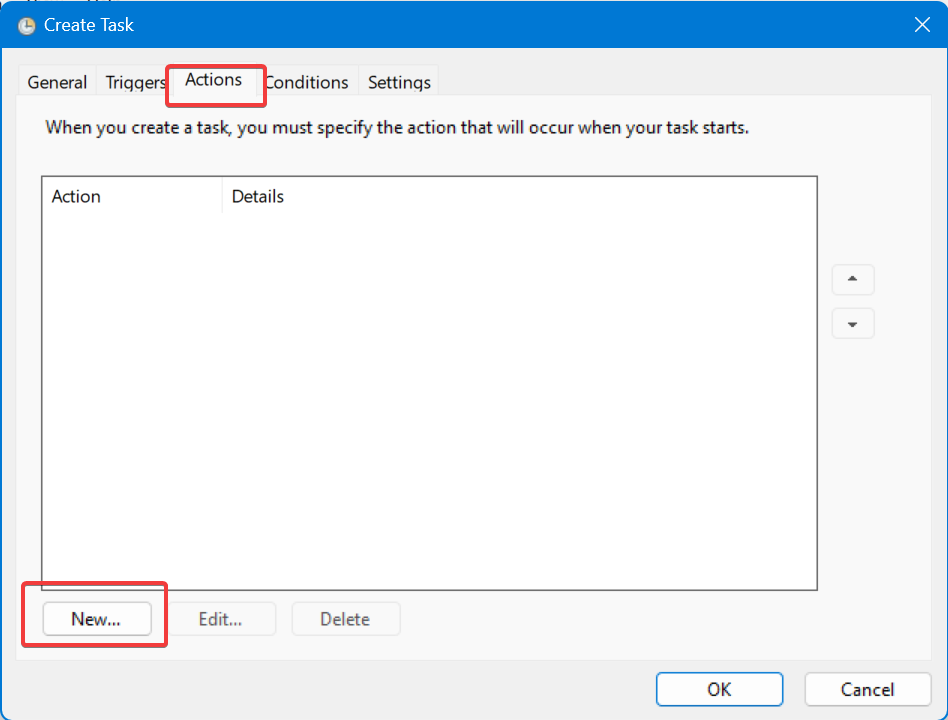
- Set it to Start a program and add defrag.exe under Program/script. Click Ok.
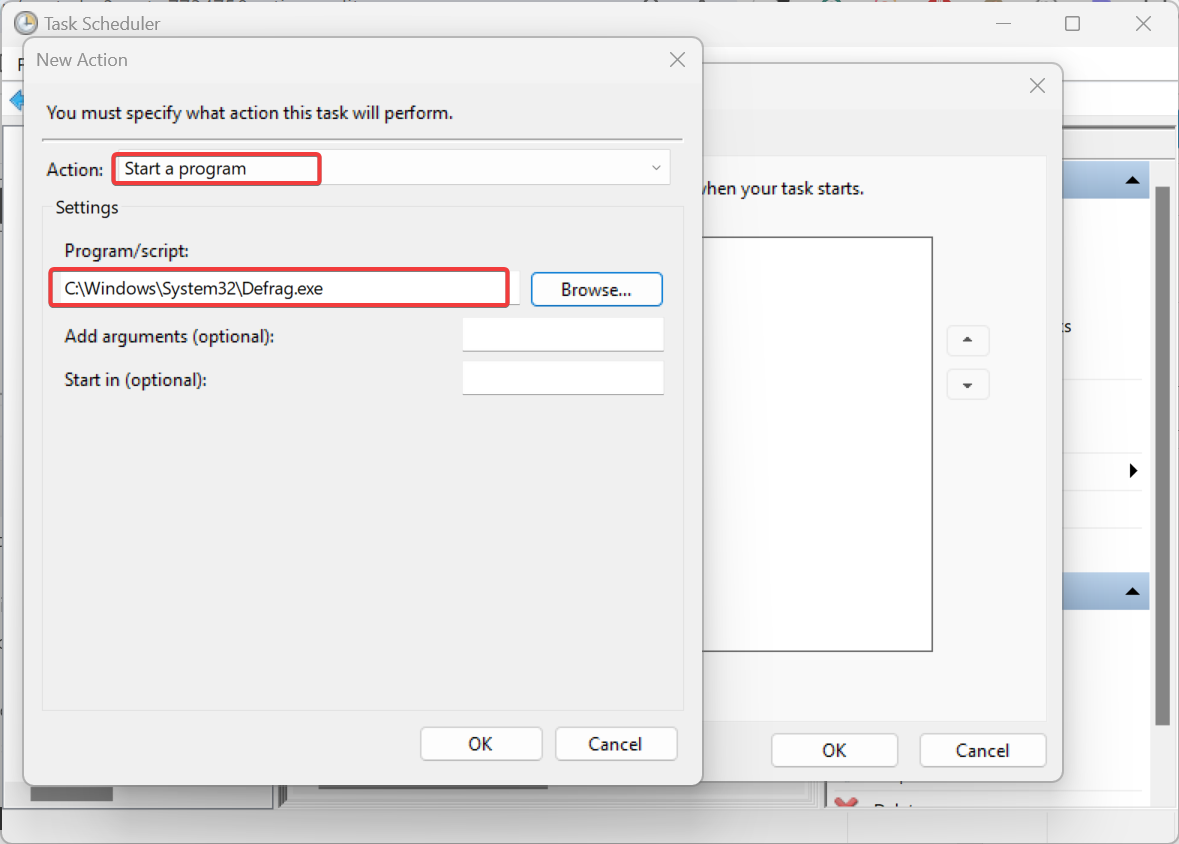
- Hit Ok once again to save all settings.
As you can see, the process is quick and easy. But if you run into any problems with the Defragment and Optimize Drives utility, run Windows troubleshooter or a SFC scan.
However, if you want more control over how the process is handled and get extra perks like detailed reports, SSD optimization, and disk cleanup, consider getting a third-party defragmenter software.
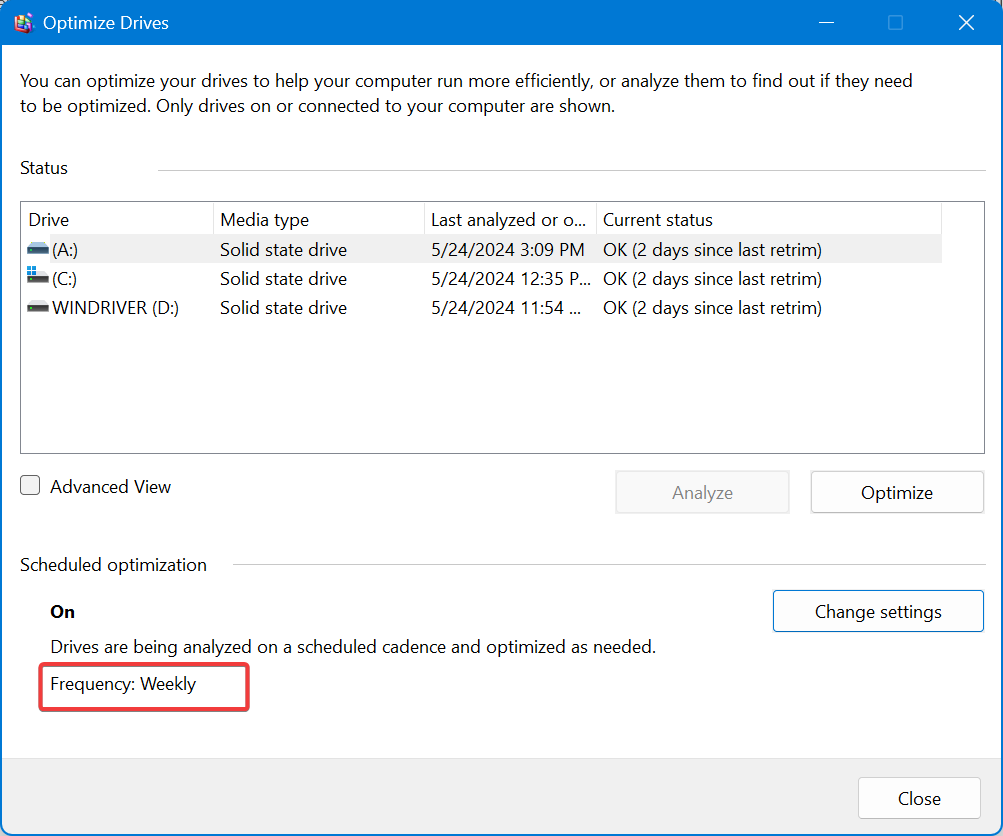
How do I check my defrag schedule?
To check your defrag schedule on Windows 11, open the Defragment and Optimize Drivers software and take a look at the Scheduled Optimization section at the bottom. If scheduling is on, you’ll be able to see the frequency it’s set to weekly, daily, or monthly.
What is Disk Defragmentation?
Disk defragmentation organizes fragmented data on a computer’s hard disk or solid-state drive, enhancing performance.
Over time, files become scattered across the disk, slowing read and write speeds. Defragmentation rearranges data to group related pieces together, reducing access times.
Wrapping up
That’s it! Now know exactly how to schedule disk defragmentation on Windows 11. After going through this process you don’t have to worry about this aspect of your computer’s performance.
Was this article helpful to you? Let us know in the comments section below.
Read our disclosure page to find out how can you help Windows Report sustain the editorial team. Read more


Improve this guide


User forum
0 messages