Fix: Service Host Local Service High CPU [Network Restricted]
Disabling the Superfetch feature should fix this issue quickly
Key notes
- If the Service Host: local system process is registering high CPU usage on your PC, it might be because of some system services.
- A quick way to fix this issue is to run the SFC, and DISM scans to fix corrupt system files.
- Another effective solution is to restart the Windows Update services using Command Prompt.

Some Windows users complain that their CPU usage is high without any particular reason. It can be that Service Host: Local Service (Network Restricted) is causing high CPU usage.
The problem occurs whenever the computer wakes up from sleep or even during regular work. If you’re facing a similar issue, you will find a solution in this post.
How do I fix high CPU usage by Service Host local system?
1. Disable the Superfetch service
1. Go to Search, type services and open Services.

2. Find the Superfetch service, right-click on it and go to Stop.

3. Restart your computer.
That’s all. After disabling the Superfetch service, your CPU usage should return to normal, and you’ll be able to continue working on your computer without any problems.
Although Microsoft says that the Superfetch service improves computers’ performance over time, in practice, it’s the opposite.
Many users complained that this service keeps performance-optimized only when the system is newly installed, but it decreases its performance after some time.
Also, Superfetch services run on very low priority, so it should not affect other IO activities because normal IO activities run at high priority.
Several users reported that they fixed the Service Host: local system high CPU problem simply by disabling Windows Update and Event Log service. So you might want to try that as well.
2. Run SFC and DISM scan
If Service Host is causing high CPU usage, that can sometimes be due to file corruption. Your system files can get corrupted; if that happens, you can repair them by running an SFC scan. To do that, follow these steps:
- Press the Windows key + X to open Win + X menu. Select Command Prompt (Admin) from the list. If Command Prompt isn’t available, select PowerShell (Admin) instead.

- When Command Prompt opens, enter sfc /scannow and press Enter to run it.

- SFC scan will now start. This process can take about 10 minutes, so don’t interrupt it.
After the SFC scan is finished, check if the problem is resolved. If the issue persists, or if you can’t run an SFC scan, you’ll need to use the DISM scan instead. To do that, follow these steps:
- Open Command Prompt as administrator.
- When Command Prompt starts, enter DISM /Online /Cleanup-Image /RestoreHealth.

- DISM scan will now start. This process can take 15-20 minutes, so be sure not to interrupt it.
After the DISM scan is finished, check if the problem persists. If you were unable to run the SFC scan before, be sure to try running it now. After both scans are completed, the problem should be completely resolved.
If you’re having trouble accessing Command Prompt as an admin, you better take a closer look at this guide.
3. Run Windows Update troubleshooter
According to users, you might be able to fix this problem simply by running the Windows Update troubleshooter.
If Service Host is causing high CPU usage, the problem can be related to Windows Update, and running the troubleshooter should fix it. To do that, follow these steps:
- Press Windows Key + I to open the Settings app.
- When the Settings app opens, navigate to Update & security.

- In the left panel, navigate to Troubleshoot section. Select Windows Update and click Run the troubleshooter.

- Wait while the troubleshooter scans your system and checks for problems.
If you’re having trouble opening the Setting app, look at this article to solve the issue.
You can also run the troubleshooter by following these steps:
- Press Windows Key + S and enter control panel. Select Control Panel from the list.

- When Control Panel opens, go to Troubleshooting.

- Click on View all in the menu on the left.

- Click on Windows Update.

- When the Windows Update window opens, click on Advanced and Run as administrator. Now click on Next and follow the instructions on the screen to complete the troubleshooting.

Both methods will check Windows Update and fix any potential problems. After the troubleshooting is finished, check if the problem still appears.
4. End unnecessary HP processes
When Service Host is causing high CPU usage, the cause might be related to HP processes that are running in the background. To fix the problem, you need to end the HP processes from Task Manager by doing the following:
- Press Ctrl + Shift + Esc to open Task Manager.
- When Task Manager opens, look for any HP processes. Users reported that the HP Help process was causing this problem on their PC, but other processes can also cause this issue. If you see any HP processes, right-click them and choose End Task from the menu.

- After ending all HP processes, check if the problem persists.
If disabling the HP processes fixes the problem, you might have to repeat this solution whenever this issue appears. If you want a permanent solution, you’ll have to find the HP applications related to those processes and uninstall them.
Most users have no idea how to deal with a slow Task Manager. Don’t be one of them, and read this quick guide to learn how to make it faster!
5. Remove problematic applications
If Service Host is causing high CPU usage, the problem might be related to third-party software. According to users, it seems that the problem was caused by Dragon Naturally Speaking software.
To fix the problem, users suggest completely removing this application from their PCs. If you’re using Dragon Naturally Speaking frequently and don’t want to remove it, update it to the latest version and check if that solves the problem.
Another application that can cause this problem to appear is MSI Command Center. Many users reported that removing this application fixed the problem on their PC, so be sure to do that.
Several users reported that a Chrome VPN extension caused the issue, so if you installed any new extensions recently, be sure to remove them and check if that solves the problem.
6. Perform a Clean boot
As we already mentioned, sometimes third-party applications and services can cause this problem to appear. If Service Host is causing high CPU usage on your PC, performing a Clean boot is recommended to find the application causing it.
To do that, follow these steps:
- Press Windows Key + R and enter msconfig. Press Enter or click OK.

- Go to the Services tab and check the Hide all Microsoft services option. Now click on Disable all button.

- Navigate to Startup section and click on Open Task Manager.

- A list of all startup applications will now appear. Right-click the first entry on the list and choose Disable. Now repeat this step for all entries on the list. After disabling all startup items, close Task Manager.
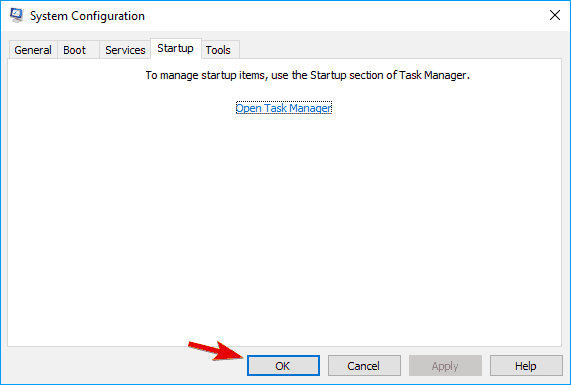
- In the System Configuration window, click Apply and OK to save changes. Restart your PC to apply the changes.
After your PC restarts, check if the problem still appears. If not, it means that one of the disabled applications or services was causing this issue.
To find out which application is the cause, enable apps and services individually or in groups until you find the one causing the problem. After you find it, you can keep it disabled, remove it or reinstall it and check if that solves the problem.
If you want to know how to add or remove startup apps on Windows 10, check out this simple guide.
7. Change processor scheduling
According to users, if Service Host is causing high CPU usage, you might be able to fix the problem by changing processor scheduling. This is relatively simple, and you can do it by following these steps:
- Press Windows key + S and enter advanced. Choose View advanced system settings.

- When the System Properties window opens, in the Performance section, click on the Settings button.

- Go to the Advanced tab and set Adjust for best performance of Programs.
- Now, click on Apply and OK to save changes.

After making the changes, the problems with high CPU usage should be resolved completely.
8. Restart the Windows Update service
If Service Host is causing high CPU usage, you might be able to fix the problem simply by restarting the Windows Update service. To do that, follow these steps:
- Open Command Prompt as administrator.
- Now run the following commands:
- net stop wuauserv
- net stop bits
- Minimize Command Prompt.
- Open File Explorer and navigate to
C:/Windows/SoftwareDistributiondirectory. Delete all files from the SoftwareDistribution folder. - Now go back to Command Prompt and run the following commands:
- net start wuauserv
- net start bits
After doing that, the problem should be completely resolved.
Service Host: local system high CPU Windows 11
Below are some of the surefire solutions to apply if you are facing this issue on Windows 11:
- Disable the Windows Update and Background Intelligent Transfer Service
- Remove corrupt system files
- Disable the Superfetch service
- Perform a clean boot
Thankfully, we have shown how to perform most of these fixes in the Windows 10 section. You might just need a tweak or two due to the OS difference.
Common Service Host Local System errors
Problems with high CPU usage can drastically impact your performance, and users reported the following issues as well:
- Service Host Local System high disk usage, network usage, memory usage: Many users reported other problems with this service. According to them, Service Host Local can also cause high disk and memory usage.
- Service Host Local System taking up resources: This is another common problem with this service, and many users reported that Service Host Local System is taking up various resources.
- Service Host Local System slow: Another problem that can occur due to this service is various slowdowns. According to users, your system might become slow due to high CPU usage.
- Service Host Local System startup: Sometimes, issues with this service can occur as soon as your system starts. Many users reported that high CPU problems start appearing right after startup.
- Service Host Local System memory leak: Another problem related to Service Host Local System is memory leaks. Memory leaks can be problematic, and they can drastically affect your performance.
- Service Host Local Service virus: In some cases, problems with Service Local Host Service can be caused by virus infections. If you suspect that your PC is infected, be sure to perform a detailed malware scan.
Service Host and high CPU usage can cause many problems, but we hope you solve this problem using one of our solutions. You can learn more about related bandwidth spikes by checking this guide on high network usage caused by Service Host Network Service, which helps you understand why certain host processes create heavy network traffic.
If you face other issues like Windows Explorer’s high CPU usage, check our detailed guide to fix it quickly.
For more suggestions or questions, reach for the comments section below.
Read our disclosure page to find out how can you help Windows Report sustain the editorial team. Read more


Improve this guide


User forum
23 messages