How to Create a Folder in SharePoint (Step-by-Step Guide)
Creating folders in SharePoint helps you organize documents and collaborate efficiently with your team. Whether you’re using SharePoint Online or the classic interface, follow these quick steps to add a new folder to your document library.
Table of contents
How to Create a Folder in SharePoint?
1. Open Your SharePoint Site
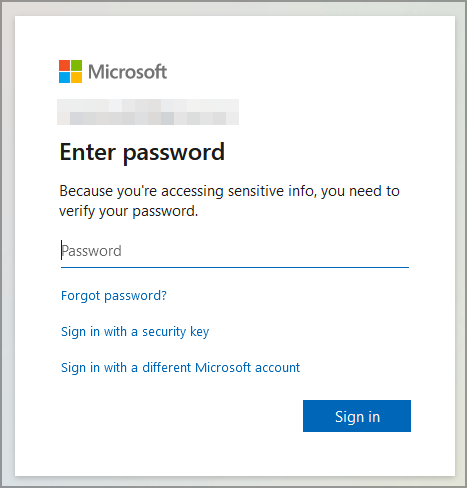
Start by visiting your company’s SharePoint website and logging in with your Microsoft 365 account.
- Go to your organization’s SharePoint site from your browser.
- Log in using your Microsoft 365 credentials.
- Select the specific site or team where you want to add the folder.
If you want faster file navigation from your desktop, see how to open SharePoint in File Explorer.
Need a refresher on sites, libraries, and permissions before creating folders? Read our SharePoint how to use guide for a quick orientation.
2. Access the Document Library
To create or store folders, you need to open a document library within the selected site.
- Each SharePoint site includes at least one document library.
- Click on Documents in the left sidebar or site navigation menu.

- Choose the library where you want to store your new folder.
Setting up a new workspace before organizing folders? Learn the steps in how to create a site in SharePoint to make sure your folder structure starts in the right place.
3. Switch to the Correct View (Optional)
SharePoint offers both modern and classic experiences, so it’s best to confirm which layout you’re using before proceeding.
- If you’re using the modern experience, you’ll see a clean interface with a + New button at the top.
- If your site is using the classic experience, you’ll find an Upload or New Document dropdown instead.
4. Create a New Folder
Now it’s time to create the actual folder where you’ll store your files.
In Modern SharePoint:
- Click + New at the top of the document library.
- Select Folder from the dropdown list.
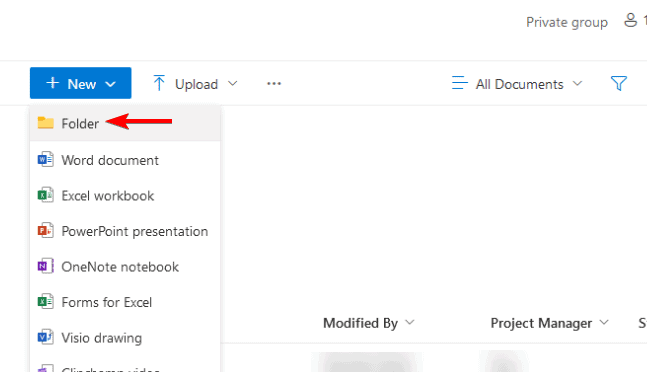
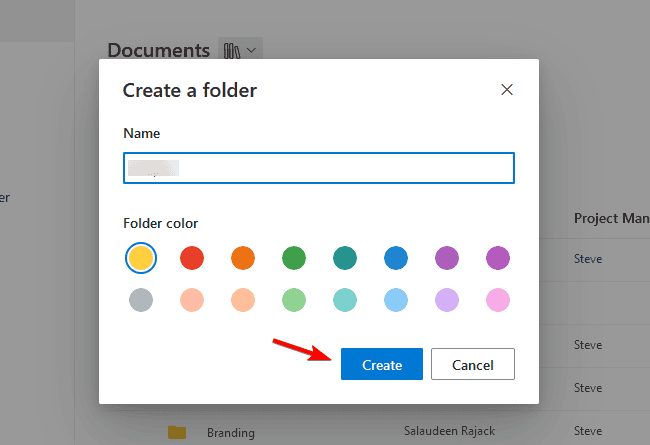
- Enter a folder name in the prompt that appears.
- Click Create to confirm.
In Classic SharePoint:
- Click New Document or New from the toolbar.
- Choose Folder from the list.
- Type the name for your new folder.
- Press OK or Save to finish.
5. Move or Upload Files into the Folder
After creating the folder, you can start adding files directly into it to keep your workspace organized.
- Double-click the folder name to open it.
- Click Upload or drag and drop files directly into the folder area.
- Wait for the upload to finish, then confirm your files appear inside.
To organize files efficiently after upload, check out how to move files in SharePoint.
6. Share or Manage Folder Permissions
You can decide who can access your folder by adjusting its sharing settings and permissions.
- Select the folder and click Share.
- Enter email addresses of users or groups.
- Choose the permission level: View, Edit, or Full Control.
- Click Send to share.
If you work with Teams integration, learn to manage file access with SharePoint in Microsoft Teams.
Why Create Folders in SharePoint
Organizing your content into folders provides structure and improves collaboration efficiency.
- Keep documents structured and easy to find.
- Improve teamwork through better organization.
- Maintain version control and reduce duplication.
For even more flexibility, consider using metadata tags or views to sort and filter content without overusing folders.
FAQs
Select the folder you want to rename, click the three dots (⋯) menu, choose Rename, enter a new name, and confirm your changes.
Yes. Simply open an existing folder, click + New > Folder, and give it a name to create a subfolder inside.
You might not have the right permissions. Make sure your account has Edit or Contribute access, or contact your SharePoint administrator to request the required rights.
Select the folder, click the three dots (⋯) menu, and choose Delete. Confirm the deletion when prompted. Deleted folders go to the Recycle Bin, where you can restore them later if needed.
To fully manage your SharePoint spaces, you can also follow this step-by-step guide on how to delete a SharePoint site and keep your environment clean and organized.
Conclusion
Creating a folder in SharePoint takes only a few clicks and helps you keep your files neatly arranged. Use the + New > Folder option to start building your folder structure and improve your team’s workflow today.
Read our disclosure page to find out how can you help Windows Report sustain the editorial team. Read more


Improve this guide


User forum
0 messages