Steam Library Folder is Not Writable: 5 Easy Fixes to Use
You may start be removing read-only permissions from the steamapp folder
Key notes
- Some Steam users reported that the library folder is not writable, which happens most of the time after manually changing the library location.
- The first thing to do is check if the SteamApp folder has some specific options turned on.
- Steam Download Cache might be why the library folder is not writable on Steam, so you might need to clear it.
- You'll probably need to change the Steam library folder to solve this issue.

By default, Steam stores all games and the data in a standard directory where the installation is available. This can change only if you choose a specific location when installing the software.
The default installation location will be in the C partition, in the Program Files folder, while the bulk of data will be stored in the Steam folder.
However, the user can change the library location for Steam games manually. This can sometimes create issues with the Steam app resulting in the library folder not being writable.
Fortunately, we’ve compiled a list of practical solutions to fix this annoying problem.
What does it mean if a folder is not writable?
There are a few common causes, at the top of these are the following:
- The SteamApp folder doesn’t have the necessary permissions – In this case, you should check if the folder has the Read-Only permission activated.
- Hard drive issues – While we may be unable to pinpoint the specific problems, users with errors on the drive have also experienced this Steam problem.
- Antivirus programs – Certain files are known to be blocked by your antivirus app even though they are perfectly safe. You should only use the best antivirus.
- Temporary bugs in the game – These might determine the need to reinstall the Steam app. However, it would be best if you considered this as the last solution to try.
Users have also encountered the following errors.
- Steam failed to add new library – This error can be problematic, and it can prevent you from playing your favorite games. Fortunately, we have the perfect solutions you can try to fix it.
- Failed to load library steam.hdll in Dead Cells – This is a pretty popular error but can be easily solved by following our recommended steps.
- Steam game doesn’t show up in the library – No matter what the exact circumstances are in your case, not being able to find your game in the Steam Library is incredibly infuriating for all users. So, if you face it, it is essential to have some options to help you fix it.
Regardless of your specific issue, it would be best to try the solutions below.
How do I fix the Steam library folder if it’s not writable?
1. Check if steamapps folder has Read-Only permission
- Use the following keyboard shortcut to open File Explorer: Windows + E.
- In the search bar, type This PC, then hit the Enter key.
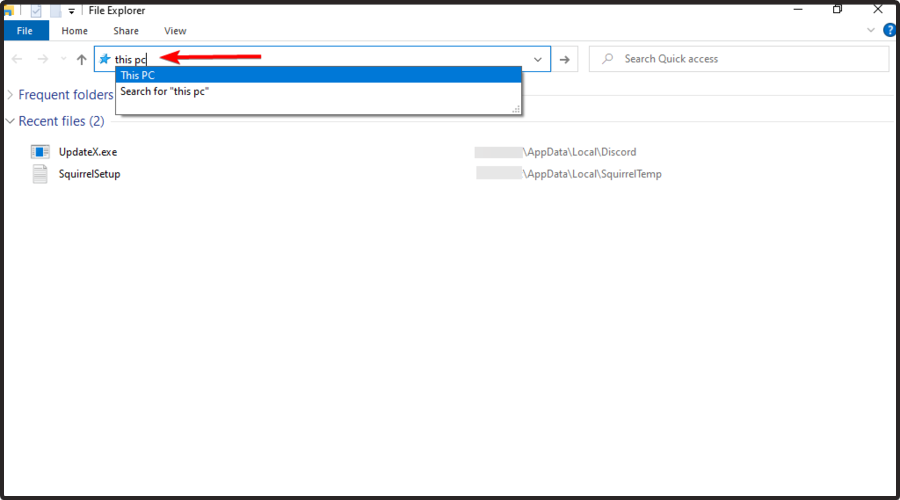
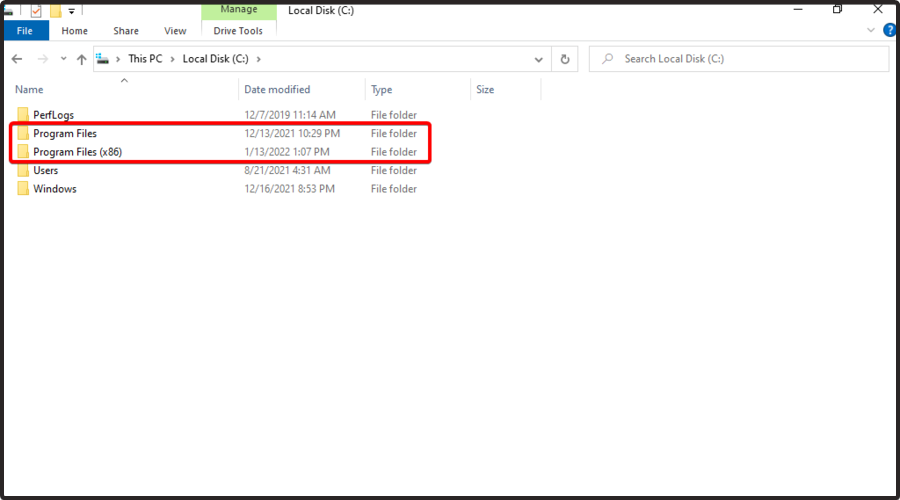
- Navigate to Local Disk (C:).

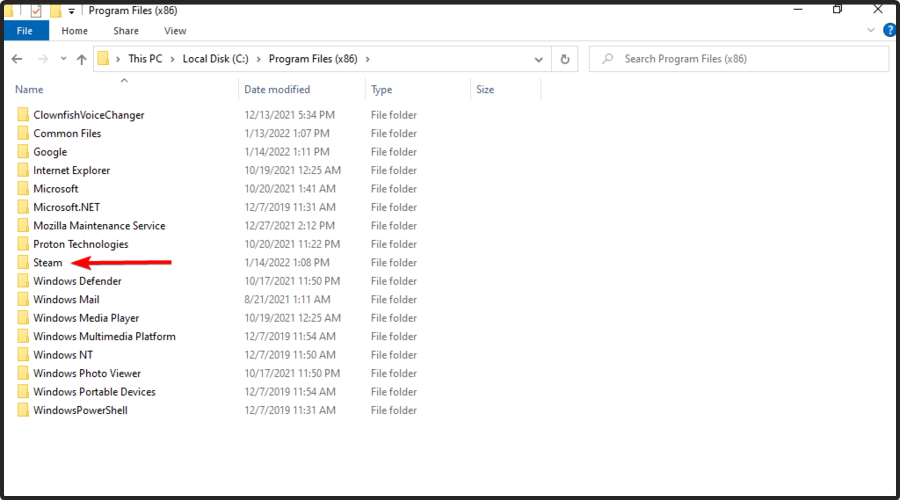
- Now, go to the Program files (x86).
- Double-click on the Steam folder.
- Right-click on the steamapps folder and select Properties.

- In the General tab, under the Attributes section, uncheck the Read-only box.

- Click Apply and click OK to save the changes.
The error may occur if the Steamapps folder does not have the necessary permission to write into the folder and if the folder permission is set to write only. Here is how to fix it.
2. Repair the Library folder using Steam
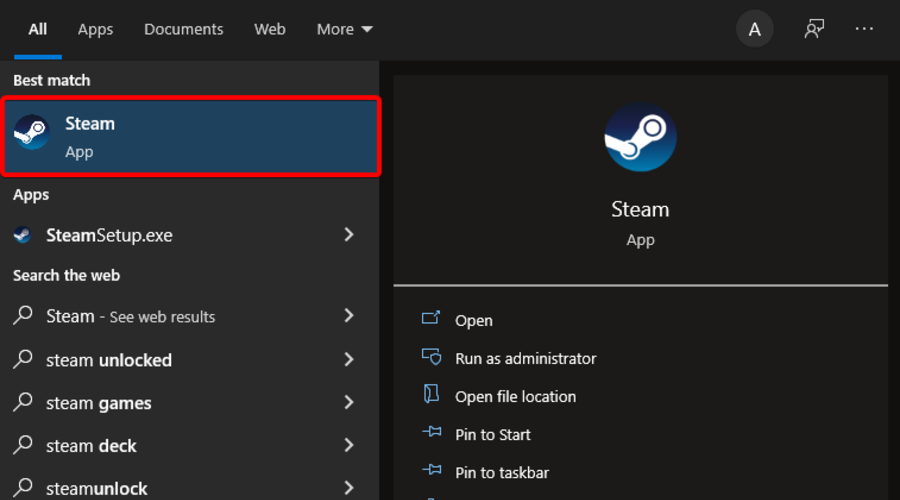
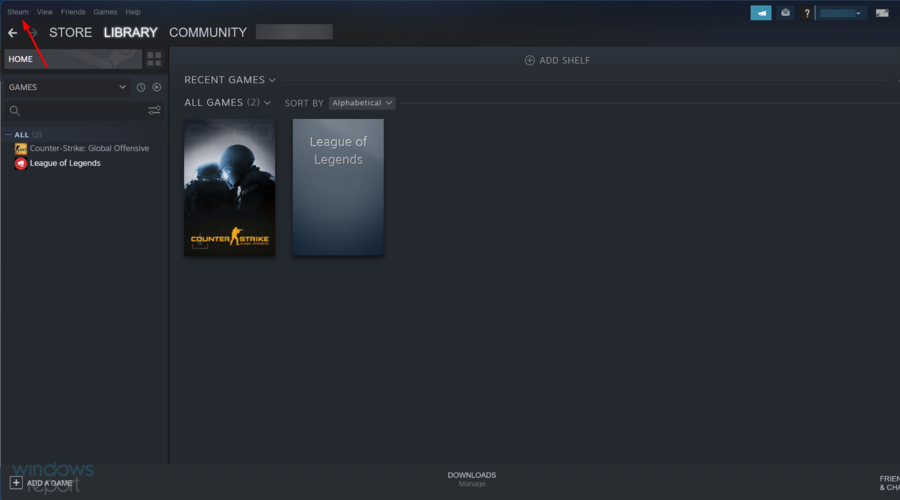
- Hit the Windows key, type Steam, then open the first result.
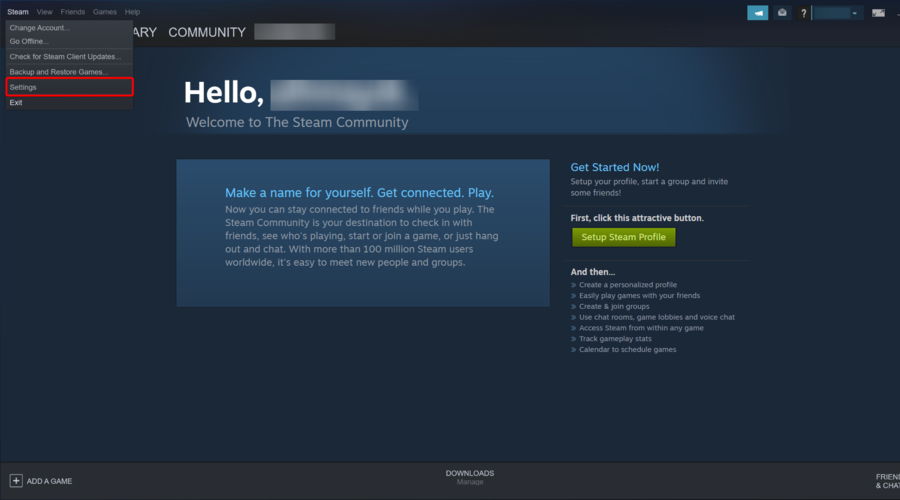
- From the top-left corner of the window, click on Steam.
- Go to Settings.
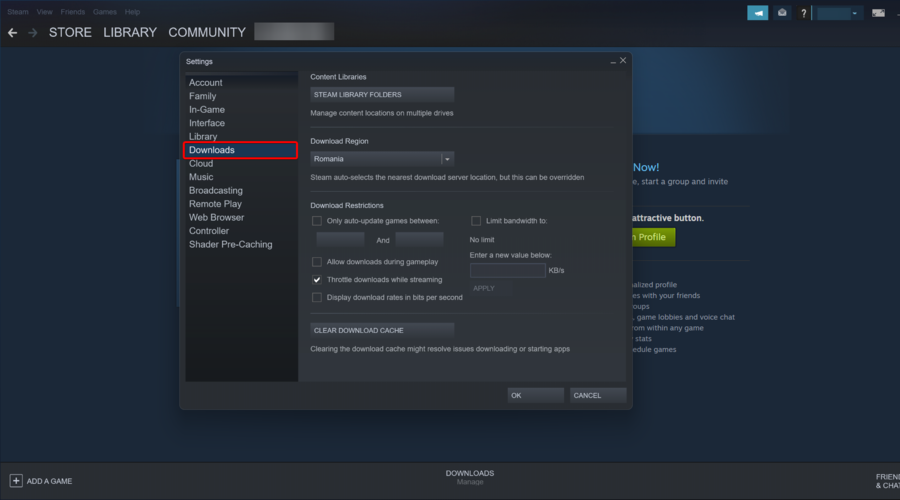
- Now, click on the Downloads tab.
- In the right pane, click on Steam Library Folder.

- Right-click on the folder that is giving the error and select Repair Library Folder.
- Steam will run the troubleshooter and fix any problem with the folder.
Your Steam app comes with a built-in library folder repair option that can be used to repair the game folder causing the error. Here is how to do it.
3. Clean Download Cache
- Hit the Windows key, search for Steam, then open the desktop client.
- From the top-left corner of the window, click on Steam.
- Now, navigate to Settings.
- From the left window pane, click on the Download tab.
- In the right pane, click on the Clear Download Cache button at the bottom of the page.
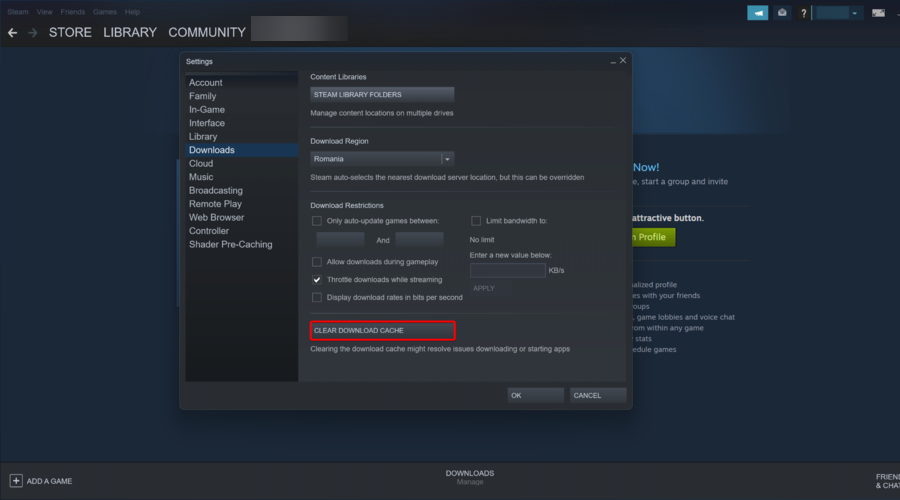
The download cache in steam helps with a faster connection. However, the bad cache can create problems with the game starting and downloading. Try clearing the download cache and see if that resolves the error.
4. Change Steam Library Folder
- Press the Windows key, type Steam, and click on the first result.
- From the top-left corner of the window, click on Steam.
- Navigate to Settings.
- Go to the Downloads tab, then click on Steam Library Folders.

- Click on the Add icon. Here you can either select an existing folder or create a new folder.

- Select the folder and close the settings window. Ensure the select folder has enough free storage space to install the games.
- Now try to download the game again and check for any improvement.
If you haven’t changed the default Steam library folder yet, it might be time to do so. Some users have reported that changing the Steam library folder from default to custom has fixed the issue. Here is how to do it.
5. Reinstall the Game
- Hit the Windows key, type Steam, then open the app.
- From the main menu, click on Library.

- Right-click on the problematic game, then choose to Uninstall it.

- When asked to confirm, click on Delete to uninstall the game completely.
- Launch Steam again, and click on Store.
- Search for the game in the Steam store, then download and install the game to see if uninstalling the game fixed the error.
If the error occurs while trying to play the game or during the update, you can try uninstalling and reinstalling the game to fix the issue.
Uninstalling the game will not delete your game data as it is synced with your Steam account, but you will have to download the game files from scratch.
These were the best solutions you can try to make your library folder writable on Steam.
If you have additional questions, do not hesitate to comment in the section below.
Read our disclosure page to find out how can you help Windows Report sustain the editorial team. Read more


Improve this guide

User forum
0 messages