Steam Unpacking Slow: 4 Ways to Make It Faster
If the drive has any issues, it will affect unpacking speed
3 min. read
Updated on
Read our disclosure page to find out how can you help Windows Report sustain the editorial team Read more
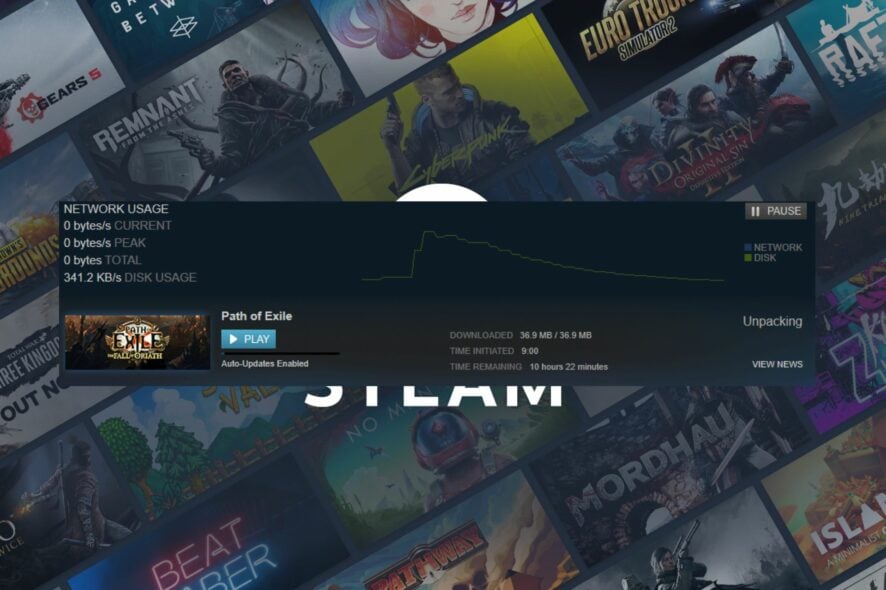
Many gamers reported slow unpacking speed when downloading new games or updates on Steam.
This can happen if you’re dealing with a big size game, or if the hard drive or solid-state drive (SSD) is slow. It may also be because you have many opened apps and you run out of resources.
Before taking the steps below, try freeing up some storage space, close unnecessary background apps, and turn off the antivirus temporarily.
What do I do if Steam is unpacking slowly?
1. Set Stream priority to high
- Press the Windows + X and select Task Manager to open it.
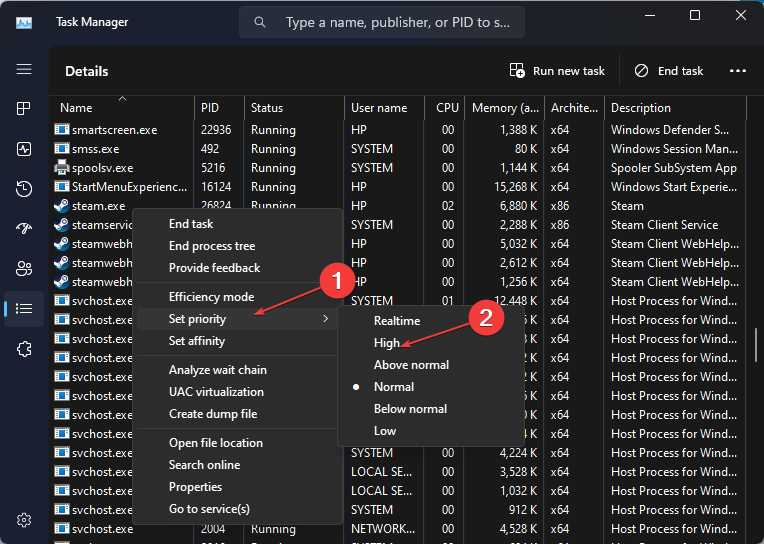
- Click on the Details tab and navigate to Stream.exe. Right-click it and select Set Priority and select High.
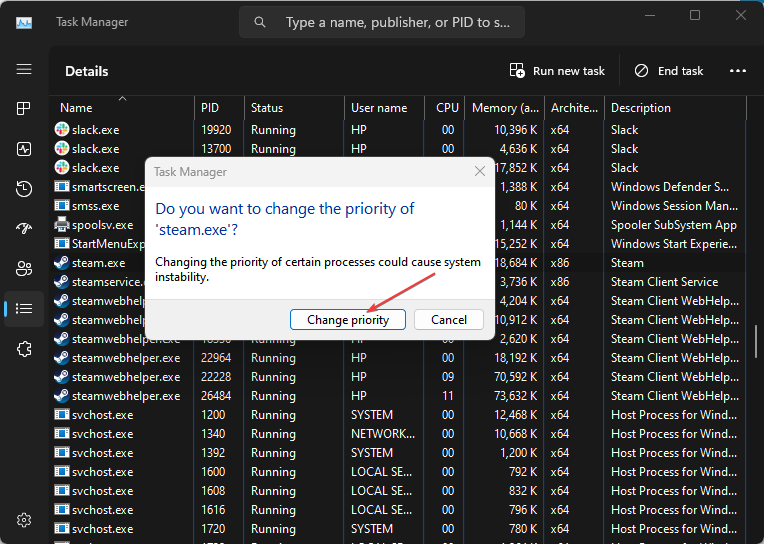
- Click on Change priority to confirm your choice in the dialog box.
Setting the Stream app as a high priority will boost its performance with top priority over other running apps. Check out our complete guide on how to set priority in task manager for more insight.
2. Defrag HDD or Optimize SSD
- Press the Windows key, type File Explorer, and press Enter key to open.
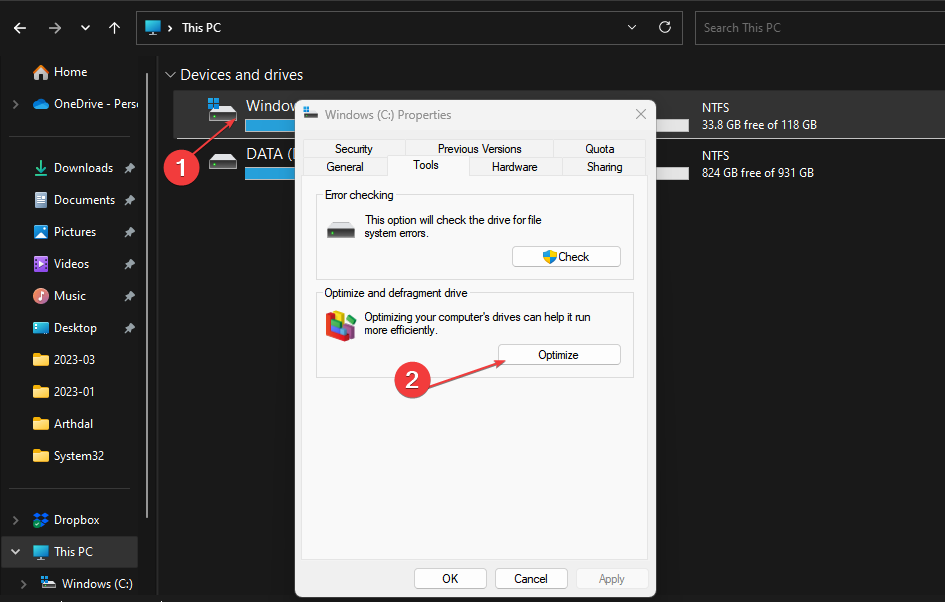
- Click on This PC from the left side pane and right-click the drive where the Stream app is. Select Properties.
- Then, click the Tools tab. Select the Optimize buttons from the Optimize and defragment drive section.
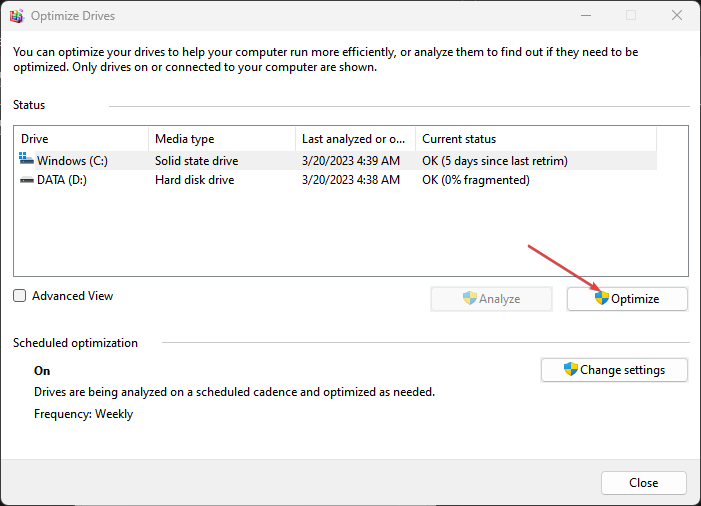
- Click the Optimize button to start the process.
The Optimize Windows tools will trim SSD drive and optimize HDD drive to improve speed. We have a complete guide on ways to fix disk defragmenters that won’t run in Windows.
3. Delete Files in Depotcache Folder
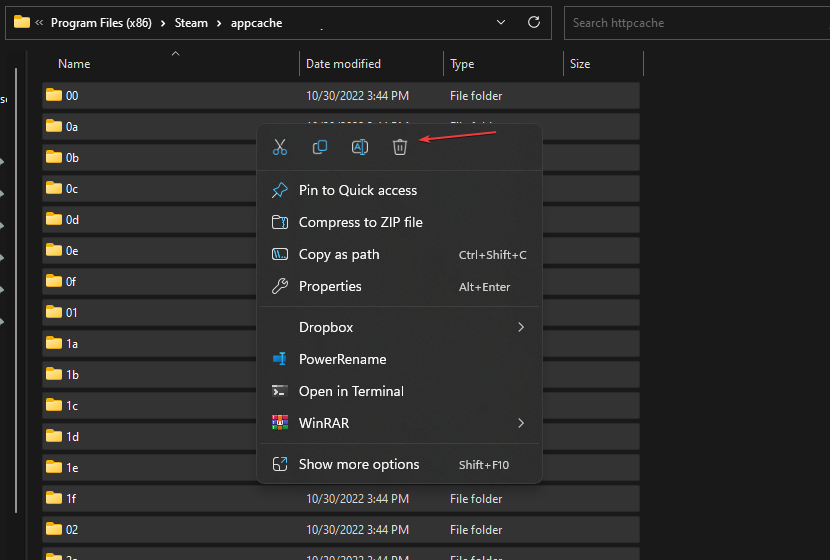
- Close the Stream app. Press the Windows + E to open File Explorer.
- Copy and paste the following path and press Enter:
C:\Program Files (x86)\Steam\depotcache - Delete all the files in the Depotcache folder.
The folder path differs in PCs depending on the drive in which the Stream app is.
4. Check Drive for error
- Press the Windows + E to open File Explorer and click on This PC from the left side pane.
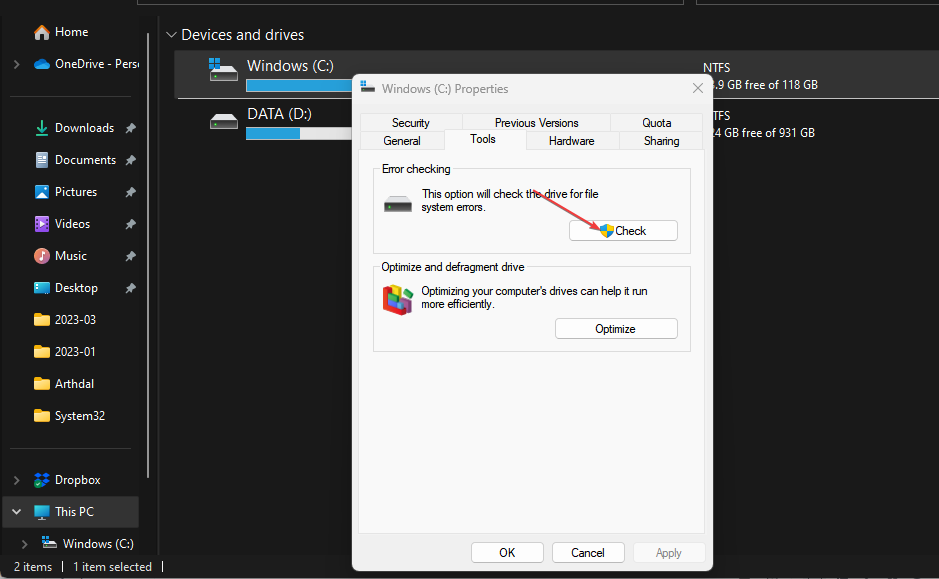
- Right-click the drive where the Stream is and click on Properties from the context menu.
- Click the Tools tab and select the Check button from the Error checking section.
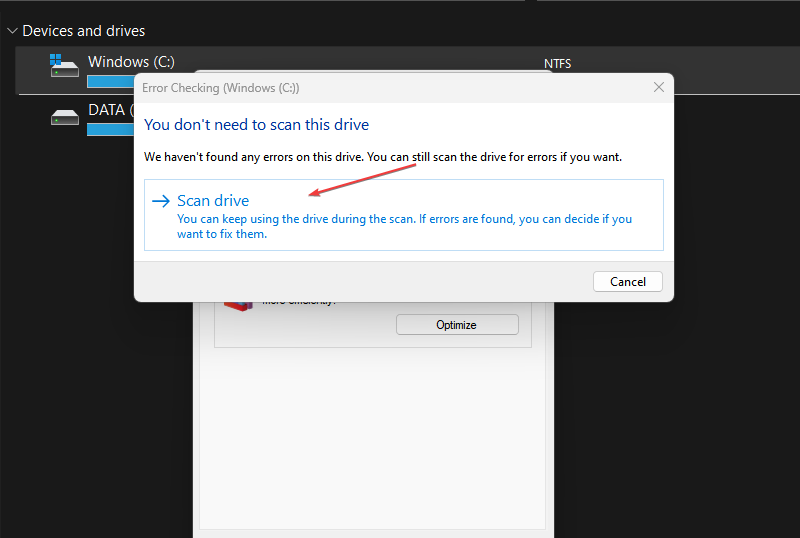
- Click on the Scan drive link and wait for the process to be complete.
The process above scans the drive for corrupt system files and bad partitions to improve your system performance. Feel free to read about methods to use if Windows cannot repair the drive on your PC.
In addition, check our detailed guide on ways to fix ISDone.dll error on Windows 10/11. Also, you can read about how to make Windows 11 faster on your device.
Alternatively, you can read about ways to fix a Steam download Stuck at 100% on your device.
Should you have further questions or suggestions, kindly drop the in the comments section.

