Stornvme.sys BSoD: 5 Ways to Fix It
Update system drivers to get past the BSoD
6 min. read
Updated on
Read our disclosure page to find out how can you help Windows Report sustain the editorial team Read more
Key notes
- Stornvme.sys, a Microsoft Win64 EXE driver file, has been reported to cause a blue screen issue on your PC.
- Hardware issues and incomplete software updates are known to corrupt the stornvme.sys file.
- You can resolve the BSoD crash by a malware scan and restoring your PC to a previous restore point.
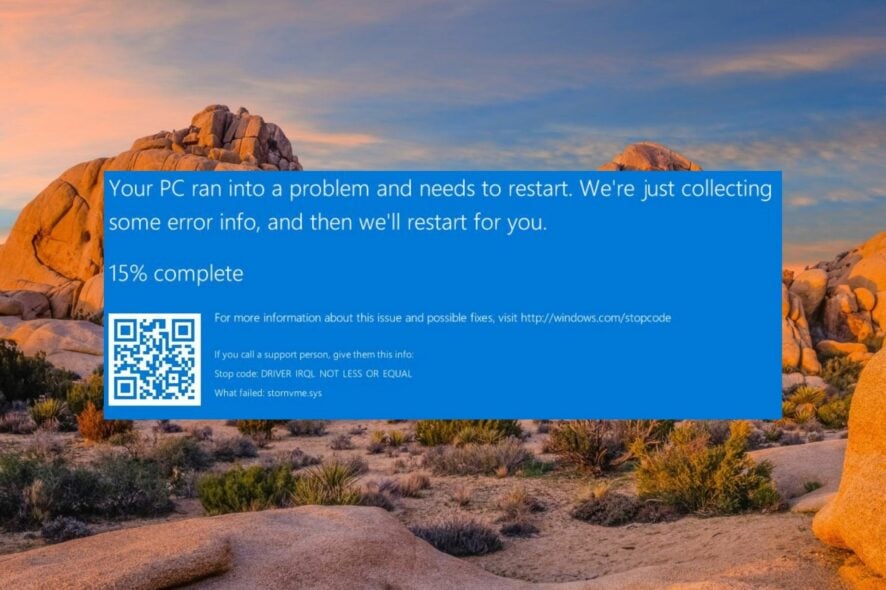
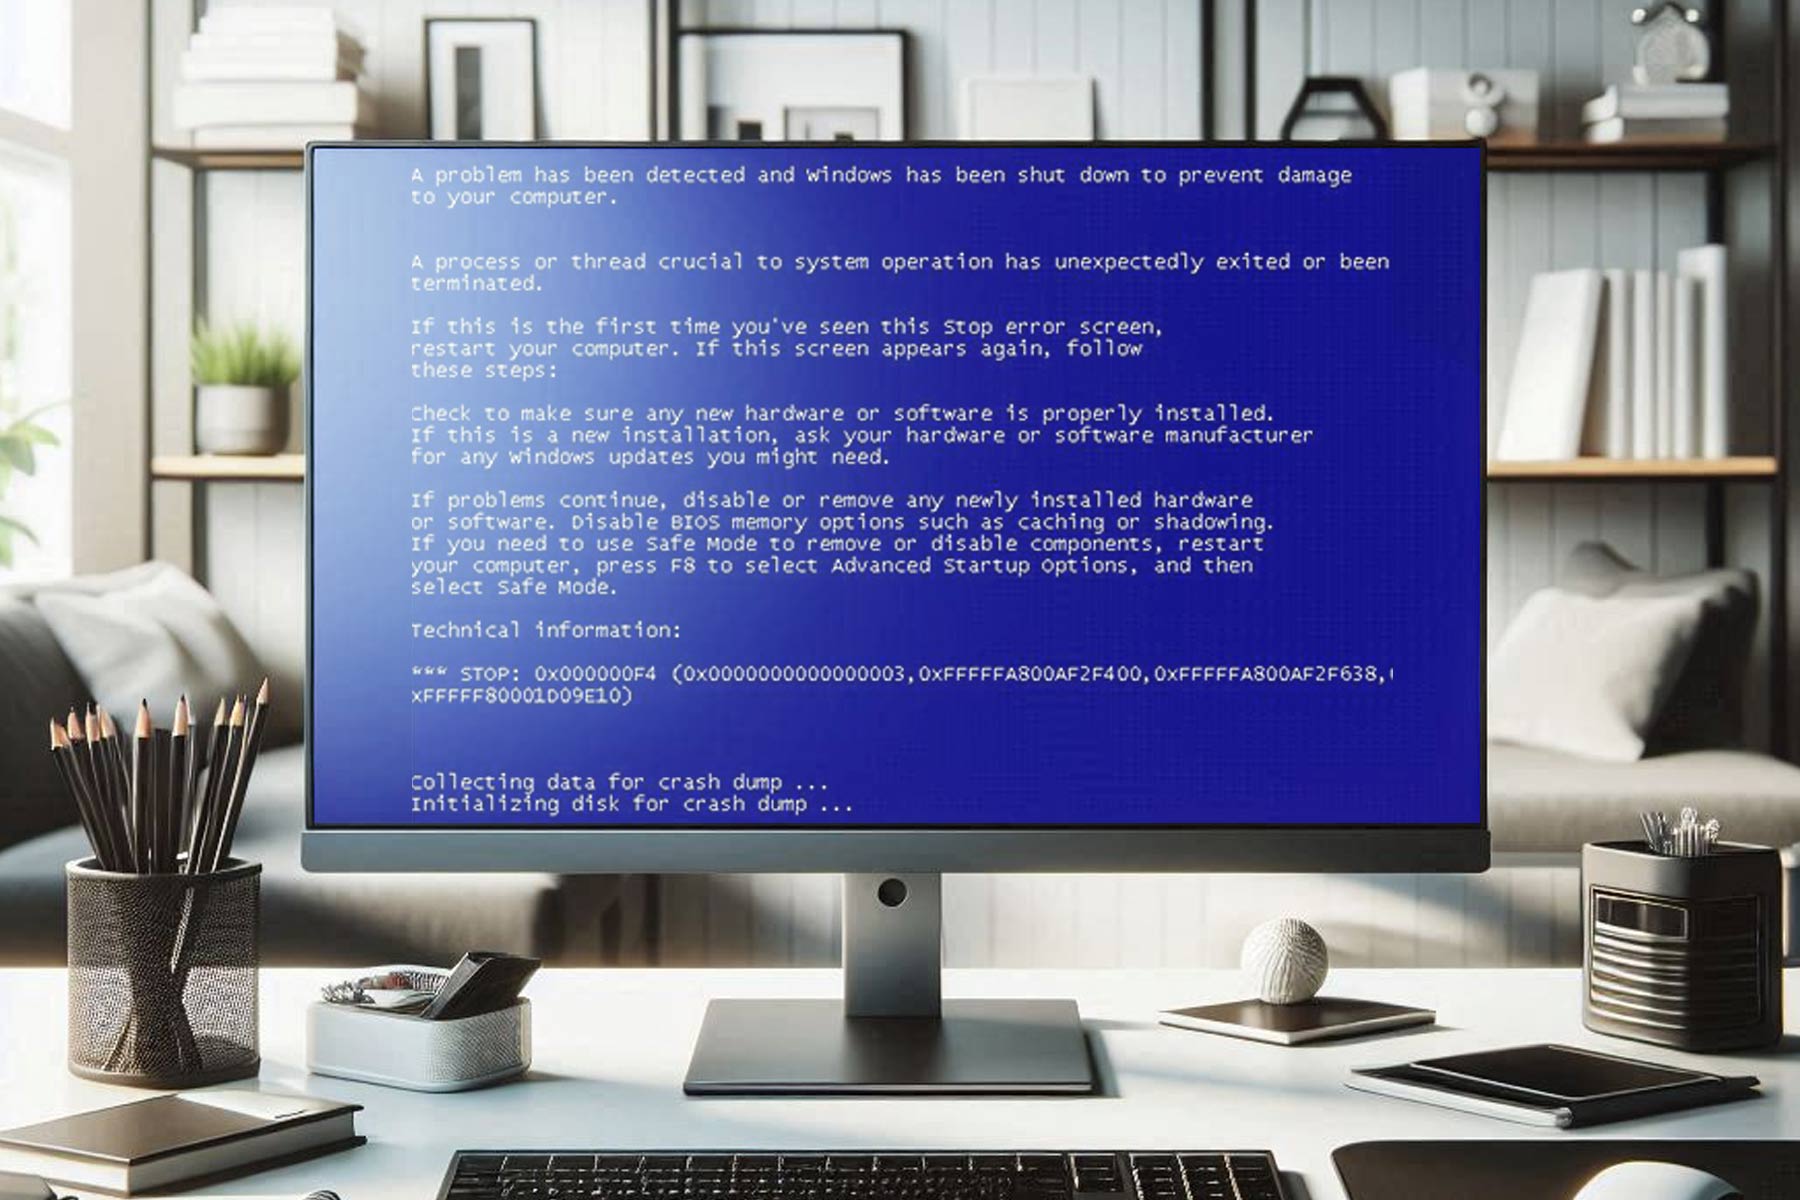
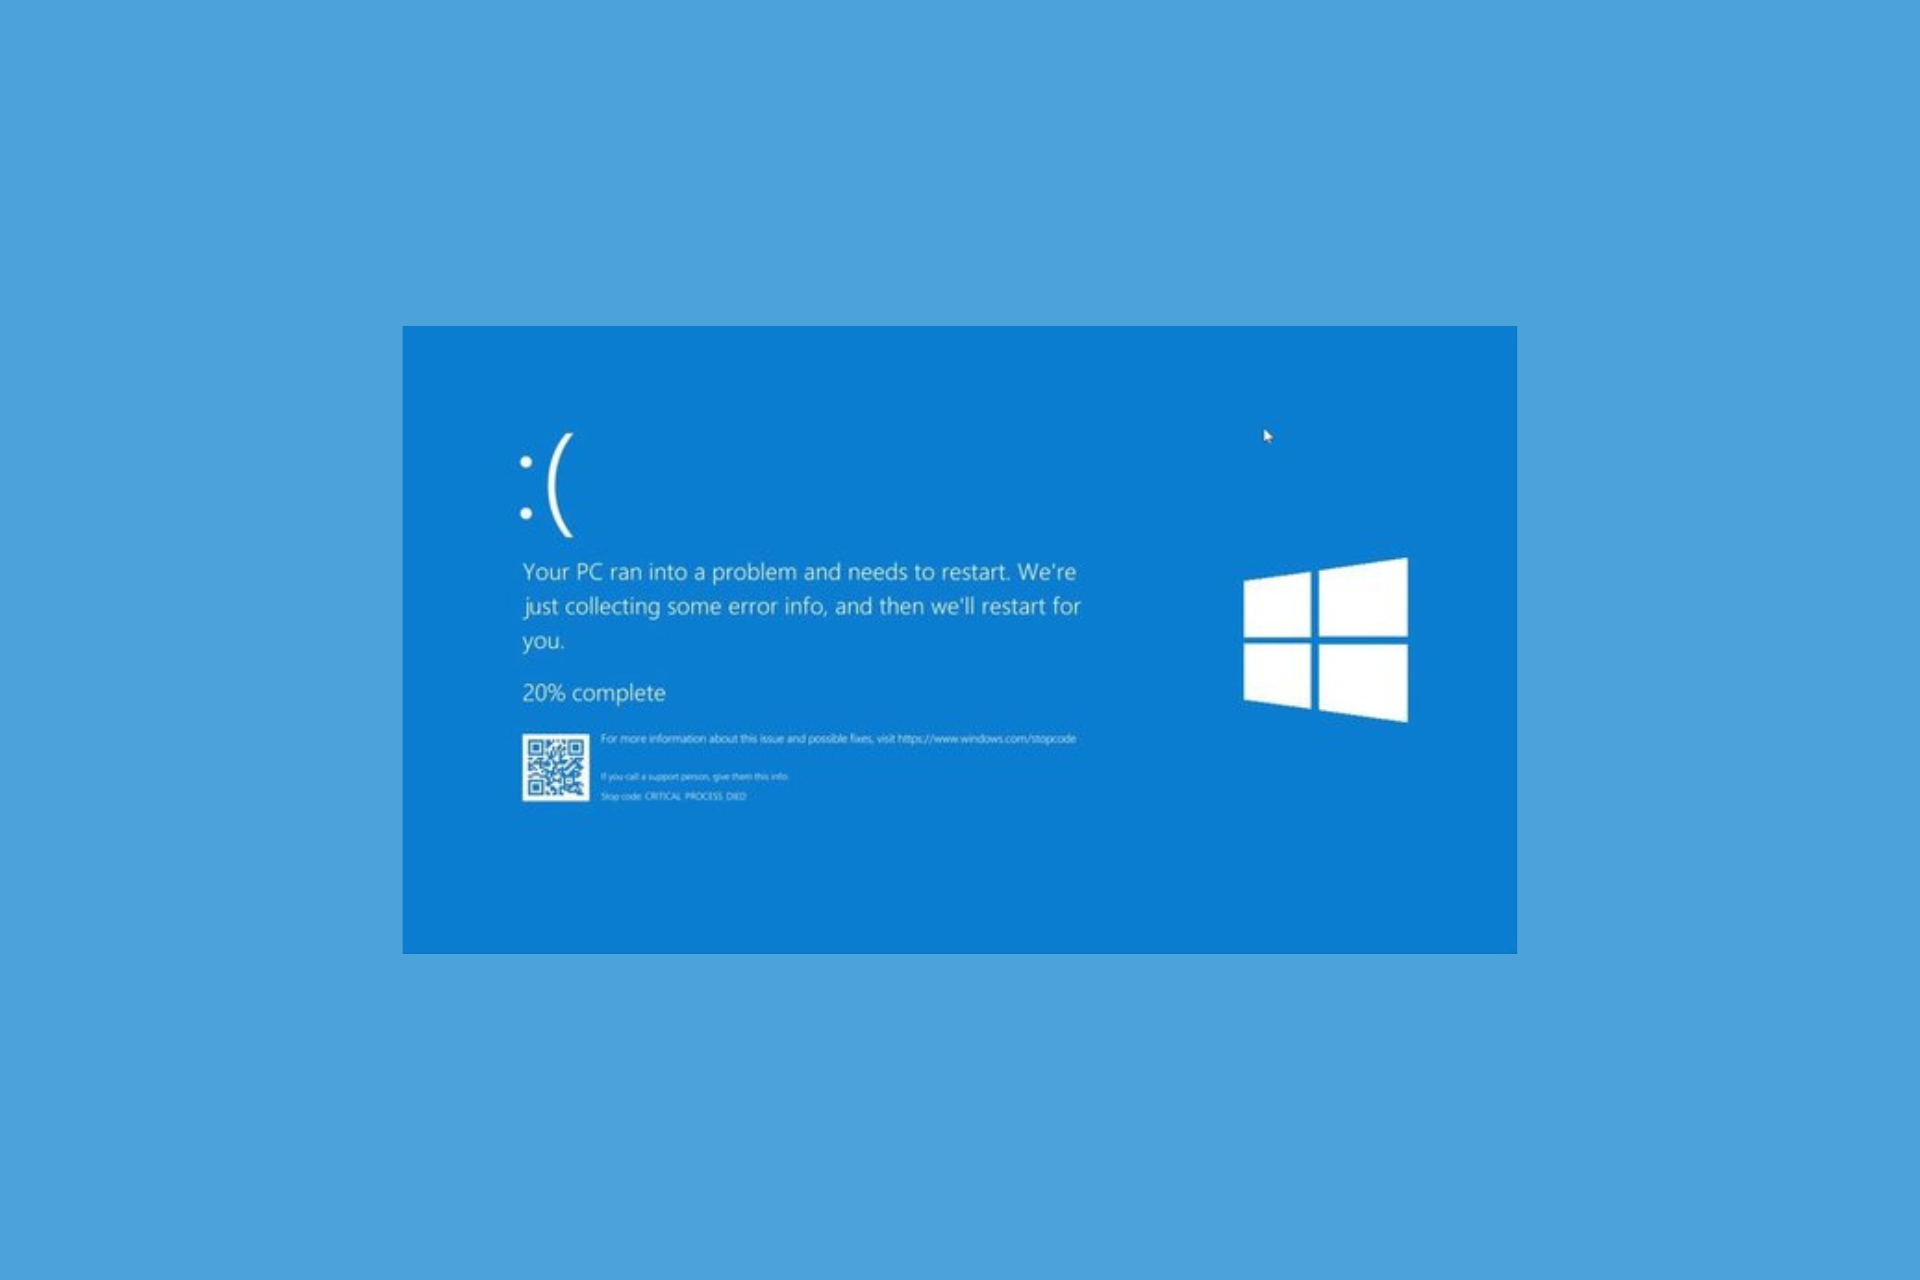
Stornvme.sys, also known as Microsoft NVM Express Storport Miniport Driver file, is a type of Win64 EXE driver file first created by Microsoft for Windows 8.1. This driver file can sometimes become corrupt and cause your Windows PC to crash randomly into the Blue Screen of Death causing data loss.
Why do I encounter the Stornvme.sys BSoD error?
A BSoD crash due to the stornvme.sys error can happen for several reasons an it also comes with the DRIVER_IRQL_NOT_LESS_OR_EQUAL stop code. The most recurrent ones are the following:
- Corrupt system drivers – Compatibility issues due to corrupt or outdated system drivers are the primary cause of the stop code.
- Virus infection – A PC damaged due to malware infection becomes vulnerable and causes BSoD errors.
- Incomplete software installation – Software-related problems like unsuccessful installation are another reason for the stornvme.sys BSoD error.
- Hardware issues – Hardware and disk-related issues like corrupt disk drivers put the system in a compromised state, hence the error.
- Broken system files – Corrupt or damaged system files cause the system to malfunction and crash abruptly.
If you experience a BSoD crash on your PC because of stornvme.sys, the solutions listed in this guide will prove effective in overcoming it.
How do I fix the Stornvme.sys BSoD error in Windows?
Before implementing the solutions lined up below, try the solutions listed below:
- Uninstall the recently installed Windows Update from your computer.
- Scan your PC for viruses and malware using Windows Defender or a third-party antivirus.
- Uninstall the app that was not installed successfully and re-install it later.
If these methods do not seem fruitful, proceed to the mainstream solutions listed below.
1. Restart your PC in Safe Mode
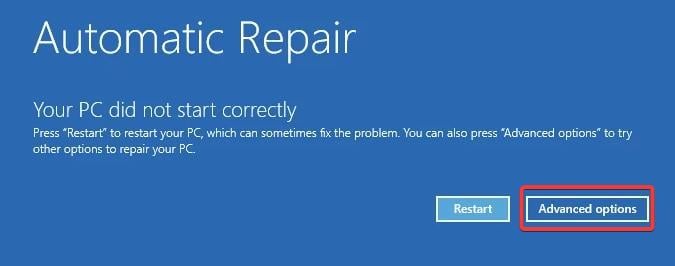
- Hold down the power button for a few seconds until your PC powers off. Press the power button to start your PC and quickly power it off as soon as the Windows logo flashes on the screen. Perform the same step until you reach the Automatic Repair screen.
- Hit the Advanced options button to initiate the automatic repair process.
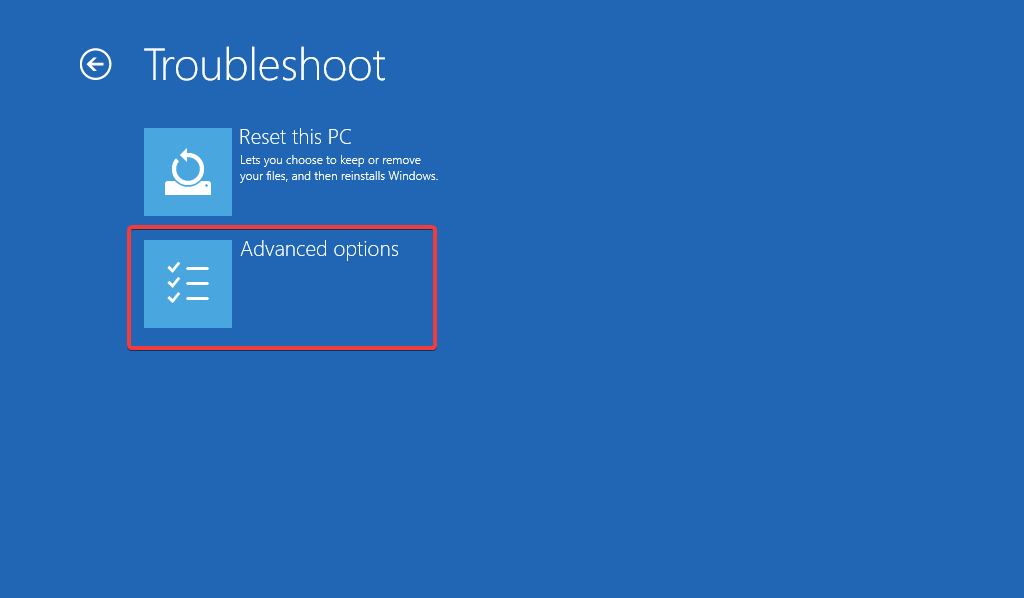
- Next, select the Troubleshoot option.
- Click Advanced options.
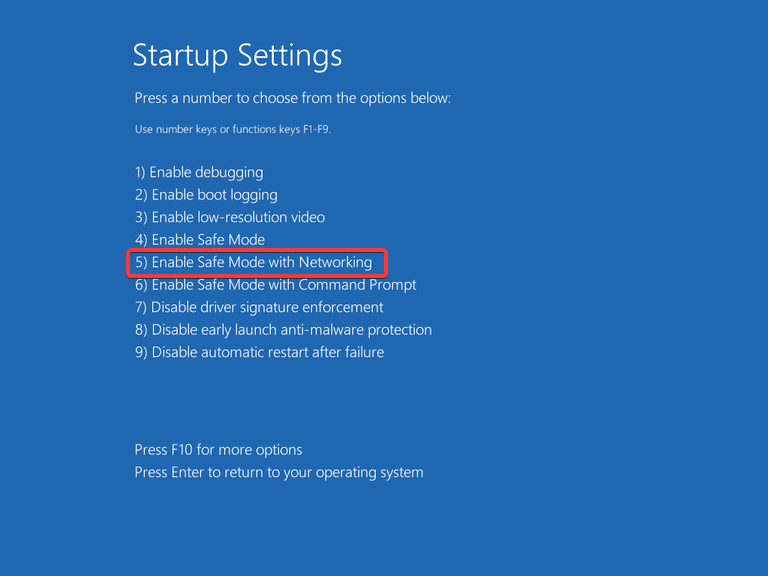
- Choose Startup settings from the Advanced options window.
- Press the F5 key to choose Safe Mode with Networking from the list of safe mode variants.
In Safe mode, your PC Windows operates in a basic state, with only a limited set of files, drivers, and apps functional. Once you enter the safe mode, execute the troubleshooting methods lined up below to get past the stornvme.sys BSoD error.
2. Run SFC and DISM scans
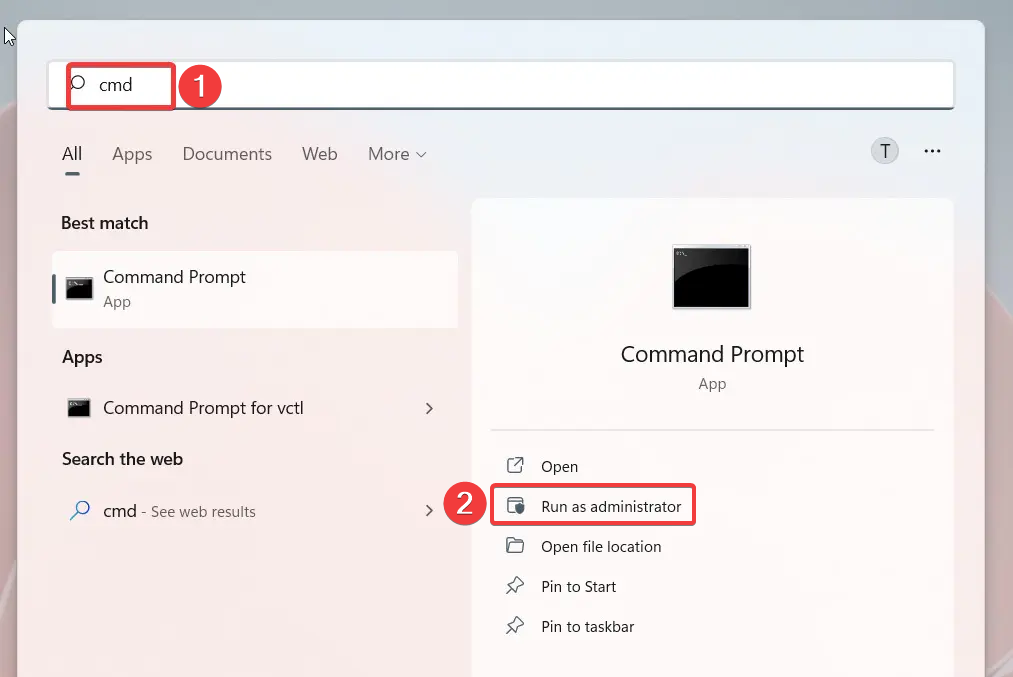
- Hit the Windows key to bring up the Start menu, type cmd in the search bar and choose Run as administrator from the search results.
- Click Yes on the User Account Control prompt.
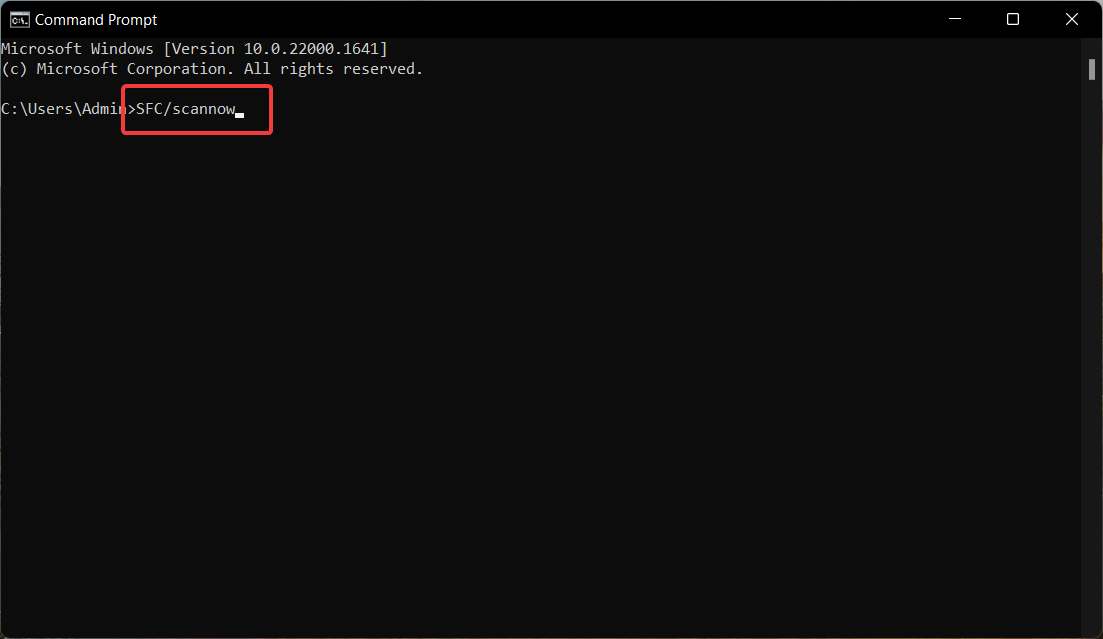
- Type or paste the following command and press the Enter key to run System File Checker.
sfc /scannow - Wait until the message verification is 100% complete appears. Type or paste the below command and press the Enter key to initiate the DISM scan.
DISM /Online /Cleanup-image /Restorehealth
System File Checker scan and DISM tool will diagnose the corrupt system files and faulty disk images will restore the original version from the compressed folder.
If you think the above process isn’t thorough enough for repairing your Windows system, we suggest you try dedicated repair software.
3. Perform System Restore
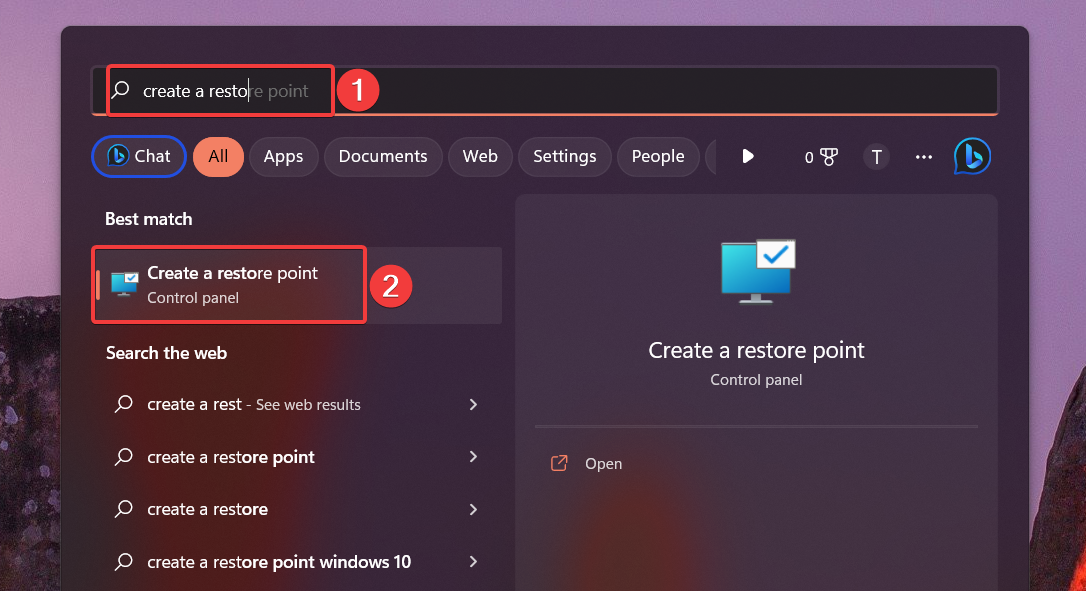
- Bring up the Start menu by pressing the Windows key, type create a restore point in the search bar, and choose the first search result to access the System Properties window.
- Press the System Restore button located in the System Protection tab.
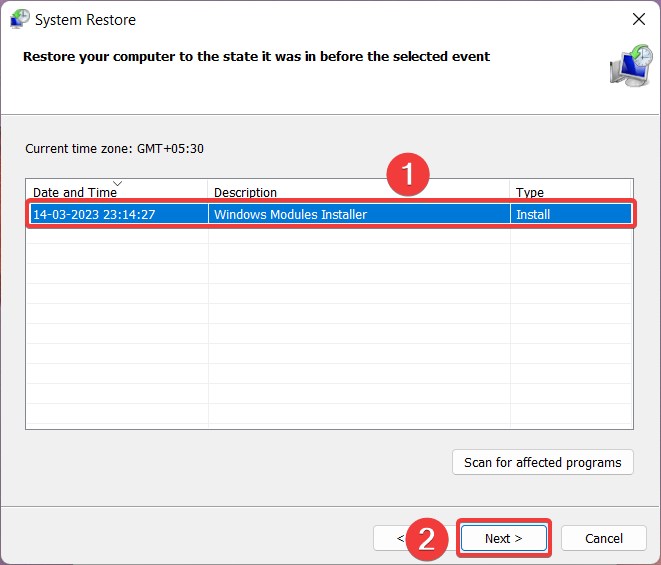
- Choose the suitable restore point from the list when your PC was not crashing into BSoD because of the stornvme.sys and hit the Next button.
- Confirm the restore point and initiate the system restore process by pressing the Finish button.
Restoring your PC to a previous time will revert all the changes that damaged the stornvme.sys file such as incomplete software update which in turn invoked the BSoD.
4. Update the system drivers
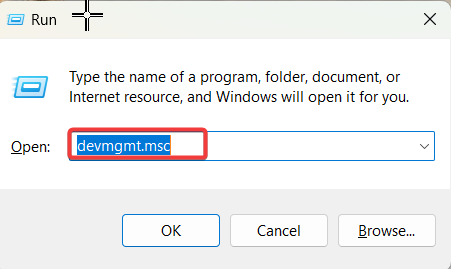
- Use the Windows + R shortcut to bring up the Run dialog box. Type the following command in the text box and hit OK.
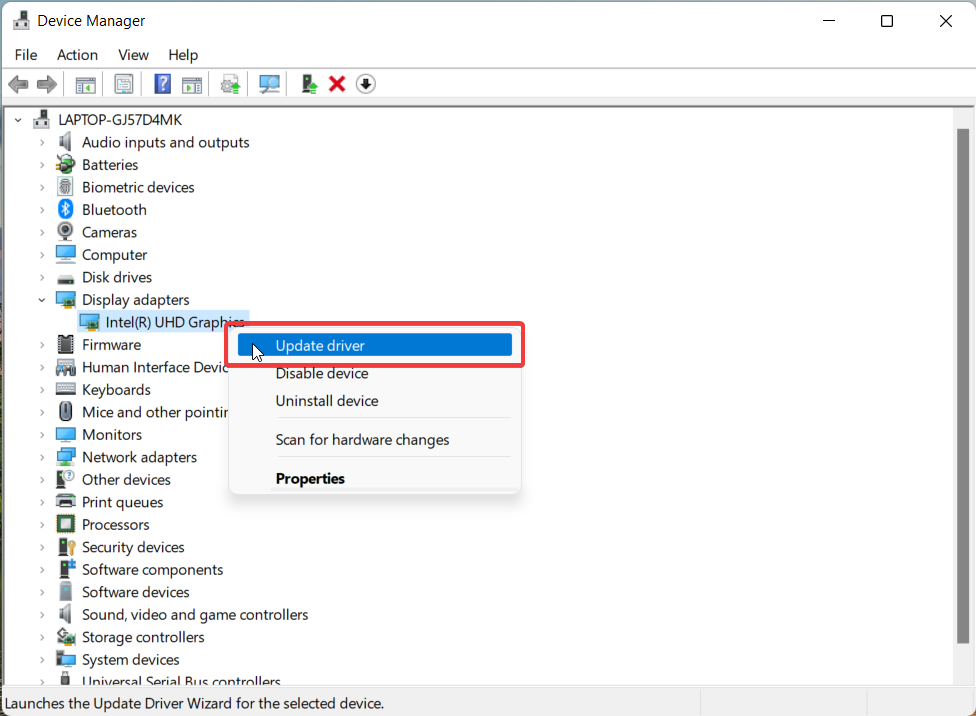
devmgmt.msc - In the Device Manager window, expand the Display adapter category to view the list of installed drivers.
- Right-click the relevant graphic driver and choose the Update driver option from the context menu.
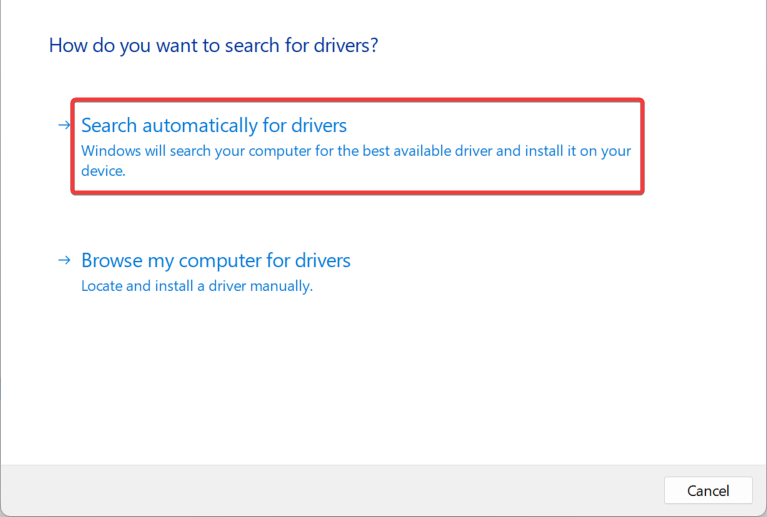
- Select the Search automatically for drivers option on the new window that appears.
- Windows will now look for the best available driver update for your graphics card system and will automatically download and install it.
If no update is available, you will see a message saying the best drivers are already installed. In this case, follow the other methods for updating the graphics drivers on Windows PC.
Similarly, update all the obsolete system drivers under each category to resolve the BSoD crash issue.
5. Reset Windows
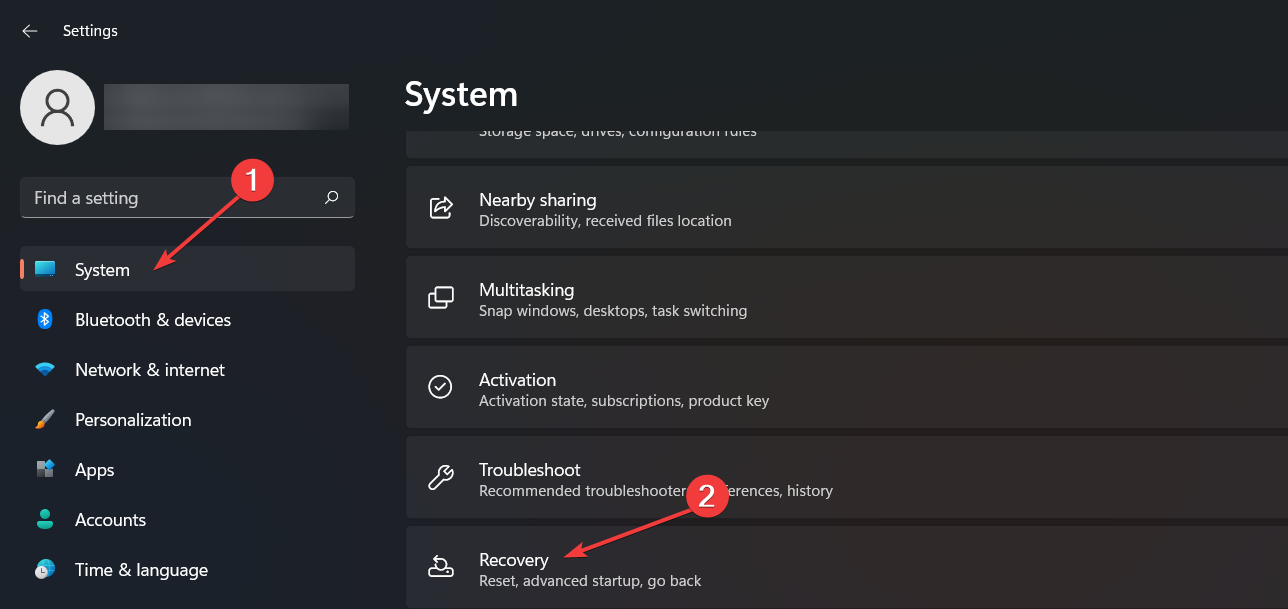
- Bring up the Settings app using the Windows + I shortcut key.
- Scroll down the System settings and select Recovery option from the right section.
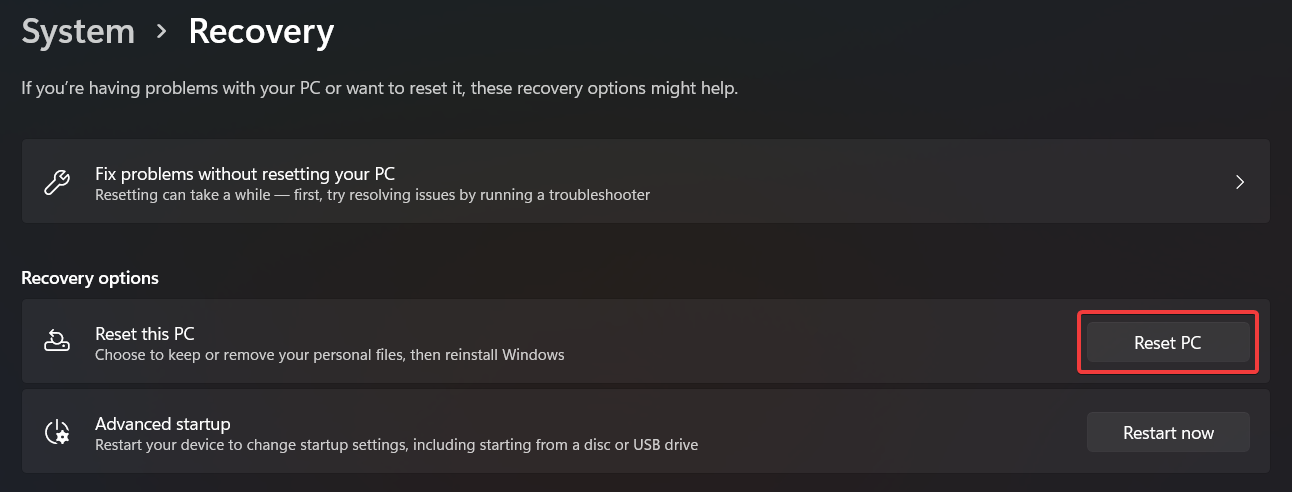
- Press the Reset PC button located under the Recovery options.
- A Reset this PC pop-up will appear. Choose the Keep my files option to reset Windows without affecting your files and data.
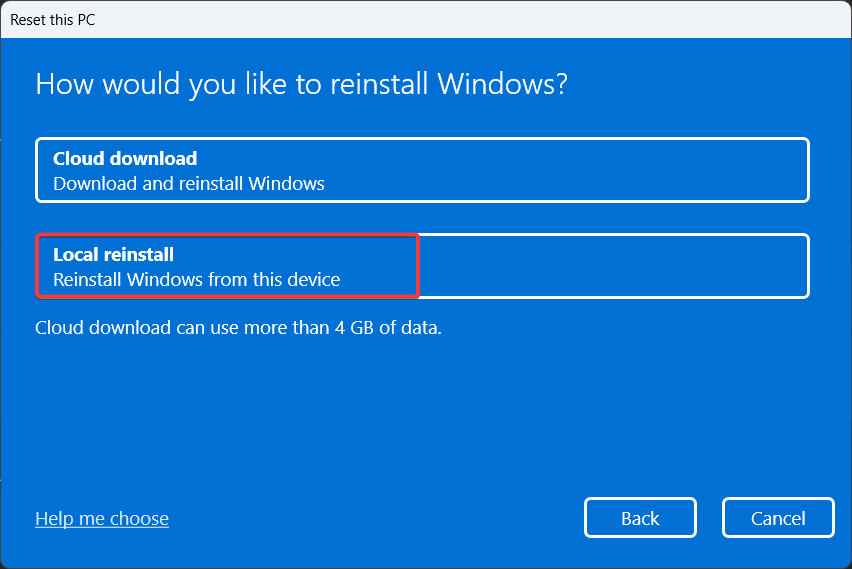
- Select the method you would like to opt for reinstalling Windows from the next screen. We recommend Local reinstall to quickly reset Windows locally.
Resetting your Windows PC will reset and wipe out all misconfigured settings and will restore the system files to the default state. After the local install is completed, the stornvme.sys BSoD error will no longer bother you.
That’s all in this guide! Before you leave, you may want to know how to resolve the ACPI.sys error on your Windows PC.
So which of the troubleshooting methods listed in this guide did the trick? Do let us know in the comments.

