Sysprep was Not Able to Validate Installation [Windows 11 Fix]
5 min. read
Updated on
Read our disclosure page to find out how can you help Windows Report sustain the editorial team. Read more
Key notes
- The Sysprep was not able to validate your Windows installation Windows 11/10 error frequently occurs because of user-installed UWP apps and BitLocker.
- Uninstalling some UWP apps you’ve installed could fix the Sysprep Windows 11 error.
- Some users might need to disable BitLocker to fix the Sysprep was not able to validate your windows installation 0x80073cf2 error.
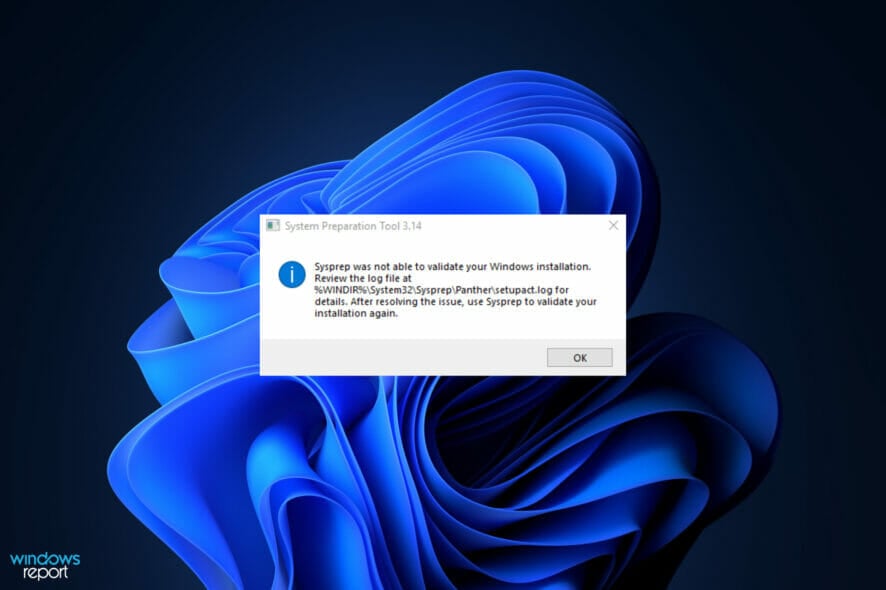
Sysprep, otherwise System Preparation, is a command-line tool some users utilize to prepare Windows images for deployment. However, an error can arise for some users after entering a Sysprep command for system preparation. One user said this in an MS forum post:
I have a clean installed Windows 10 pro which was activated by MAK license. When I tried to prepare this system with Sysprep, I got the error message Sysprep was not able to validate Your Windows installation.
That Sysprep issue can arise on Windows 11, 10, and 8 platforms. When that issue arises, the Sysprep command doesn’t run and validate the installation as expected. If you need to fix that Sysprep issue, check out the Windows 11/10 resolutions for it below.
How come the Sysprep error arises in Windows?
The Sysprep was not able to validate Your Windows installation error has existed since Windows 8. That issue often arises because of user-installed UWP apps. Many users have confirmed they fixed this issue by uninstalling certain UWP apps they installed from MS Store.
This issue can also occur if a default app, which is supposed to come pre-installed with Windows, is missing. In such a scenario, you would need to reinstall the missing Windows app. A general reinstall app command will do the job.
If you’re utilizing Windows Pro and Enterprise editions, the Sysprep error might be due to the BitLocker encryption feature. BitLocker doesn’t mix well with the Sysprep utility. So, disabling that feature on Windows Pro and Enterprise editions can sometimes resolve this error as well.
How can I fix the Sysprep error in Windows?
1. Reinstall default Windows UWP apps
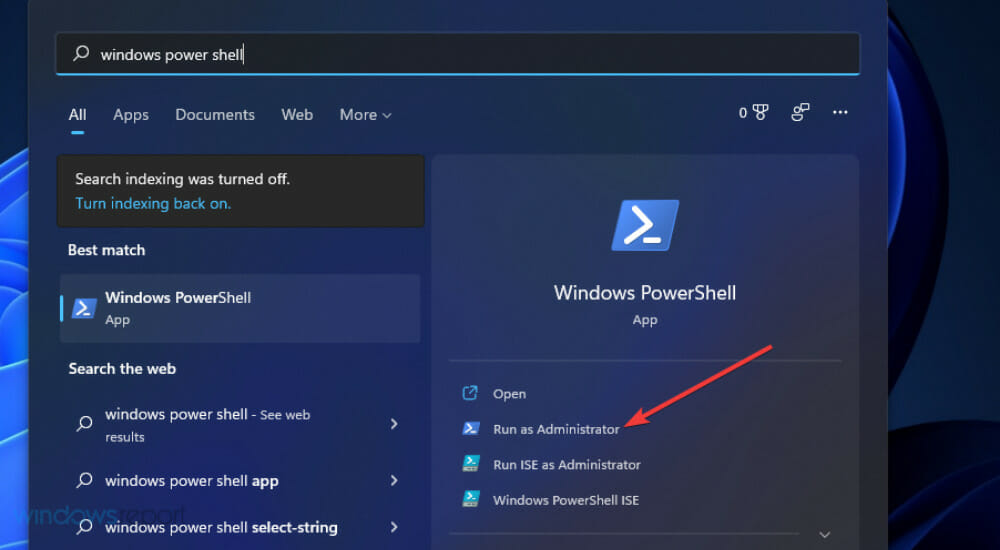
- To bring up the search box, press the Windows + S keyboard shortcut.
- Type Windows PowerShell in the search box.
- Click PowerShell’s Run as administrator option.
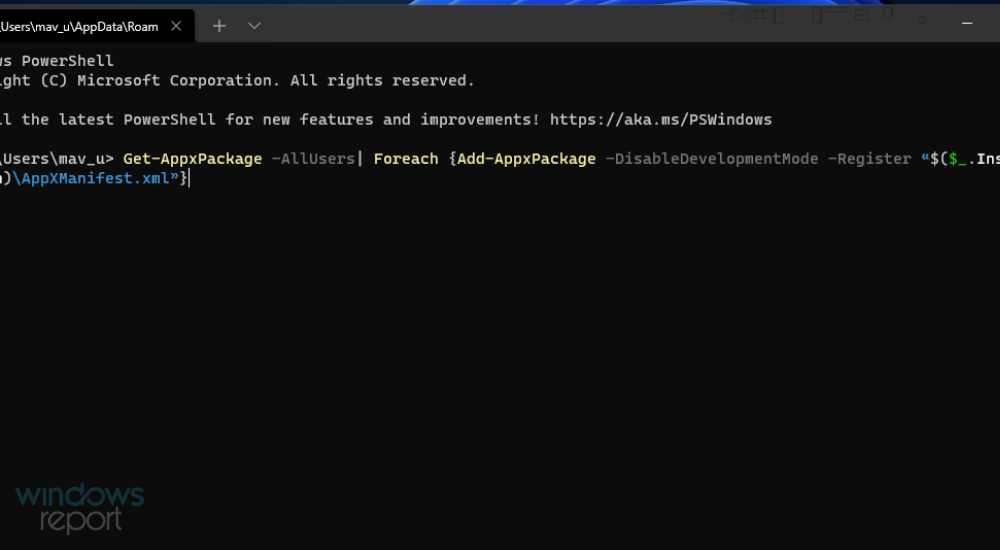
- Input this PowerShell command:
Get-AppxPackage -AllUsers| Foreach {Add-AppxPackage -DisableDevelopmentMode -Register “$($_.InstallLocation)\AppXManifest.xml”} - Press the Enter keyboard key to execute.
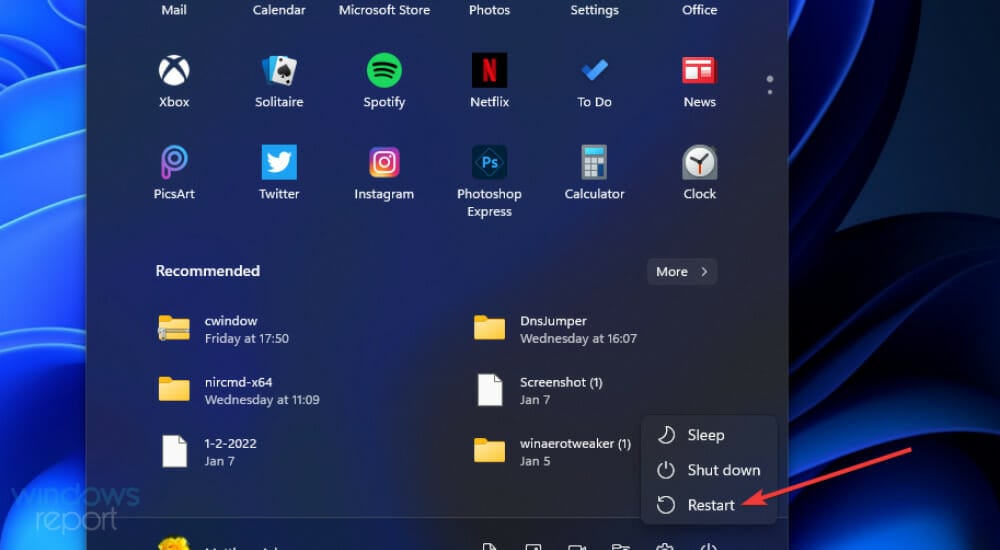
- When the command has finished, click Power and Restart on your Start menu.
2. Disable BitLocker
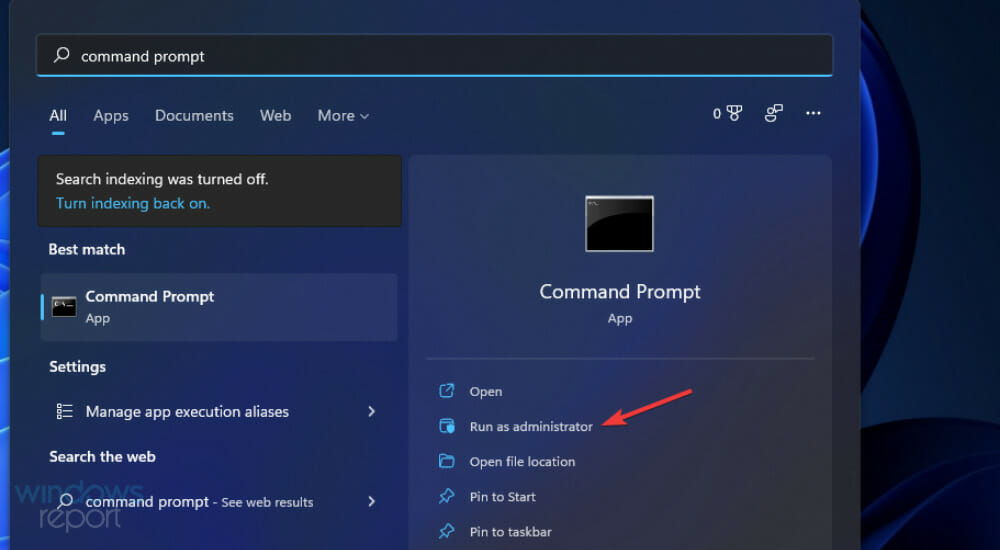
- Launch the Windows 11/10 search tool with its hotkey (specified in resolution one).
- Input Command Prompt into the search tool’s text box to find that app.
- Click the Run as administrator option for the Command Prompt shown directly below.
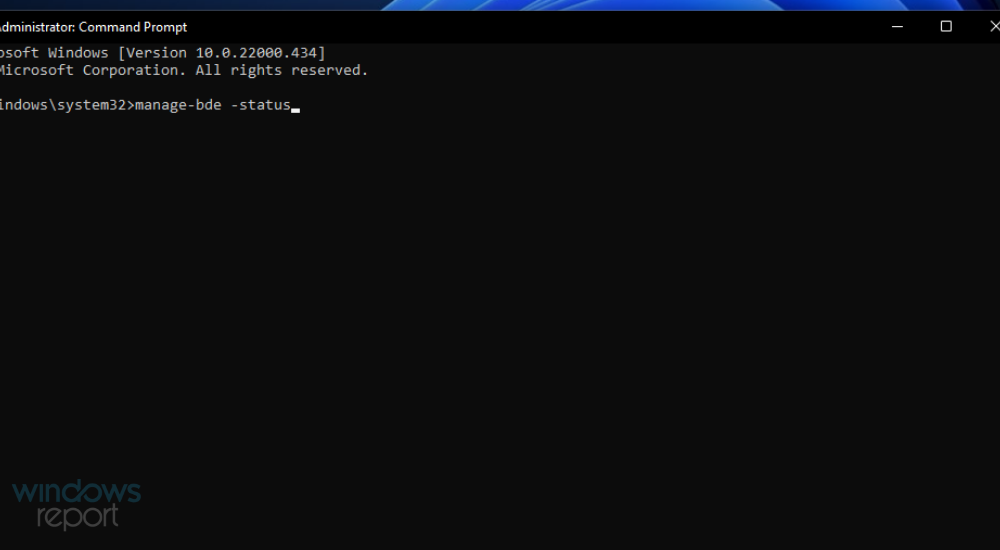
- Enter this command and press Return:
manage-bde -status - To disable BitLocker, type in this command and press Return:
Disable-Bitlocker –MountPoint ‘C:’
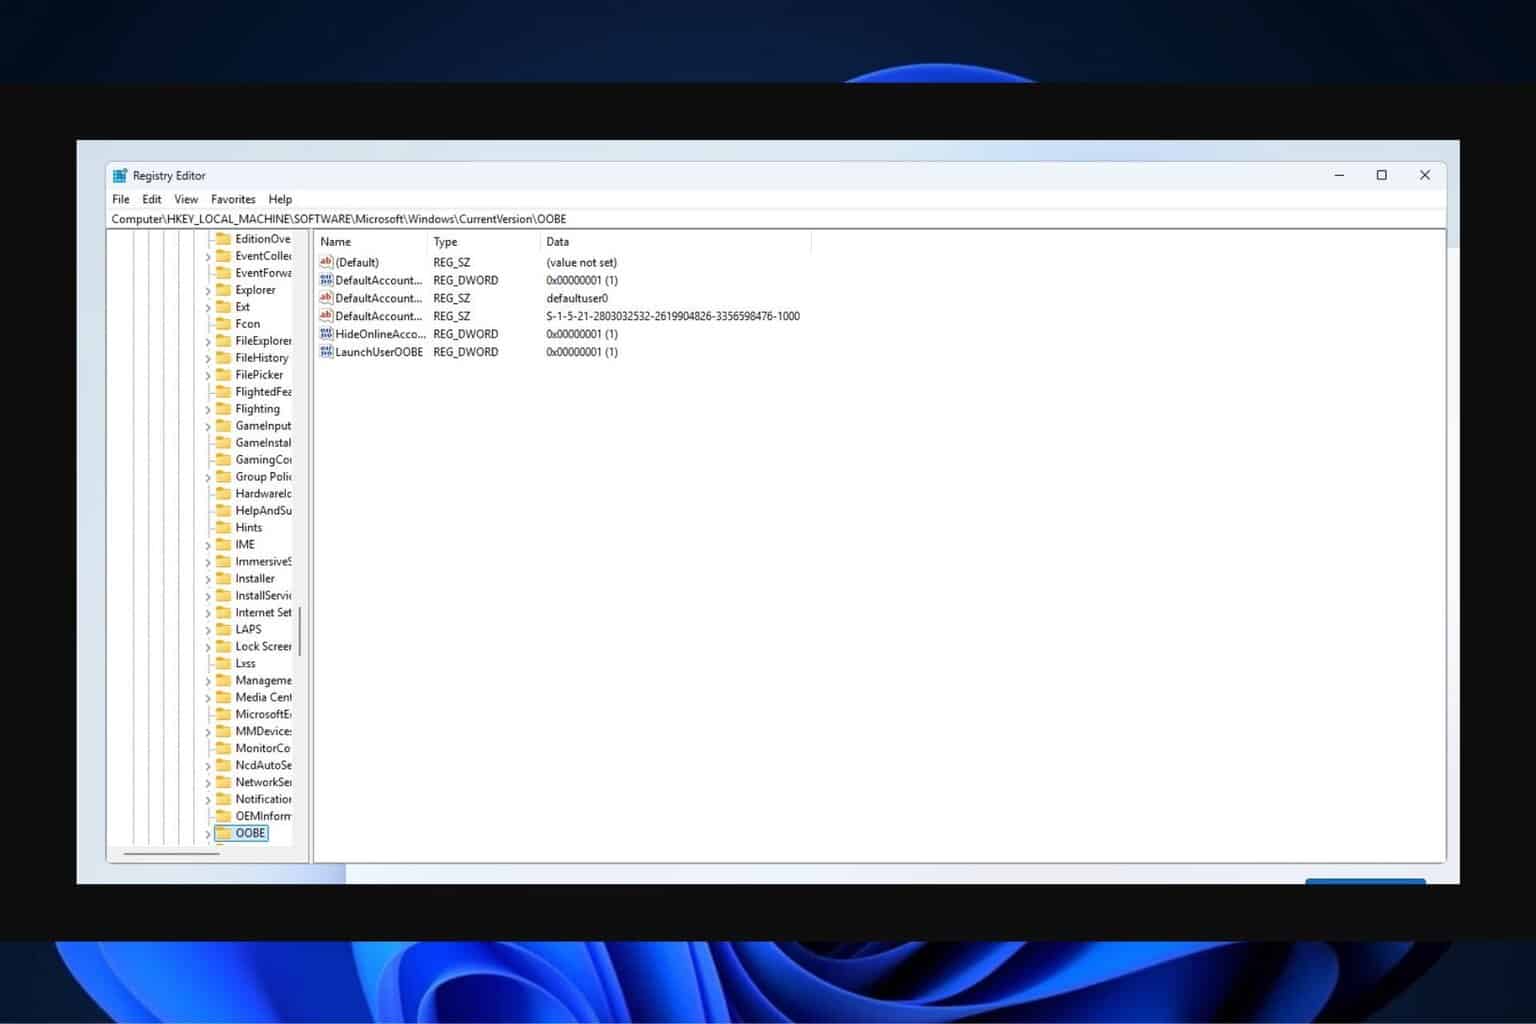
3. Edit the registry
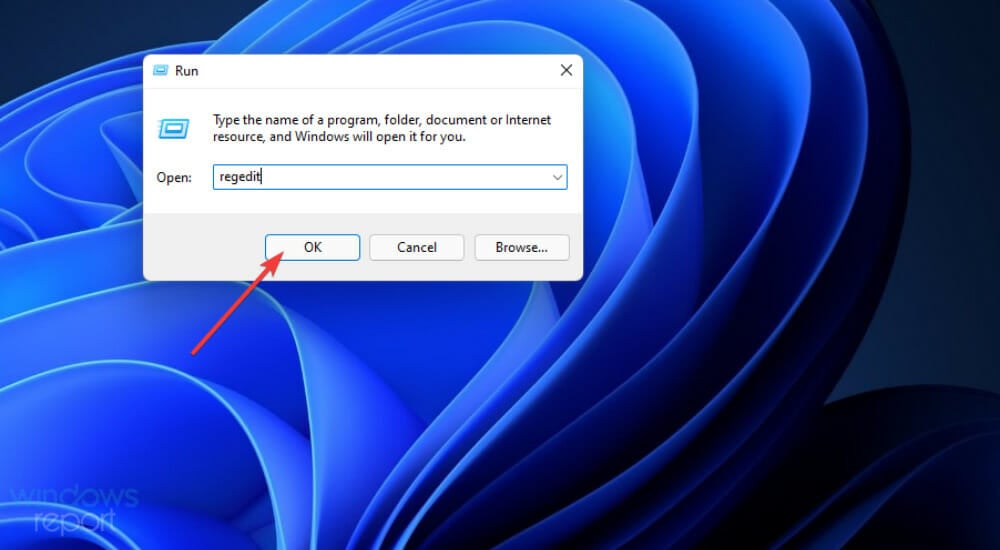
- Press the Windows + R keys together at the same time to launch Run.
- Type this Run command in the Open box:
regedit - Click OK to open Registry Editor.
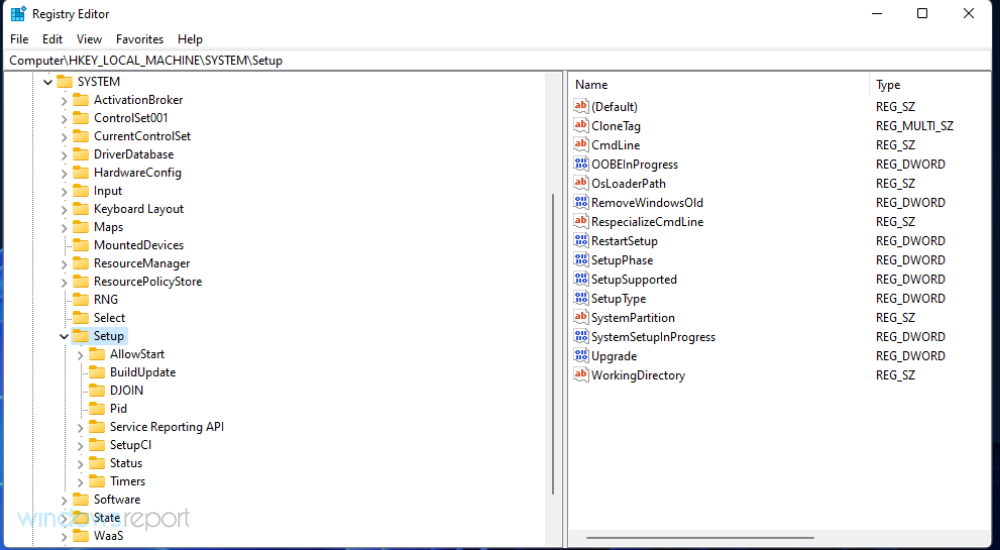
- Then navigate to this registry key:
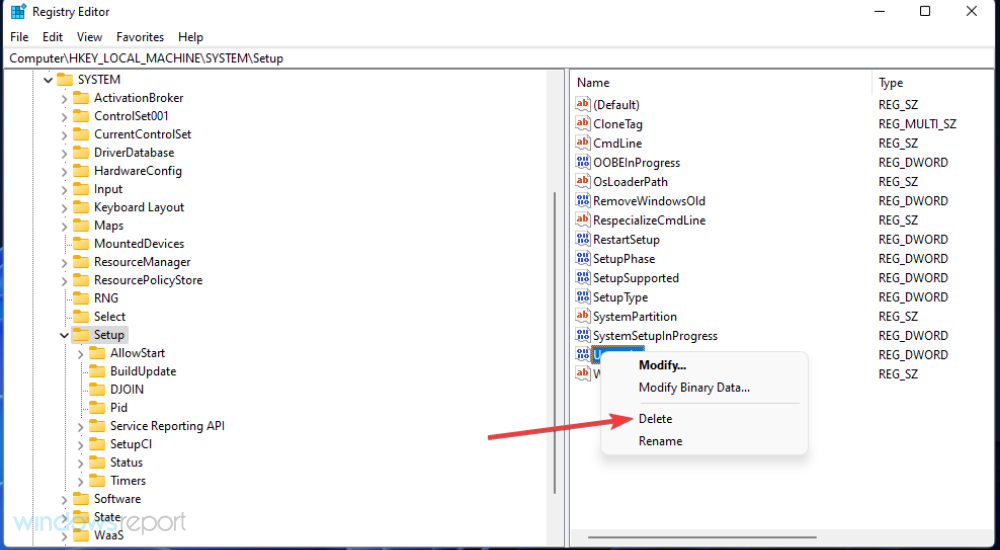
Computer\HKEY_LOCAL_MACHINE\SYSTEM\Setup - Select the Setup key on the left side of the registry.
- Right-click the Upgrade DWORD and select Delete.
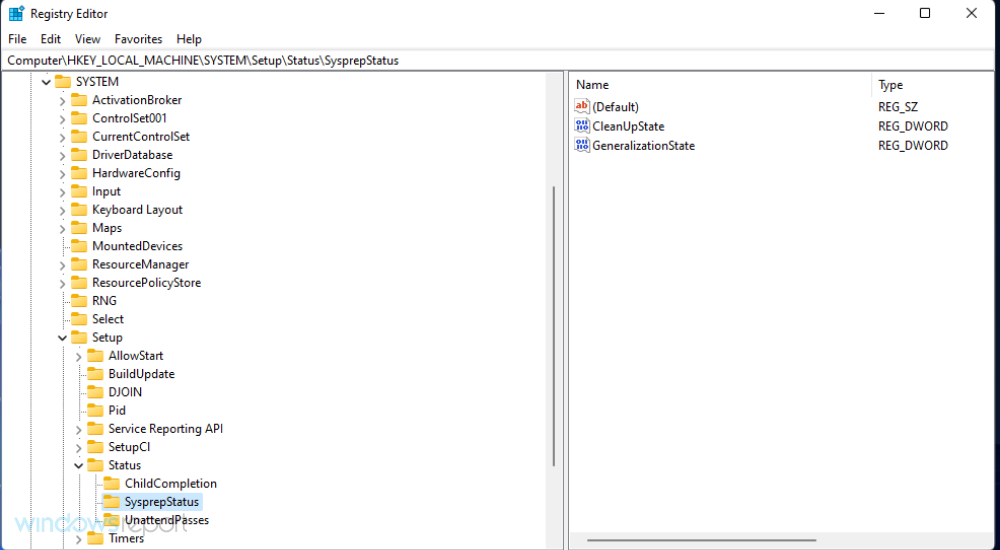
- Go to this registry key:
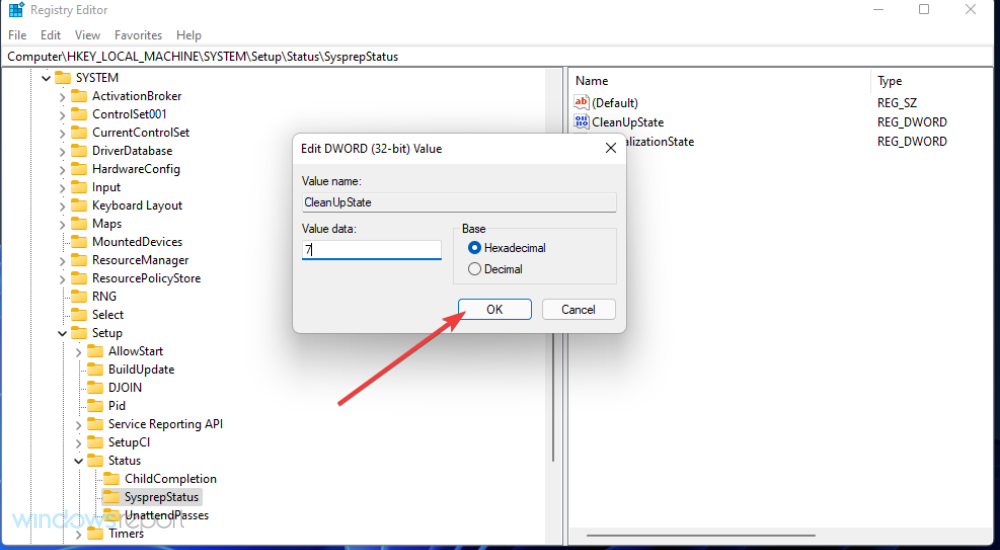
HKEY_LOCAL_MACHINE\SYSTEM\Setup\Status\SysprepStatus - Double-click the CleanUpState DWORD.
- Erase the current number and enter 7 in the Value data box, and click the OK option.
- Thereafter, press the Start button. Select the Power and Restart options there.
 NOTE
NOTE
4. Uninstall any UWP apps you’ve installed yourself
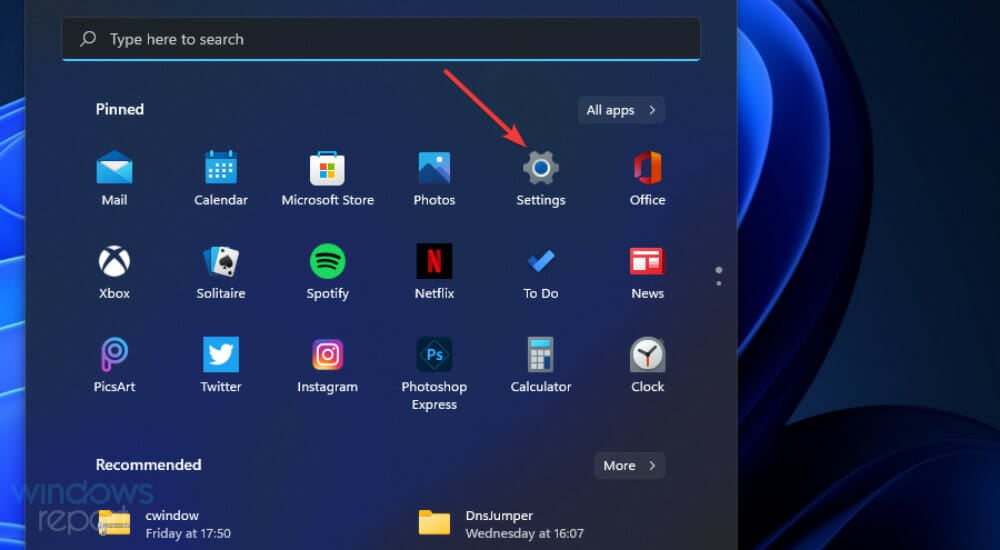
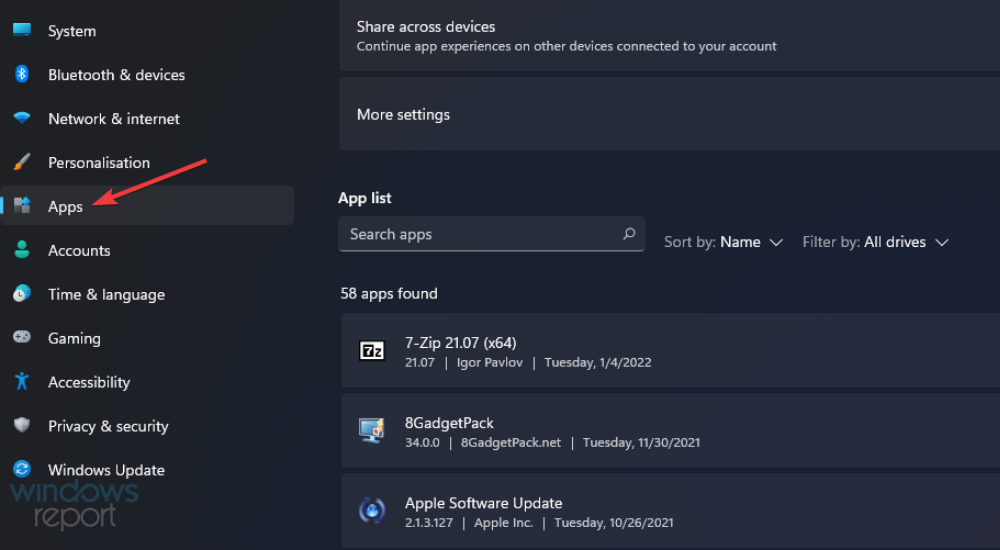
- Click Start and select the pinned Settings app on that menu.
- Select the Apps tab.
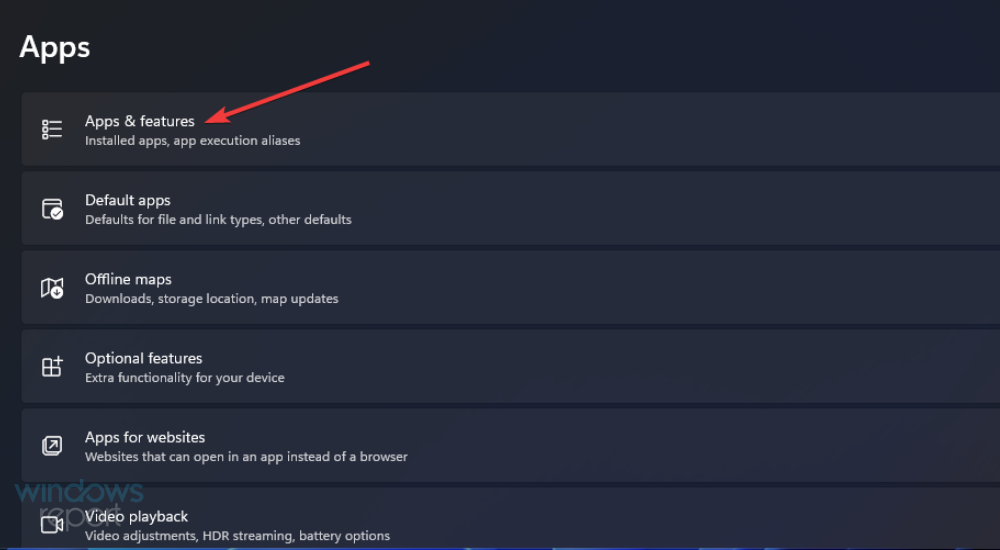
- Click Apps & features to open uninstall options.
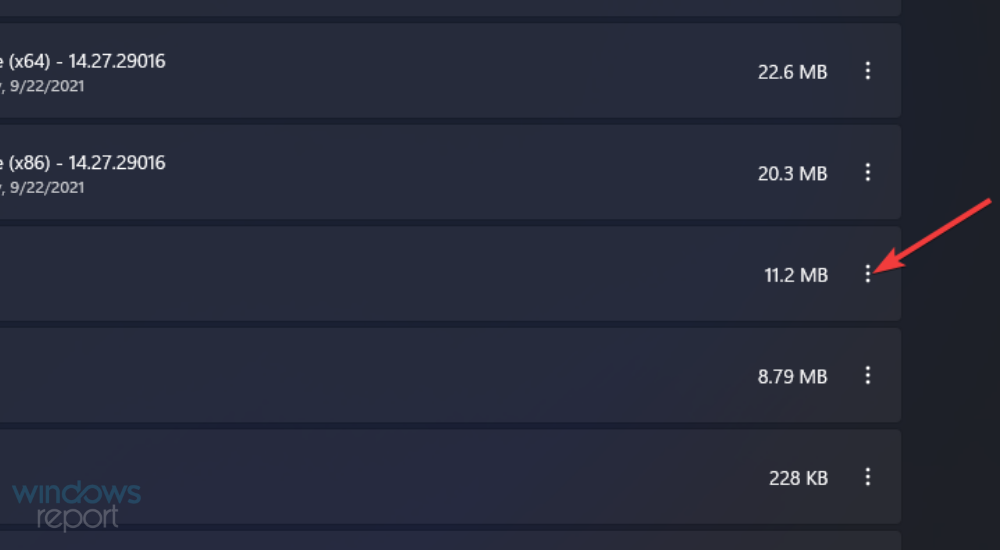
- Click the three-dot button for a UWP app you’ve downloaded from the MS Store.
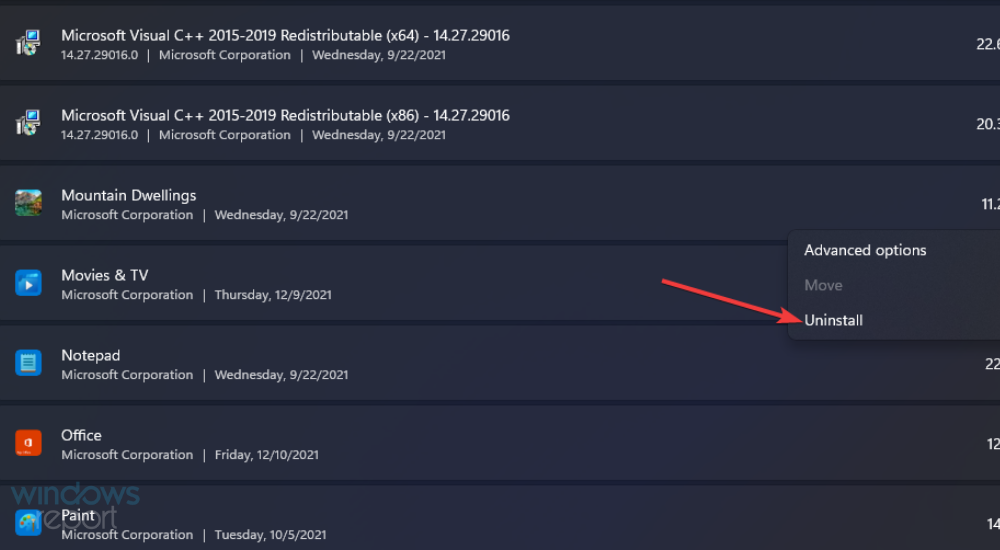
- Select the Uninstall option.
Note that you can bulk uninstall UWP apps with some third-party uninstaller such as CCleaner. This software enables you to select and uninstall multiple apps and also includes options for erasing leftover residual files.
You’ll probably notice that the Sysprep error message includes a setupact.log file path. Checking that file will help you identify UWP apps causing the error, and other potential factors behind it.
This is how you can check the setuppact.log file in Windows 11/10.
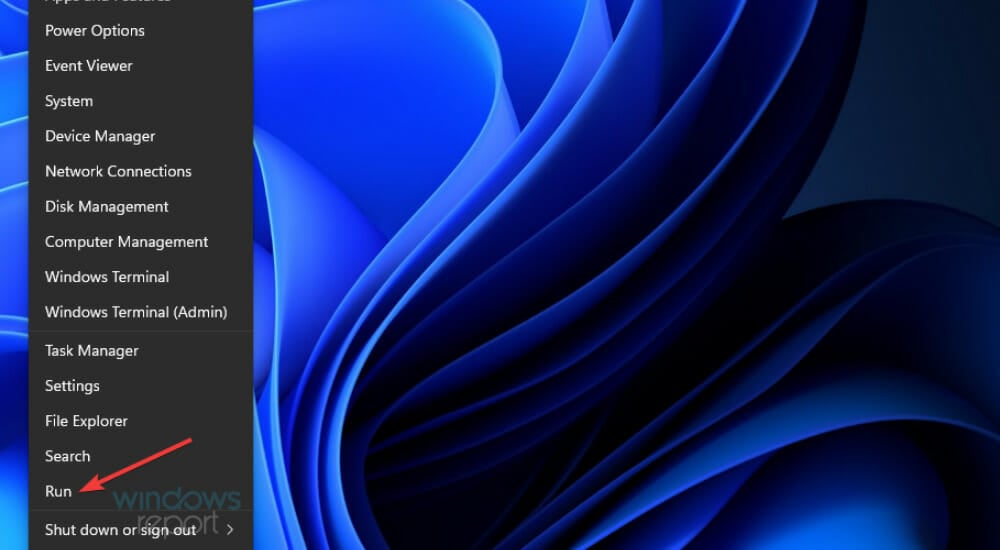
- Right-click Start and select the Run accessory on the alternative Win + X menu.
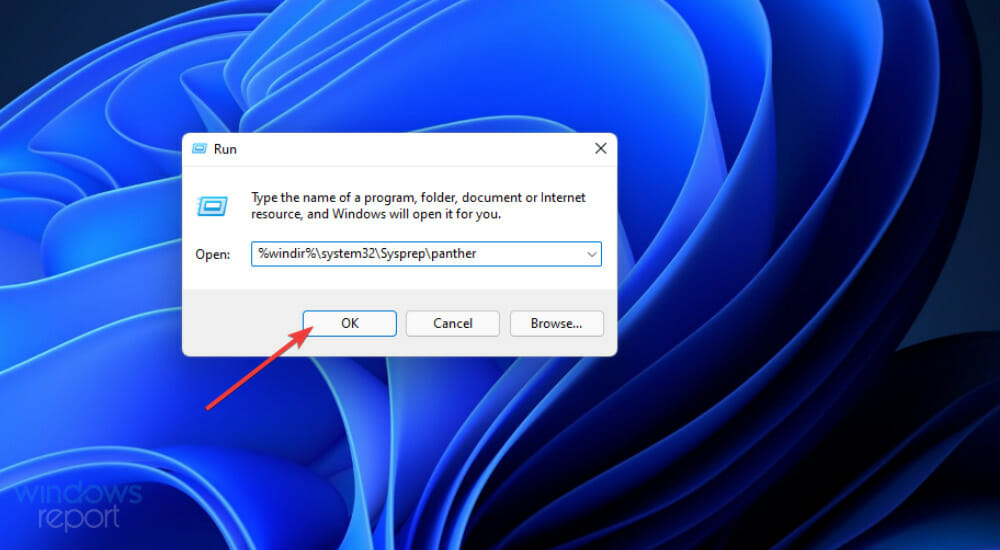
- Enter the folder path specified within the Sysprep error message in the Open box:
%windir%\system32\Sysprep\panther - Click OK to open the folder.
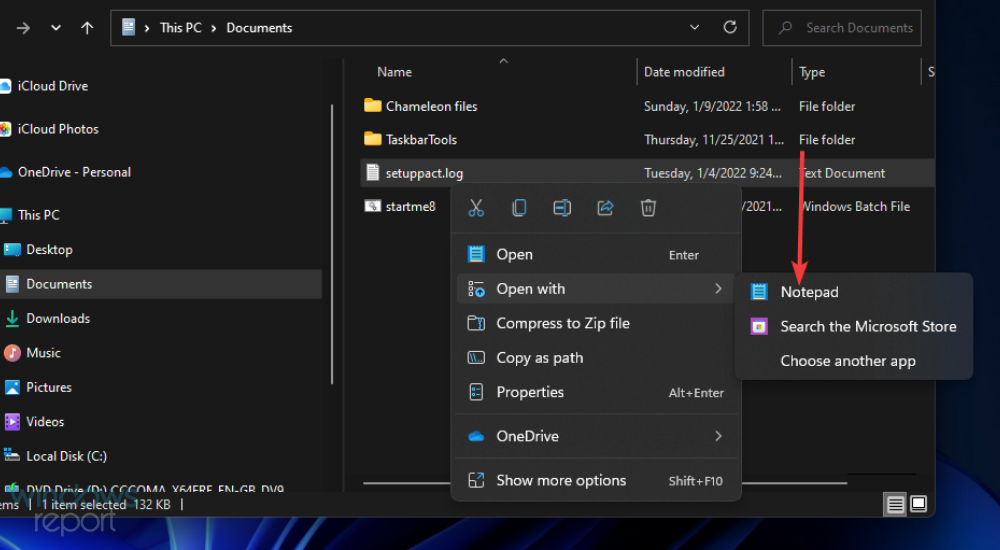
- Right-click the setupact.log file in the folder and select Open with.
- Then choose to open the log file with Notepad.
Thereafter, scroll down to the bottom of that log file to view Sysprep error details. If there’s an app causing the issue, the log file will include details for it as follows.
SYSPRP Package [app ID] was installed for a user, but not provisioned for all users. This package will not function properly in the Sysprep image. Error SYSPRP Failed to remove apps for the current user: 0x80073cf2.
If you see log details like that, you’ve probably hit the bullseye! Simply uninstall the app (or apps) specified there as outlined within resolution four.
Those are some of the best ways you can fix the Sysprep Windows 11/10 error. As they’re confirmed resolutions, they’ll probably fix that error in most cases.
However, that doesn’t mean they’re 100 percent guaranteed resolutions. If you need more suggestions, some of the resolutions in our How to fix Windows 10 Sysprep errors guide might help.
You can also send a support ticket to Microsoft at the Contact Microsoft Support page.
Feel free to chat about the Sysprep was not able to validate error in this page’s comments section below. You can share other potential resolutions for this issue (if you’ve found any) and add questions for it there.



User forum
0 messages