How to Uninstall Arc Games in Windows 10
Get rid of the installer and any Arc games of your choice
![]() 2 min. read
2 min. read
![]() Updated on
Updated on
Share this article
Improve this guide
Read our disclosure page to find out how can you help Windows Report sustain the editorial team. Read more
Key notes
- Sometimes, gamers get bored of a certain game or simply want to make some more space on their PCs.
- Arc games can be easily uninstalled via the client in a few clicks, as you will see from our guide below.
- We will also show you how to remove the Arc installer from your device, as well as how to clean Arc files.

Arc Games offers one of the largest free-to-play video games on the Windows platform. Users can download and install games using the Acr Client for PC.
Sometimes, you might not want to play an Arc game anymore, or maybe you want to make up some more space on your PC for other games.
Or maybe you want to uninstall the Arc Client installer in Windows altogether. You may want to uninstall the Arc installer for troubleshooting the client or if you have decided to delete the Arc games account.
How can I uninstall Arc games from my PC?
Regardless of the reason why you want to do this, here is how you can uninstall the Arc installer in Windows.
This guide also shows how to uninstall a game from the Arc client in just a few clicks.
1. Uninstall the Arc installer
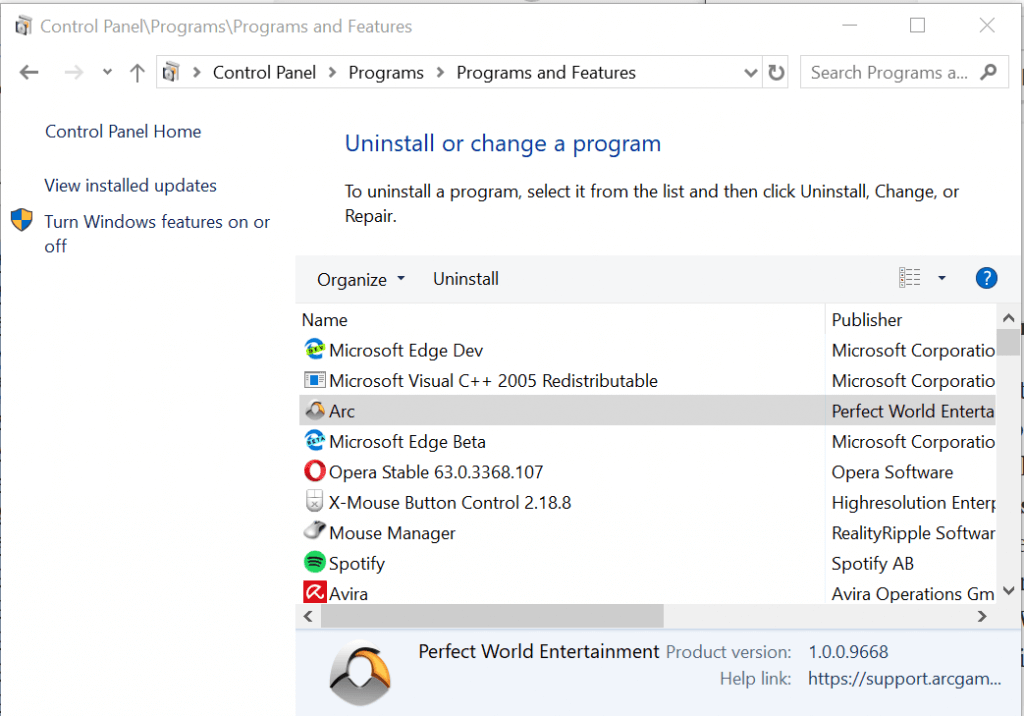
1.1 Via Control Panel
- You can uninstall the Arc Installer from the Control Panel.
- Press Windows Key + R to open Run.
- Type control and click OK to open the Control Panel.

- From the Control Panel, go to Programs > Programs and Features.
- Scroll through the installed apps list and select Arc.
- Click on Uninstall and click Yes to confirm the action.
- Follow the on-screen instructions and wait for the client to uninstall.
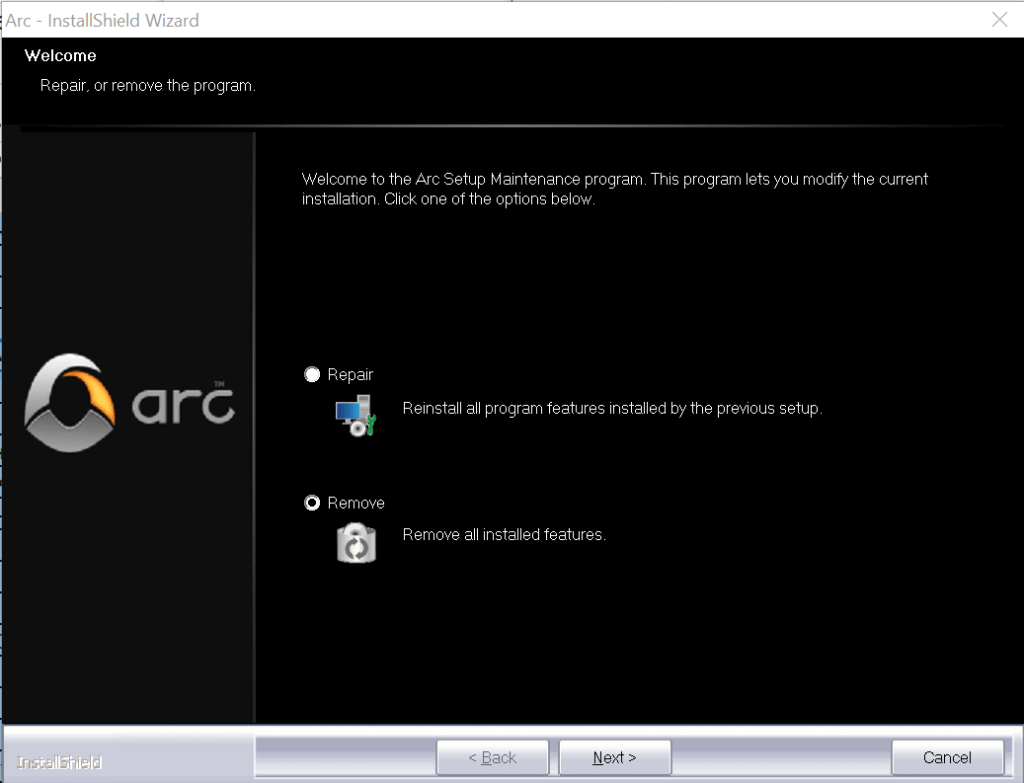
1.2 Uninstall from the directory
- You can also uninstall the Arc uninstaller using the built-in uninstaller from the installation directory manually.

- Open the “File Explorer” and navigate to the following location:
C:\Program Files (x86)\Arc - Double-click on the Uninstall Arc file.

- Click Yes to confirm the action.
- In the Installation Wizard, select Remove option.
- Click Next and wait for the client to uninstall successfully.

2. Uninstall games from the Arc client
1. Launch the Arc Client on your PC.
2. Sign in to your Arc account using your username and password.
3. From the home screen, select the Charge tab from the left pane.

4. Click the Tile icon. This will show all the games installed on the Arc client.
5. Locate the game you want to uninstall and right-click on it.
6. Select the Uninstall option. Click Yes to confirm the action.
7. Windows will uninstall the Arc game in a few minutes.
8. If the game’s shortcut still appears, restart the computer and check again.
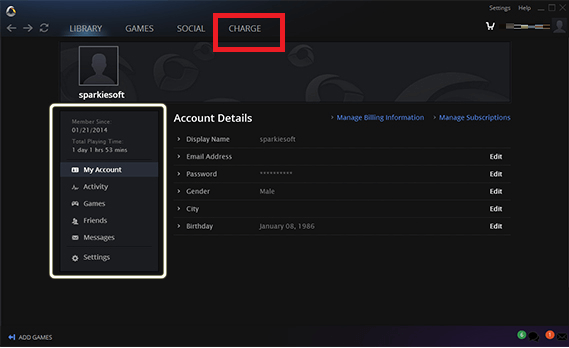
If you only want to uninstall games from your Arc client, and not the client itself, you can do it from the Arc Client account settings.
From there, you can manually select which games you want to uninstall, and get them removed from your PC within seconds.
3. Clean Arc client files
- If the Arc game shortcut appears on the desktop even after uninstalling the client, try this.
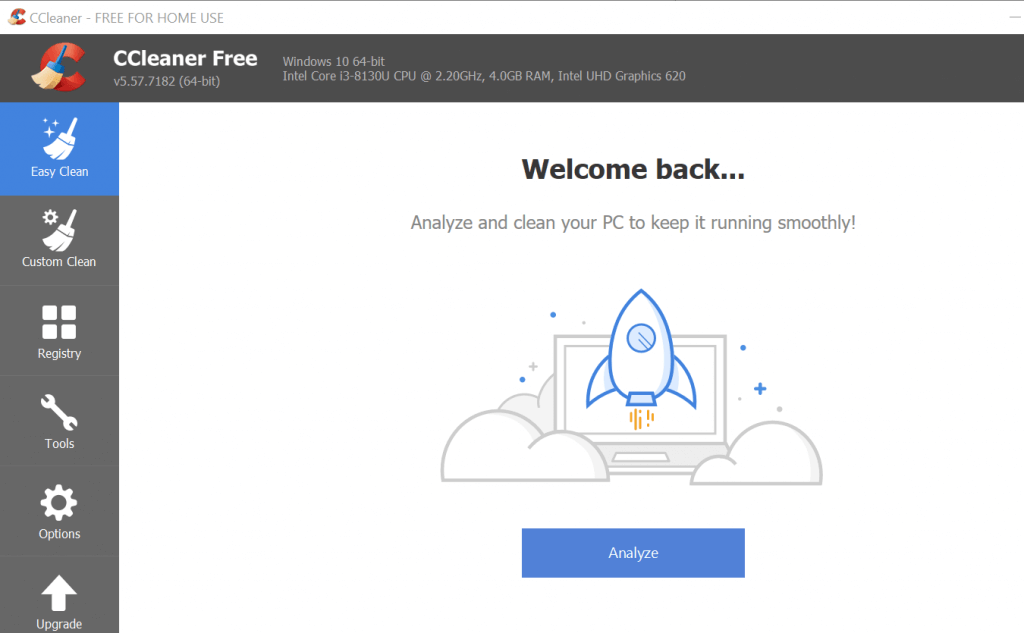
- Download and install registry cleaner software.
- We are using CCleaner to clean the files.
- Launch CCleaner and click on Analyze.
- Once the analysis is done, select all the file types you want to delete and click on Clean.
- That should remove any files left behind during the Arc installer’s uninstallation.
Arc Games client offers some excellent free-to-play and paid games. However, if you have decided to free some space on your hard drive, follow the steps in this article to uninstall Arc games and uninstaller.
Do let us know your favorite Arc game titles in the comments section below.


User forum
0 messages