VAN 68 Valorant Error [Solved]
In most cases, it's the DNS issues or missing permissions to blame
5 min. read
Published on
Read our disclosure page to find out how can you help Windows Report sustain the editorial team. Read more
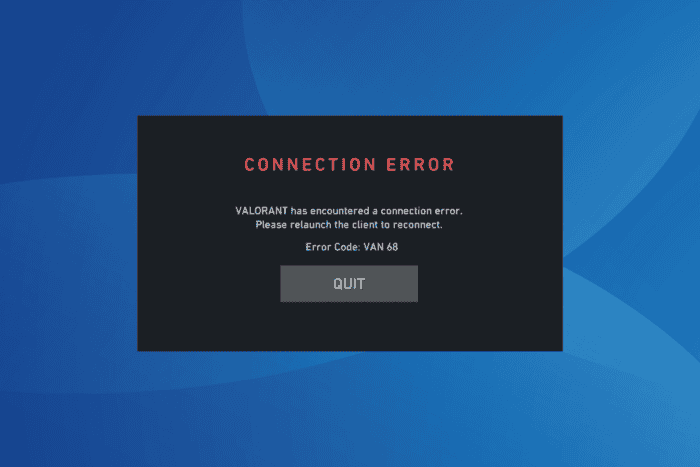
If you are a Valorant fan, chances are you must have come across the VAN 68 error code. The error message reads, VALORANT has encountered a connection error. Please relaunch the client to reconnect!
VAN 68 is a common error code usually arising due to problems with the game servers, DNS issues, missing permissions, misconfigured network settings, or conflicts with other apps.
Before you start troubleshooting, check Valorant’s server status on the official website or use a real-time monitoring service like Downdetector. If the servers are up and running, disable the VPN (if using one) and reboot/factory reset the router.
How can I fix the error code VAN 68 in Valorant?
1. Use a VPN
A few of the affected Valorant players I talked to informed me that using a VPN fixed the VAN 68 error code. So, all you need to do is get a top-rated VPN solution, such as ExpressVPN.
After you download and install the VPN service, you can connect to a server location in one of 105 countries to reduce ping and lag while playing Valorant.
Also, you could download free VPN software if you are unsure about a paid one.
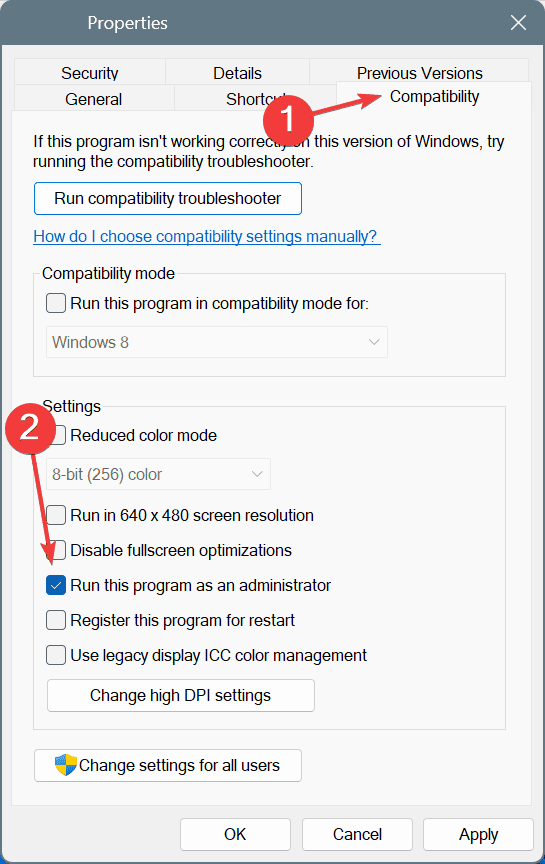
2. Run Valorant as administrator
- Right-click on Valorant’s launcher (.exe file), and select Properties.
- Go to the Compatibility tab, and tick the checkbox for Run this program as an administrator.
- Click on Apply and OK to save the changes.
3. Resolve DNS issues
3.1 Flush the DNS cache
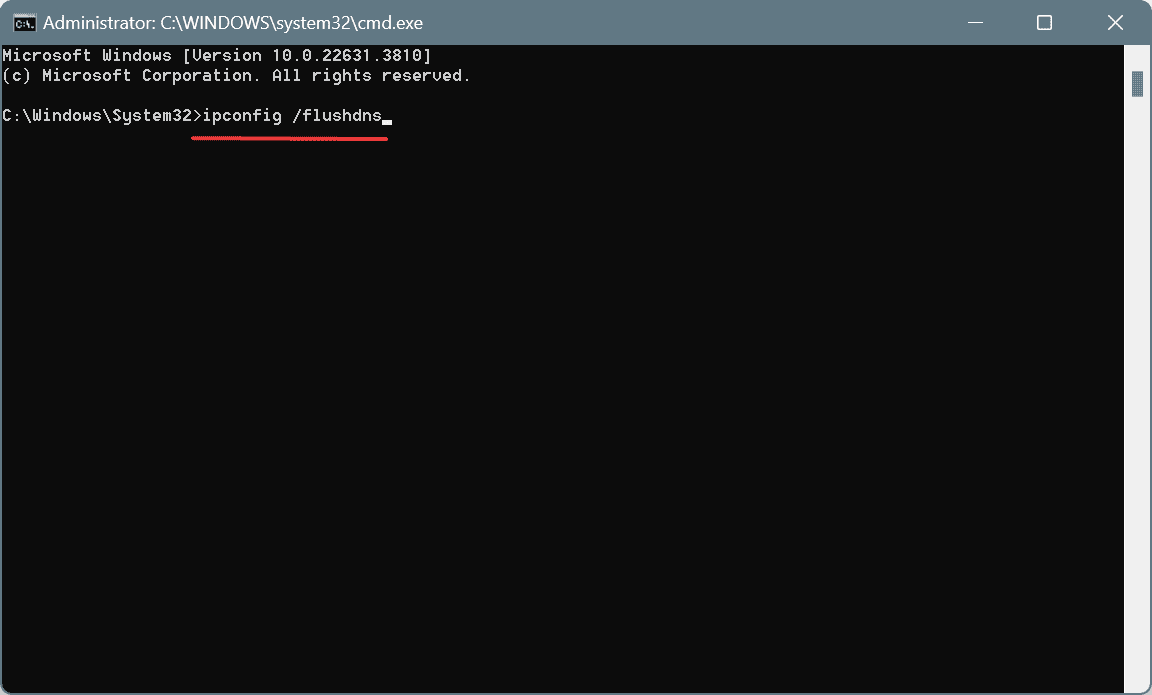
- Press Windows + S to open Search, type Command Prompt, and click on Run as administrator on the right.
- Click Yes in the UAC prompt.
- Paste the following command and hit Enter:
ipconfig /flushdns - Restart the computer, launch Valorant, and check for improvements.
3.2. Use Google’s DNS
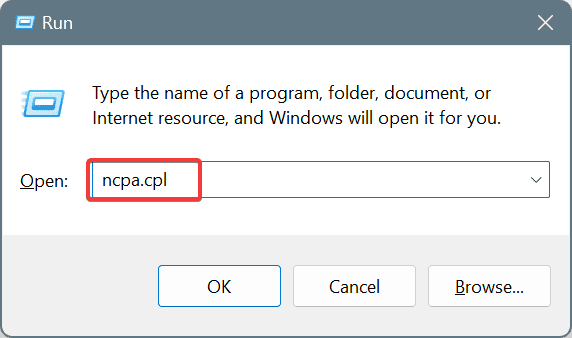
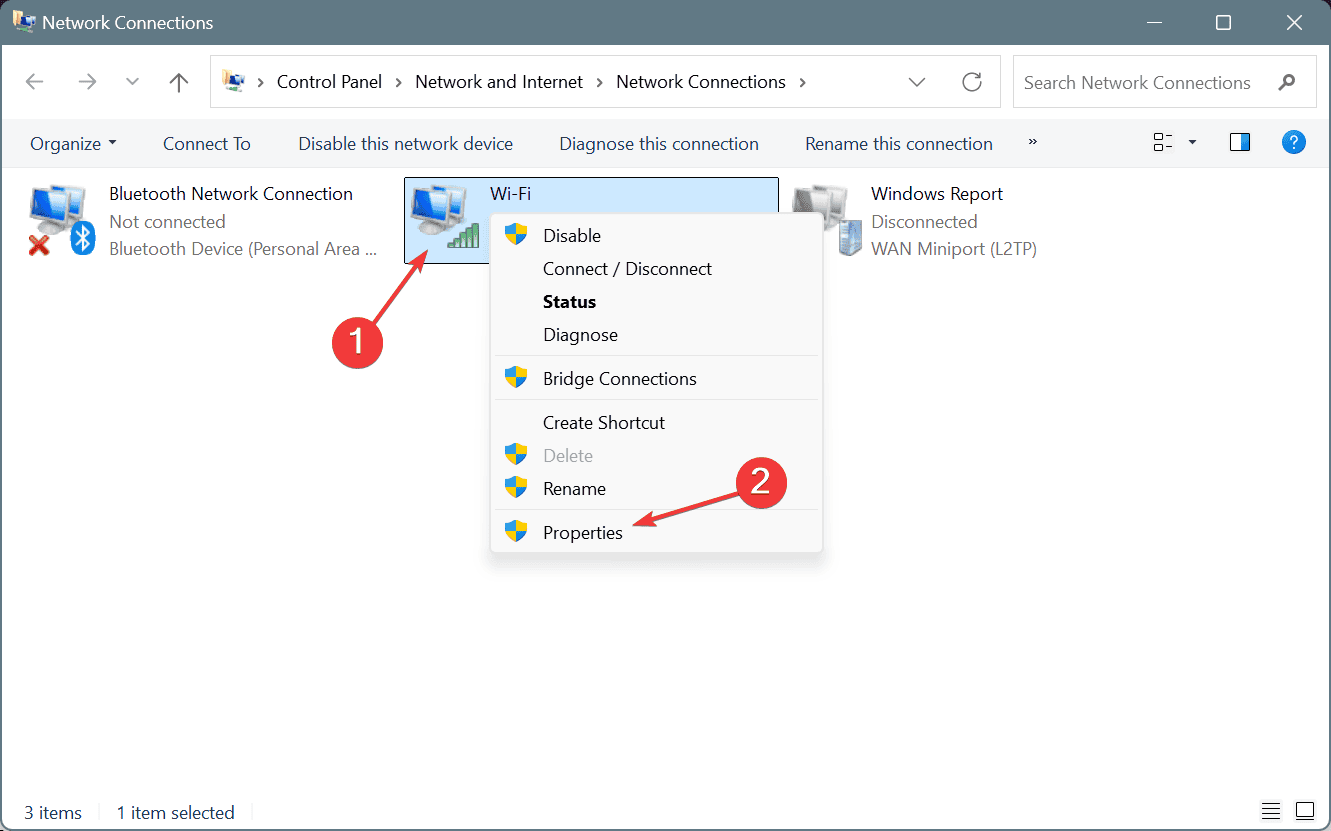
- Press Windows + R to open Run, type ncpa.cpl in the text field, and hit Enter.
- Right-click on the active network adapter and choose Properties.
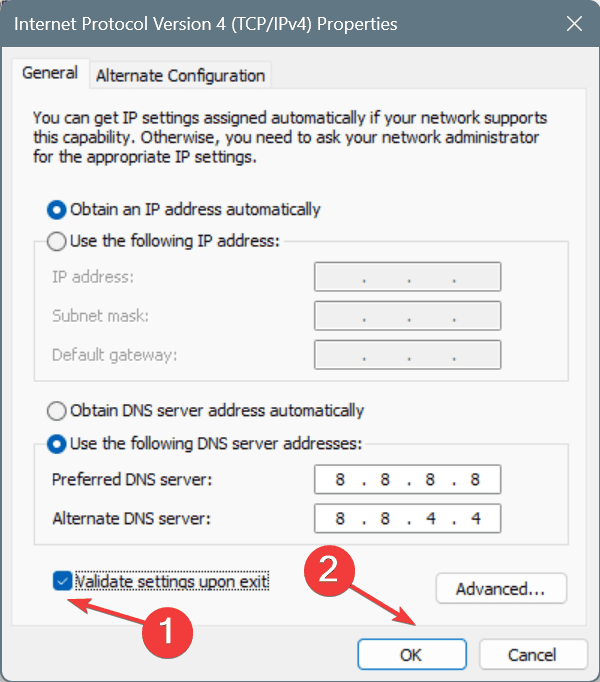
- Select Internet Protocol Version 4 (TCP/IPv4) from the list, and then click on Properties.
- Choose the Use the following DNS server addresses option, and enter the following in the fields underneath:
- Preferred DNS server: 8.8.8.8
- Alternate DNS server: 8.8.4.4
- Tick the checkbox for Validate settings upon exit and click OK to save the changes.
- Relaunch Valorant and verify whether you still encounter the connection error.
In 4 out of 5 cases, it was a DNS issue to blame for the VAN 68 Valorant error on a Windows PC. Here, clearing the DNS cache and/or switching DNS addresses fixed things!
While I selected Google’s public DNS, you can go with the fastest DNS server near you and enjoy an improved speed.
4. Disable IPv6
- Press Windows + R to open Run, type ncpa.cpl, and hit Enter.
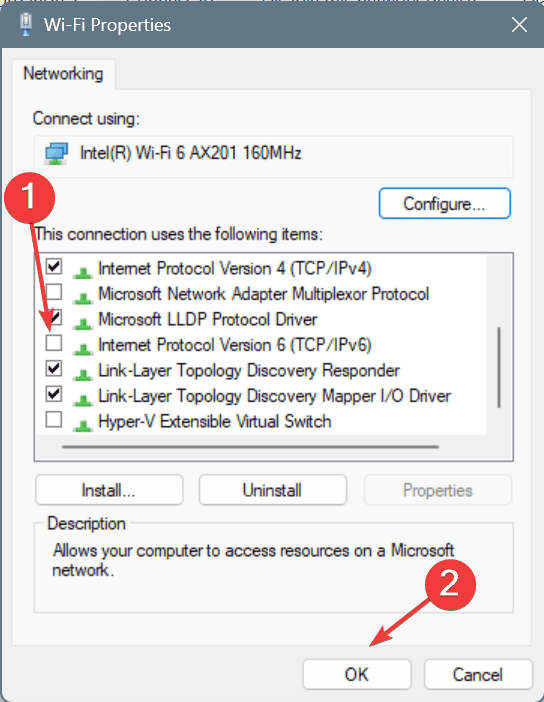
- Right-click on the network adapter in use, Wi-Fi or Ethernet, and select Properties.
- Now, untick the checkbox for Internet Protocol Version 6 (TCP/IPv6), and click OK to save the changes.
- Restart the computer, then launch Valorant and check whether the VAN 68 error still appears.
5. Run the Vanguard service (Vgc)
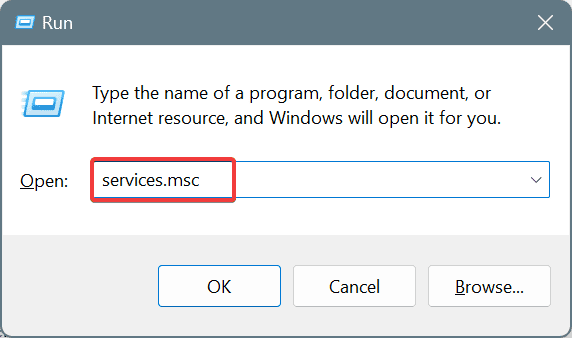
- Press Windows + R to open Run, type services.msc in the text field, and hit Enter.
- Scroll down, right-click on the Vgc service, and select Properties.
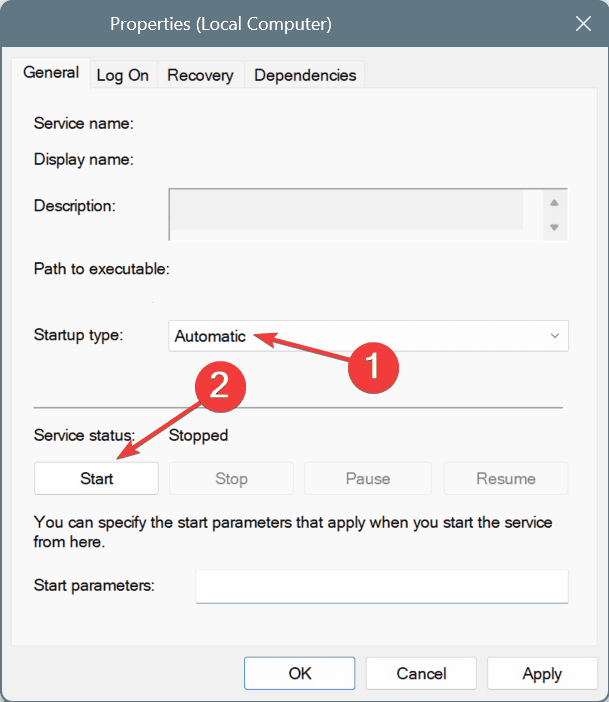
- Select Automatic from the Startup type dropdown menu, and then click the Start button under Service status.
- Finally, click Apply and OK to save the changes.
- Similarly, run all services linked to Valorant, Vanguard, and Riot Client and then check for improvements.
6. Whitelist Valorant in firewall
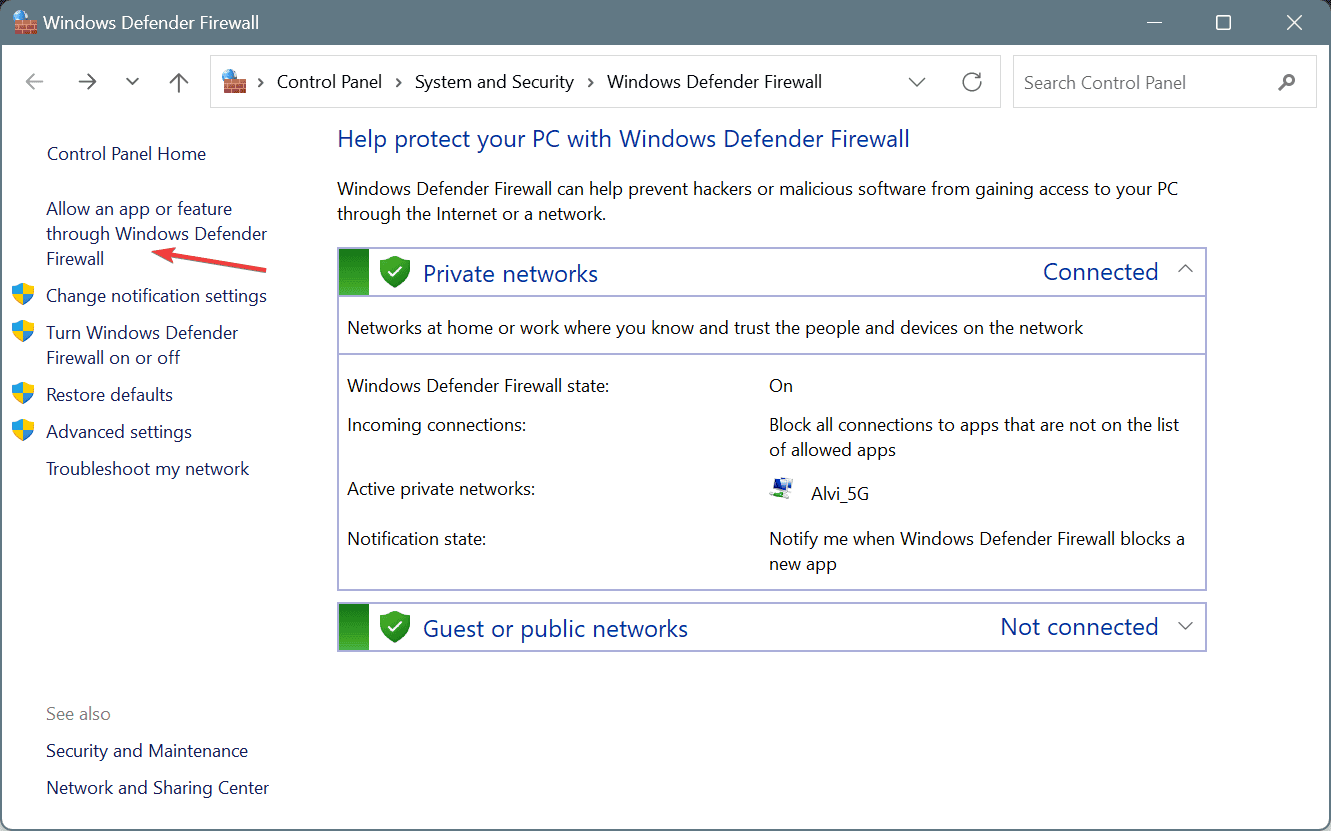
- Press Windows + S to open Search, type Windows Defender Firewall in the text field, and click on the relevant result.
- Select Allow an app or feature through Windows Defender Firewall from the left pane.
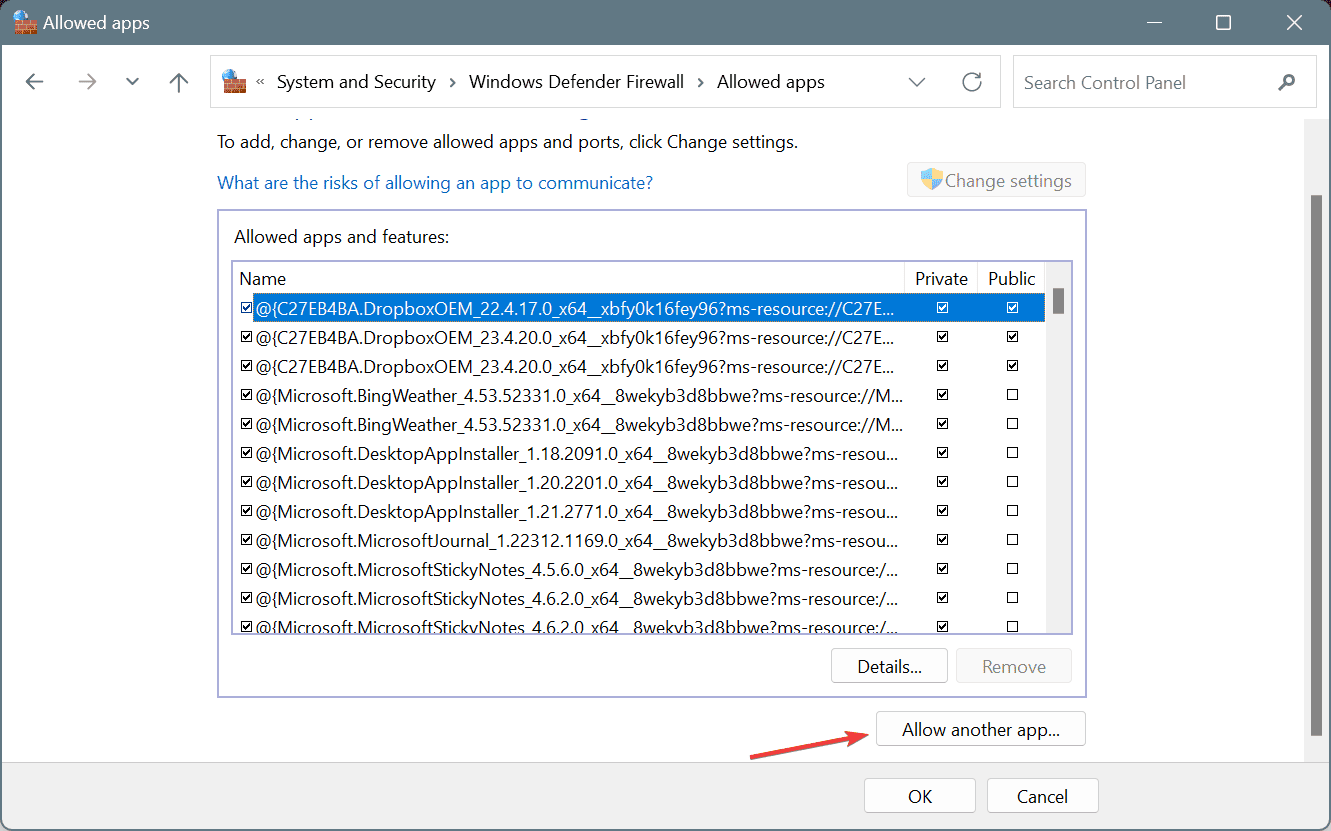
- Click on Change settings.
- Now, click on Allow another app.
- Head to the installation path for Valorant, select the game’s launcher, and click on Open.
- Click on Add.
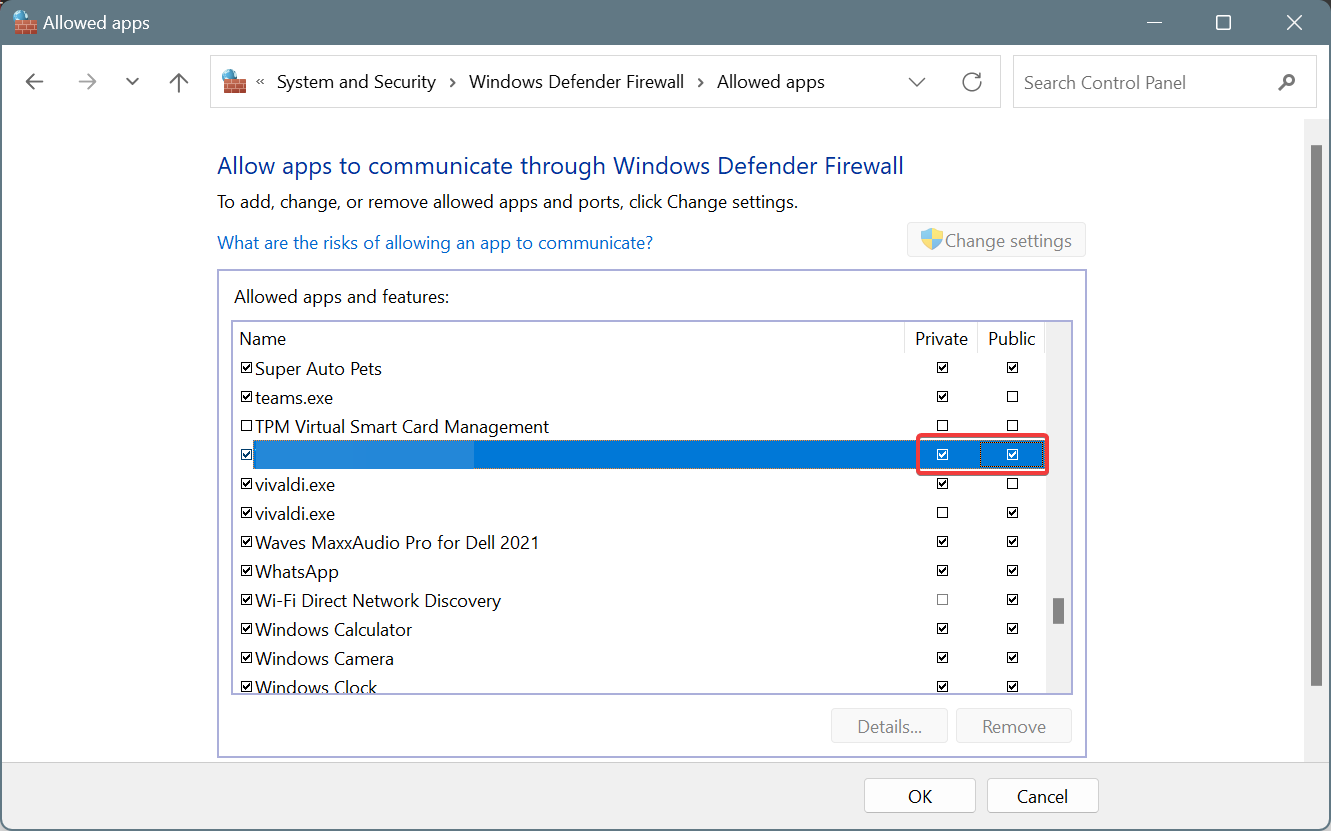
- Now, tick the checkboxes for Private and Public next to Valorant.
- Similarly, whitelist Riot Client in Windows Defender Firewall, and click on OK to save the changes.
Often, Windows Defender Firewall blocks an app, and if this is the reason for the VAN 68 error in Valorant on PC, you will need to whitelist the game. Also, if you have any third-party firewall or antivirus installed, make sure to allow Valorant through it.
7. Uninstall conflicting third-party software
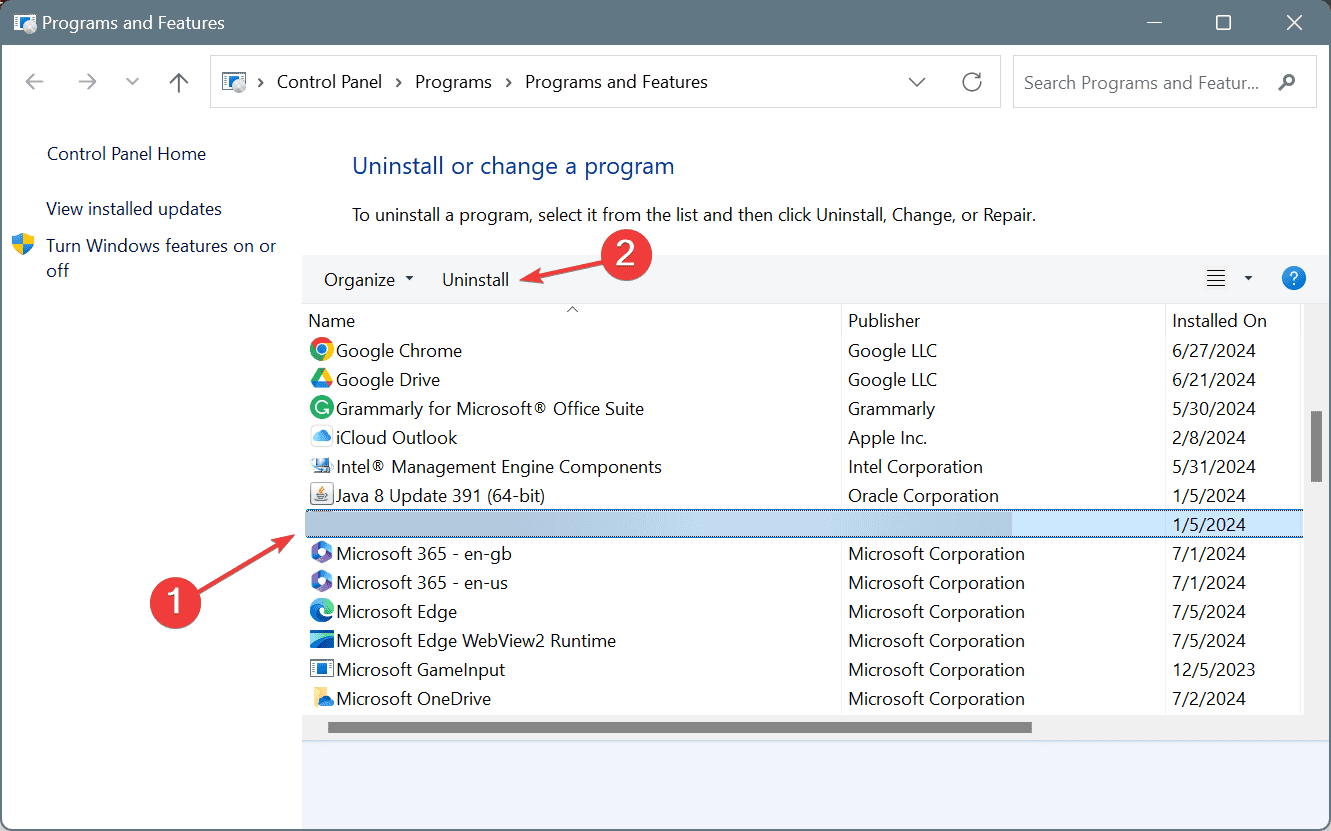
- Press Windows + R to open Run, type appwiz.cpl in the text field, and hit Enter.
- If you find Killer Control Center or Killer Network Manager in the list of apps, select it, and then click on Uninstall.
- Follow the on-screen instructions to complete the installation process.
- Similarly, remove any other third-party software that may be conflicting with Valorant.
If you don’t want to uninstall these apps, here’s the setting that needs to be disabled on both to fix the VAN 68 Valorant error:
- Killer Control Center: Killer Prioritization Engine
- Killer Network Manager: Enable Advanced Stream Detect
But, since the settings may re-enable after an update, I recommend uninstalling the app altogether.
In case the error persists, remove Valorant and Riot Client using an effective uninstaller software to get rid of any leftover files and Registry entries, and then reinstall them using the setup available on the official website.
Before you leave, discover some quick tips to improve the FPS in Valorant and enjoy a superior gaming experience!
Which fix worked for you? Share with our readers in the comments section.


User forum
0 messages