Visual Studio: Stop a Build Safely in Seconds
If your project build is taking too long or got stuck, you can stop it easily in Visual Studio. Follow the steps below to cancel the process safely without closing the entire IDE.
Table of contents
How to Stop a Build in Visual Studio?
Use the Cancel option
You can do that by following these steps:
- Locate the build progress
Check the bottom status bar or Output window to confirm a build is running.
- Use the Cancel Build button
In the toolbar, click the red Stop icon next to the green Start button.
- Use the menu option
Click Build on the top menu bar, then select Cancel Build
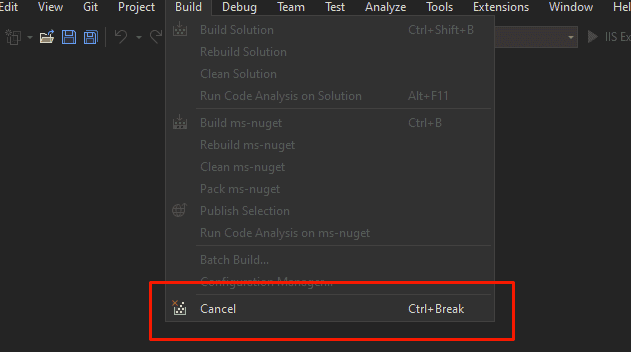
- Use the shortcut key
Press Ctrl + Break to stop the build instantly
- Wait for confirmation
Look for “Build canceled” in the Output window once the process ends
If Visual Studio becomes unresponsive, end the MSBuild.exe process from Task Manager.
For more workspace control, learn how to open Solution Explorer in Visual Studio.
Why Stop a Build in Visual Studio?
- Free up resources if a large solution slows down your system.
- Stop an incorrect or unintended configuration before it finishes.
- Avoid waiting through long compilation times after spotting an error.
If you switch branches or experiments often, see how to stash changes in Visual Studio to keep your work safe.
FAQs
Right-click inside the Output window and select Cancel Build if the toolbar Stop icon isn’t visible.
No. It simply halts compilation. You can safely rebuild after addressing issues.
If the IDE is frozen, it may take a few seconds to respond. In rare cases, close it from Task Manager.
Use Visual Studio’s diff tools. Learn how to compare two files in Visual Studio.
Conclusion
Knowing how to stop a build in Visual Studio saves time and prevents unnecessary delays. Use the toolbar button, menu option, or keyboard shortcut to cancel builds quickly and keep coding efficiently.
Read our disclosure page to find out how can you help Windows Report sustain the editorial team. Read more


Improve this guide


User forum
0 messages