Webcam Detected as NDIS Compatible Device: 3 Ways to Fix it
Check the installed webcam drivers
3 min. read
Published on
Read our disclosure page to find out how can you help Windows Report sustain the editorial team. Read more
Key notes
- When the webcam is detected as an NDIS compatible device, connect to another port, install a compatible driver, or perform a system restore.
- Keep reading to find out the step-by-step solutions discovered by Windows Report experts!
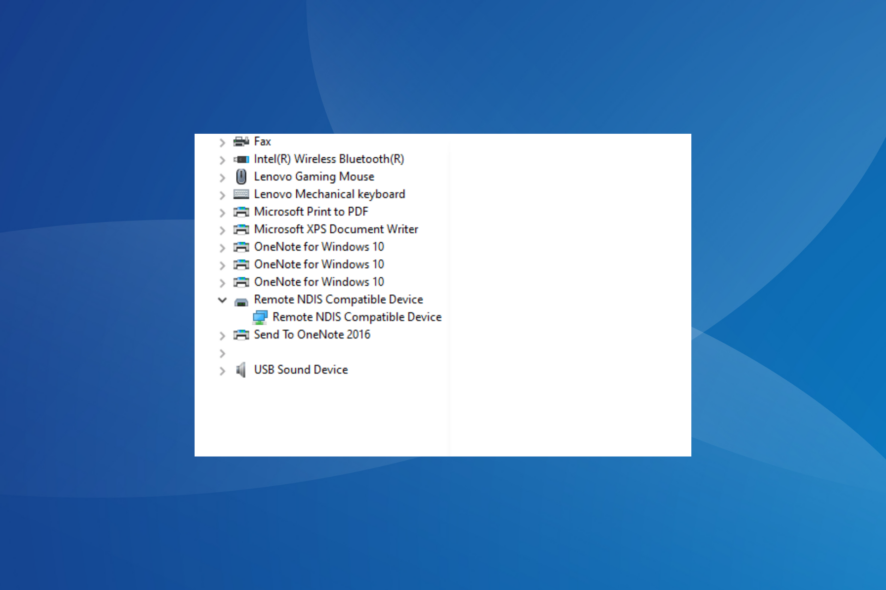
The webcam is often detected as a Remote NDIS Compatible Device and is listed under the same entry in the Device Manager. The issue is seen on both Windows 10 and Windows 11.
The problem arises when Windows perceives the webcam as a network device instead. This usually happens after an OS or driver update is installed.
What can I do if the webcam is detected as an NDIS compatible device?
Before we start with the slightly complex fixes, try these:
- Restart the computer.
- If it’s an external webcam, reconnect it to the PC. Also, switch between the available USB ports and make sure you are not using a hub.
- Check for any pending Windows updates and install them.
1. Browse your computer for the webcam driver
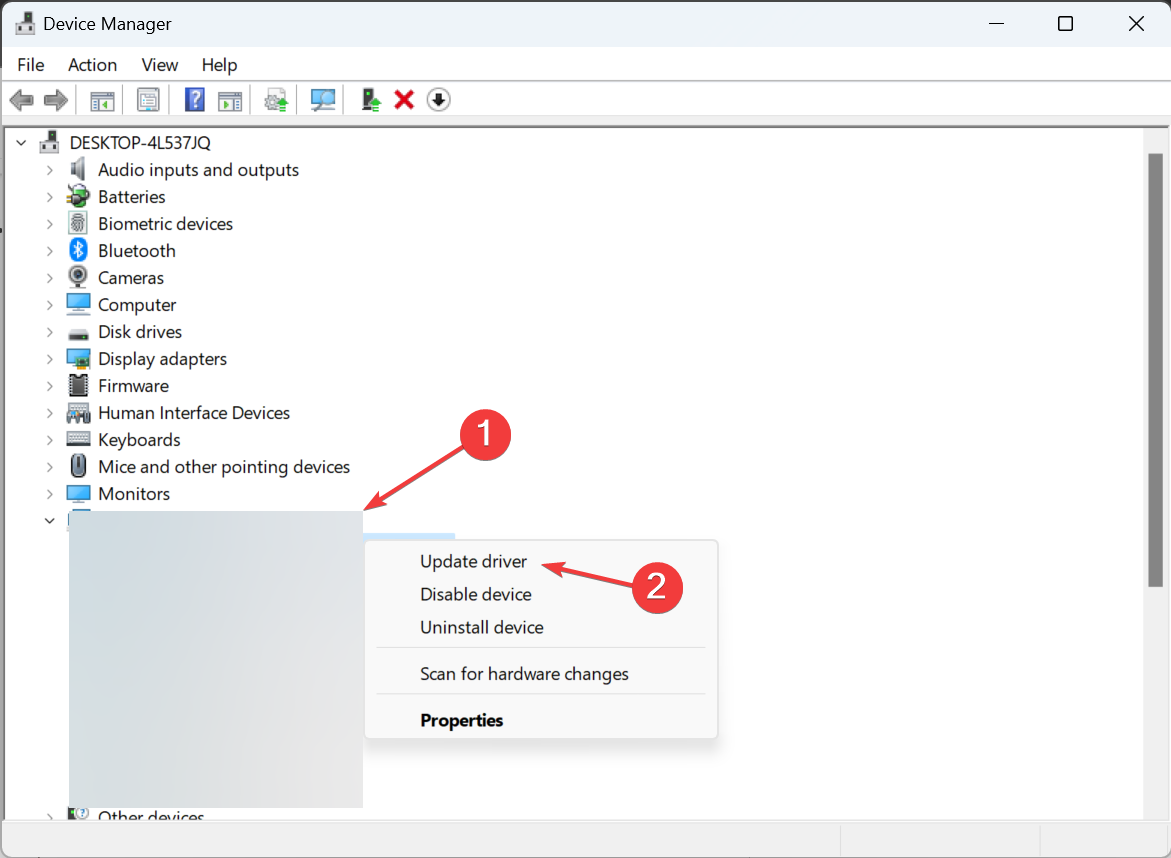
- Press Windows + X to open the Power User menu, and select Device Manager from the list of options.
- Right-click the webcam detected as an NDIS compatible device, and select Update driver.
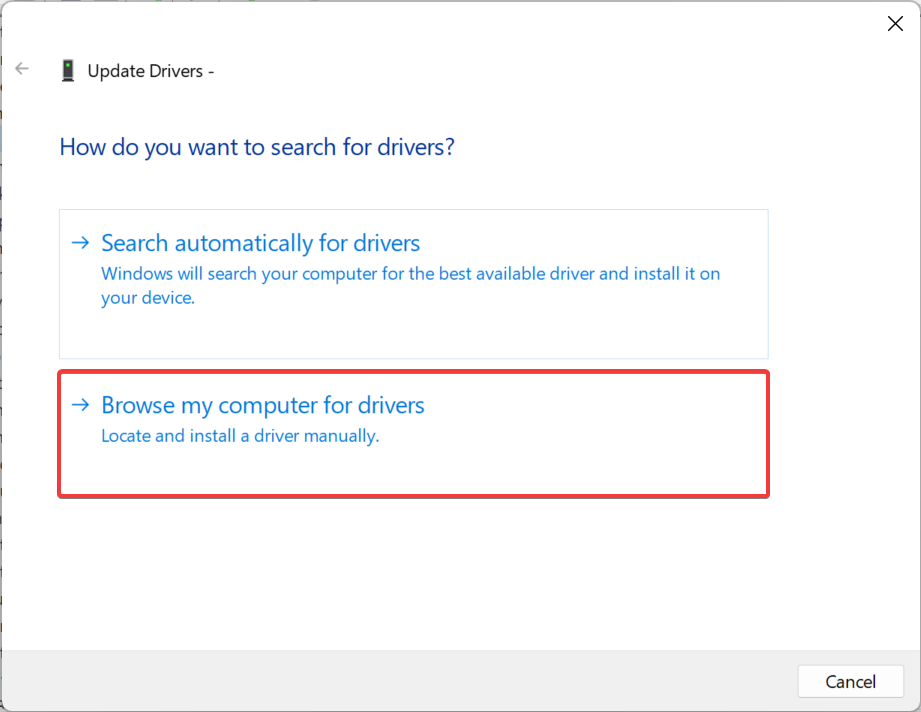
- Choose Browse my computer for drivers.
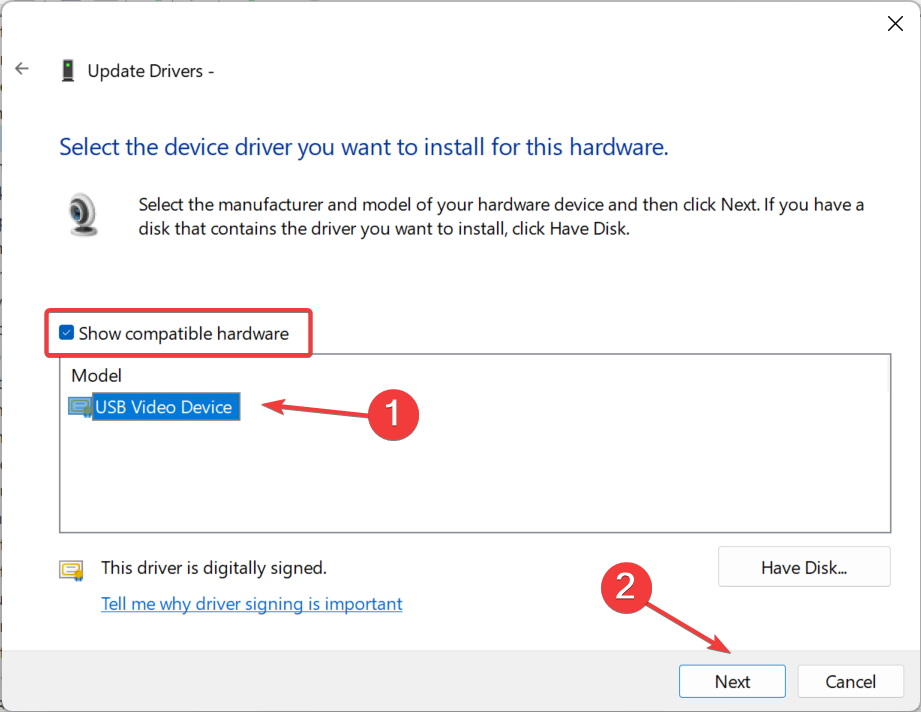
- Click on Let me pick from a list of available drivers on my computer.
- With the Show compatible hardware checkbox ticked, select another driver from the list, and click on Next.
- After the driver installation is complete, restart the computer.
- Download and install the Outbyte Driver Updater app.
- Launch the software and wait for the app to detect all incompatible drivers.
- Now, it will show you a list of all outdated drivers to select the ones to Update or Ignore.
- Click on Update & Apply Selected to download and install the latest versions.
- Restart your PC to ensure the applied changes.

Outbyte Driver Updater
Maintain your device healthy by letting OutByte Driver Updater find the latest driver options.2. Install the webcam driver from the manufacturer’s website
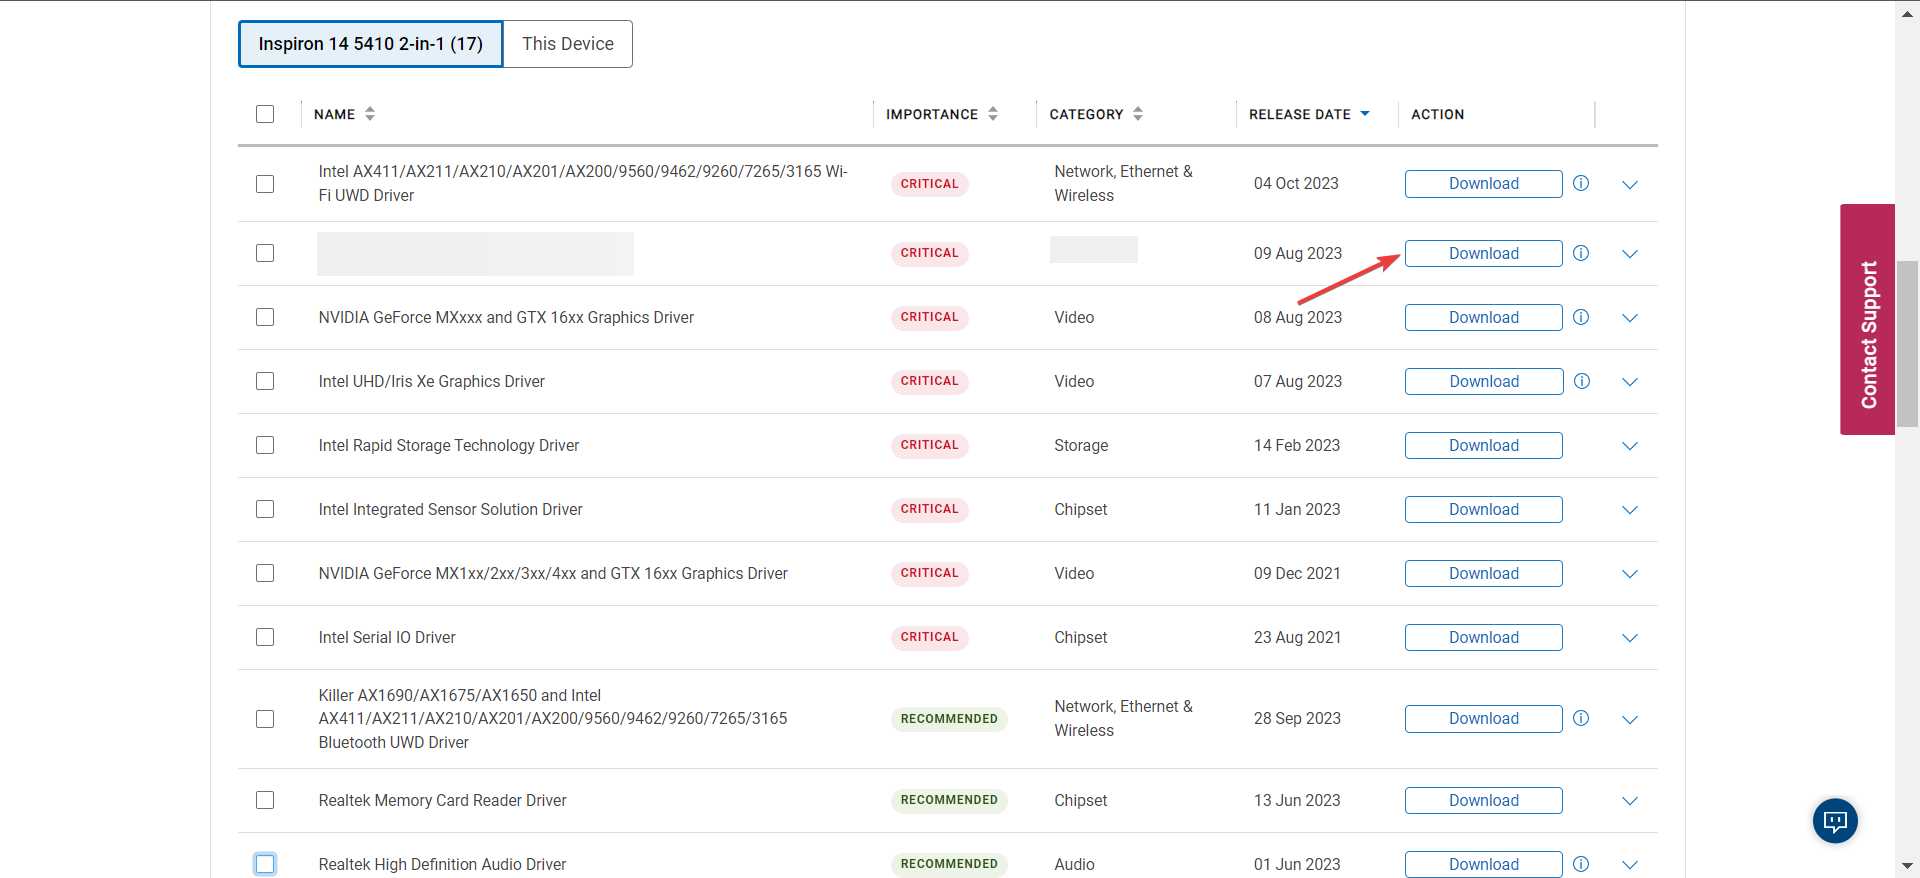
- Open the device manufacturer’s driver download page, and select your computer’s model.
- Look through the available drivers and find one for the webcam.
- Click the Download button next to the latest webcam driver.
- Run the setup and follow the on-screen instructions to complete the process.
- Finally, reboot the computer for the changes to apply.
Even when the webcam is not showing in the Device Manager, you follow a similar approach and update the webcam drivers. For external webcams, you will have to go to the webcam manufacturer’s website instead.
Remember, since Windows can’t usually find an update, it’s best that you manually install the latest drivers. But be cautious and only install the compatible driver!
3. Perform a system restore
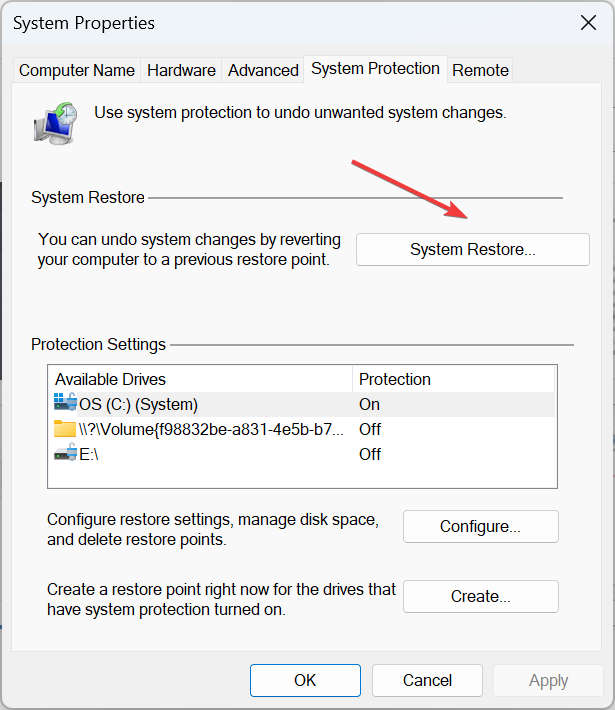
- Press Windows + S to open Search, type Create a restore point in the text field, and click the relevant result.
- Click on System Restore.
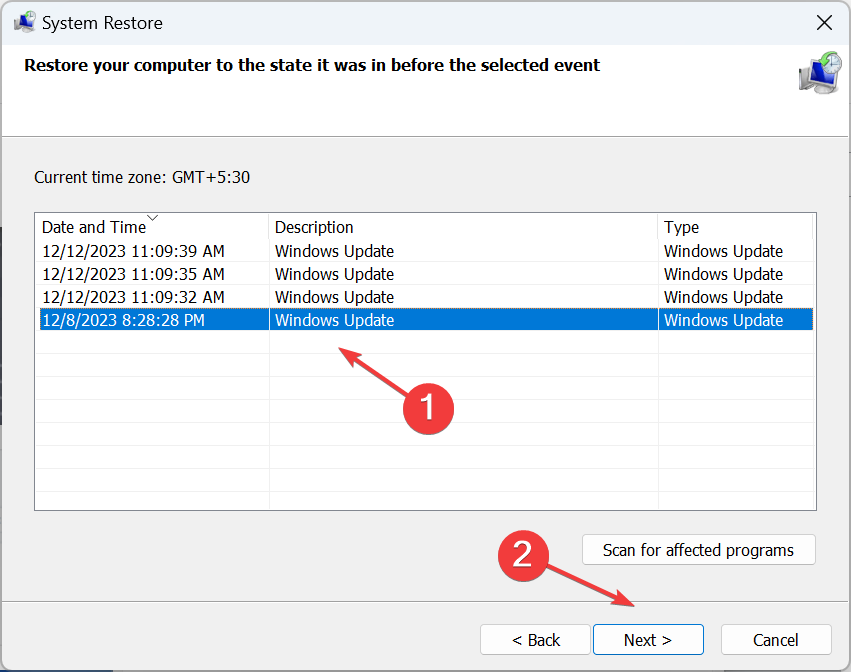
- Select the Choose a different restore point option, and click Next.
- Pick another restore point from the list, one created before the issue first appeared, and click Next.
- Verify the details and click on Finish.
- Wait for the system restore to complete. It may take up to an hour.
If you have created a restore point, use System Restore to revert the changes when the webcam is detected as a Remote NDIS Compatible Device.
Remember, there aren’t many troubleshooting measures available, and if all else fails, reset Windows to factory defaults. Before you do that, transfer the important files to an external storage drive.
And if it turns out to be a hardware problem, you can always switch to the best webcam for Windows.
For any queries or to share what worked for you, drop a comment below.





User forum
0 messages