How to Enable & Use Webcam Protection for Improved Security
Privacy protection starts from blocking any access to your webcam
Key notes
- If you are using a dedicated webcam protection software for improved security, you can enable the Webcam Protection settings in the software itself.
- Once you have enabled this feature, you can now modify the settings to block any unwanted third-party access to the camera.
- But, if you are not using a 3rd party antivirus, then you may block access to the camera and remove any other camera permissions for enhanced security.

If you use the webcam regularly and are concerned about its security, you can enable the webcam protection feature through its settings.
A webcam serves as a crucial communication device for many, especially if you are hosting official video conferences, attending online classes, etc.
However, with online fraud on the rise, your system can be prone to virus attacks or can be intruded by spyware at any given time.
But, if you want to change the camera settings in Windows 11, we have some effective solutions that can help you fix the issue.
What is Webcam Protection?
Webcam Protection is a feature offered by 3rd party antivirus software that prevents any malicious apps to access the webcam on your PC without your permission.
Once you enable the Webcam Protection feature, it will make sure that no unreliable app can use the webcam to capture photos or videos and import the contents outside for malicious purposes.
In this post, we will guide you through the process on how to enable and use the Webcam Protection settings in a 3rd party antivirus, as well as how to protect your webcam on your Windows PC.
How do I enable & use Webcam Protection?
1. Use a 3rd party Webcam Protection Software
To begin with, it’s not a Windows feature, so, you cannot enable it on your OS. Instead, you would need a 3rd party antivirus to enable Webcam protection and improve security.

So, for example, if you are using a dedicated antivirus software like ESET HOME Security Essential, Bitdefender, SpyShelter, or Kaspersky Internet Security, etc., you can enable the built-in Webcam Protection feature to stay protected.
ESET HOME Security Essential
Enable webcam protection with ESET’s premium and reliable features.2. Disable the camera access
1. Press the Win + I keys simultaneously on your PC to launch Windows Settings.
2. On the left end of the Settings app, click on Privacy & security.

3. Now, on the right, scroll down, and under App permissions, click on Camera.

4. On the next screen, on the right, turn off Camera access.
5. You can also turn off Let apps access your camera.

6. Further, you can also disable the Let desktop apps access your camera option, as shown below.

Another way to ensure webcam protection is disabling your PC’s camera. Once you have disabled the camera via settings, webcam protection will prevent any unauthorized access to your device.
If you are wondering how to disable the webcam protection, then you can follow the same process as above and simply turn on the access in steps 4, 5, and 6.
3. Use a VPN
VPNs are essential for those who are concerned about their online privacy and especially if you are using a webcam frequently for your work.
In such cases, you can use a reliable VPN service to enhance the security of your PC or laptop, thus making sure that your webcam is also protected.
How do I know if my antivirus is blocking my camera?
If it’s your Windows Defender that’s blocking the external webcam, you can follow the below instructions, and add an exclusion:
- Go to the taskbar, expand the system tray on the right side and click on the Windows Security icon.

- Next, click on Virus & threat protection.

- On the next screen, on the right, under Virus & threat protection settings, click on Manage settings.

- Now, on the right side, scroll down and under Exclusions, click on Add or remove exclusions.
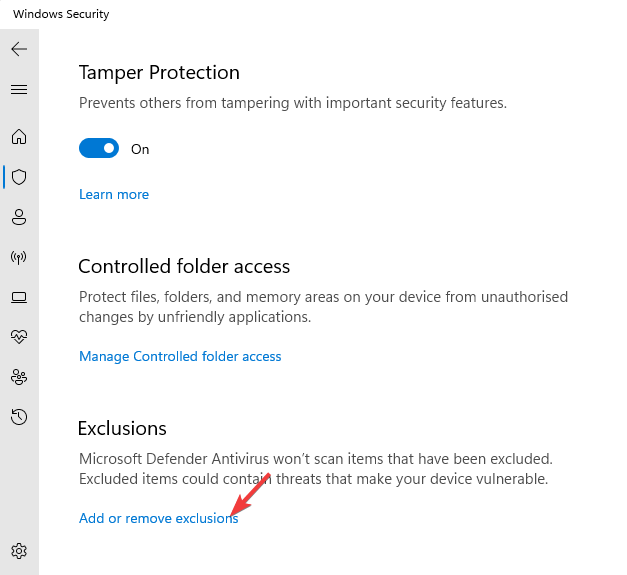
- Here, Add an exclusion to allow the webcam.

But, if Windows Defender is blocking the built-in webcam, it may be because it found some malicious software with the application.
In this case, you must check if the Camera driver is updated to the latest version. If not, then you can follow the method in our post to update the driver on your Windows 11 PC.
But, if you are using a 3rd party antivirus, and if it’s blocking your computer camera, you can refer to our detailed post for the fix related to different software.
However, if you are using software other than that mentioned in the post, you can visit your antivirus software company’s website for further assistance.
If you have any other queries related to the webcam, you can leave your query in the comments box below.
Read our disclosure page to find out how can you help Windows Report sustain the editorial team. Read more


Improve this guide


User forum
0 messages