Fix: This driver can't release to failure [Full Guide]
Key notes
- Gigabyte Motherboards are some of the most popular in the world, and keeping them constantly update d is important.
- Sometimes the lack of updates or certain software issues can lead to error messages in Gigabyte motherboards.
- The article below is just one of many included in our hub dedicated to fixing System Errors.
- Take a look at our dedicated Fix page for more step-by-step troubleshooting guides.
This driver can’t release to failure is an error message that more specifically pertains to Gigabyte motherboards.
Some users have stated that the error message pops up after upgrading to Windows 10.
The error message is usually due to a motherboard‘s lack of built-in Wi-Fi, which is something required for the Gigabyte App Center’s Cloud Station Server.
Here are a few resolutions that can fix this Gigabyte motherboard error in Windows 10.
How do I fix the This driver can’t release to failure error?
- Update the Motherboard Drivers
- Switch off the Always run on next reboot setting
- Reinstall Gigabyte Services via Command Prompt
- Update the App Center
- Uninstall the App Center
1. Update the Motherboard Drivers
You might need to update your Gigabyte motherboard drivers to fix the driver can’t release error message. However, the motherboard has various drivers.
As such, it’s probably better to utilize driver-updating software to ensure the motherboard drivers are updated. This includes updating old ones, fixing broken ones, and replacing missing ones.
- Download and install the Outbyte Driver Updater app.
- Launch the software and wait for the app to detect all incompatible drivers.
- Now, it will show you a list of all outdated drivers to select the ones to Update or Ignore.

- Click on Update & Apply Selected to download and install the latest versions.
- Restart your PC to ensure the applied changes.

Outbyte Driver Updater
Maintain your device healthy by letting OutByte Driver Updater find the latest driver options.2. Switch off the Always run on next reboot setting
- First, open the Gigabyte App Center via the Windows system tray.
- Then click the Cloud Station Server tab at the bottom of the app.
- Switch off the Always run on next reboot setting for the Cloud Station Server.
- Select the OC tab for Remote OC, and switch the Always run on next reboot option off.
- Then select the Gigabyte Remote tab, and turn off the Always run on next reboot option.
- Restart your desktop or laptop.
As mentioned, the Cloud Station Server is one component of the Gigabyte App Center that requires onboard Wi-Fi. The Remote OC and Gigabyte Remote are two are components that also need onboard Wi-Fi.
Thus, switching those components off can fix the issue.
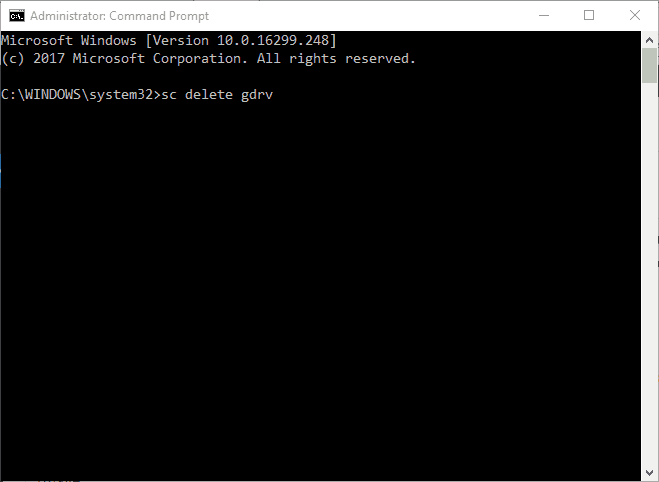
3. Reinstall Gigabyte Services via Command Prompt
- Press the Win key + X hotkey.
- Then select Command Prompt (Admin) to open the Prompt.
- Input sc delete gdrv in the Prompt, and press the Return key.
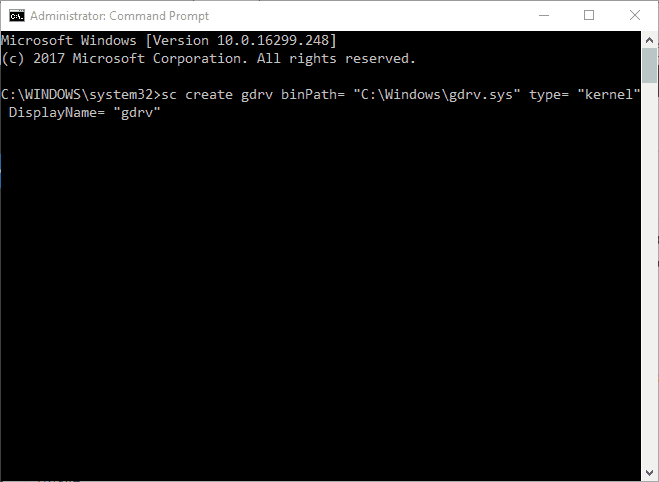
- Enter the following line, and press Enter:
'sc create gdrv binPath= "C:Windowsgdrv.sys" type= "kernel" DisplayName= "gdrv"' and Return to reinstall the services.
Alternatively, reinstalling Gigabyte services might also resolve the issue.
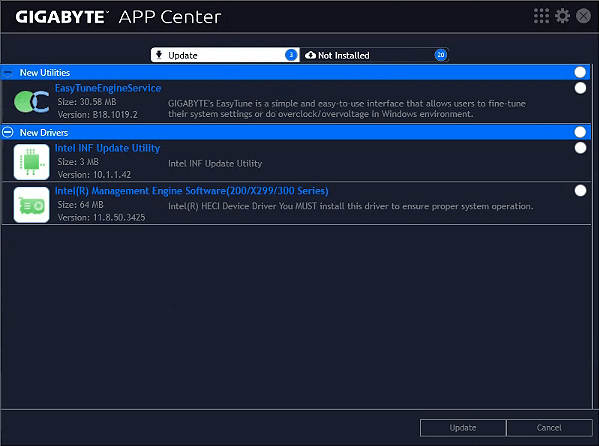
4. Update the App Center

If you’ve recently upgraded to Windows 10, update the App Center to ensure that its compatible with the latest platform.
You can do that by pressing the GIGABYTE App Center Utility Download button on this page.
Then open the installer for the app to add the latest App Center version to Windows.
5. Uninstall the App Center
- Press the Windows key + R to open Run.
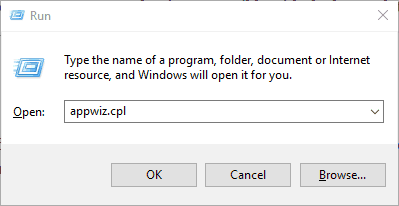
- Enter appwiz.cpl in Run and click OK to open the uninstaller window in the snapshot directly below.
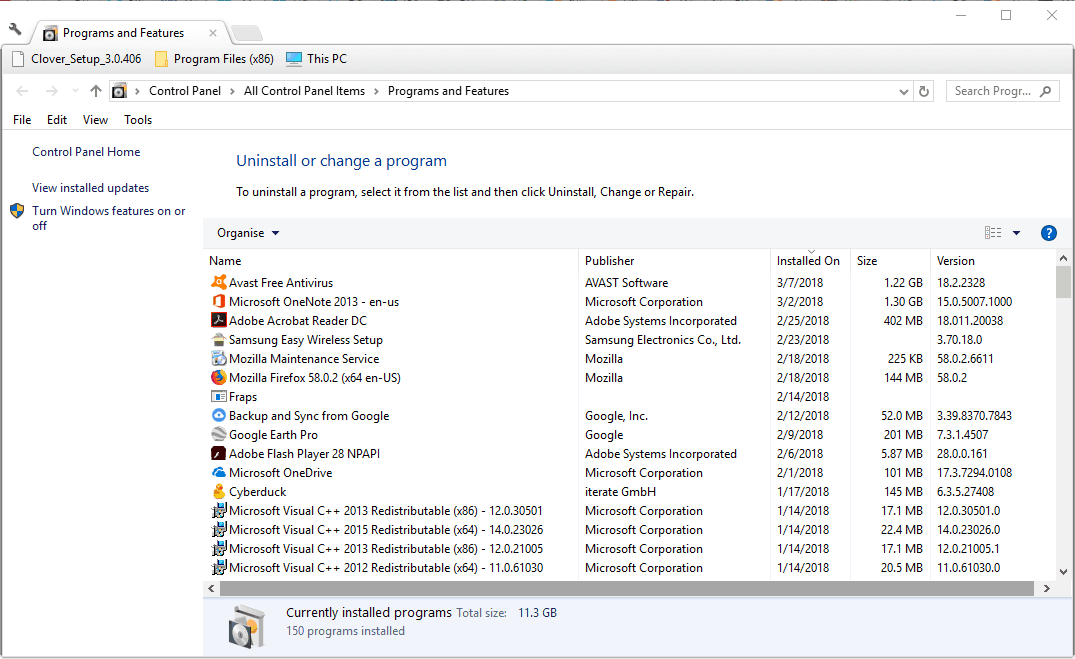
- Now select the Gigabyte App Center software, and press its Uninstall button.
- Press the Yes button for further confirmation.
- Then restart Windows after removing the App Center.
Some users have resolved the Gigabyte motherboard error message by removing the App Center from Windows. But there are also a few users who struggle with this. If that’s also your case, read on.
Can’t uninstall the Gigabyte app center
Using the Control Panel to remove a no longer wanted program (as shown above) is quick and easy, but it seems that not everyone can successfully use this option.
For some, the Gigabyte app center won’t uninstall no matter what they do. So, here’s what we suggest:
- Clean boot your computer and manually delete the entire folder from
C:\Program Files (x86)\Gigabyte\AppCenter directory - Use a good registry cleaner tool to remove any hanging, broken, or superfluous keys that might linger on.
- Finally, use a professional uninstaller tool that takes care of all the leftovers for you.
One, or more, of those resolutions, will probably fix the driver can’t release error in Windows 10. If you have any further suggestions for fixing the Gigabyte motherboard error, feel free to share them below.
Read our disclosure page to find out how can you help Windows Report sustain the editorial team. Read more


Improve this guide


User forum
0 messages