Windows 10 not Shutting Down Properly: 7 Fixes if it's Stuck
Disabling the fast startup feature should fix this easily
Key notes
- If your Windows 10 PC is not shutting down properly, it might be due to corrupt system files.
- You can solve this problem by disabling the fast startup feature.
- Another effective solution is to update your PC to the latest version.

Different power options are available on Windows PC, with the shutdown option being the most definite. However, some users complain that Windows 10 is not shutting down properly.
This makes it difficult to save power on their PC. If you are also troubled by this issue, this guide will walk you through how to fix it for good.
What causes Windows 10 not to shut down properly?
A series of factors can cause Windows 10 not to shut down properly. Listed below are some of the prominent ones:
- Power settings: The Fast startup feature is the most significant cause of this problem. While this feature helps to improve your PC’s startup time, you need to disable it to fix this issue.
- Corrupt system files: Sometimes, Windows 10 will not shut down entirely because of missing or faulty system files. You need to repair these corrupt files to get past this issue.
- Outdated PC: An outdated operating system can cause many issues, including this problem. The solution to this is to update your PC to the latest version.
What are other Windows 10 shutdown issues?
Below are some of the variations of this issue as reported by users:
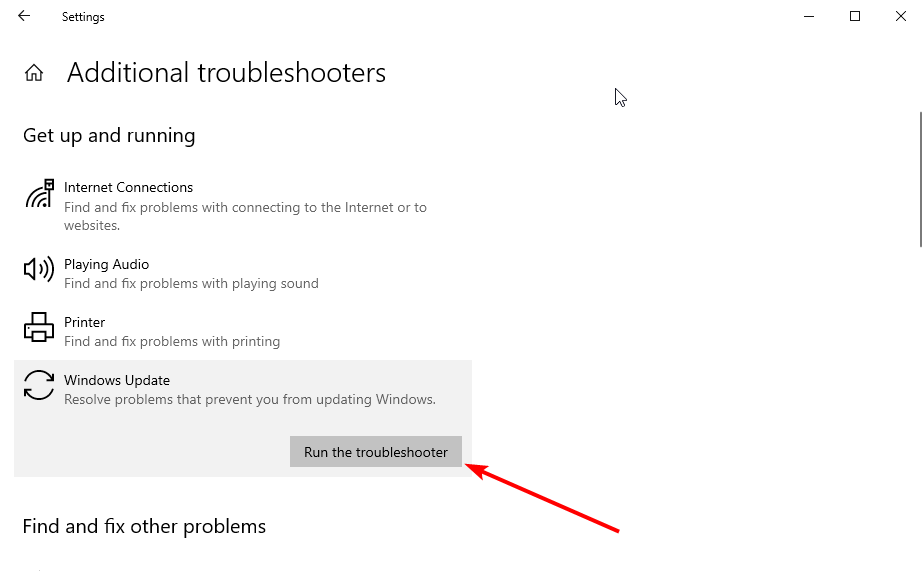
- Windows 10 won’t shut down after the update: This issue can occur due to updates problems. To fix this, you need to run the Windows Update troubleshooter.
- Windows 10 shutting down stuck: Sometimes, the shutdown process can get stuck. This can occur if you have problems with Windows Update. Run the Windows Update troubleshooter to fix the issue and check if that helps.
- Computer won’t shut down (Windows 10): Many users reported that their PC wouldn’t shut down. This can occur due to Intel(R) Management Engine Interface device, so be sure to disable it and check if that helps.
- Windows 10 not shutting down completely, black screen: This issue can sometimes occur due to the Fast Startup feature. To fix it, turn this feature off and check if that solves your problem.
- Windows 10 restarts instead of shutting down: The cause of this issue is the fast startup feature that Microsoft has introduced with Windows 10.
- Computer won’t shut down (Windows 10): This problem can also be caused by the fast startup feature that allows Windows 10 to boot faster.
- Windows 10 takes forever to shut down: If your computer takes a lot of time, the programs need to close the window or don’t go beyond that; you have a problem with malfunctioning software.
- Windows 10 computer turns on after shutting down: One common cause for this problem is a system crash. Windows is configured to restart when the system crashes automatically.
- Windows 10 not fully shutting down: There’s a slight chance that this problem could also be caused by the fast startup feature in Windows 10.
What can I do if Windows 10 is not shutting down properly?
Below are some preliminary troubleshooting steps to perform before delving into the solutions in the section:
- Force shut down your PC using the power button.
- Unplug all peripherals.
- Close unnecessary background apps.
- Make sure to install all the OS updates.
If these steps do not work, you can explore the fixes below:
1.Press Windows key + X on your keyboard and choose Device Manager.
2. Go to Sistem Devices, locate the Intel(R) Management Engine Interface right-click it and choose Disable device from the menu. When the confirmation dialog appears, click Yes.
1. Disable the Intel Management Engine interface
Apparently, after disabling the Intel Management Engine Interface, our readers were able to shut down Windows 10 properly. If it doesn’t fix the problem for you, perform this solution to reenable it.
2. Turn off the Fast startup feature
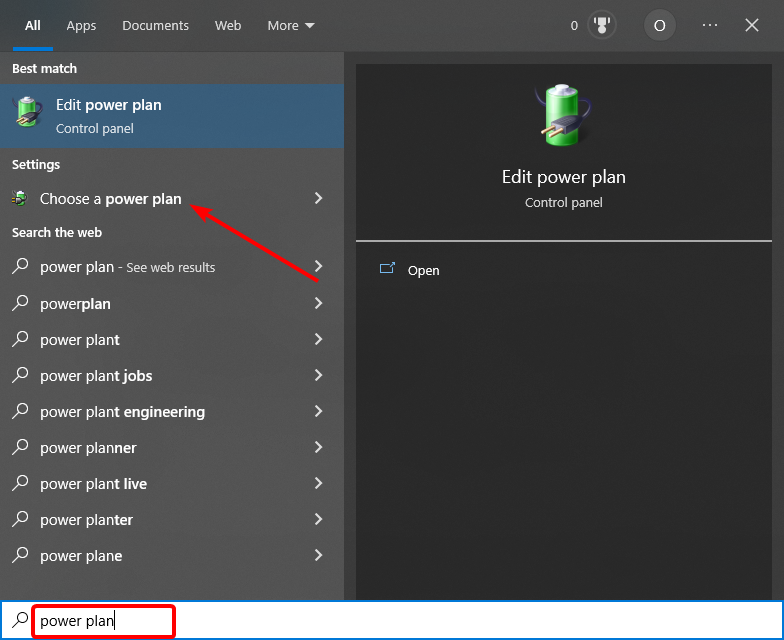
- Press the Windows key, type power plan, and select Choose a power plan.
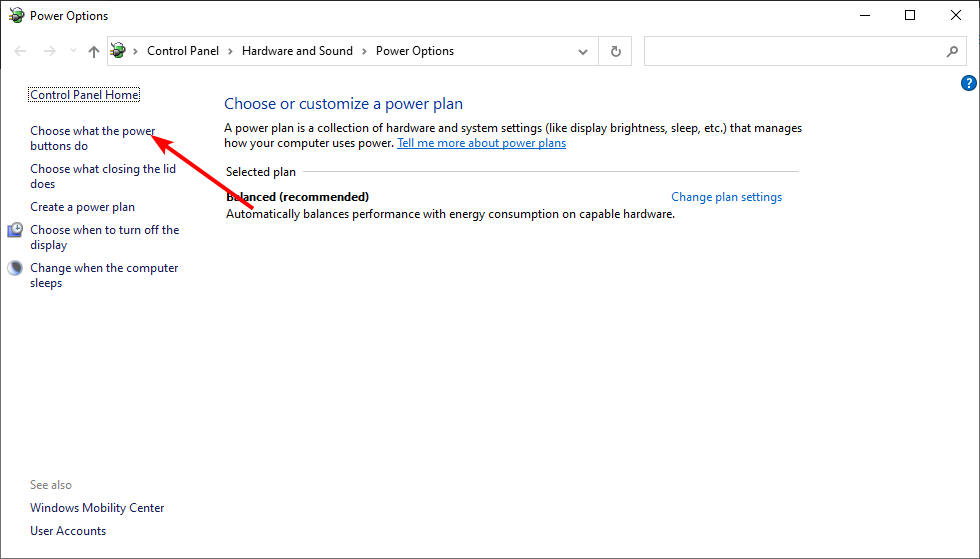
- Click Choose what the power buttons do in the left pane.
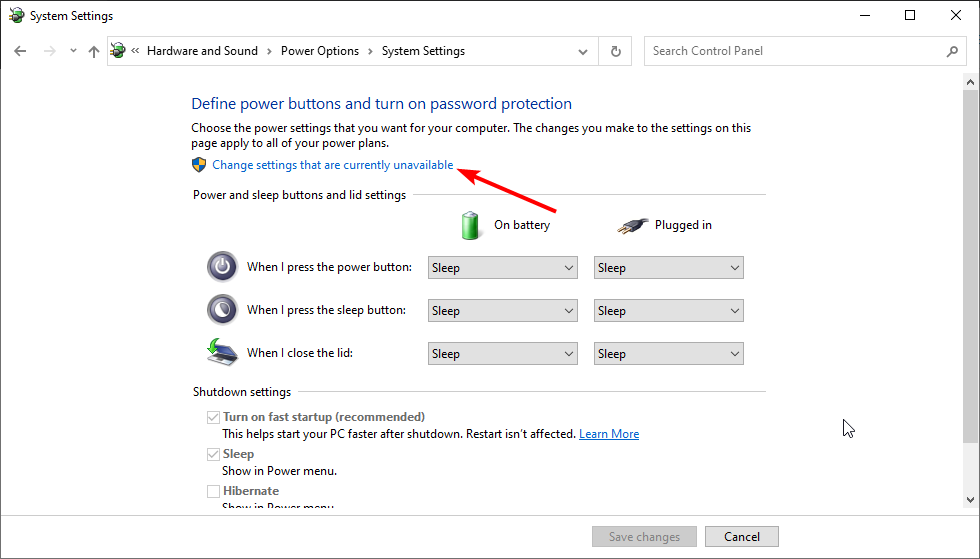
- Now, click on Change settings that are currently unavailable.
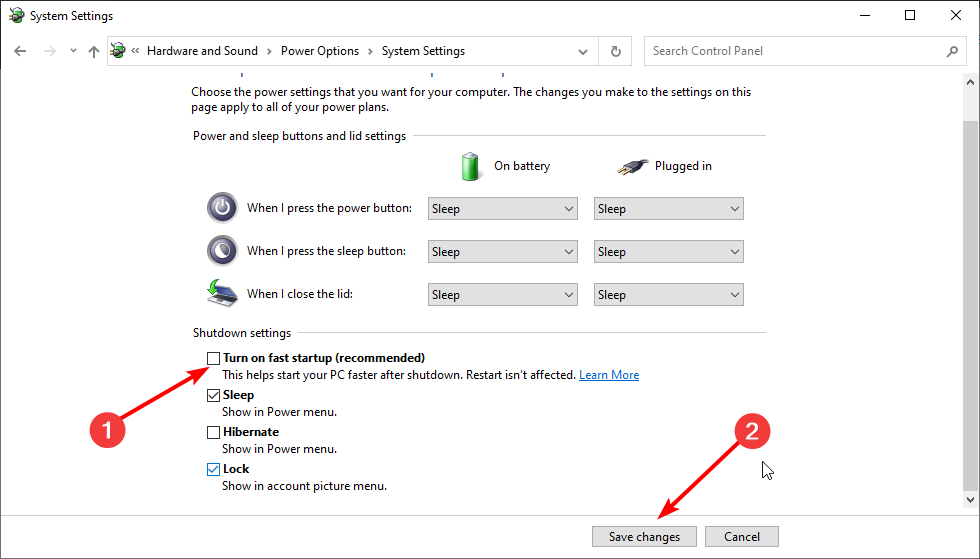
- Finally, uncheck the Turn on fast startup (recommended) option and click Save changes.
Windows has a helpful feature called Fast Startup, which combines hibernation and shutdown into one, thus allowing you to boot your PC quickly.
However, this feature can also cause Windows 10 not to shut down properly. Hence, you need to disable the feature.
3. Run the Windows Update troubleshooter
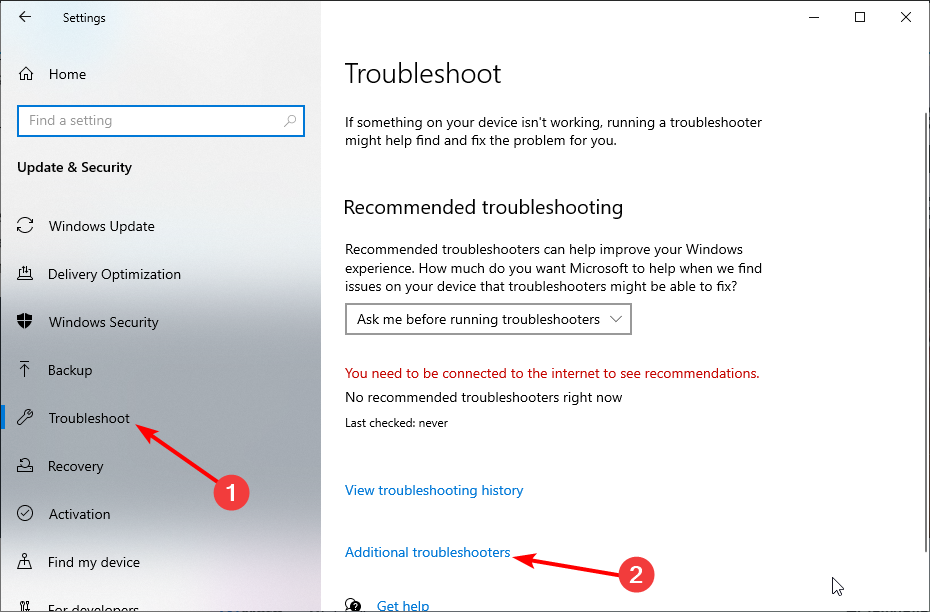
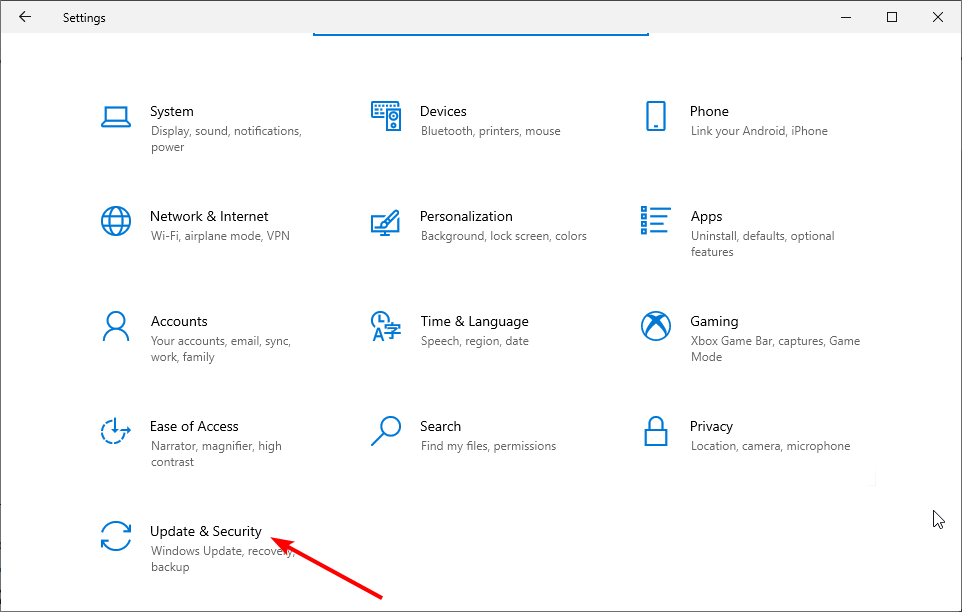
- Press the Windows key + I to open the Settings app and select Update & Security section.
- Click Troubleshoot in the left pane and select Additional troubleshooters.
- Select Windows Update, click the Run the troubleshooter button and follow the onscreen instructions.
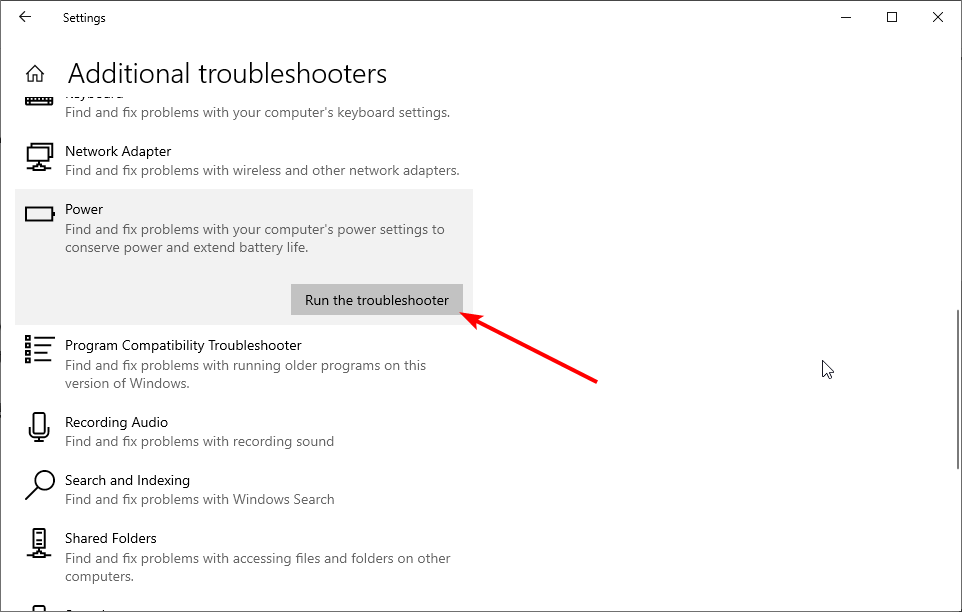
- Finally, you can also select the Power option to run the troubleshooter.
According to users, sometimes Windows 10 is not shutting down properly because of specific issues with Windows Update.
However, you can fix most of these issues simply by running the Windows Update troubleshooter.
4. Run an SFC scan
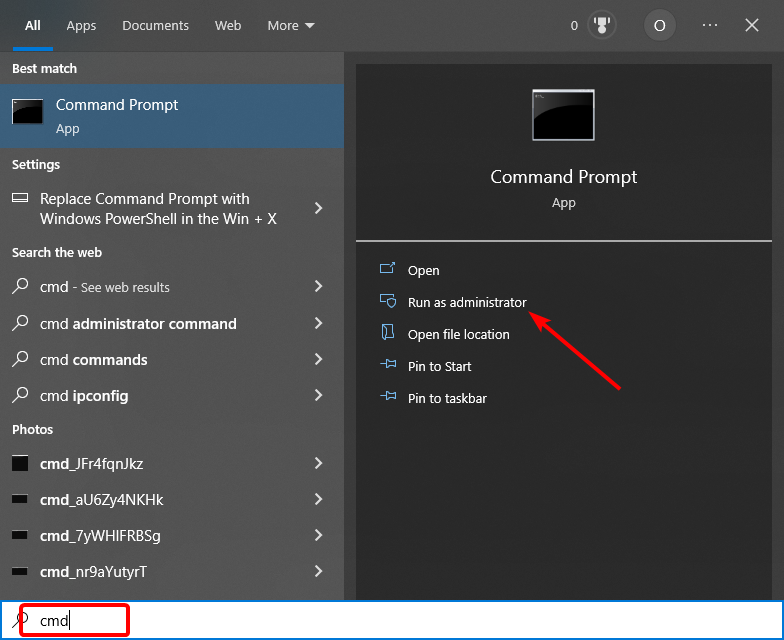
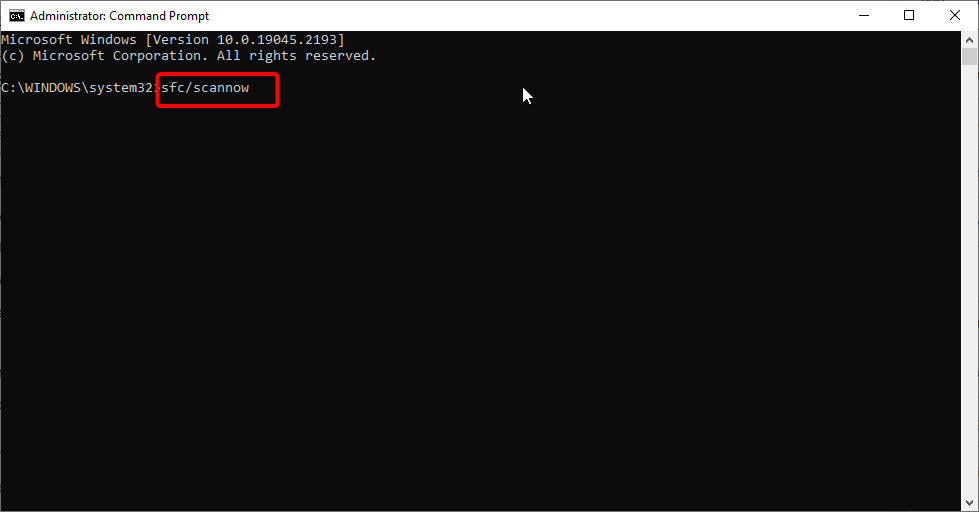
- Press the Windows key, type cmd, and select Run as administrator under Command Prompt.
- Type the command below and hit Enter to run it:
sfc /scannow - Finally, wait for the command to finish running and restart your PC.
If the system files responsible for shutting down your Windows 10 PC is corrupt, the operation might not be successful. Hence, you need to restore these files to shut down Windows 10 properly.
You can also fix your corrupt operating system files automatically with new components by using an expert assistant. Professional software can help you keep your system up-to-date and optimize so that issues like this never happen.
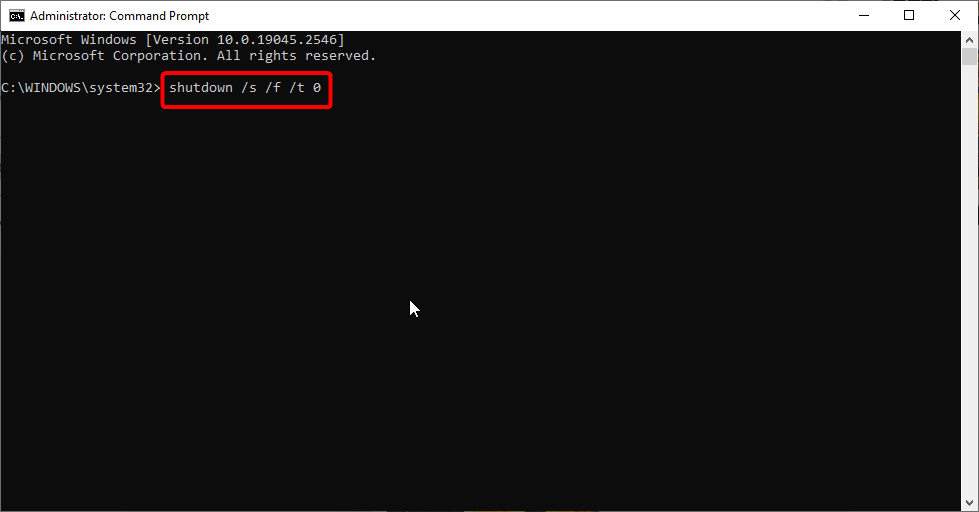
5. Use Command Prompt to shut down your PC
If your Windows 10 PC is not shutting down properly using the standard methods, you need to perform a hard shutdown. You can do this by following the steps above.
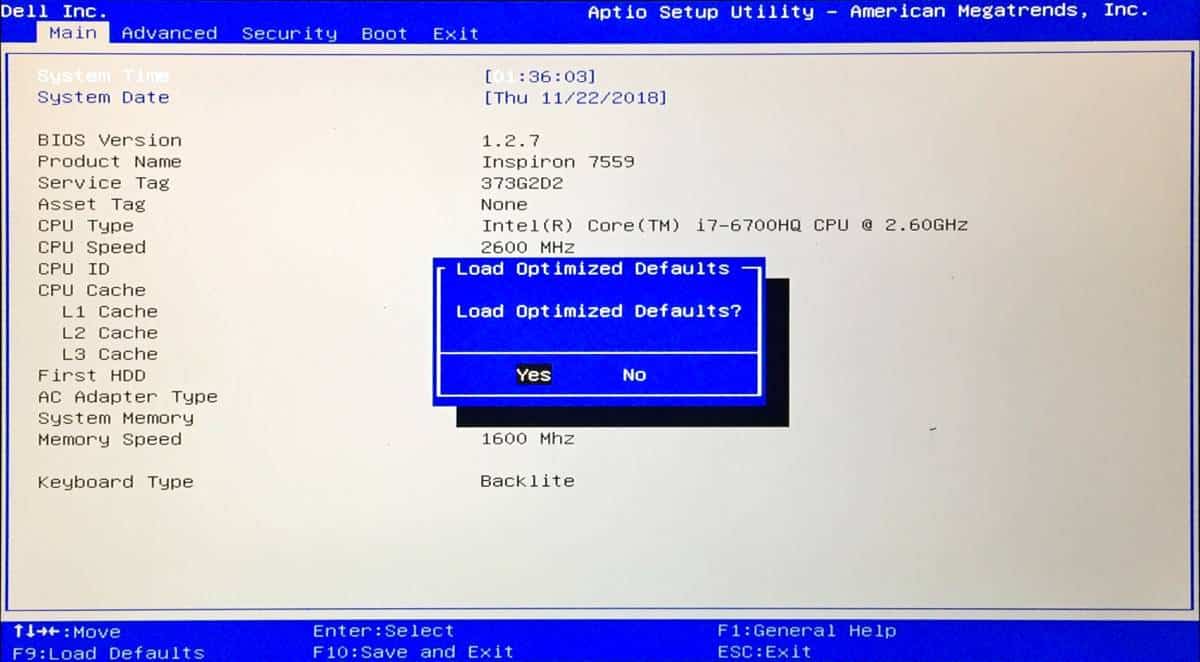
6. Reset your BIOS
- To see how to properly access and reset BIOS, we advise you to check your motherboard manual for detailed instructions.
- Navigate the BIOS and select the option to load the default settings. After resetting BIOS to the default, check if the problem is still there.
7. Cancel automatic restart in Safe Mode
- Press the Windows key + I and select the Update & Security option.
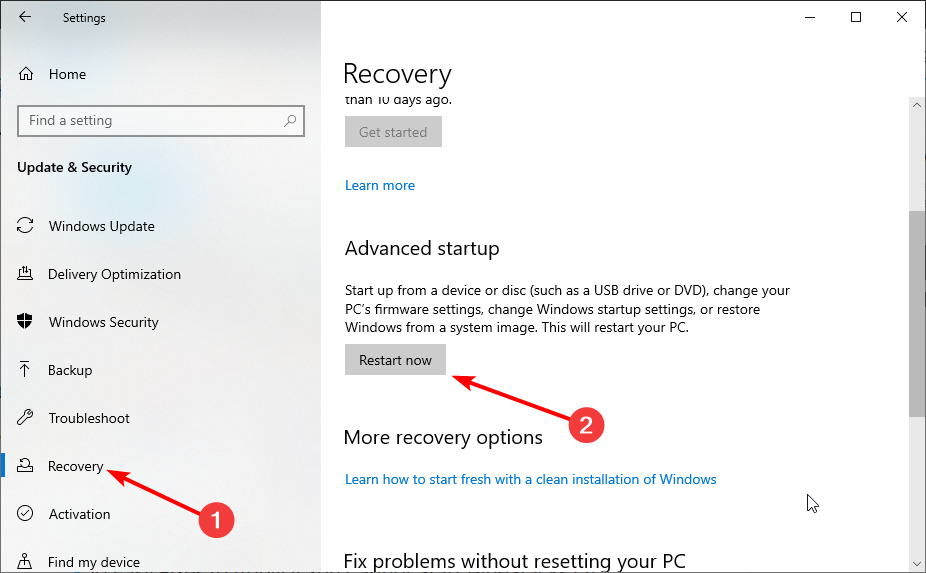
- Choose Recovery in the left pane and click Restart now under Advanced startup.
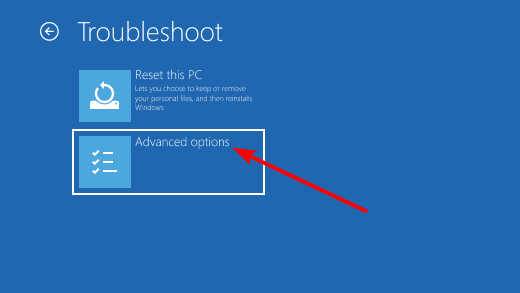
- When your PC restarts, choose Troubleshoot > Advanced options.
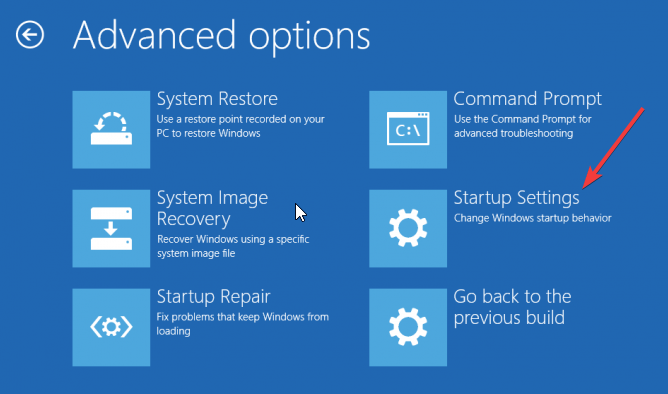
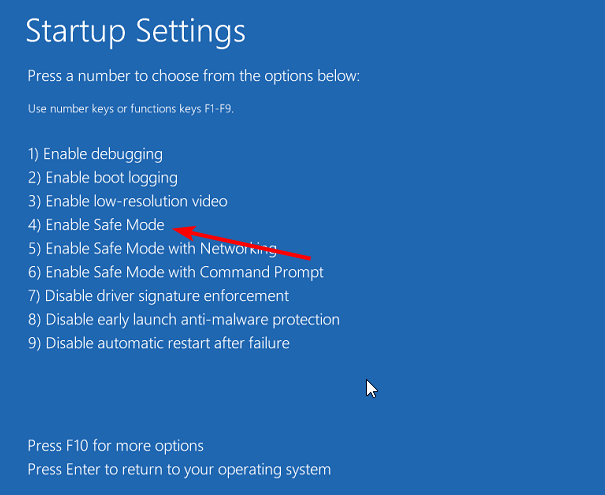
- Now, select Startup Settings.
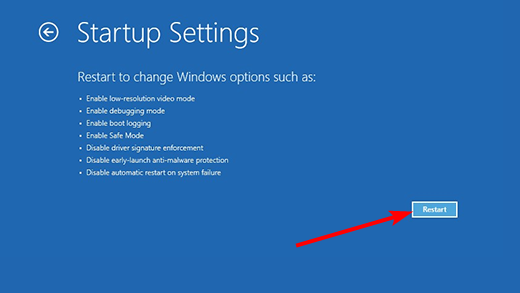
- Click the Restart button.
- When your PC restarts, press 4 or F4 to Enable Safe Mode.
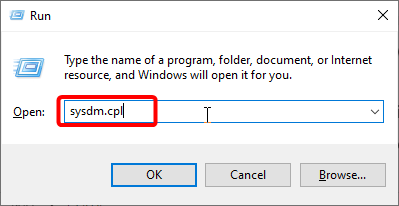
- Next, press the Windows key + R, type sysdm.cpl, and click OK.
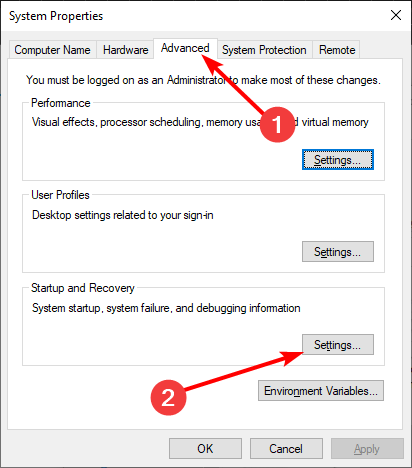
- Click the Advanced tab at the top.
- Now, click the Settings button under the Startup and Recovery section.
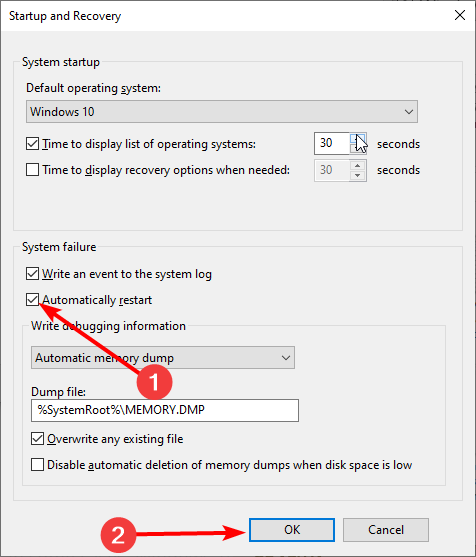
- Finally, uncheck Automatically restart and click the OK button.
In some cases, Windows 10 might not shut down properly because of some system failure. This is because your PC is set to restart when encountering an error.
So, it would be best if you disabled the automatic restart to solve the problem.
We have reached the end of this detailed guide on fixing a Windows 10 PC that is not shutting down properly. You should now be able to resolve the issue, provided you follow the steps.
If the shutdown button is not working on Windows 10, you can fix it by following the steps in our comprehensive guide.
Feel free to let us know the solution that helped you fix the issue in the comments below.
Read our disclosure page to find out how can you help Windows Report sustain the editorial team. Read more



User forum
0 messages