Dolby Atmos Not Working in Windows 11? Here’s How to Turn It On
Key notes
- Several users have in the recent past reported that Dolby Atmos is not working in Windows 11.
- To fix this, try updating or reinstalling the sound driver, enabling exclusive mode, or resetting the Dolby Access app, amongst other fixes listed below.
- Also, learn how to install the Dolby Access app on your Windows 11 PC.

Follow the steps below to quickly enable Dolby Atmos and fix common issues on Windows 11. This guide will help you restore immersive sound and get the most out of your audio experience.
What do I do if Dolby Atmos is not working in Windows 11?
1. Run the built-in audio troubleshooter
- Press Windows + I to launch the Settings app and then click on Troubleshoot on the right in the System tab.

- Next, click on Other troubleshooters.

- Locate and click on the Run button next to the Playing Audio troubleshooter.

- Wait for the troubleshooter to detect the problem and follow the on-screen instructions to fix the error.

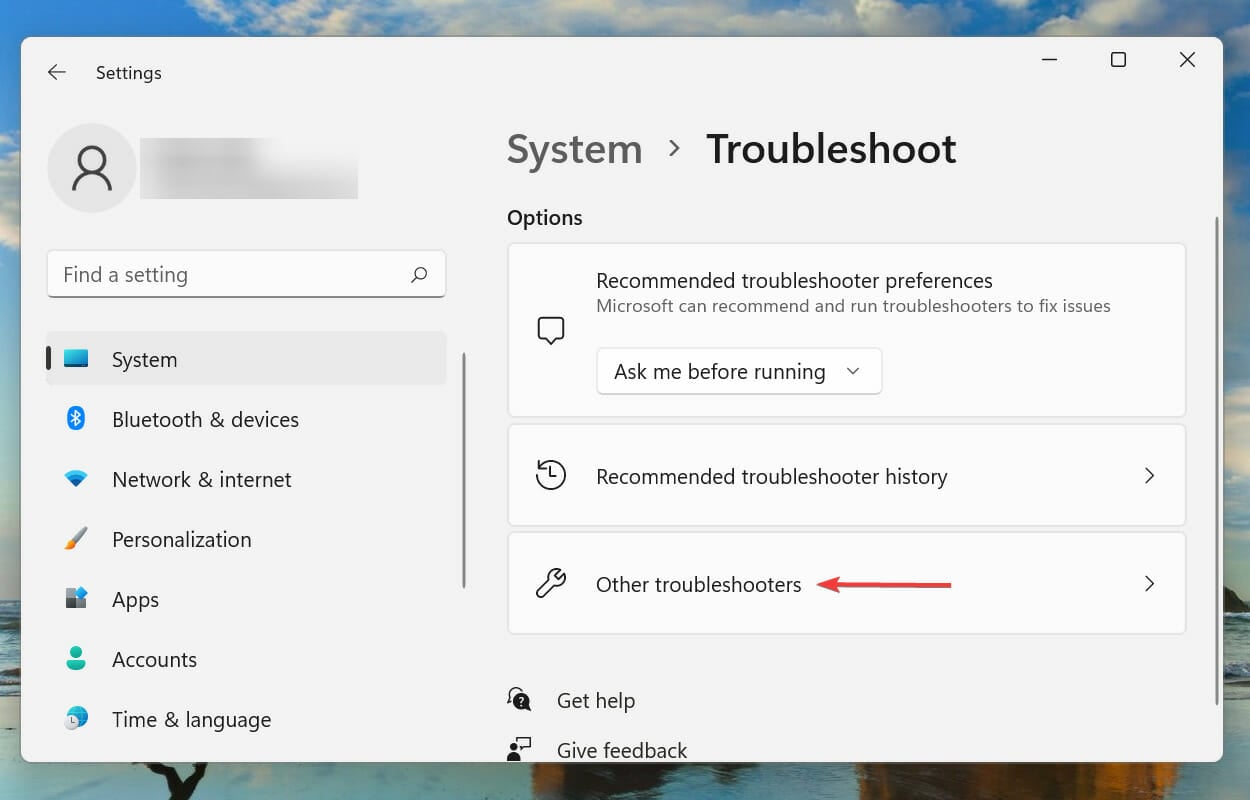

Whenever dealing with an error in Windows, it’s recommended that you first run the relevant built-in troubleshooter for it, if one exists. These are known to fix a plethora of problems with minimal effort from your end.
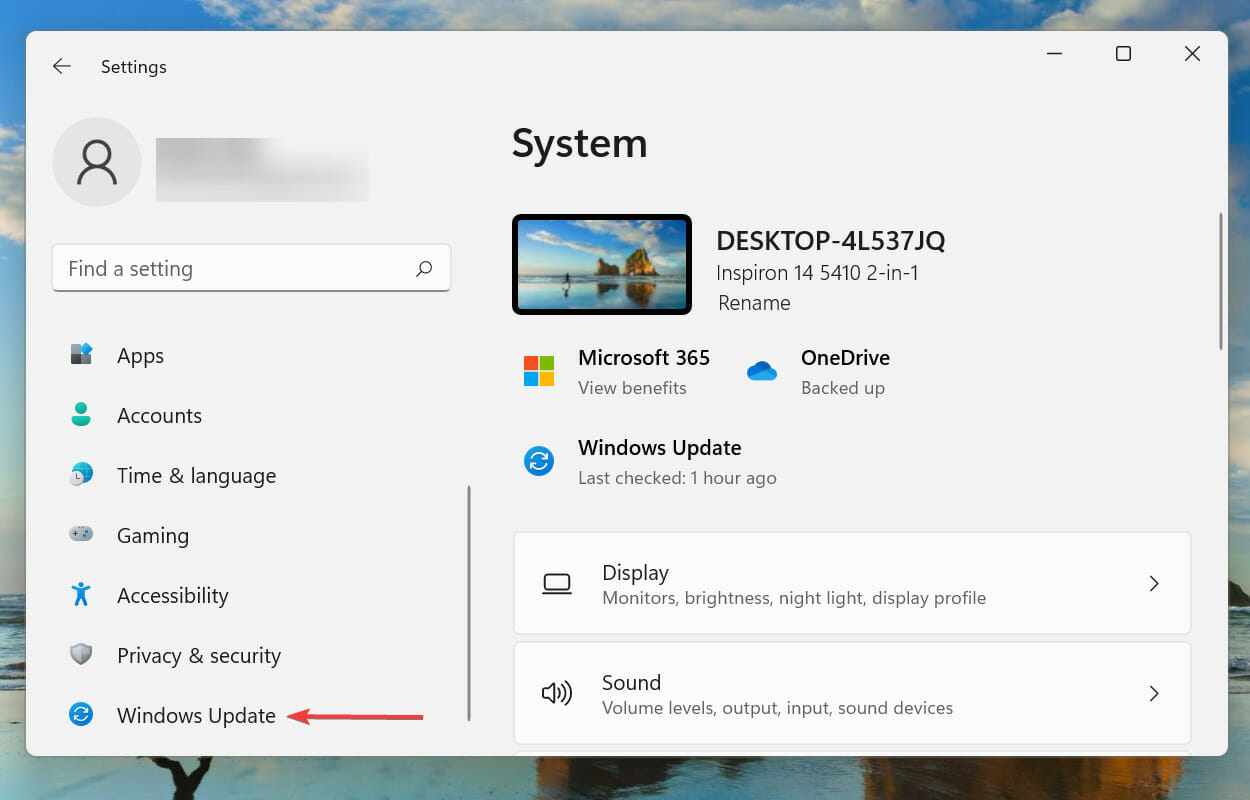
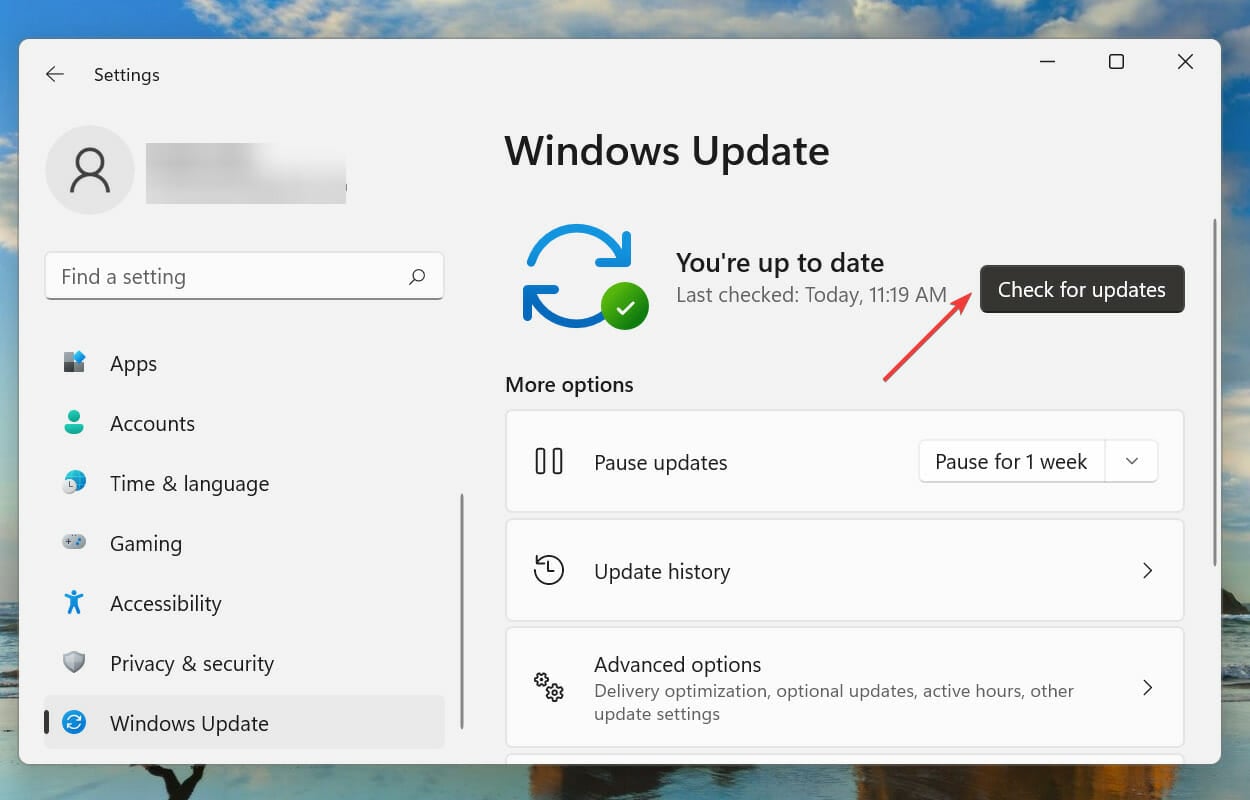
2. Update Windows 11
- Press Windows + I to launch the Settings app, and then select Windows Update tab from the navigation pane on the left.

- Click on Check for updates to scan for any available newer versions of the OS.

- If any are available, download and install them to your system, since running an older version of the OS is known to cause problems with the functioning.
3. Update the sound driver
- Press Windows + S to launch the Search menu, enter Device Manager in the text field at the top, and then click on the relevant search result that appears.

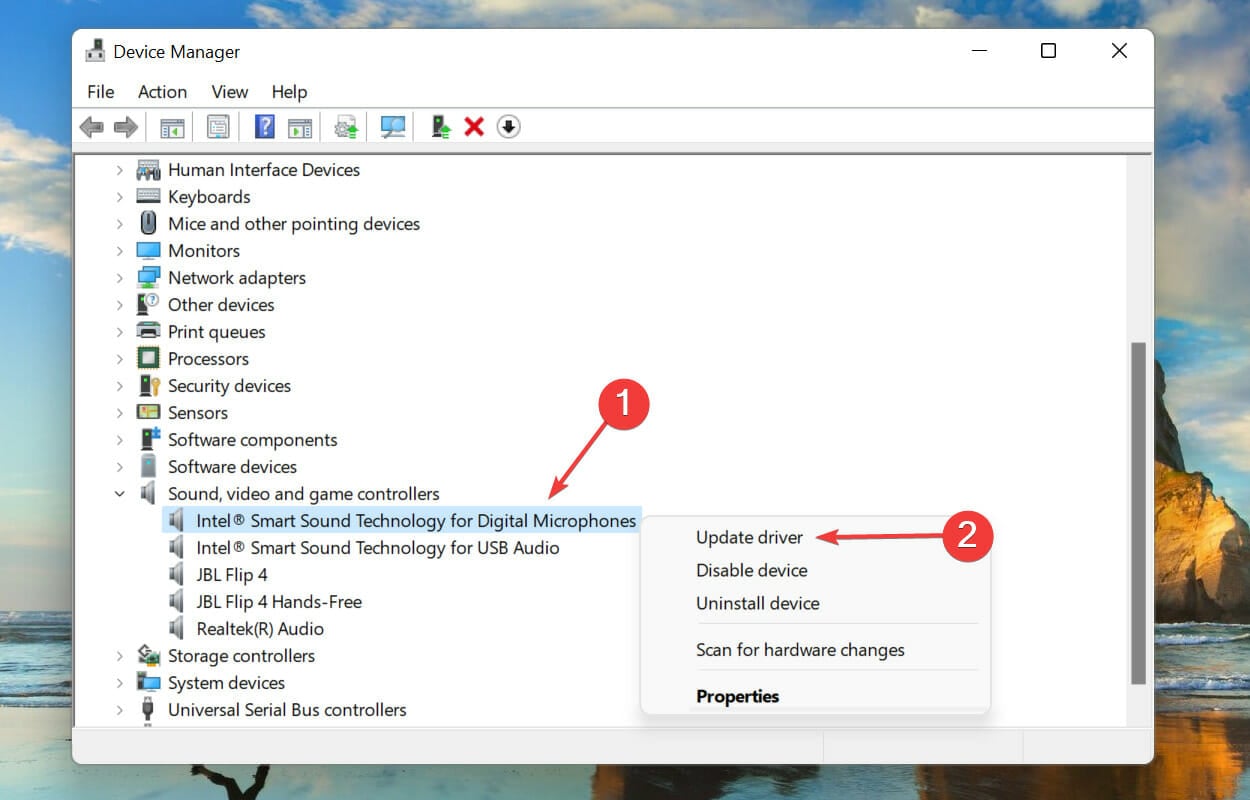
- Locate and double-click on the Sound, video, and game controllers entry.

- Now, right-click on the devices listed under it one at a time, and then select Update Driver from the context menu.

- Select Search automatically for driver from the two options in the Update Drivers window.

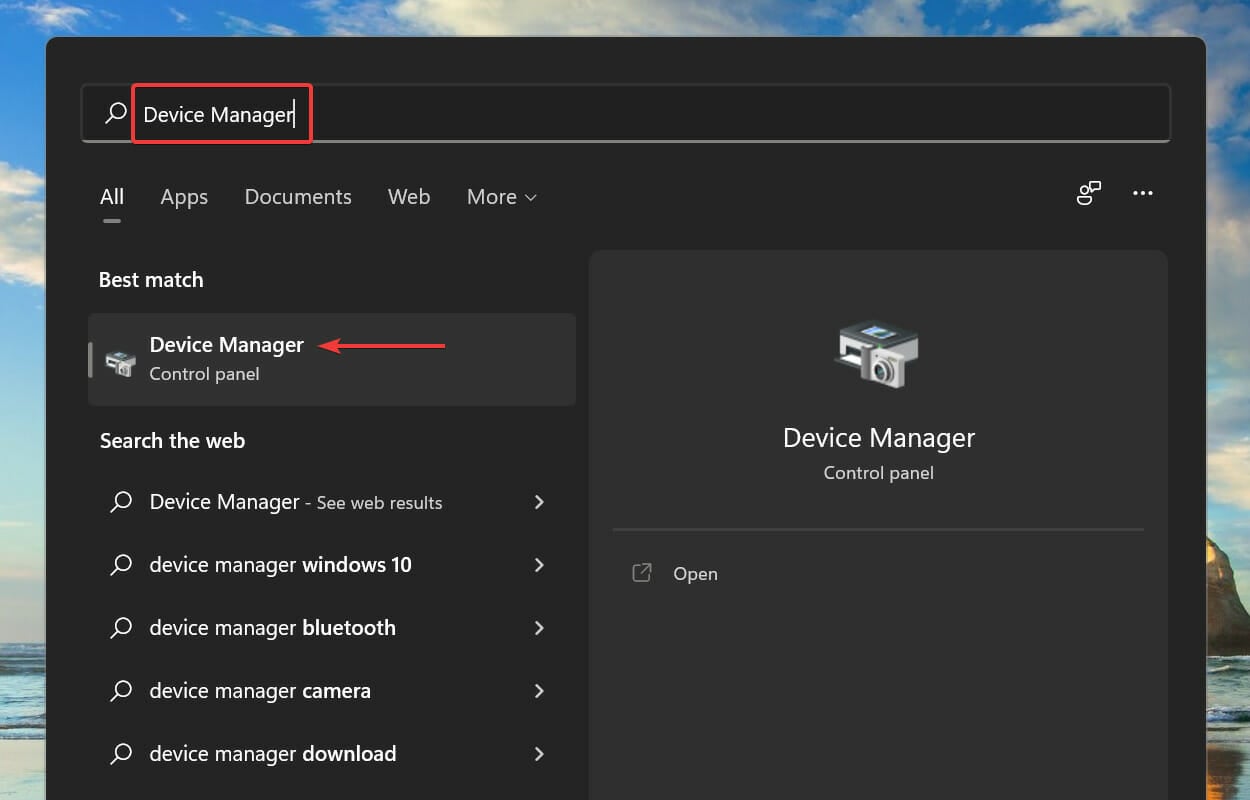

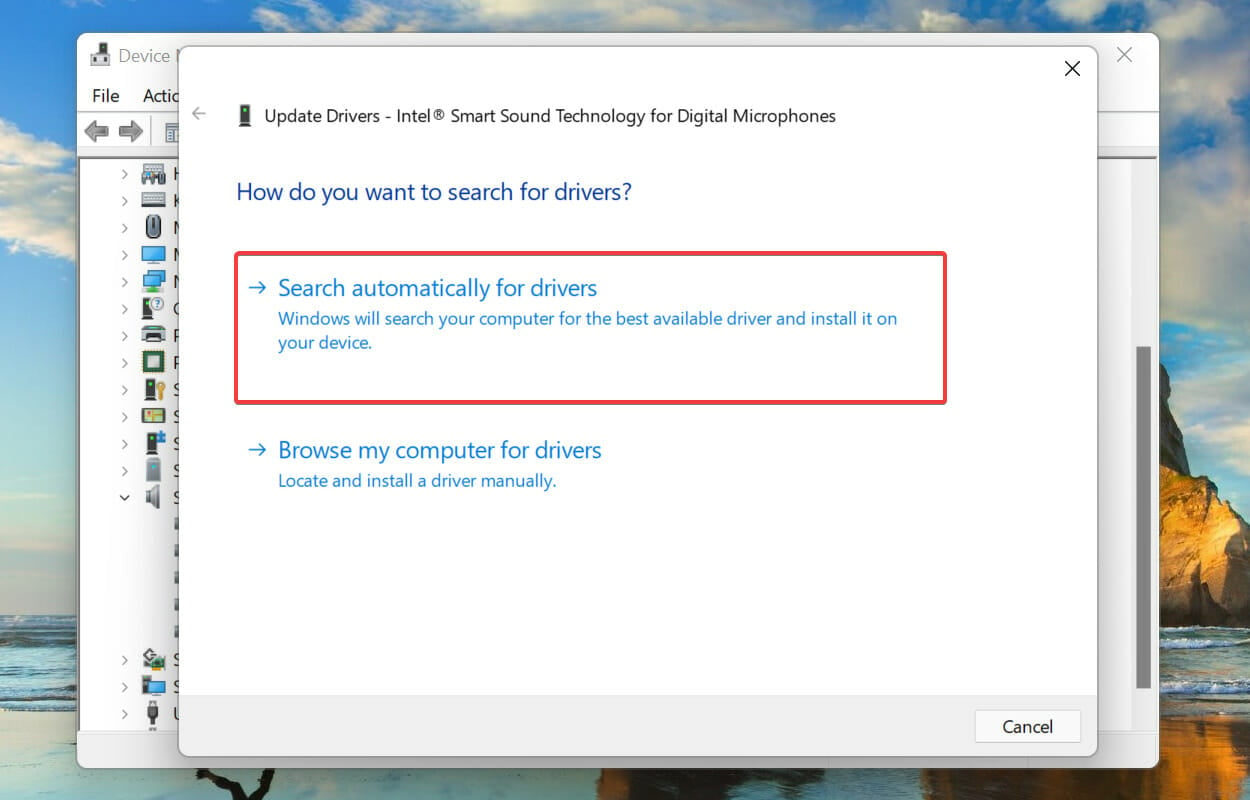
Windows will now automatically look for the best available driver on the system and install it for the device. The major drawback here is that only the hard drive is scanned for updates and not the web servers or Windows Update.
In case the drivers were not updated using the Device Manager method listed above, you can check for a newer version in Windows Update or manually download and install them.
After updating the driver, check if Dolby Atmos starts working in Windows 11.
If that sounds like too much trouble, you can always go with a reliable third-party app for the job. There are a bunch of these out there, but we recommend using Outbyte Driver Updater, a dedicated tool that scans all available sources for updates and keeps the installed drivers up-to-date.
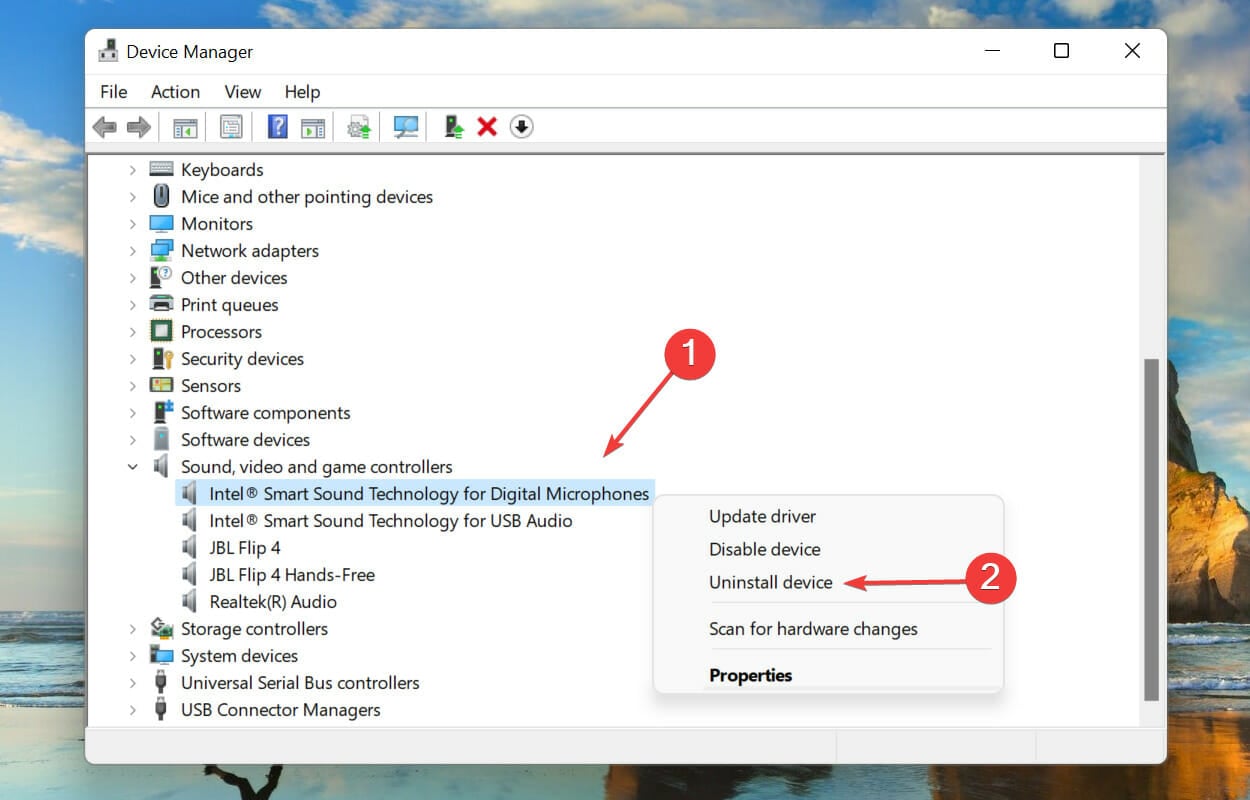
4. Reinstall the sound driver
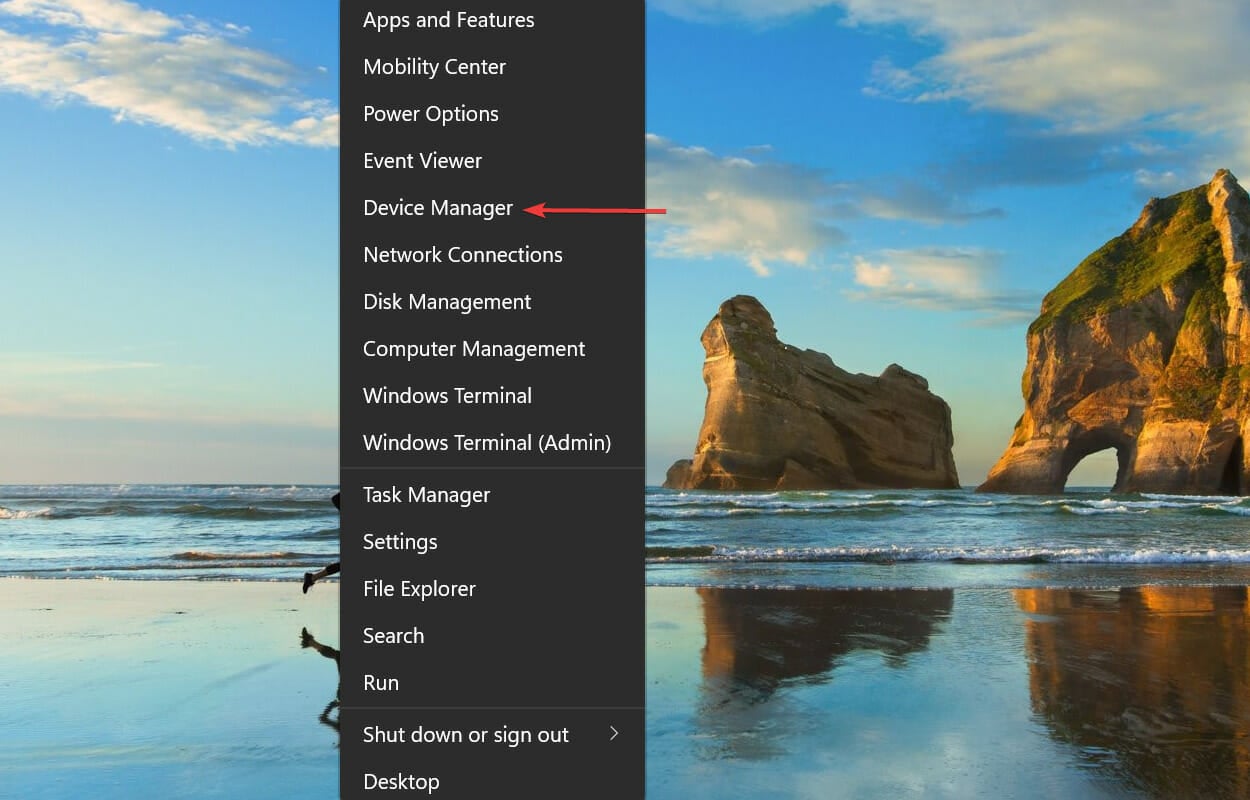
- Right-click on the Start icon or press Windows + X to launch the Quick Access/Power User menu, and then select Device Manager from the list of options.

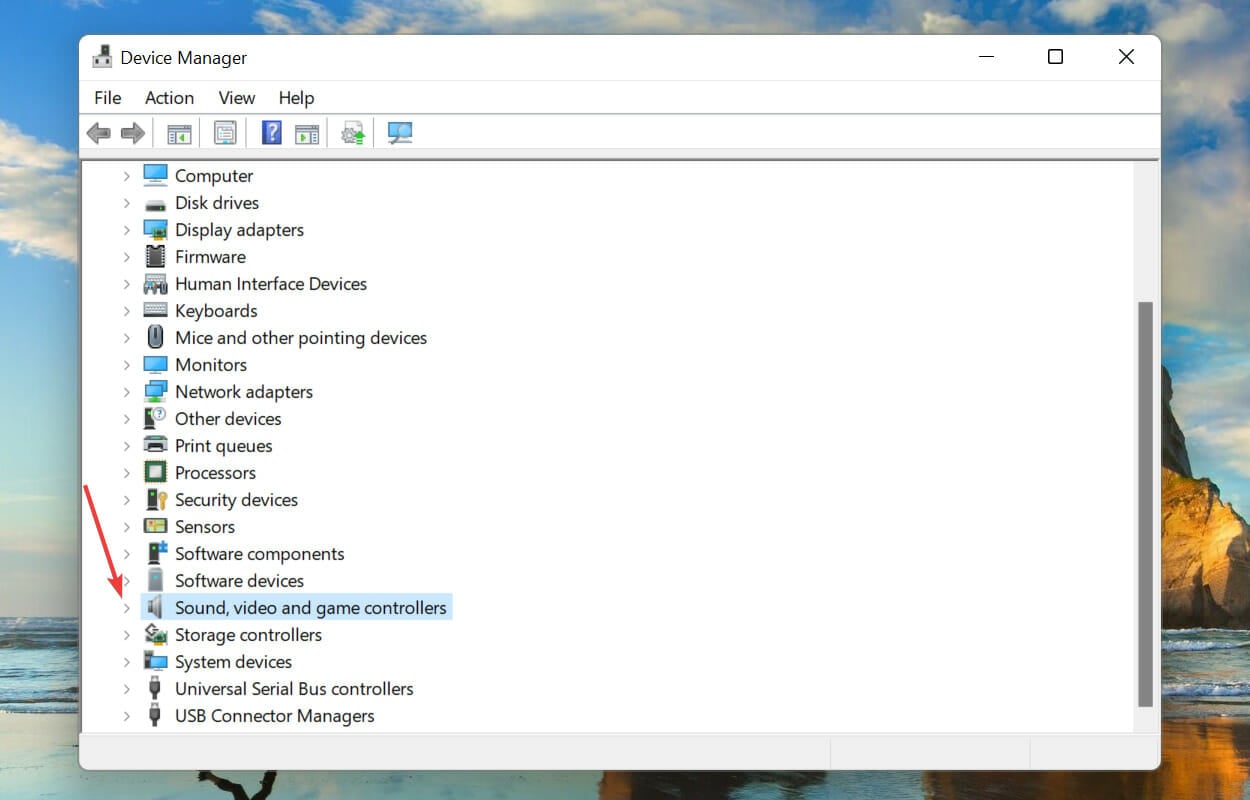
- Next, click on the carat icon before the Sound, video and game controllers entry to expand and view the devices under it.

- Now, look for a warning icon (exclaimation mark in a yellow triangle) next to any of the devices, right-click on it, and then select Uninstall device from the context menu.

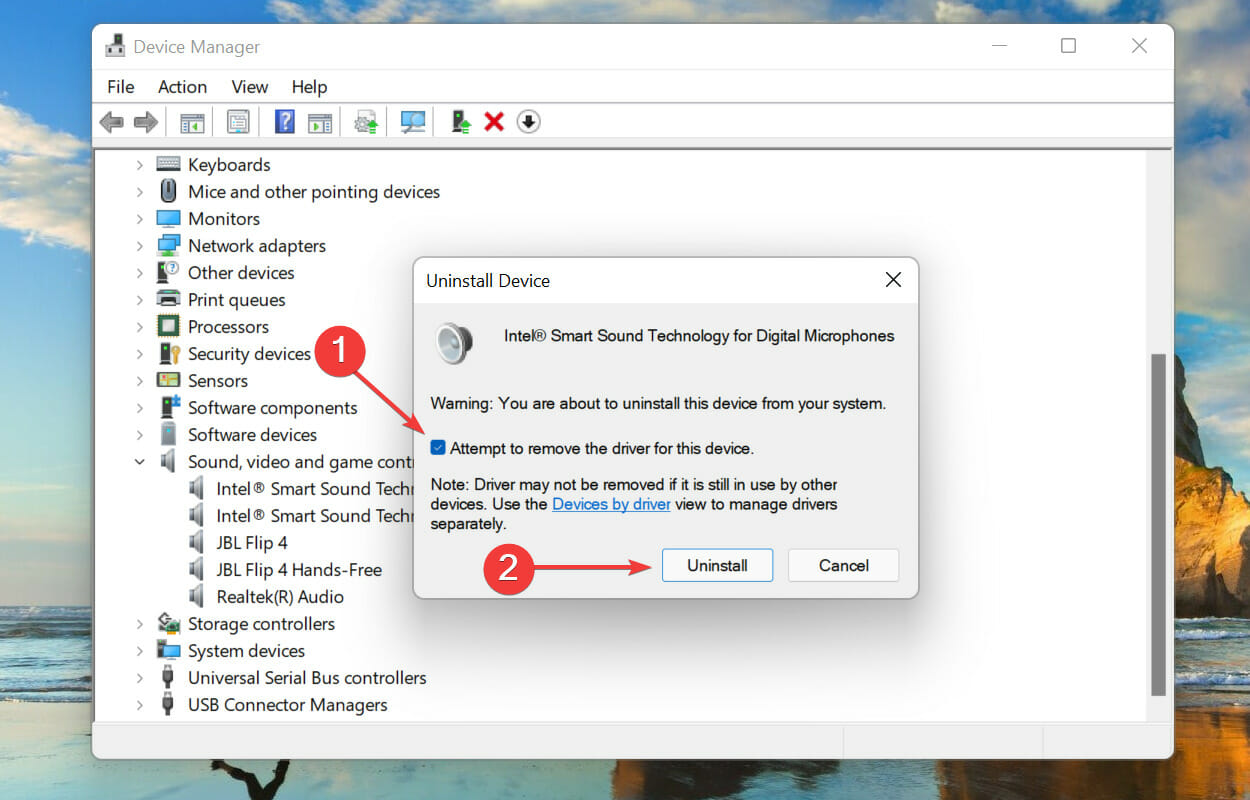
- Tick the checkbox for Attempt to remove the driver for this device and then click on Uninstall.

- After uninstalling the malfunctioning device, restart the computer.
When you restart the computer, Windows will automatically install a fresh driver to replace the corrupt one that was previously installed. Once done, check if the Dolby Atmos not working issue in Windows 11 is eliminated.
5. Roll back driver update
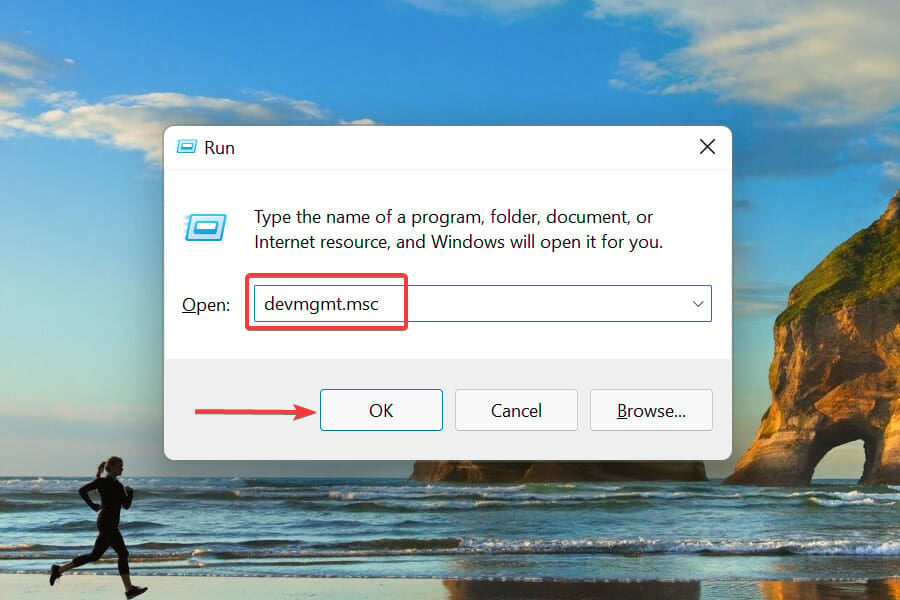
- Press Windows + R to launch the Run command, type devmgmt.msc in the text field, and then either click on OK or hit Enter to launch the Device Manager.

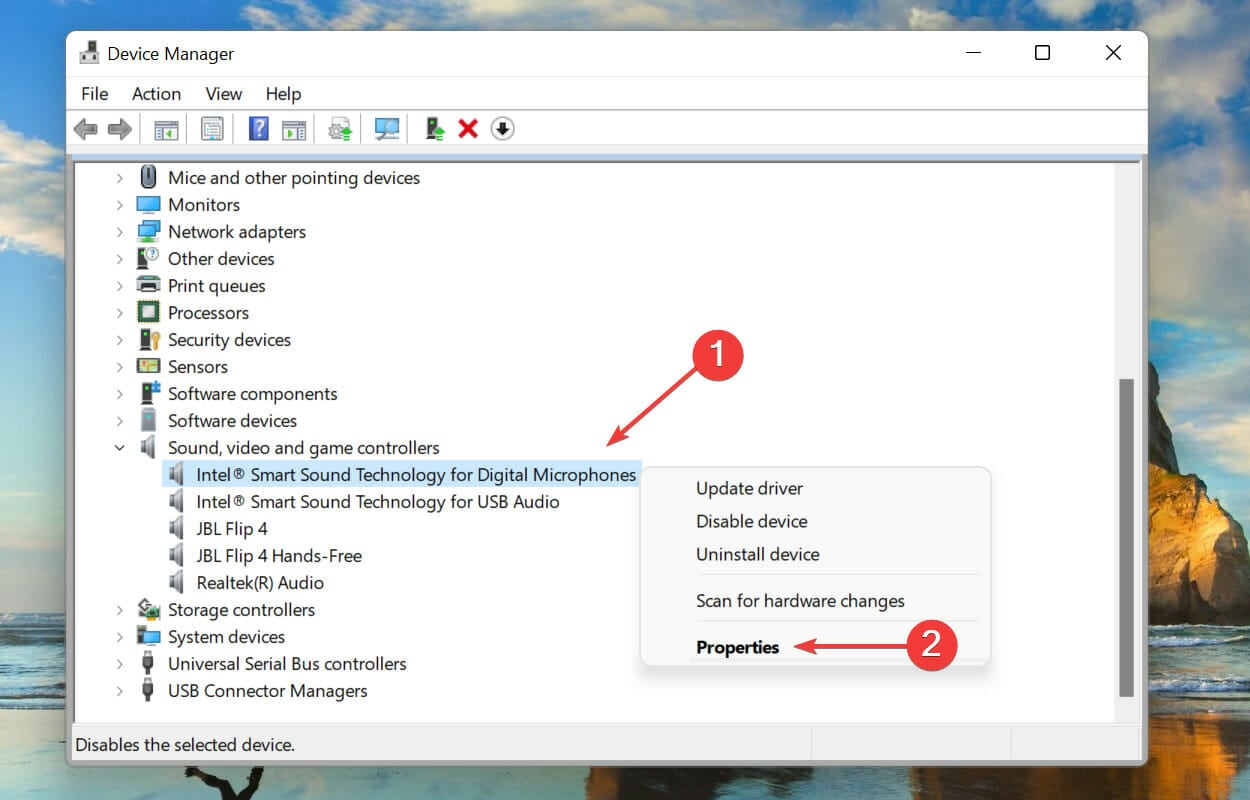
- Double-click on the Sound, video and game controller entry.

- Right-click on each of the devices listed here one at a time, and then select Properties from the context menu.

- Navigate to the Driver tab, and then click on the Roll Back Driver button.

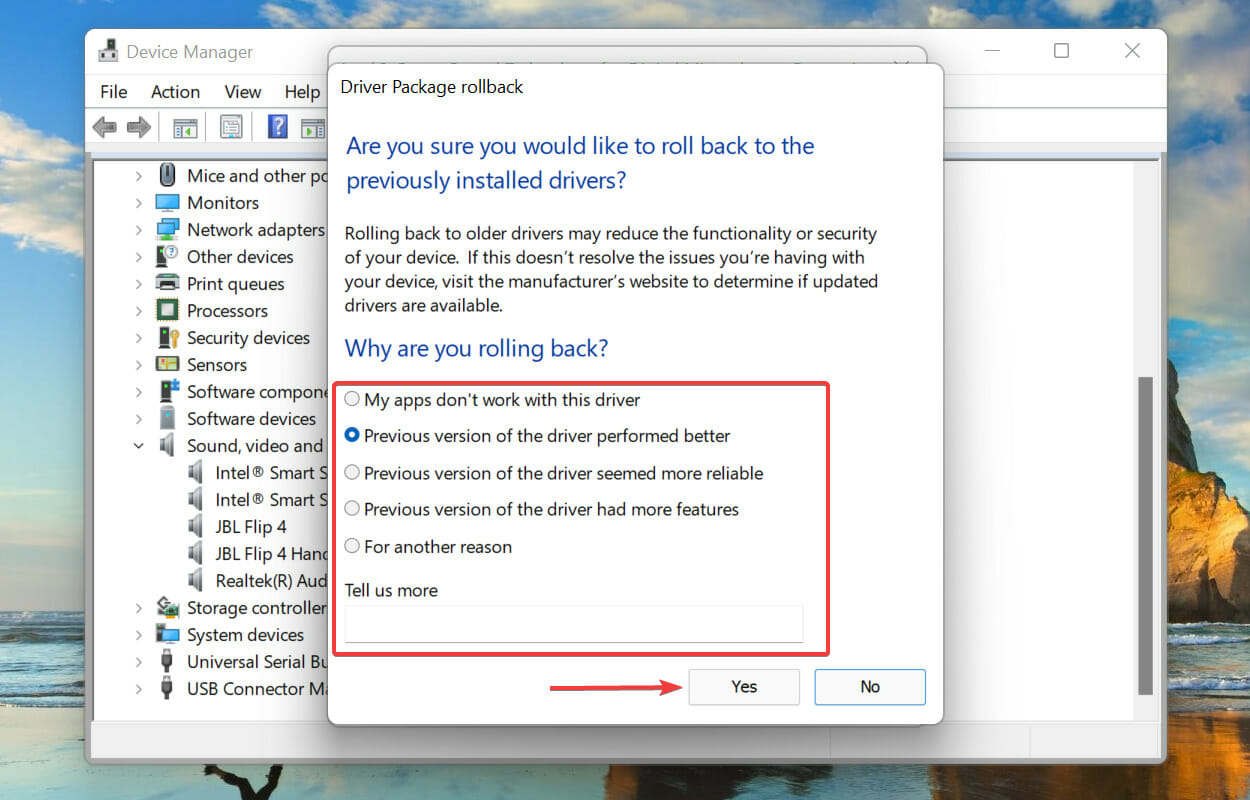
- Next, select a reason for uninstalling the update and then click on Yes to proceed.


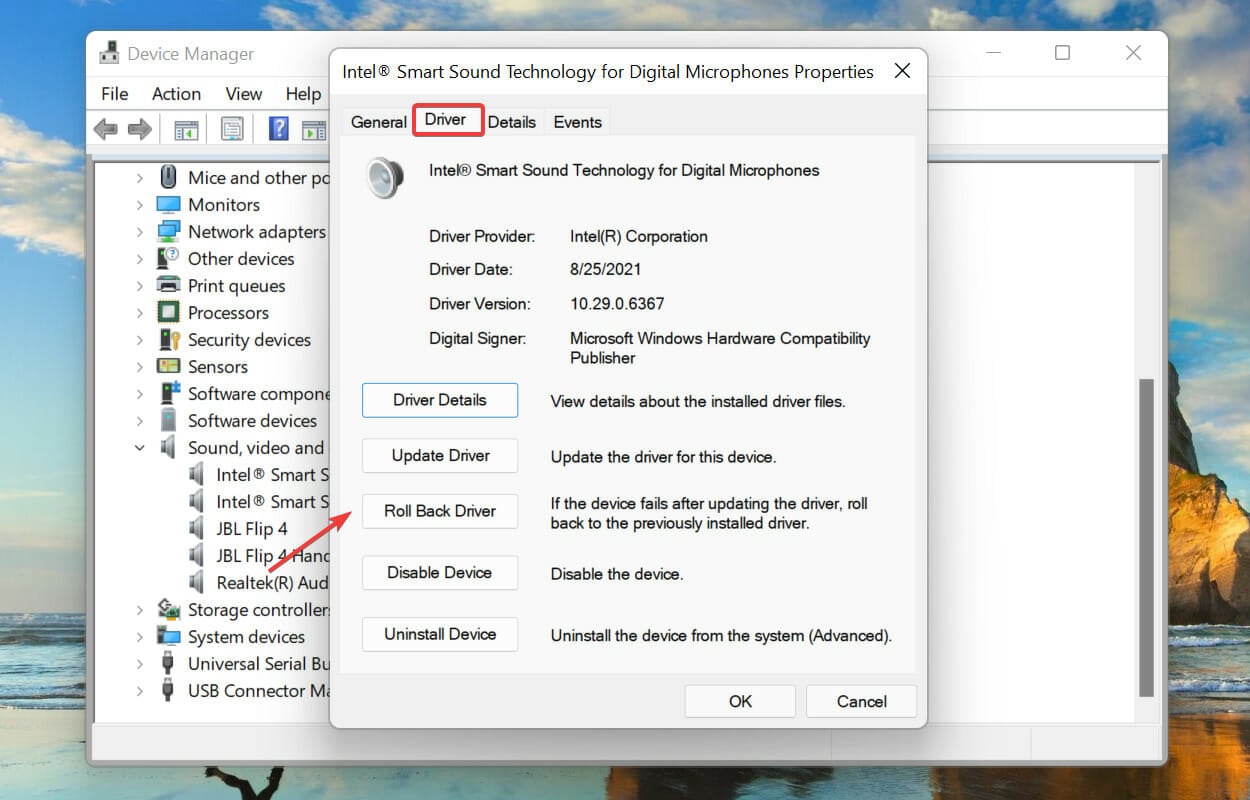
If Dolby Atmos stopped working after updating the sounds drivers in Windows 11, it’s time you roll back the driver update. Doing this will reinstall the previous driver, and in all likelihood fix the issue.
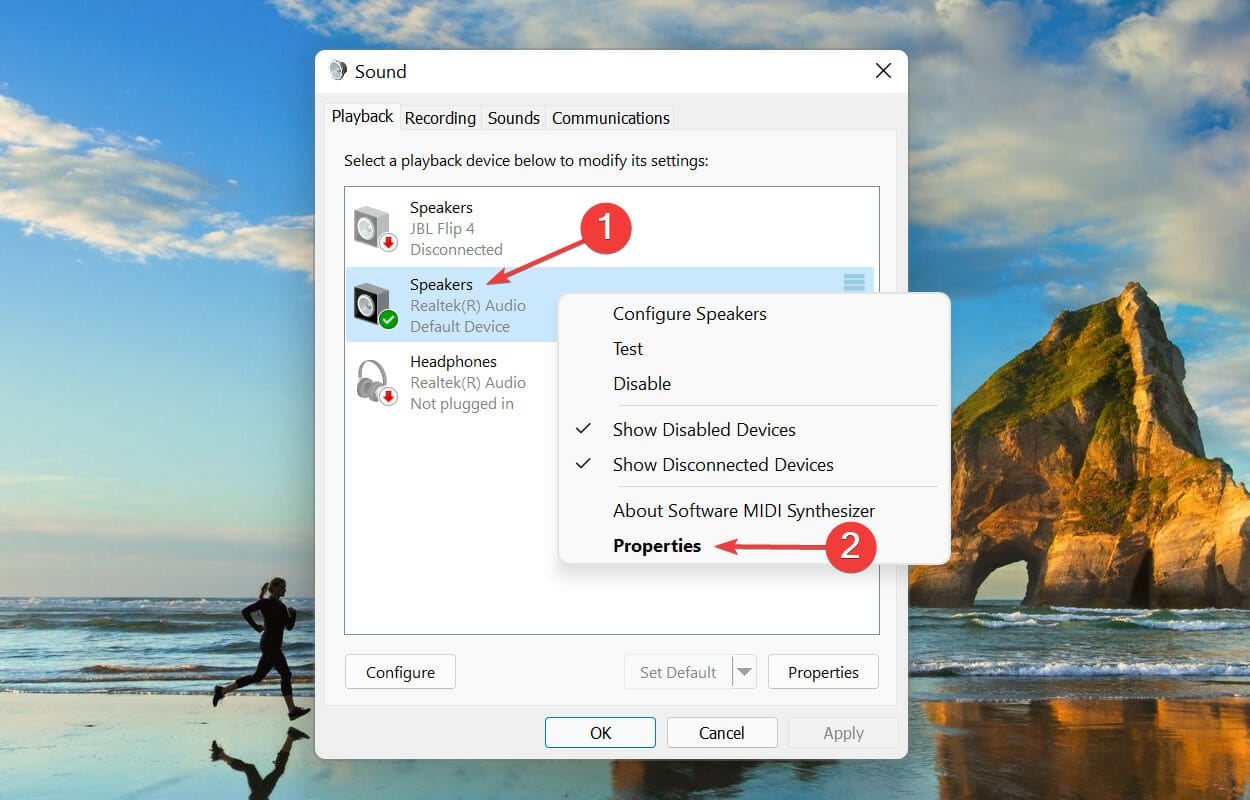
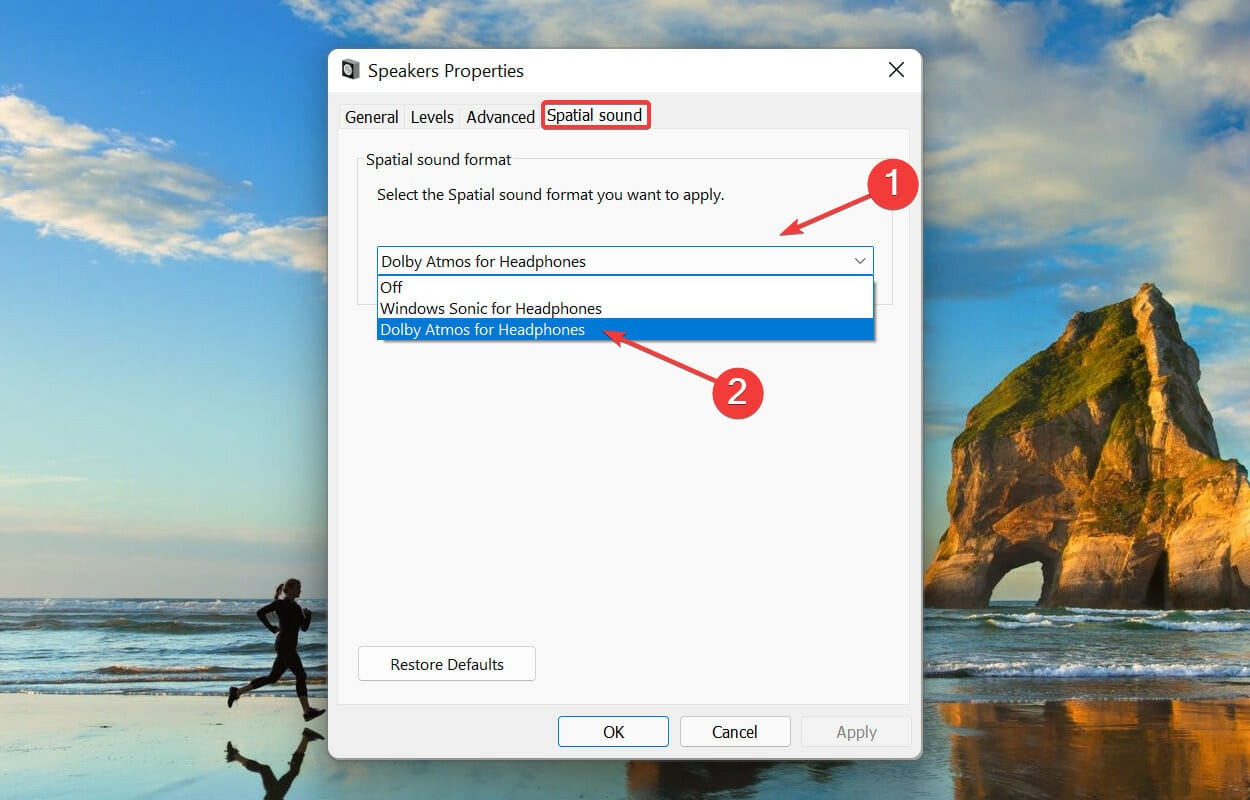
6. Enable exclusive mode
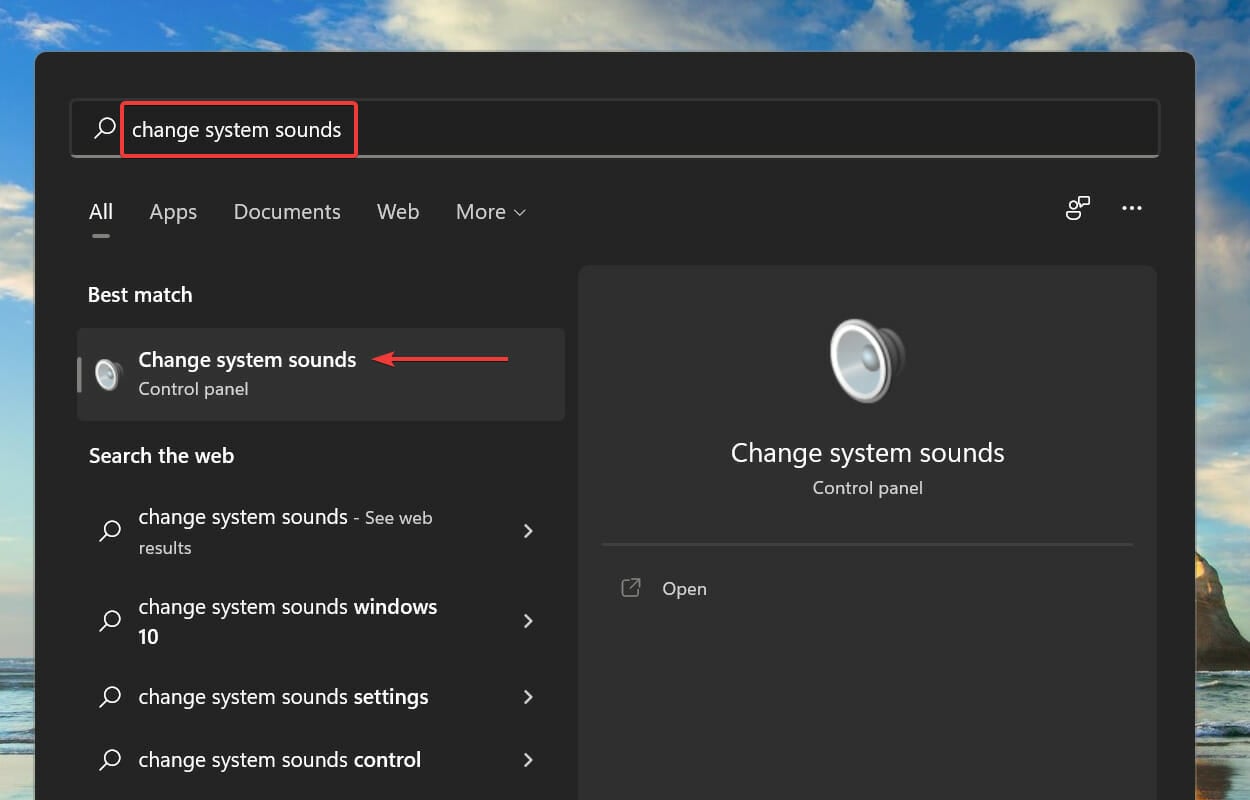
- Press Windows + S to launch the Search menu, enter Change System Sounds in the text field at the top, and then click on the relevant search result that appears.

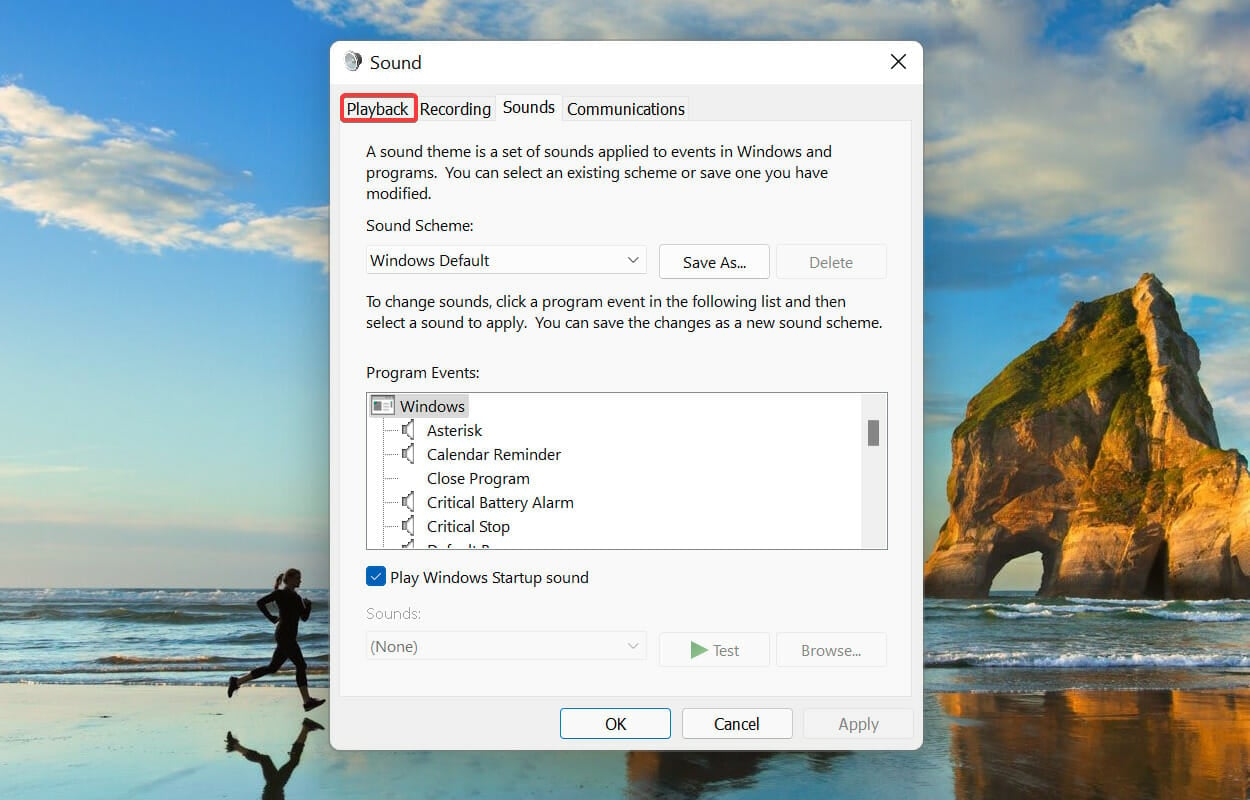
- Next, navigate to the Playback tab from the top.

- Right-click on the default playback device and select Properties from the context menu.

- Go to the Spatial sound tab, click on the Spatial sound format dropdown menu and then select Dolby Atmos for headphones from the list of options.

- Next, navigate to the Advanced tab, tick both the checkboxes under Exclusive Mode, and then click on OK at the bottom to save the changes.


You can also follow this complete guide on how to enable Dolby Atmos on Windows 11 to make sure your spatial sound settings are configured correctly.
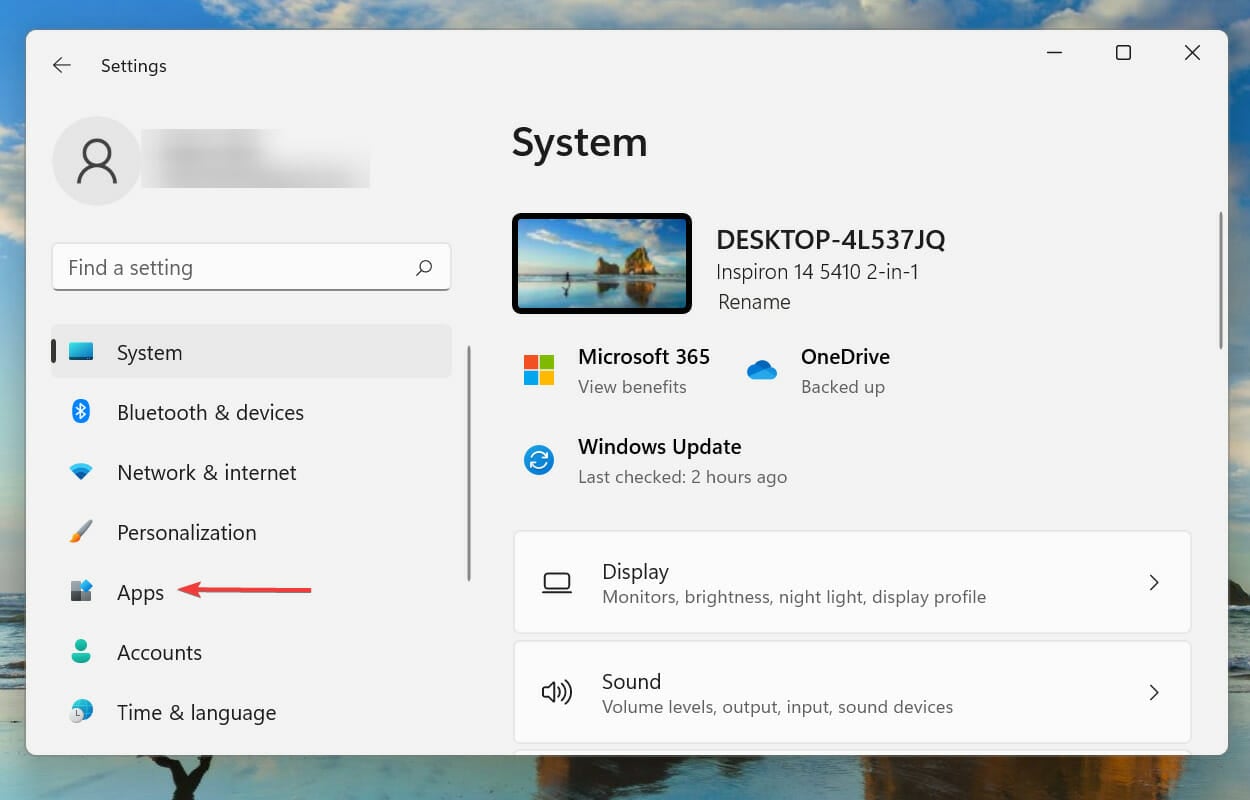
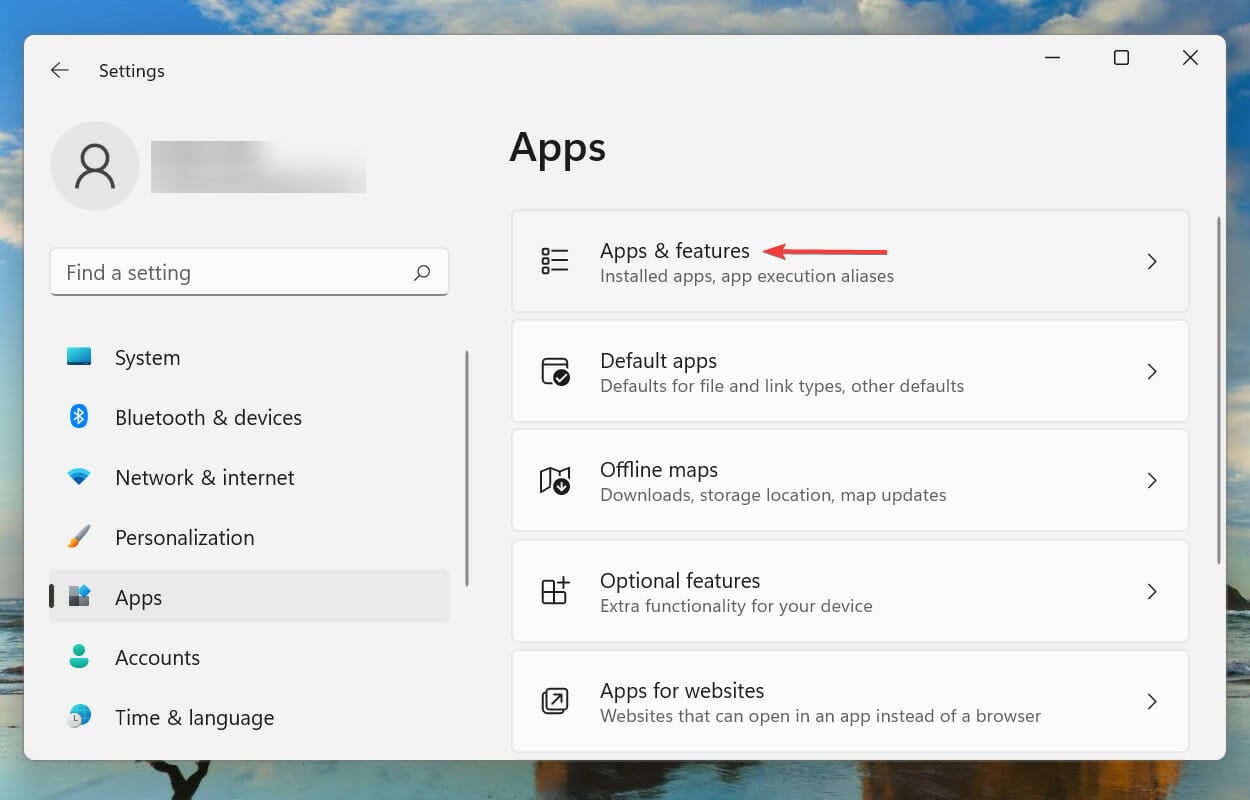
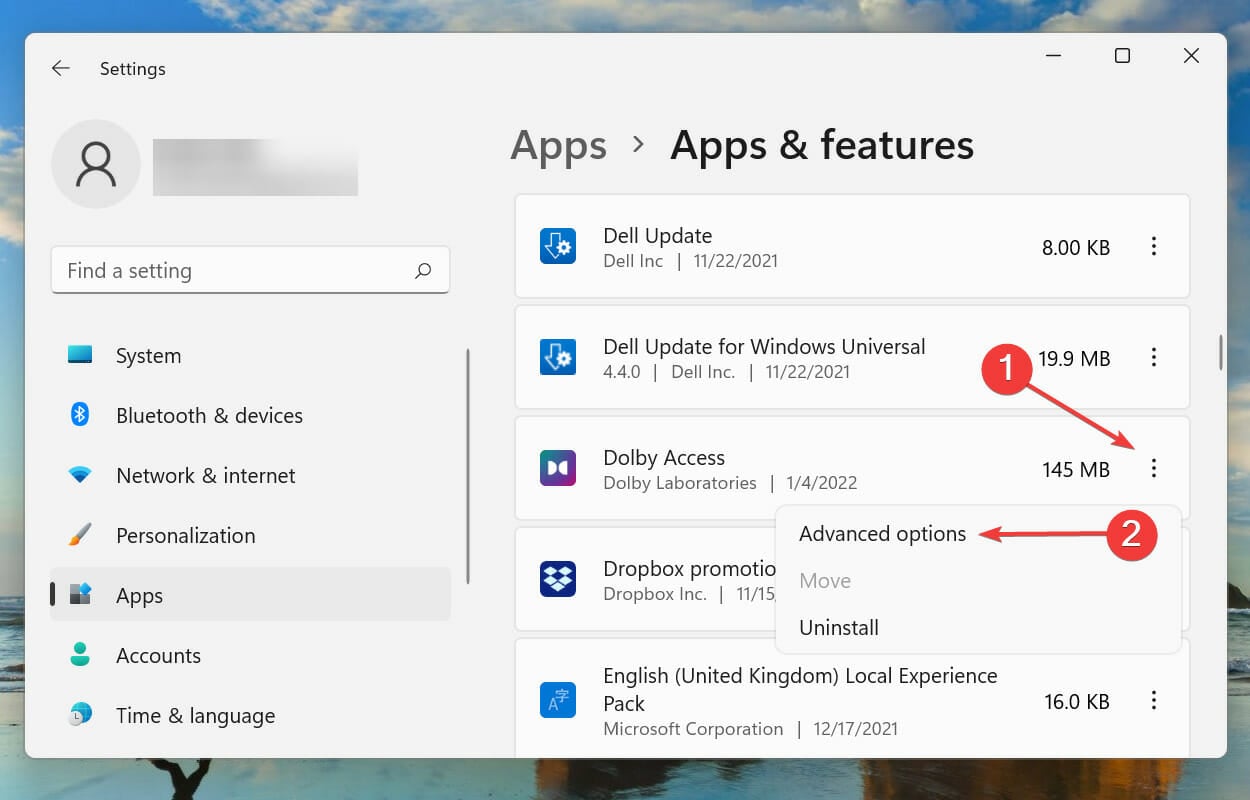
7. Reset the Dolby Access app
- Press Windows + I to launch the Settings app and then select Apps from the list of tabs in the navigation pane on the left.

- Click on Apps & features on the right.

- Locate the Dolby Access app, click on the ellipsis next to it, and then select Advanced options from the menu.

- Click on the Reset button.

- Again, click on Reset in the prompt that pops up.

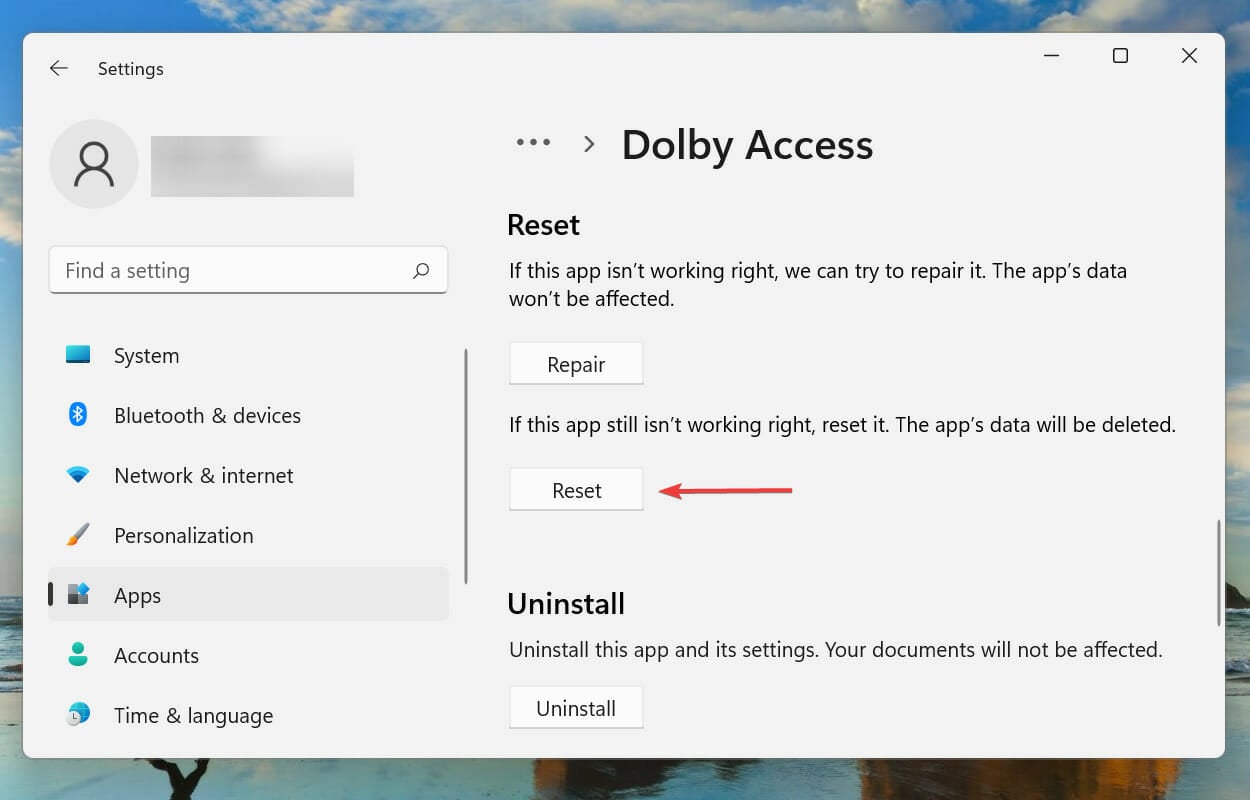
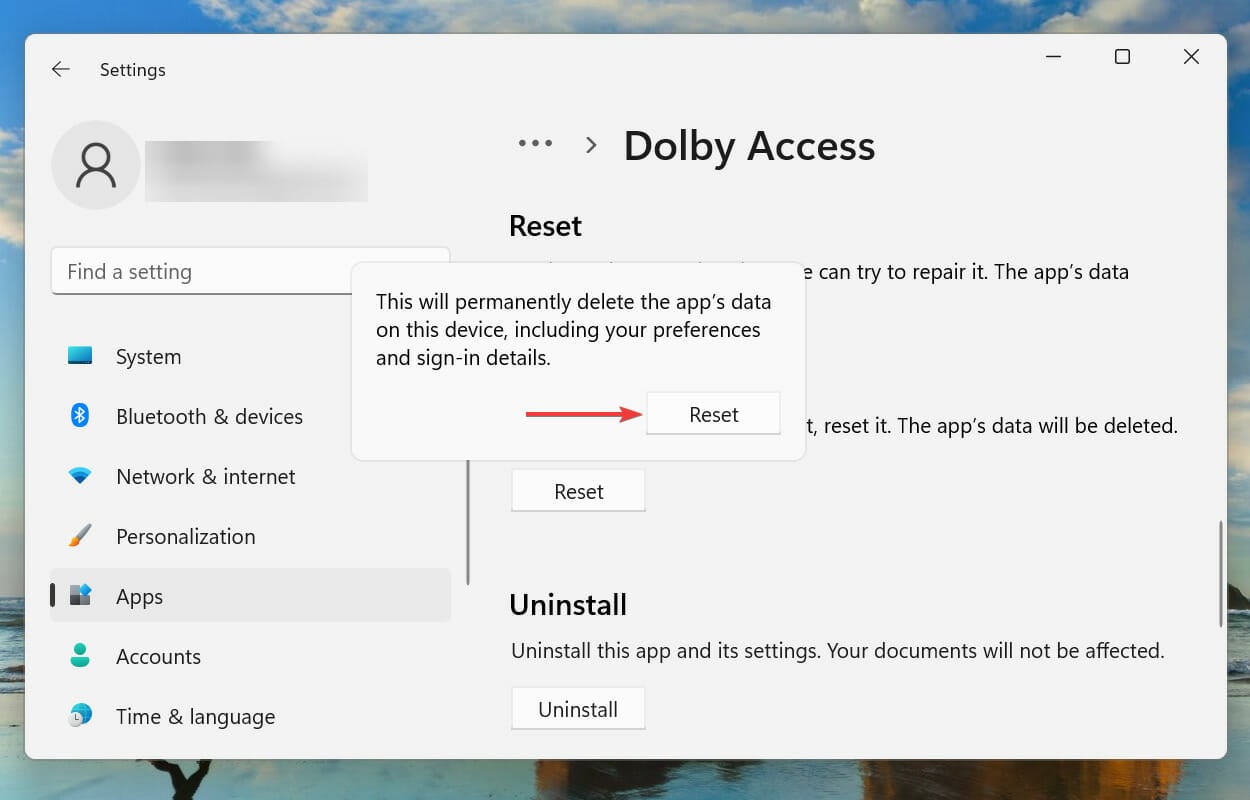
Wait for the reset process to complete and then check if the Dolby Atmos not working issue in Windows 11 is eliminated.
Why is Dolby Atmos not working in Windows 11?
There could be a bunch of reasons behind Dolby Atmos not working on your Windows 11 system, but more often than not, it’s the drivers that are the culprit. It could both be a case of outdated or corrupt drivers, along with issues in the current version.
Apart from that, it could be a problem with the OS, misconfigured settings, or the Dolby Access app itself. Whatever be the case, we have listed the relevant fixes for each to get things back up and running in no time.
If you are able to identify the problem, say a corrupt driver, directly head to the relevant method and execute it. Otherwise, you can follow the steps in the listed sequence for quick and effective troubleshooting.
How can I install Dolby Atmos in Windows 11?
You can easily install the Dolby Atmos app from the Microsoft Store, spend a few minutes setting it up and enjoy the surround system technology as it’s meant to be. Though, make sure your system is compatible with it or you have external hardware that is.
In case you have none, there’s always the option to use the built-in feature for surround sound on your headphones with the Dolby Atmos app. This doesn’t require specialized hardware and will work with any set of headphones or earbuds.
These are all the ways you can eliminate issues that are preventing Dolby Atmos from working in Windows 11 and experience total sound immersion just the ways it is in movie theaters.
For more details, check out our guides on how to install Dolby Atmos on Windows 11 and which browsers support Dolby Atmos.
If case you are facing trouble with Dolby Atmos in Windows 10, check our dedicated guide to fix the issue.
Tell us which fix worked along with your experience of Dolby Atmos in Windows 11, in the comments section below.
Read our disclosure page to find out how can you help Windows Report sustain the editorial team. Read more


Improve this guide


User forum
0 messages