Windows 11 Freezes When Alt-Tabing? 5 Ways to Fix It
Explore the easiest methods to fix the issue
5 min. read
Updated on
Read our disclosure page to find out how can you help Windows Report sustain the editorial team. Read more
Key notes
- The Windows 11 freezes when pressing the Alt-Tab error occurs if you have corrupted system files or incompatible apps.
- To fix it, run SFC & DISM scans, revert to the old Alt+Tab, or uninstall recent Windows Updates.
If your Windows 11 PC freezes when you press Alt + Tab while playing a game, or working on multiple apps, this guide can help! We will explore expert-recommended methods to fix the problem right after discussing the causes.
What causes the Alt Tab freezing on Windows 11?
There could be various reasons for the computer freezing while playing issue; some of the common ones are mentioned here:
- Corrupted system files – If the system files on your PC are damaged or affected by viruses, it could cause all kinds of issues. Try running the SFC & DISM scans to restore the files.
- Incompatible software – The outdated software on your computer could cause the freezing issue. To avoid that, uninstall the incompatible ones.
- New Alt-Tab system – The new Alt-Tab system was introduced with Windows 11 and could be buggy. To fix it, you can use Registry Editor to revert to the old one.
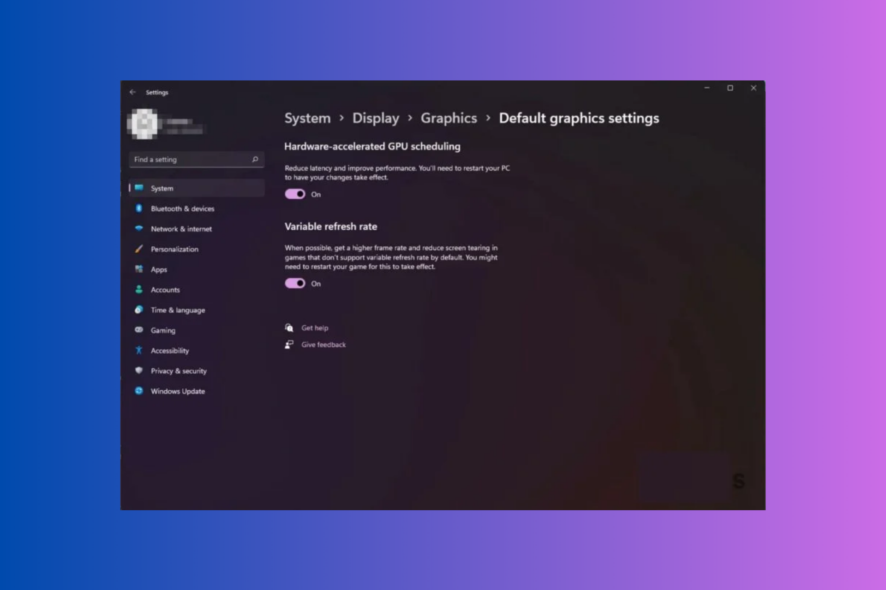
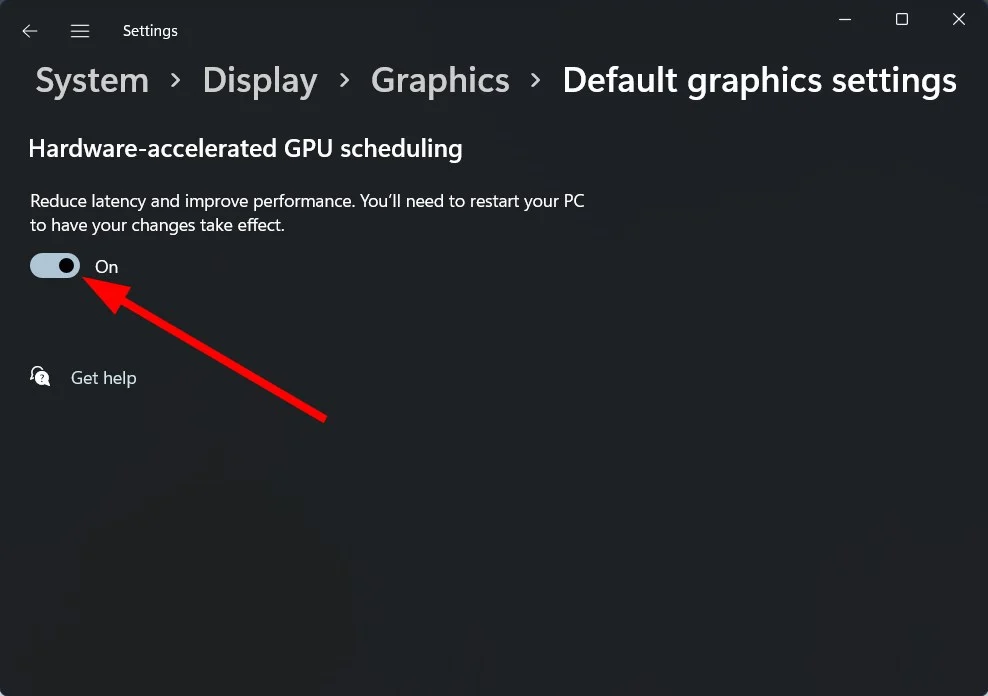
- GPU feature – Sometimes, GPU features like Hardware Accelerated GPU Scheduling can cause the issue. Try turning off the feature to get rid of the problem.
- Virus infection – If your computer is infected with malware, it may interfere with the normal functioning of your device. Try running a deep scan using a reliable antivirus tool.
Now that you know the causes of the issue, let us check out the methods to resolve the problem.
How do I fix the Alt-Tab freezing in Windows 11?
Before engaging in advanced troubleshooting steps, you should consider performing the following checks:
- Restart your computer.
- Ensure you have no pending Windows updates.
- Run a malware scan to remove the viruses.
- Quit Discord or other game streaming services.
- Ensure you have a stable internet connection.
- Check if you are logged in with a user with admin rights.
Once you have done these, move to the detailed steps mentioned below.
1. Disable the Hardware Accelerated GPU Scheduling feature
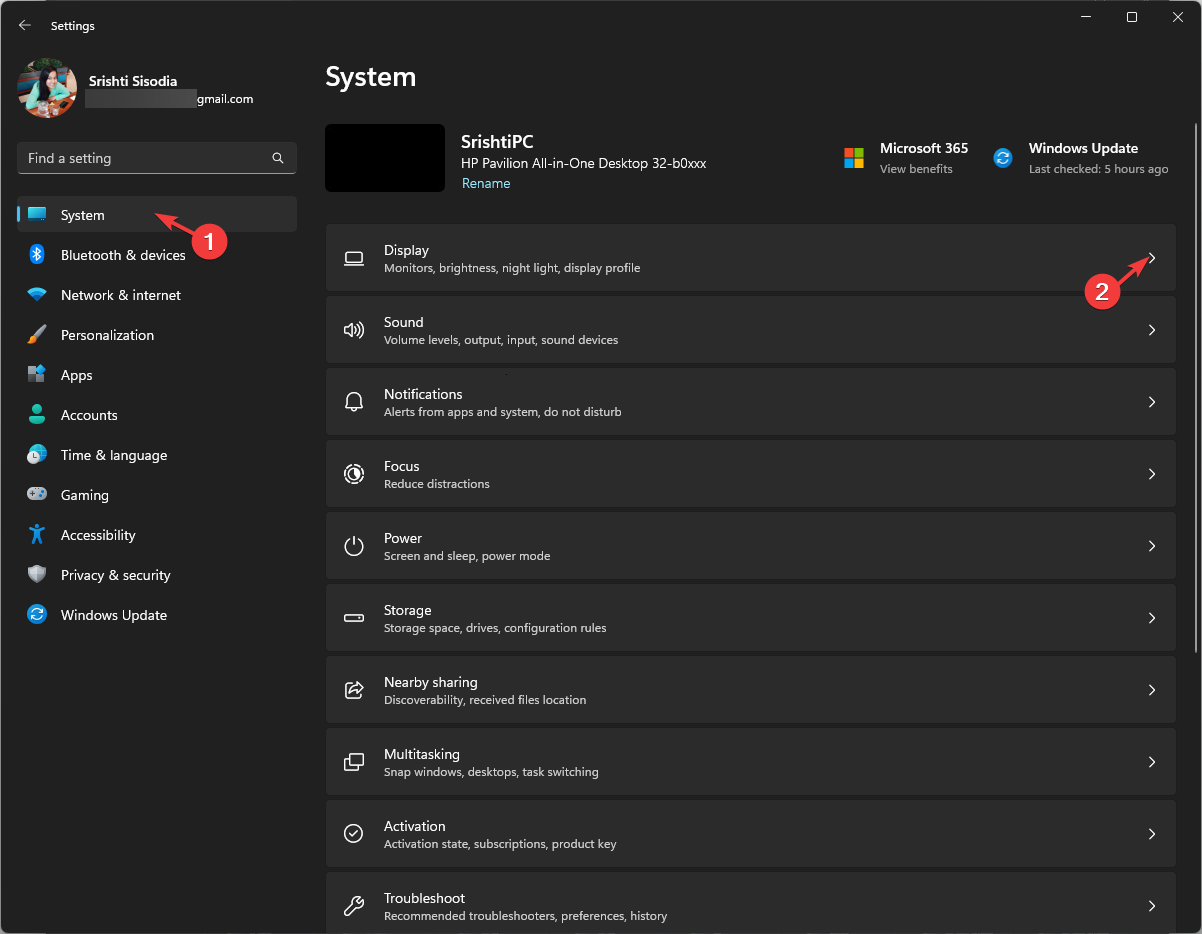
- Press Windows + I to open the Settings app.
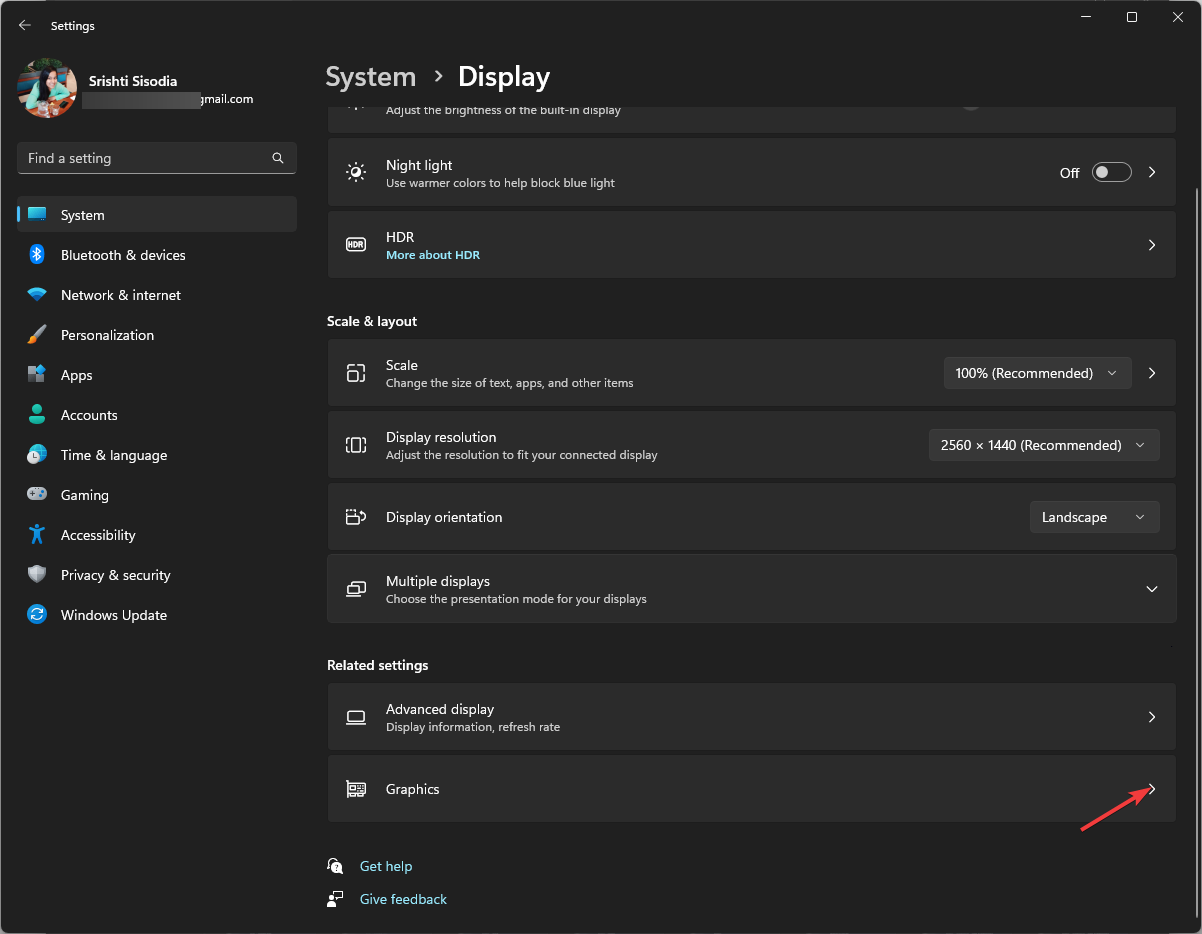
- Go to System, and click Display.
- Scroll down to Related settings and click Graphics.
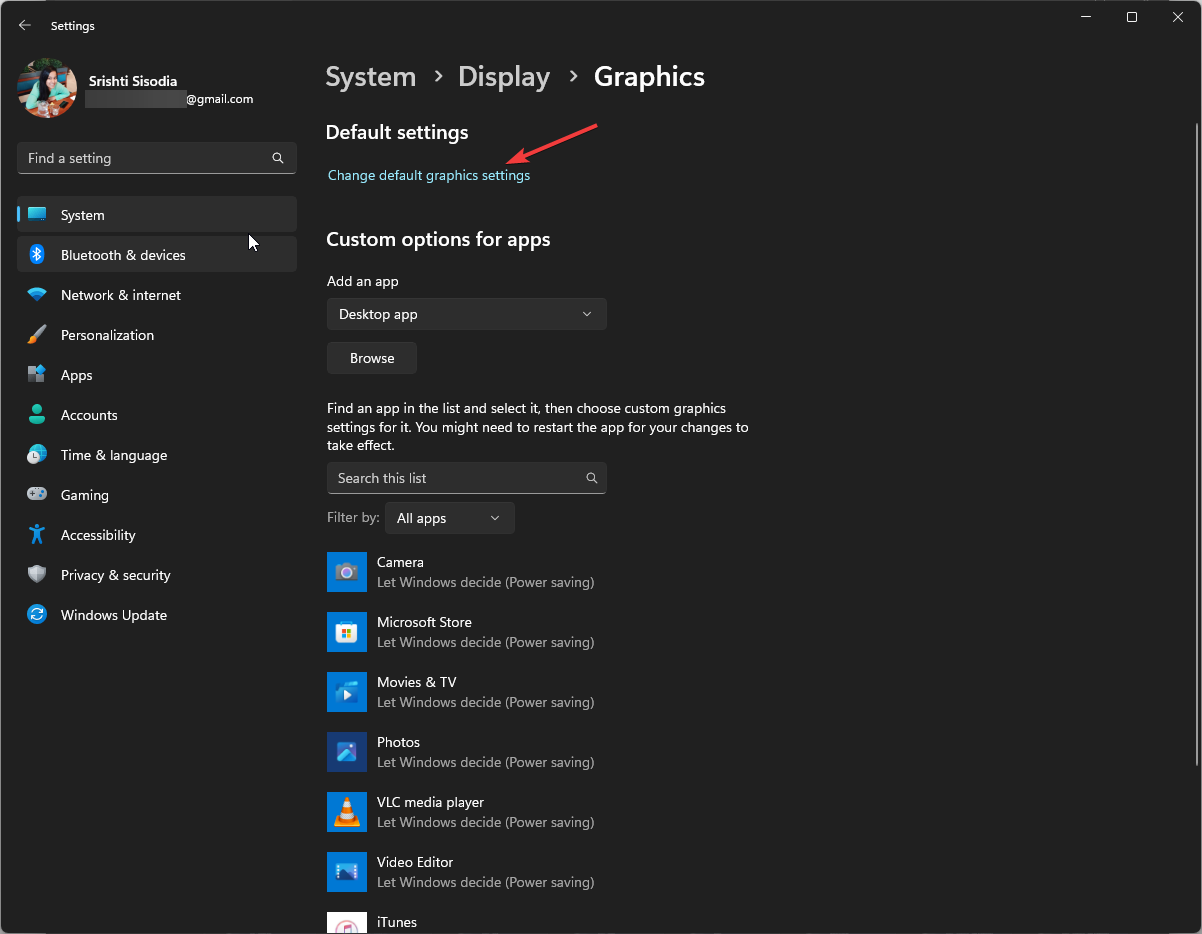
- Under Default settings, click the Change default graphics settings link.
- Next, toggle the switch to turn off Hardware Accelerated GPU Scheduling.
- Restart your computer to let the changes take effect.
2. Run SFC & DISM scans
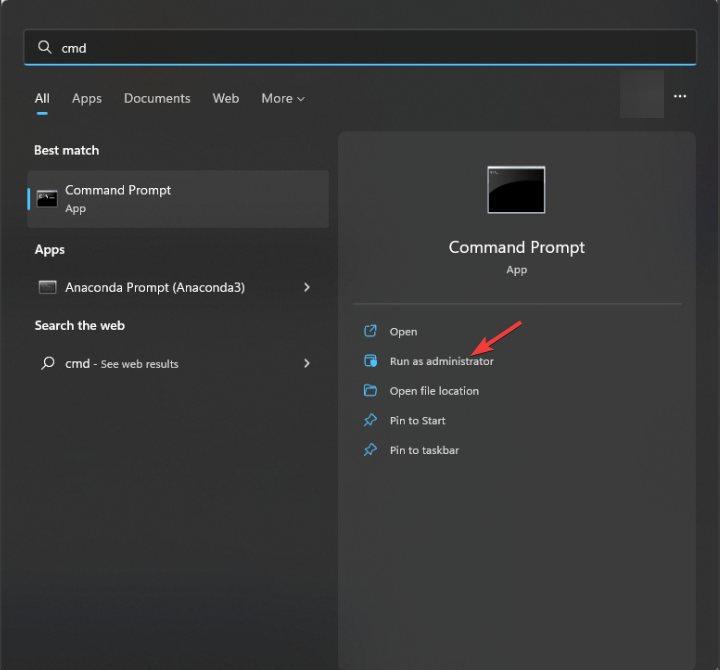
- Press the Windows key, type cmd, and select Run as administrator to open Command Prompt with admin privileges.
- Click Yes on the UAC prompt.
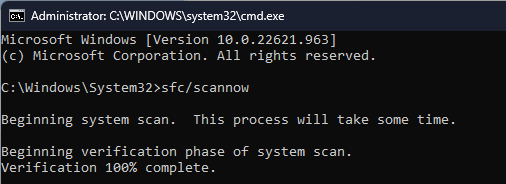
- Type the following command to scan & replace the corrupted system files and hit Enter:
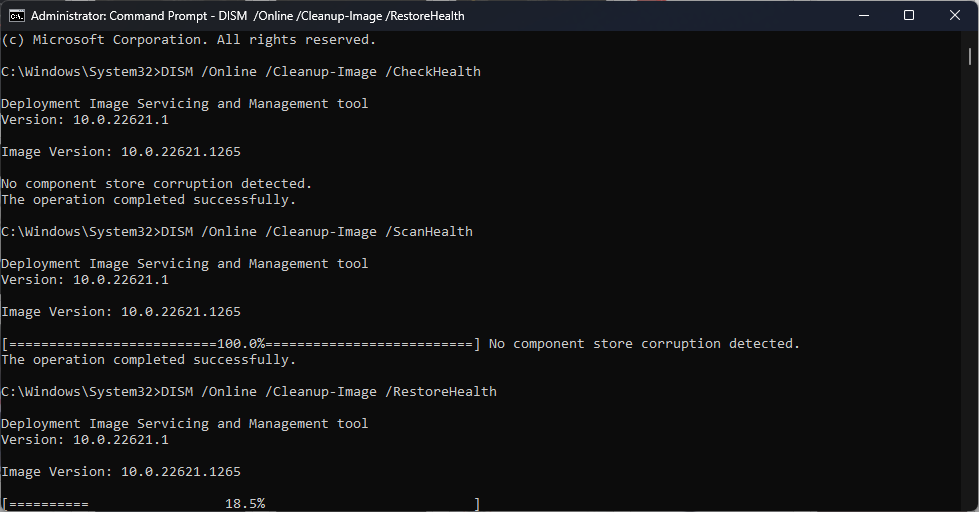
sfc/scannow - Copy & paste the following commands one by one to restore Windows OS image files and press Enter after every command:
- Reboot your PC to save the changes.
As a more effective alternative, you can try an automatic repair tool to scan your PC for corrupt or missing files and replace them with fully functional elements.
3. Revert to the old Alt-Tab system
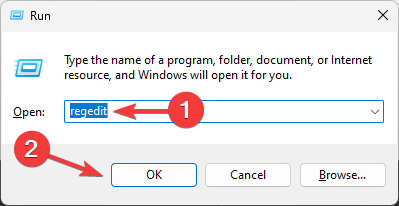
- Press Windows + R to open the Run dialog box.
- Type regedit and click OK to open Registry Editor.
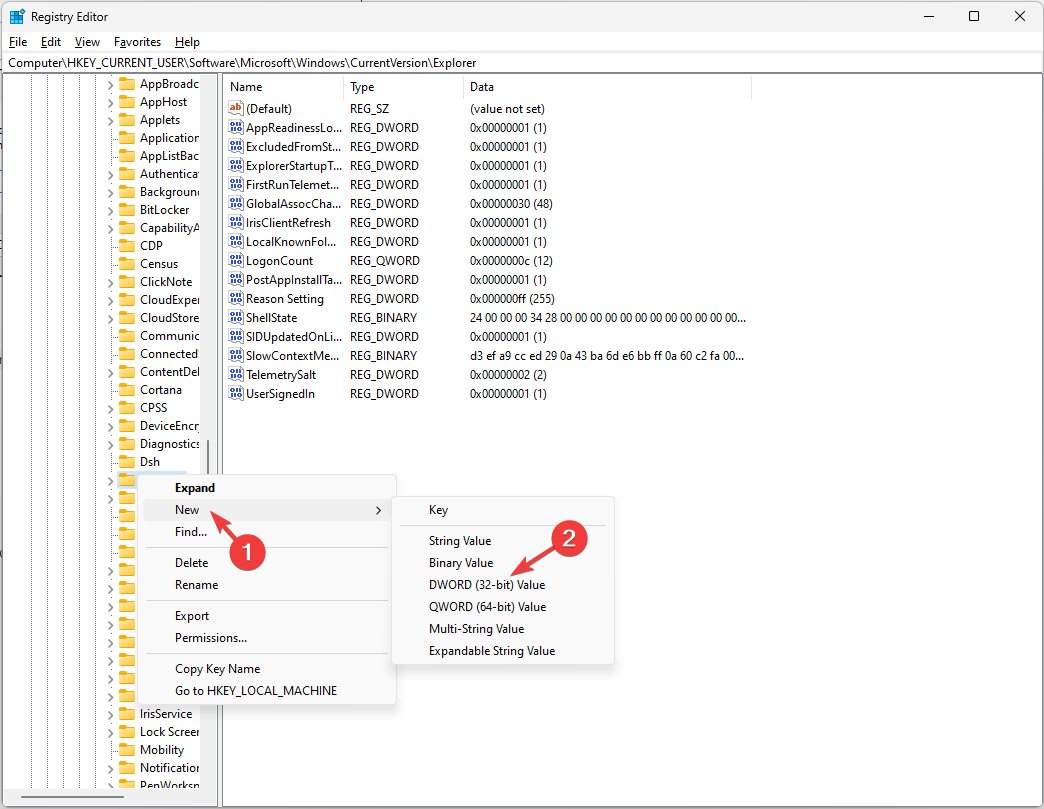
- Navigate to this path:
Computer\HKEY_CURRENT_USER\Software\Microsoft\Windows\CurrentVersion\Explorer - Right-click Explorer, select New, then DWORD (32-bit) Value.
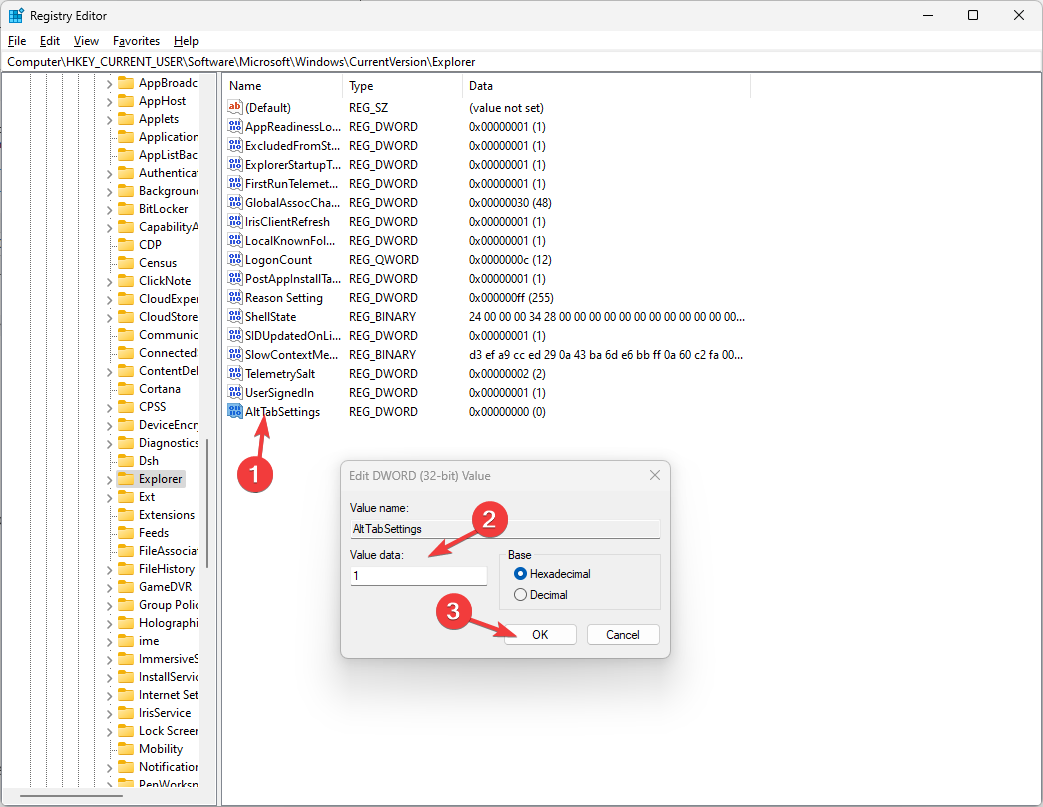
- Once created, name it AltTabSettings.
- To modify the Value data, double-click AltTabSettings, locate the Value data, and change the value from 0 to 1.
- Click OK and restart your computer.
- Once the computer is back online, launch the game and check if the issue persists.
4. Uninstall the recent Windows update
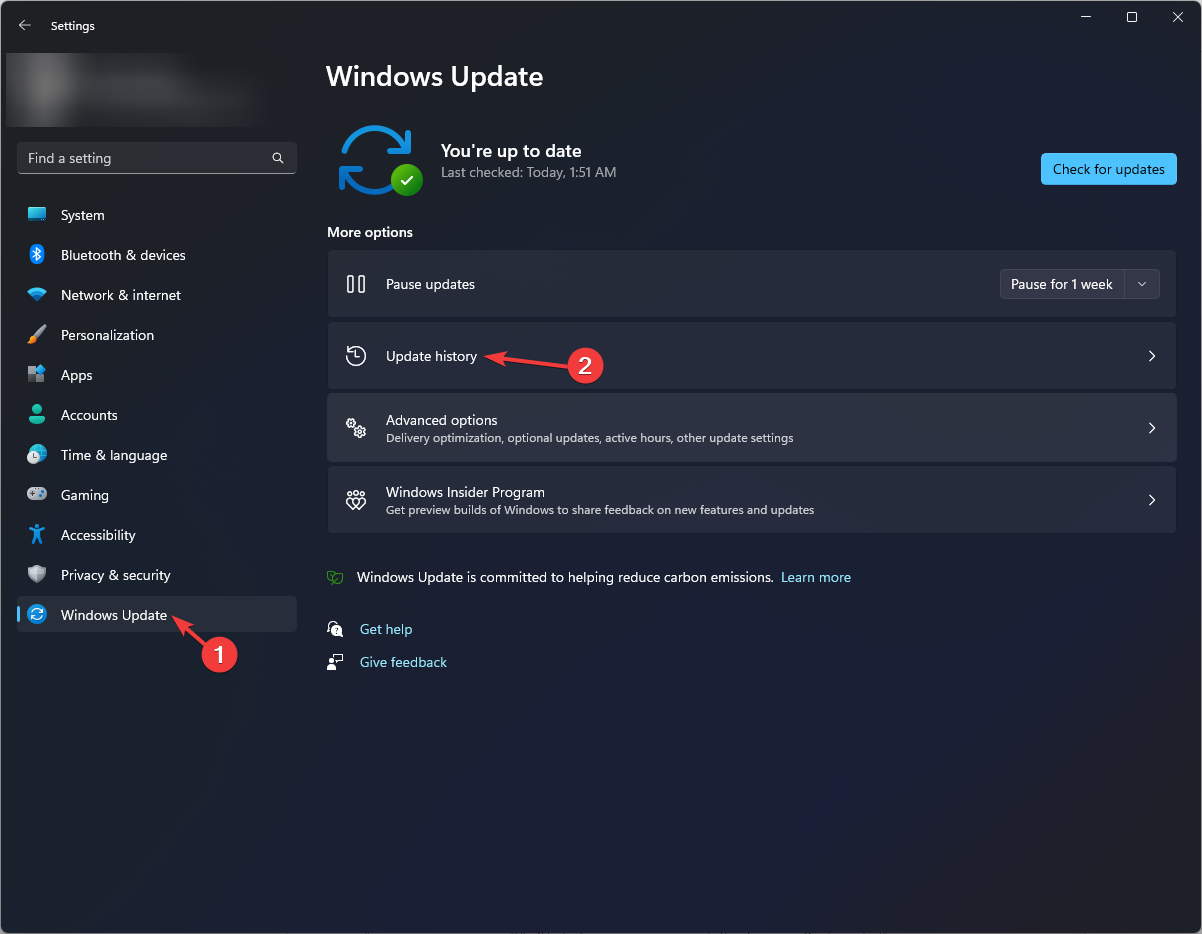
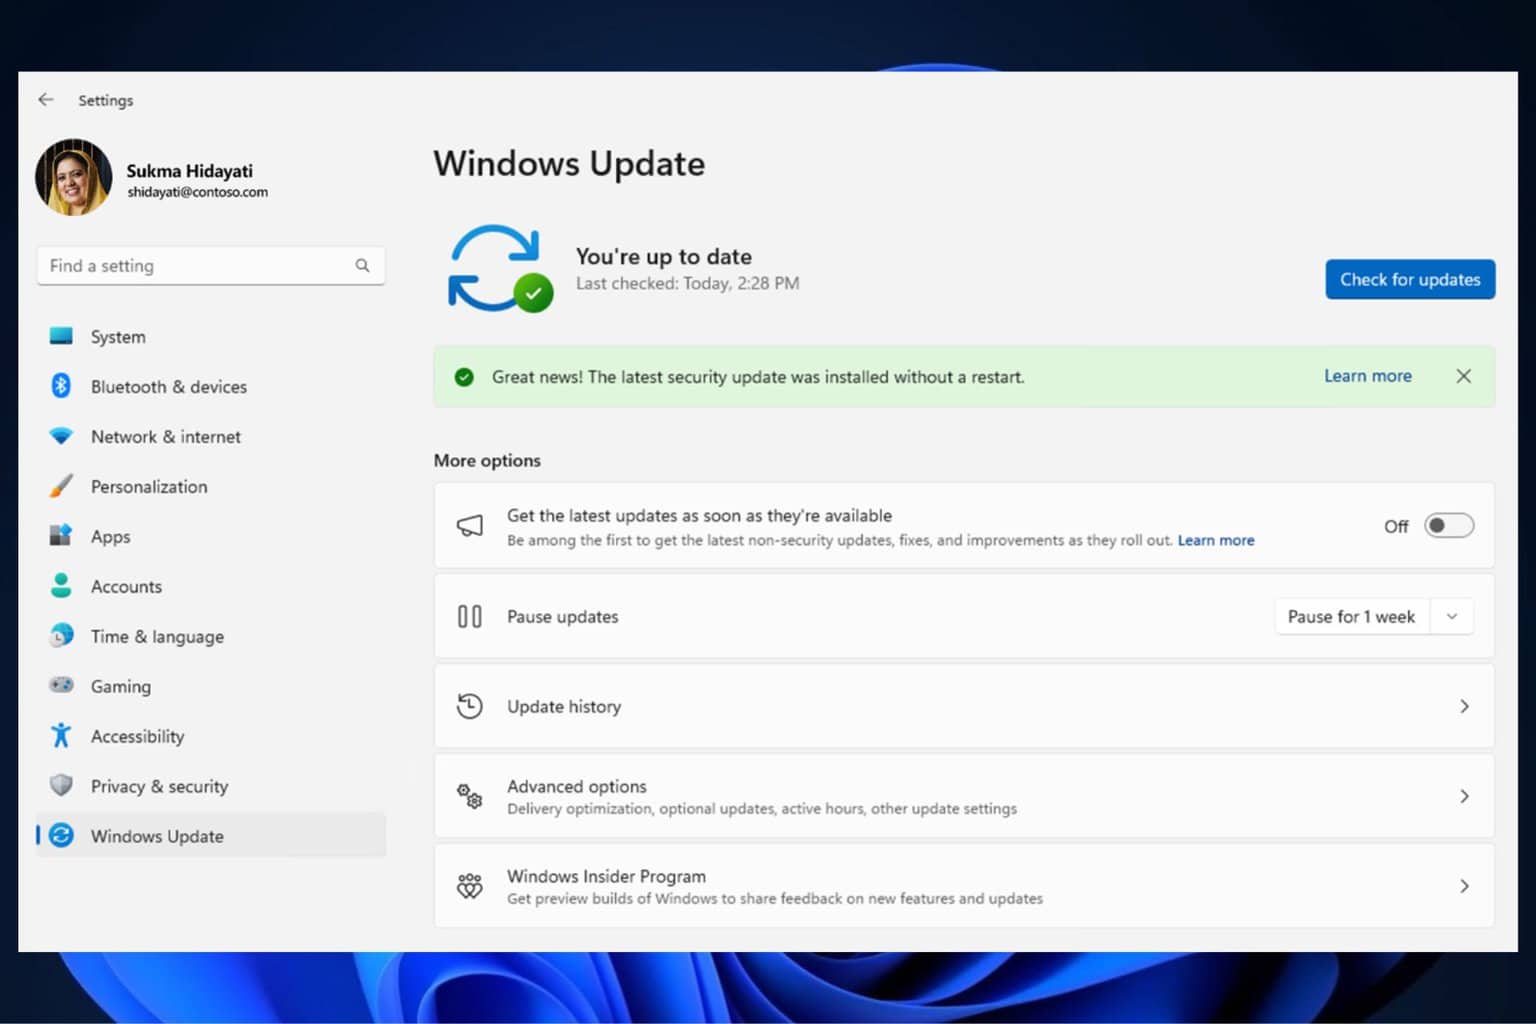
- Press Windows + I to open the Settings app.
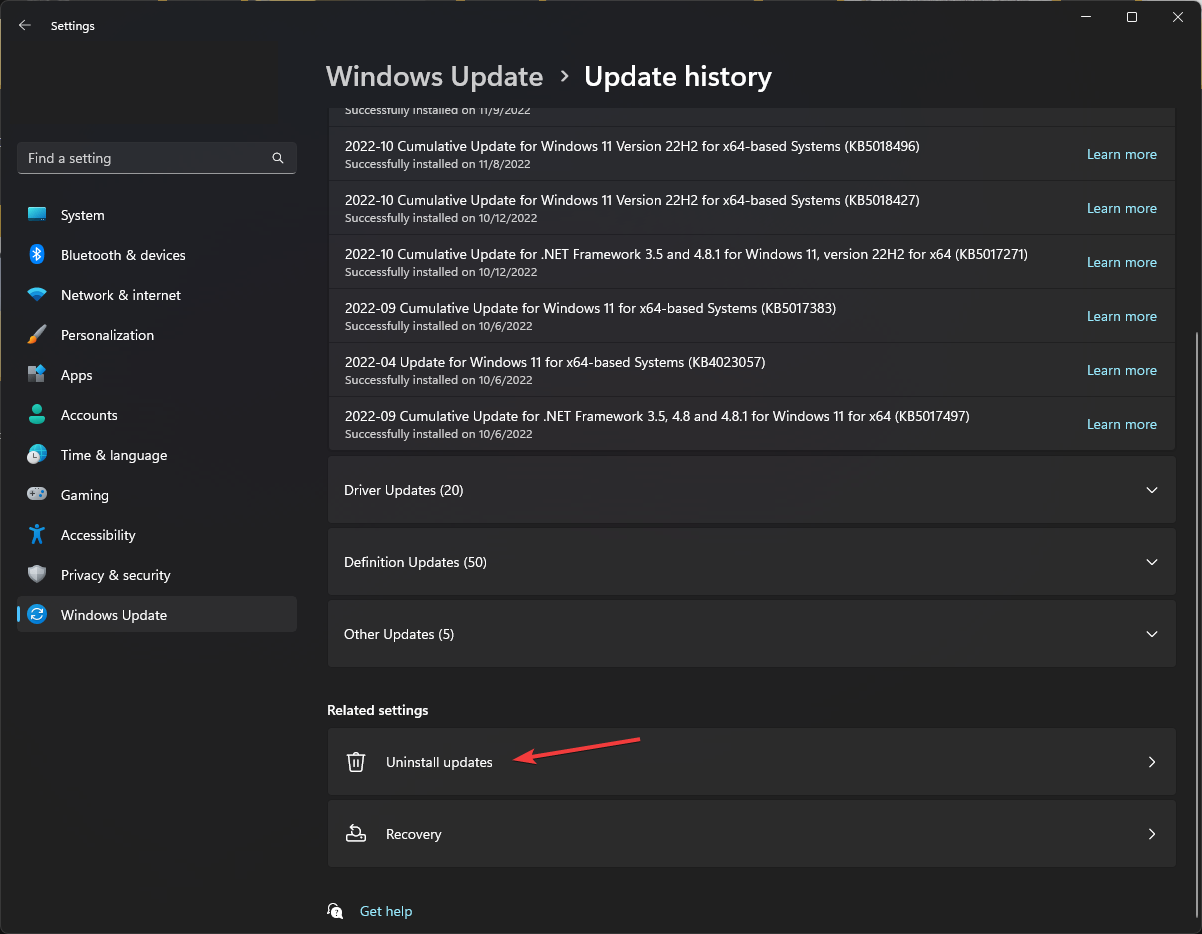
- Go to Windows Update, then click Update history.
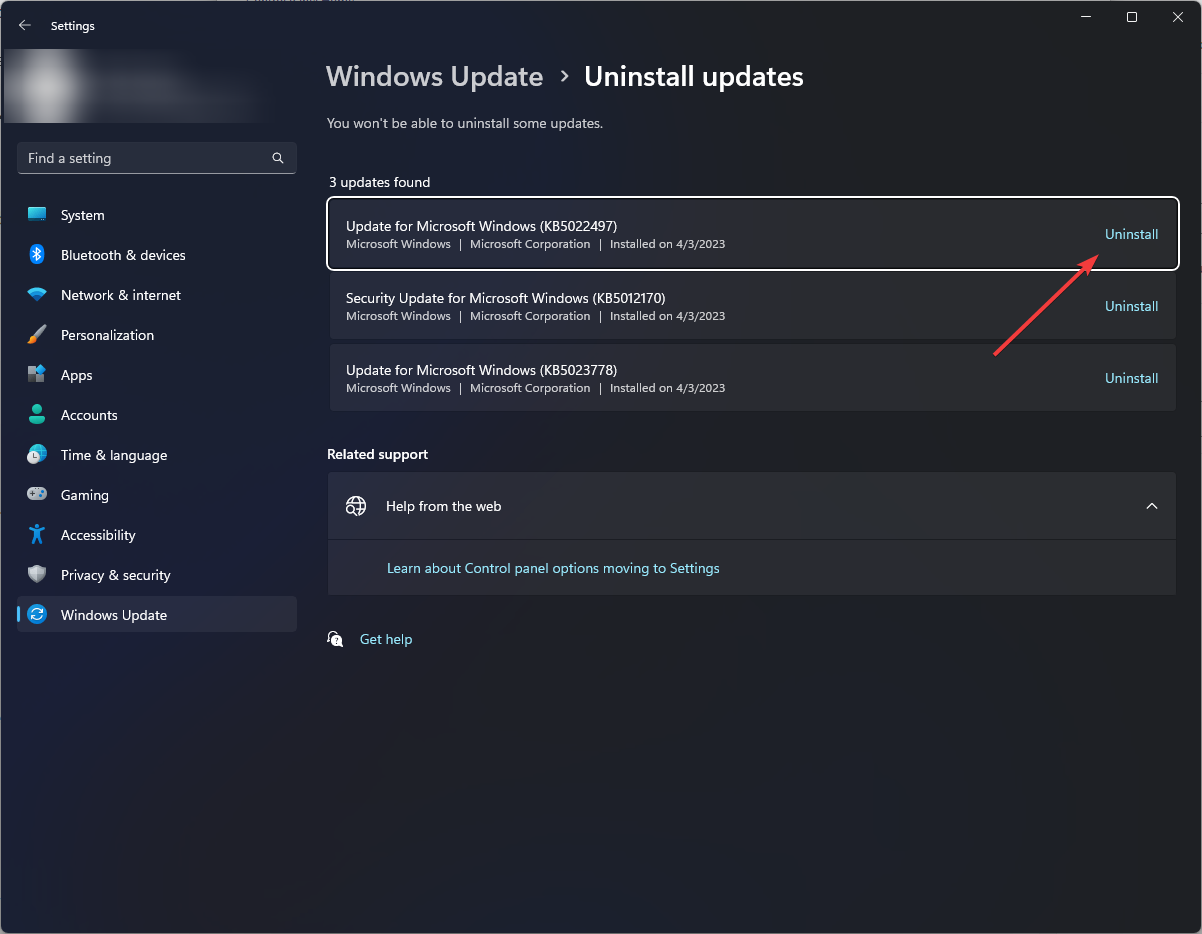
- Under Related settings, click Uninstall updates.
- Locate the recent update installed, and click Uninstall.
- Follow the onscreen instructions to complete the process.
5. Perform a repair install
 NOTE
NOTE
5.1 Download the ISO file
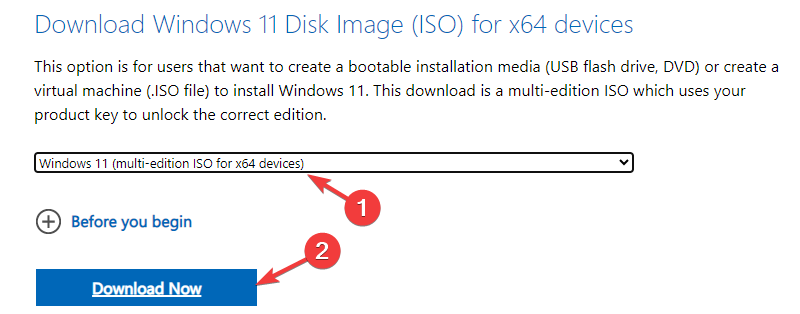
- Go to Windows 11 website, locate Windows 11 Disk Image (ISO), select the edition from the drop-down menu, and click Download Now.
- Next, choose the language and click Confirm.
- Click Download again to initiate the process.
5.2 Install the repair upgrade
- Press Windows + E to open the Windows File Explorer.
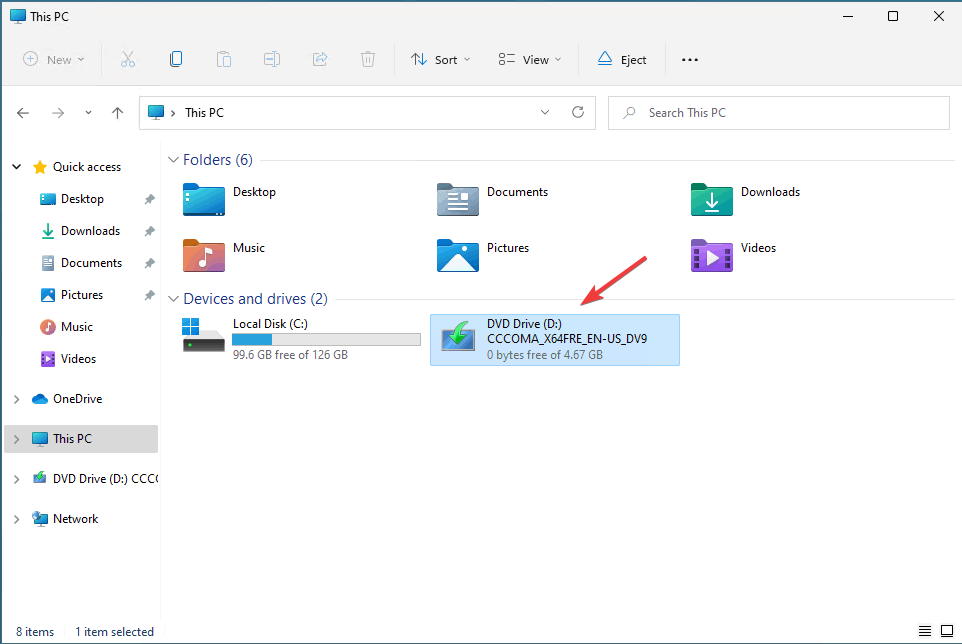
- Locate the downloaded file and click Mount. You will see a Virtual DVD drive as soon as it is complete.
- Go to the DVD drive, double-click the file to start the process.
- If you see a security warning, click Open.
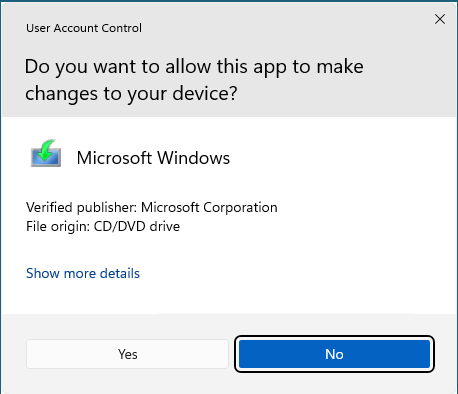
- On the following prompt, click Yes.
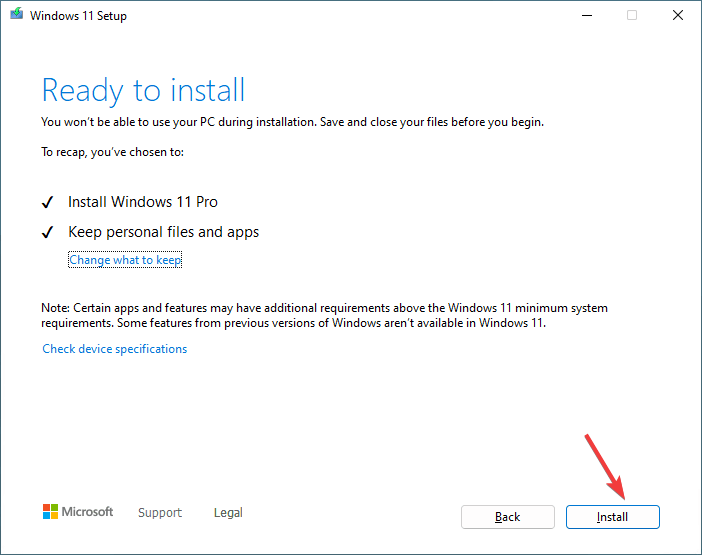
- You will get a series of instructions on the Windows 11 Setup window; follow all of them until you reach the Ready to Install page.
- Once there, click Install.
Now Windows will copy the files and reboot your computer, and once it is up, the repair upgrade will start. The process may take around half an hour, and your computer may restart multiple times, so please be patient. Once done, you will get the sign-in screen, log in and use your computer as you like.
So, these are the methods to fix the Windows 11 freeze when you press Alt–Tab and resume playing your favorite games.
If you are facing a similar issue, like Windows 11 freezing randomly, we recommend you check out this guide to find quick solutions.
Please feel free to give us any information, tips, and your experience with the subject in the comments section below.





User forum
0 messages