Windows 11 Keeps Chiming? Stop it in 8 Steps
Unwanted chimes equals distractions so how about turning them off?
Key notes
- Most of the time, your PC will notify you with sound and a dialog box if any of your programs are having issues.
- However, when it’s incessant chiming, this is an anomaly that needs to be looked into.
- We discovered easy ways to stop this annoying behavior and keep you focused.
- Read on to find out how to restore normalcy and order on your PC.
Staying productive can be hard, especially when you keep hearing chiming sounds on your Windows 11. You might be working on something important, but you will have to keep stopping to check if the notification refers to something important or not.
The worst-case scenario is when they keep coming at the most inopportune times and you don’t understand where they’re coming from. If this sounds familiar, this post is for you.
Why does Windows 11 keep making constant notification sounds?
- Faulty drivers – This can happen if you download drivers from unofficial sites.
- Problematic update – If the problem started right after updating your OS, it’s possible the Windows update was full of bugs.
- Faulty hardware – If your speakers beep randomly, they’re probably damaged.
- Virus infection – A virus that found its way to your PC can have such effects because it changes how it functions.
- Antivirus software – If your antivirus software is continuously running, it may keep making notification sounds when done.
How do I stop Windows 11 from constantly chiming?
First off, start with the following preliminary steps:
- Disconnect all peripherals and only restore your keyboard and mouse.
- Check for any active alarms and disable them.
- Close any background apps and processes.
- Uninstall any suspicious applications.
- Run Windows update and restart your PC.
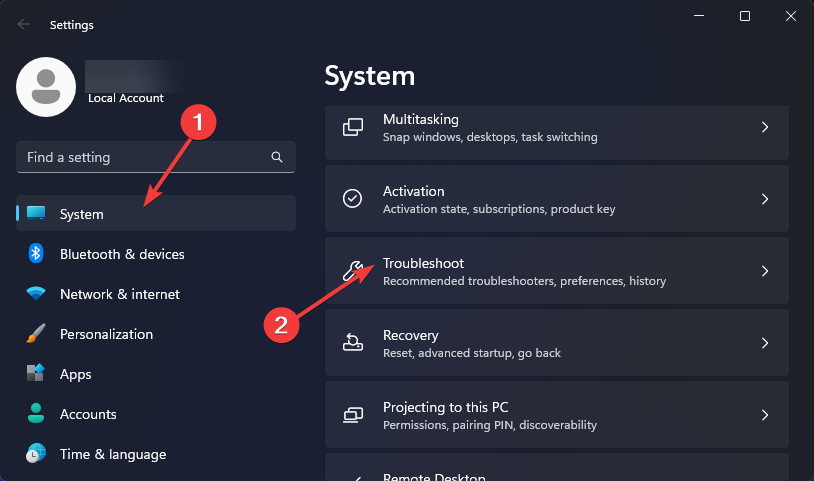
1. Run the audio troubleshooter
- Hit the Windows key and click on Settings.

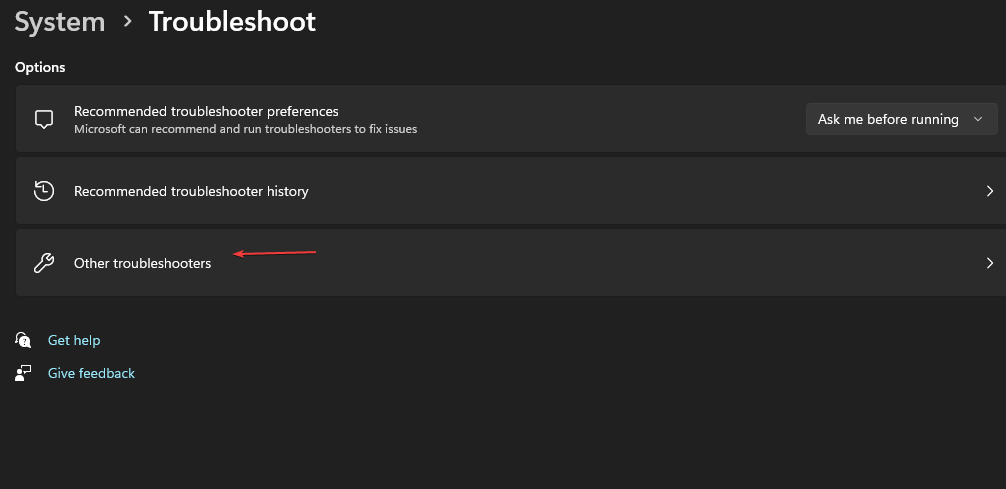
- Click on System then select Troubleshoot.
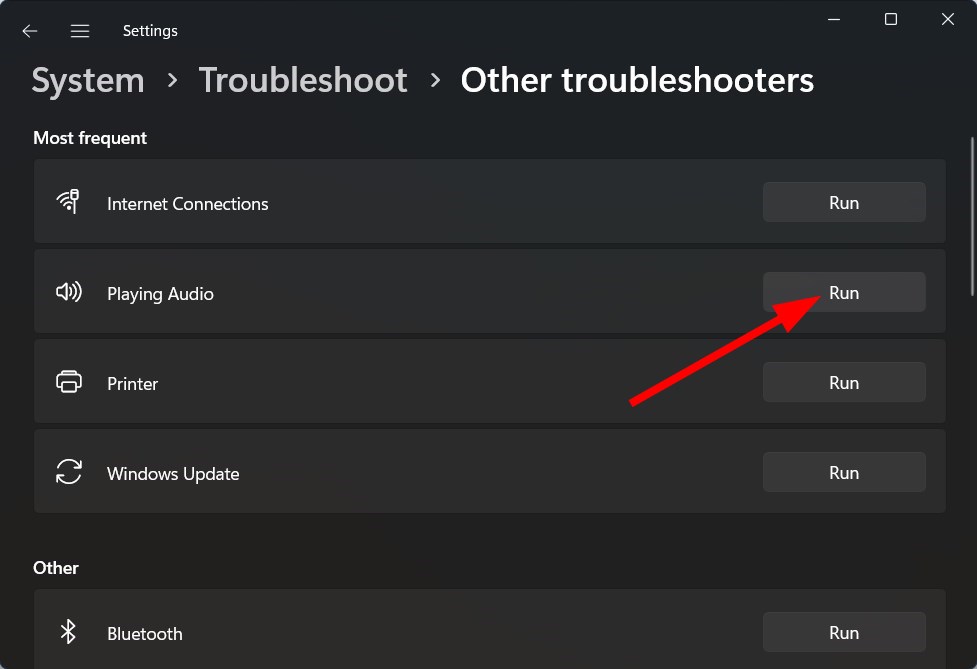
- Select Other troubleshooters.
- Hit the Run button next to Playing Audio.
2. Scan for viruses
- Click on the Start Menu icon, search Windows Security, and click Open.

- Select Virus & threat protection.
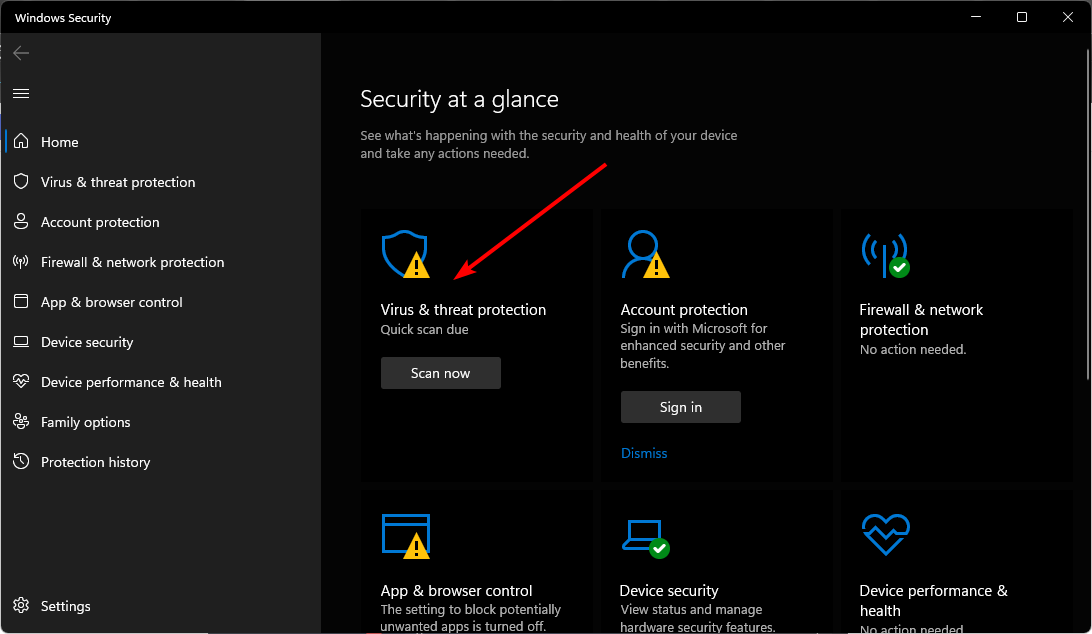
- Next, press Quick scan under Current threats.
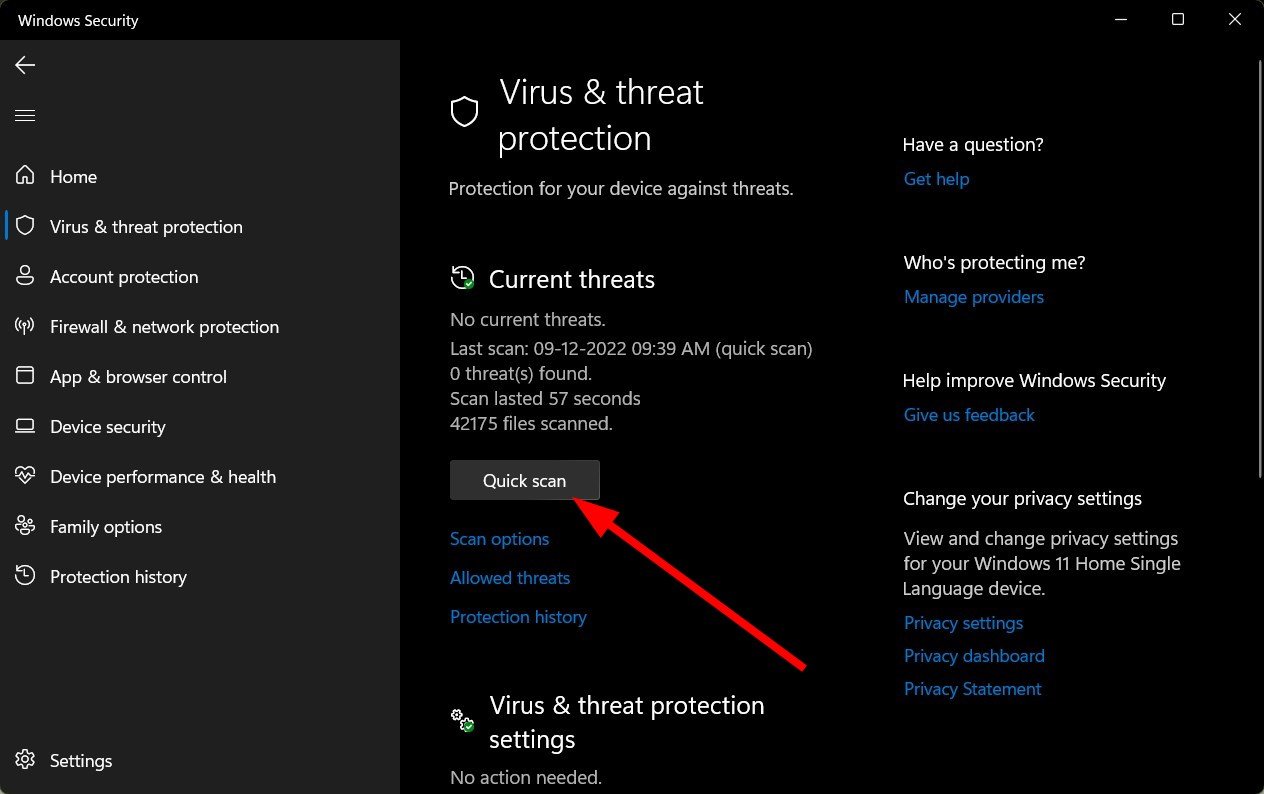
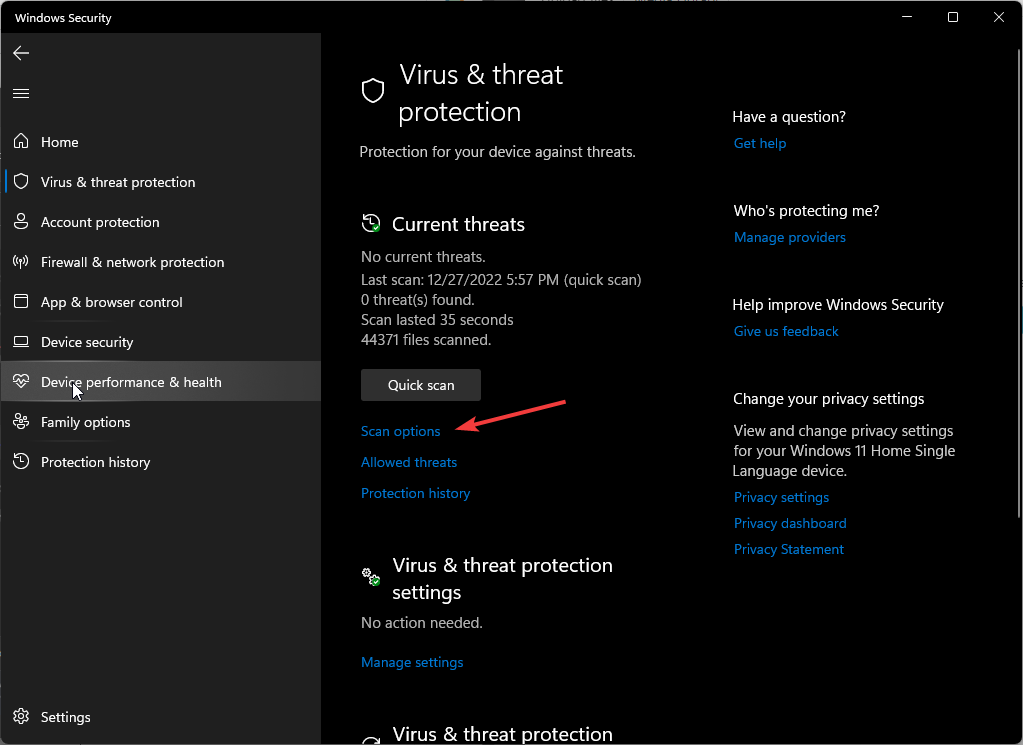
- If you don’t find any threats, proceed to perform a full scan by clicking on Scan options just below Quick scan.
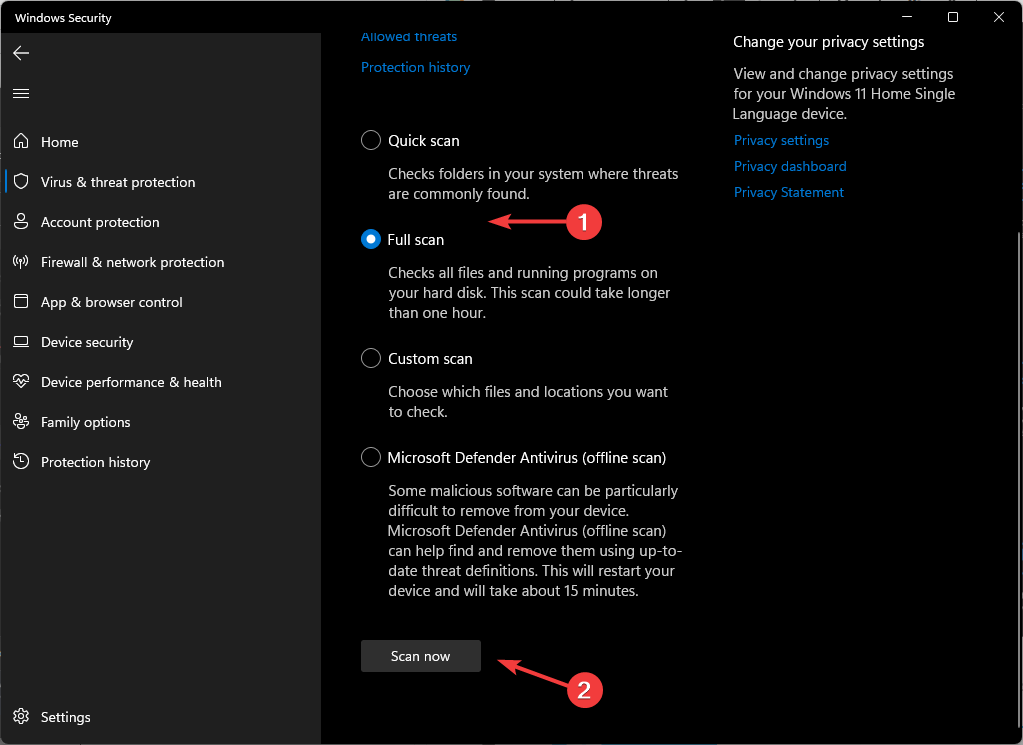
- Click on Full scan, then Scan now to perform a deep scan of your PC.
- Wait for the process to finish and restart your system.
3. Run a DISM and SFC scan
- Hit the Start Menu icon, type cmd in the search bar, and click Run as administrator.

- Type the following commands and press Enter after each one:
DISM.exe /Online /Cleanup-Image /Restorehealthsfc /scannow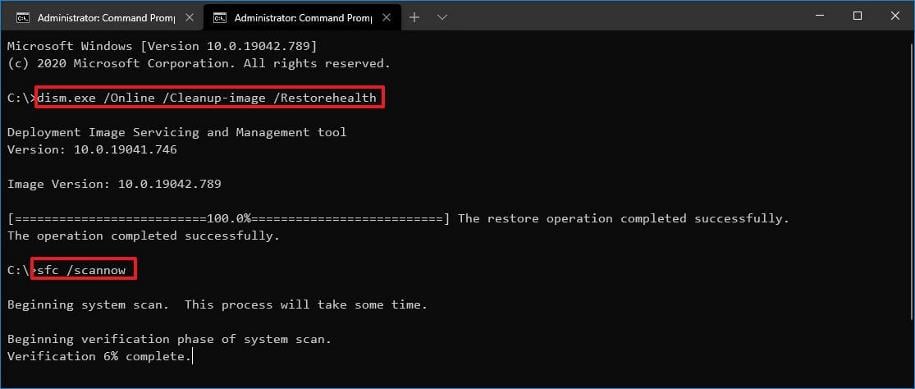
You can also opt for specialized software if DISM and SFC scans can’t detect all malfunctioning system files that are causing this error.
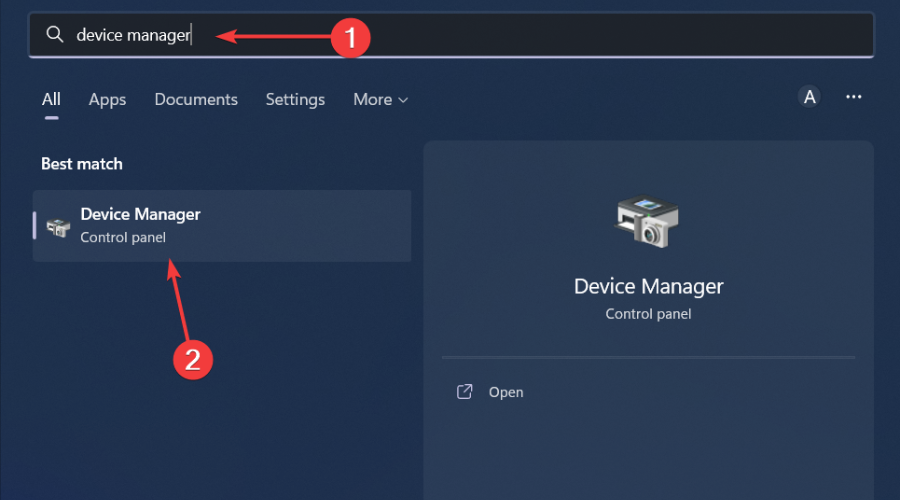
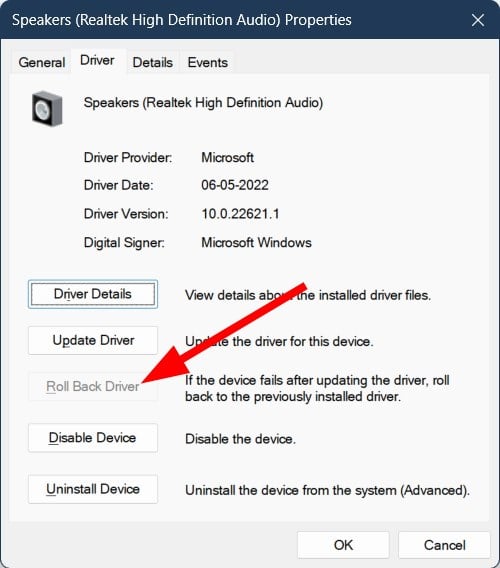
4. Rollback previous audio driver
- Hit the Windows key, type Device Manager, and click Open.
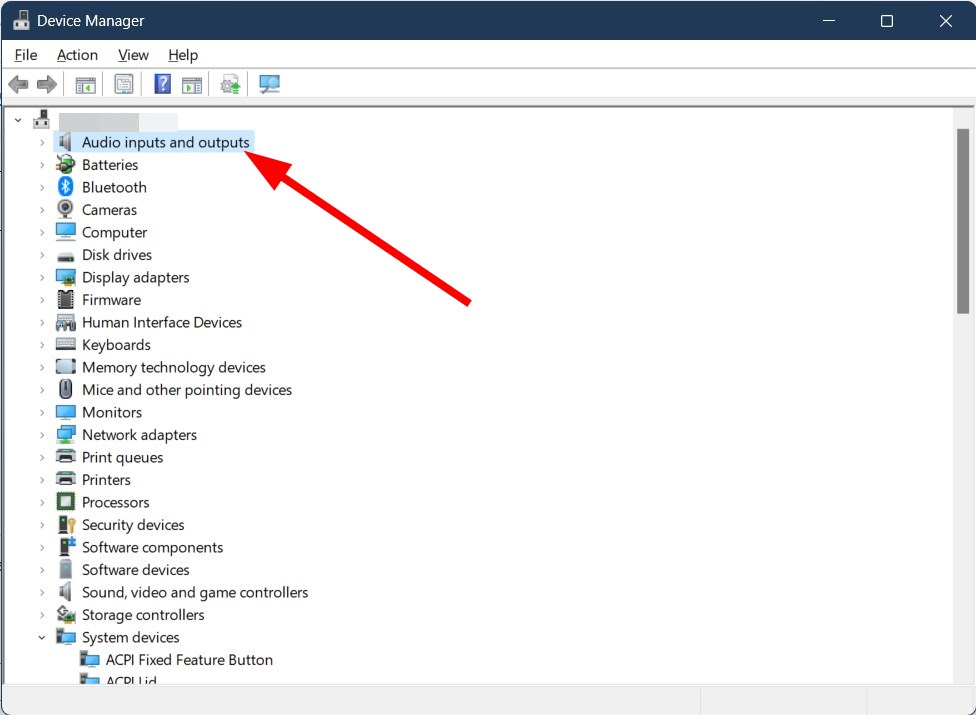
- Expand the Audio inputs and outputs section.
- Right-click on your audio driver and select Properties.
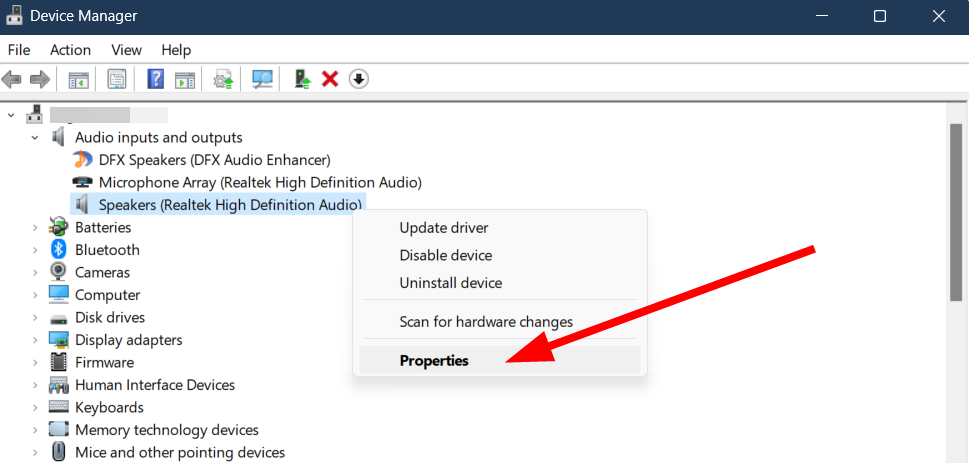
- Hit the Roll Back Driver button.
5. Uninstall recent Windows update
- Hit the Windows key and select Settings.
- Click on Windows Update and select Update history on the right pane.
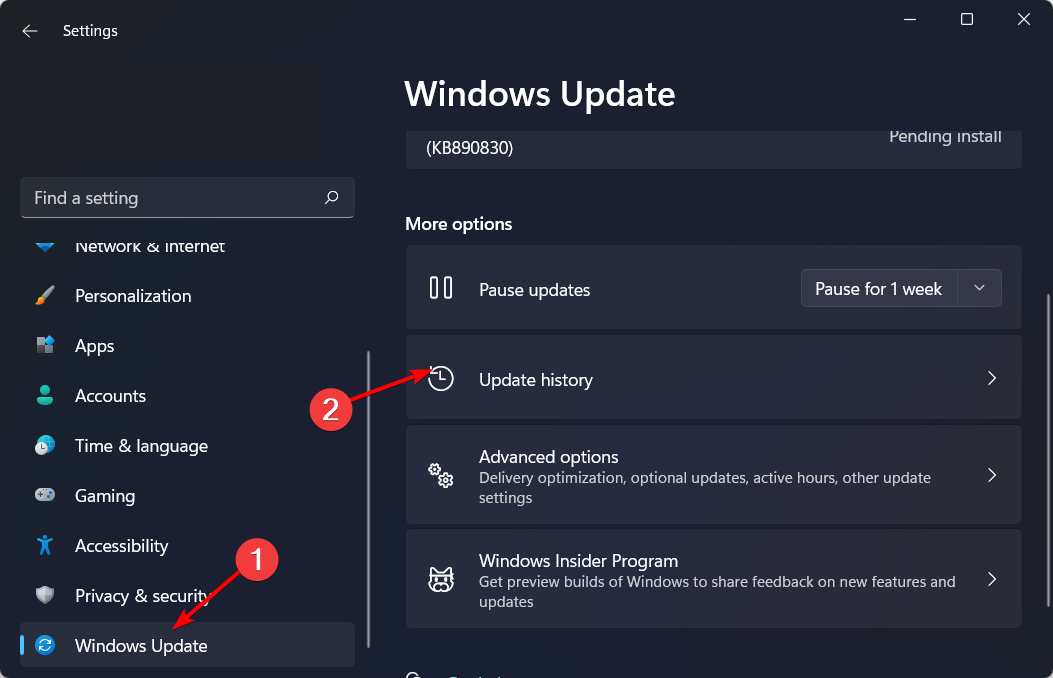
- Scroll down, and under Related settings, click on Uninstall updates.
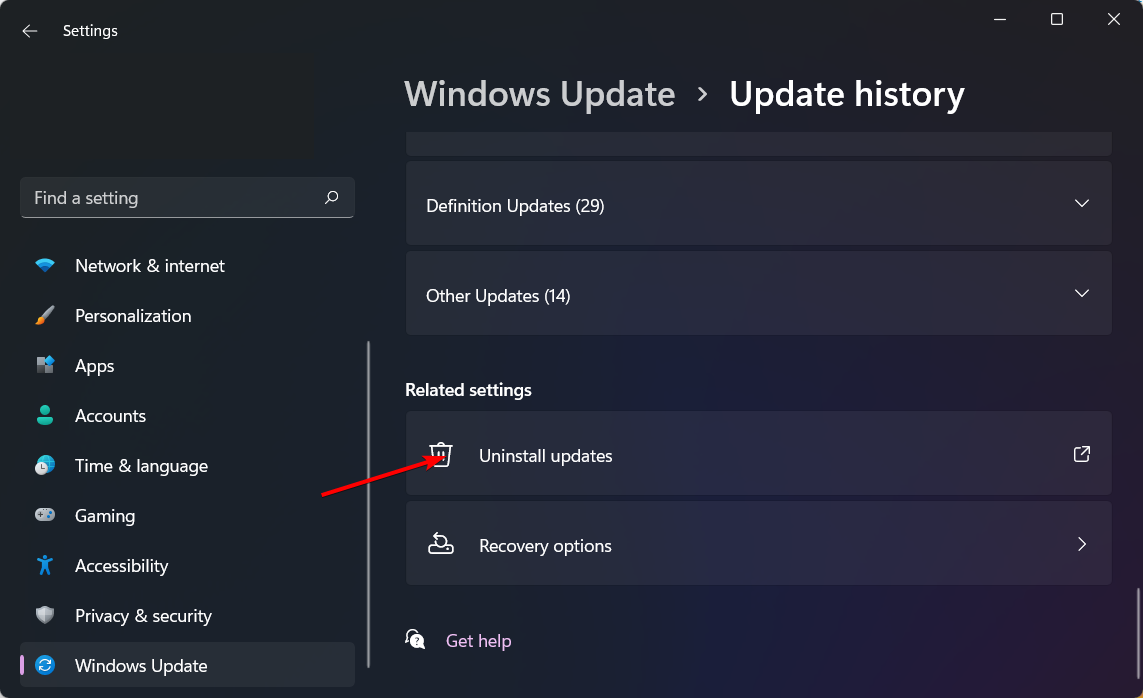
- This will take you to the most recent installed updates.
- Select the topmost update and click on Uninstall.
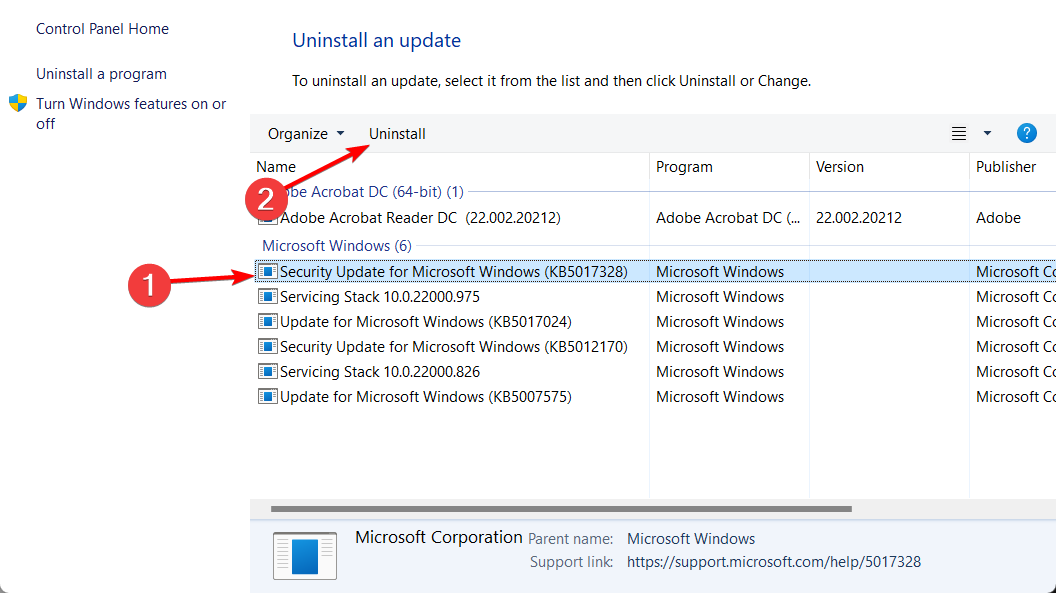
- Restart your PC and check if the problem persists.
Faulty Windows updates can sometimes cause problems with your audio. For instance, your speakers may produce a high pitched sound because the latest update interfered with your audio drivers.
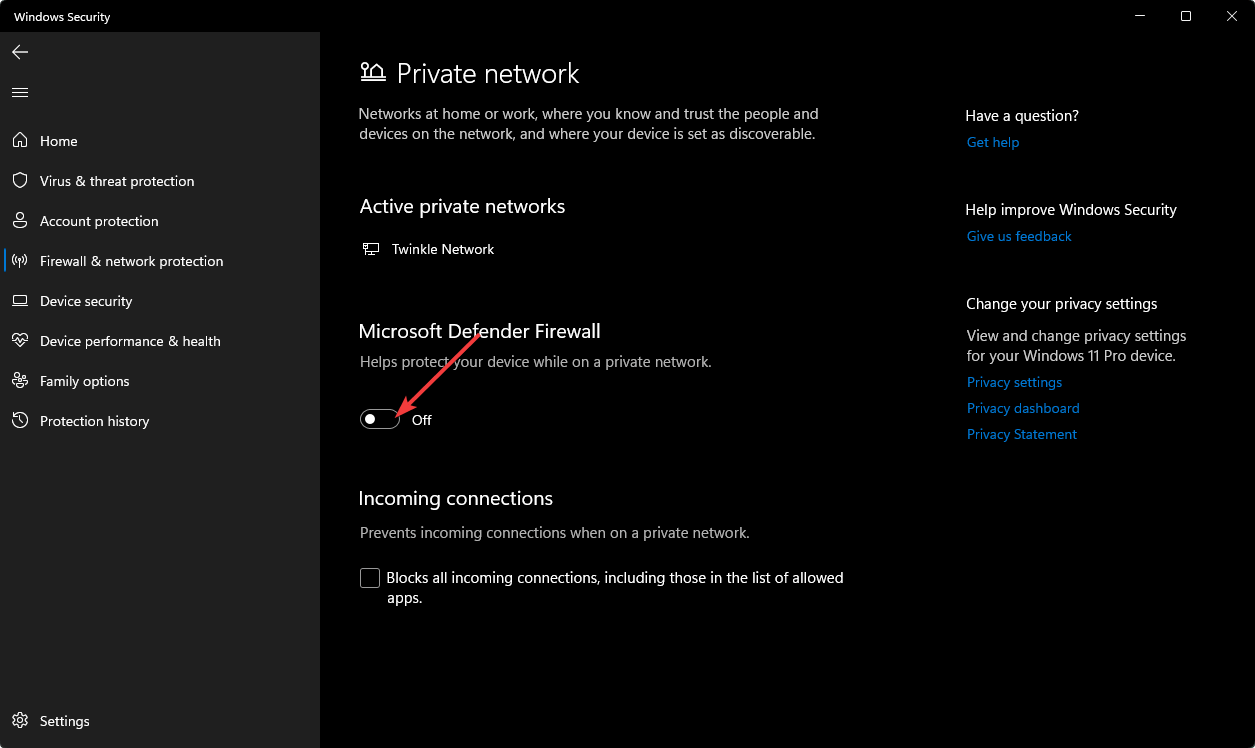
6. Disable your antivirus temporarily
- Hit the Windows key, type Windows Security in the search bar, and click Open.
- Click on Firewall & network protection, then select Public network.
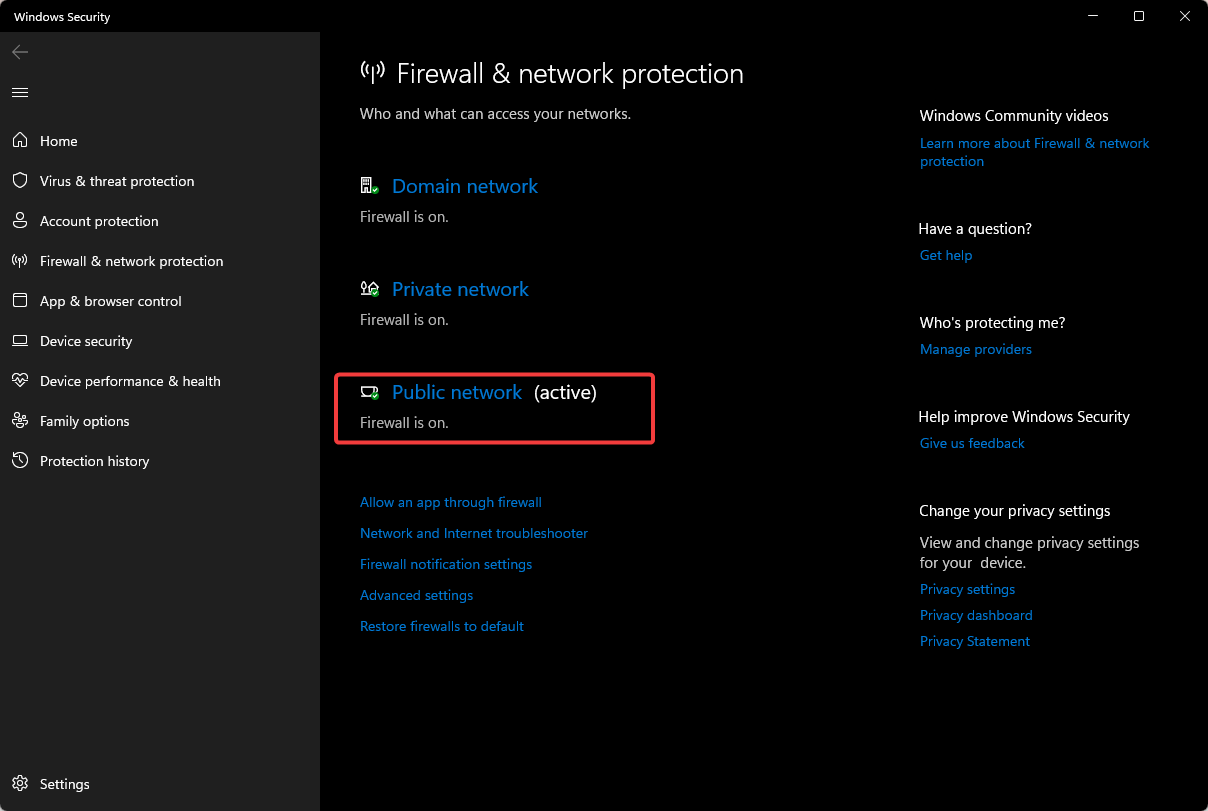
- Locate Microsoft Defender Firewall and toggle the off button.
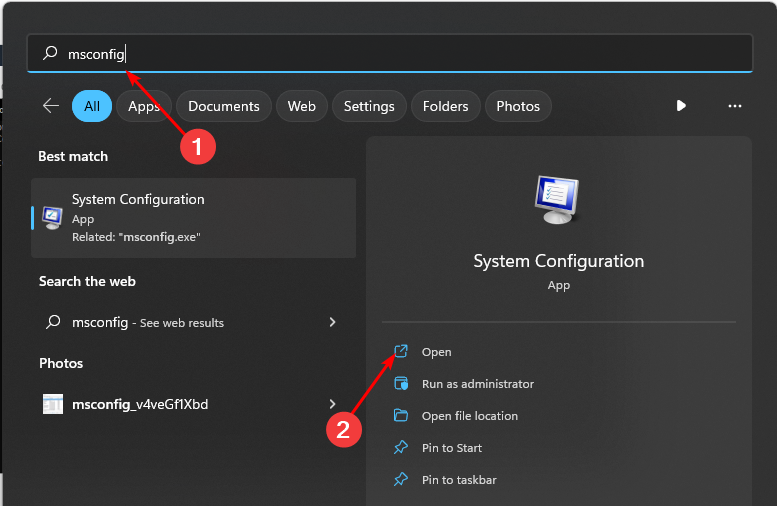
7. Perform a clean boot
- Hit the Windows key, type msconfig, and open System Configuration.
- Switch to the Services tab and select Hide all Microsoft services.
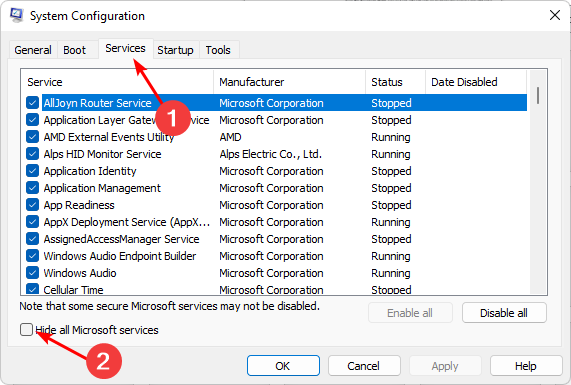
- Click on the Disable all button, then hit the Apply button to save the changes.
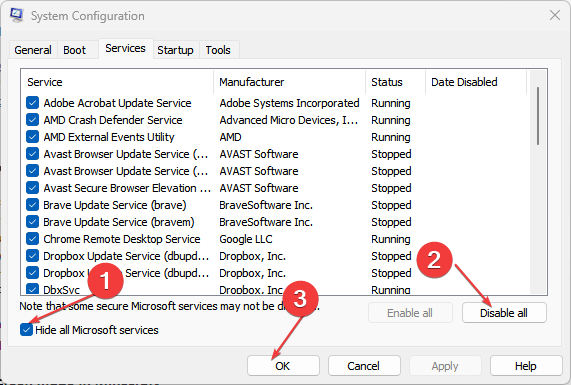
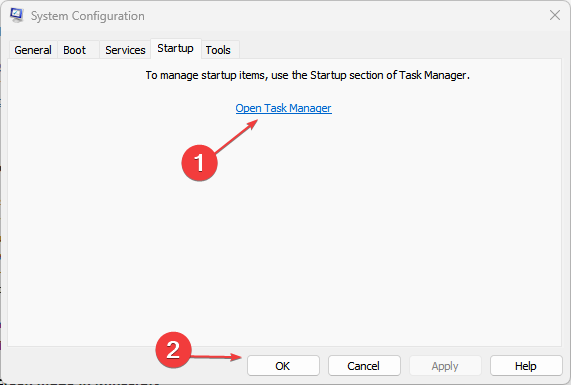
- Go back and click on the Startup tab, select Open Task Manager then click OK.
- In the Startup tab of the Task Manager, Disable all the Enabled startup items.
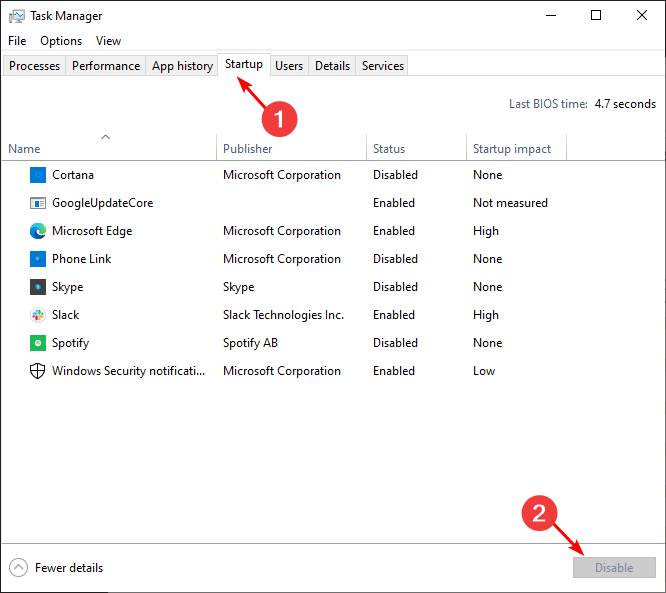
- Close Task Manager and restart your PC.
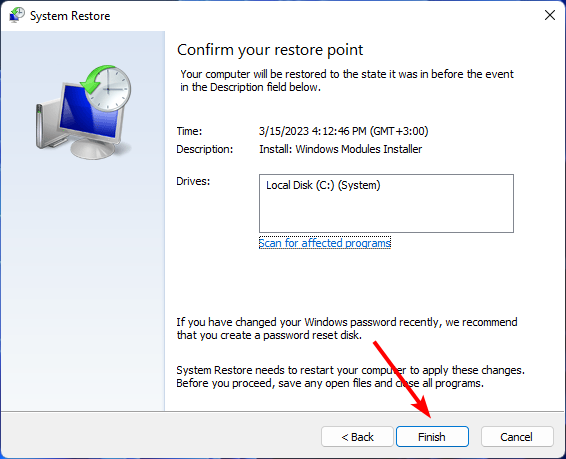
8. Perform a System Restore
- Press the Windows + R keys, type rstui, and hit Enter.
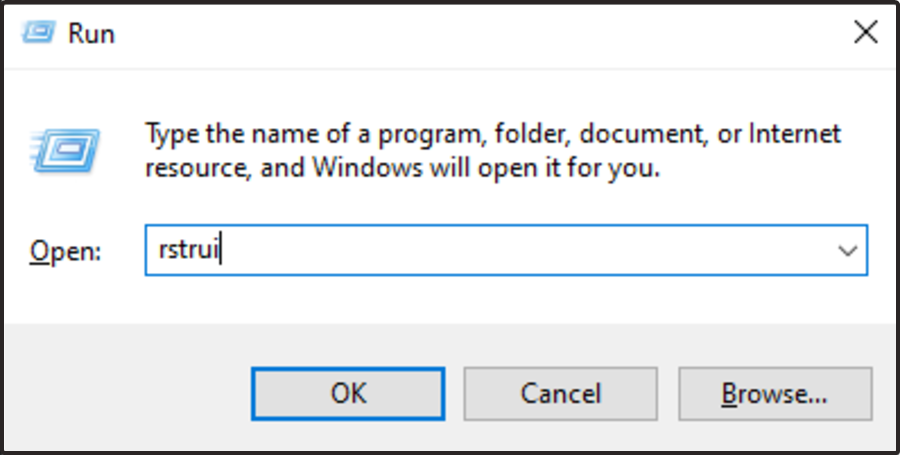
- The System Restore window will open. Click on Next.
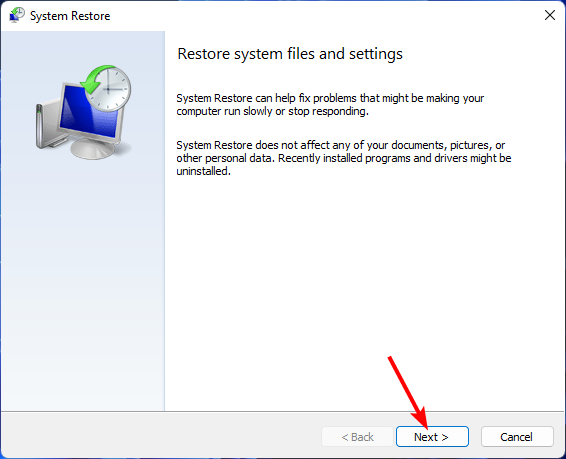
- Select the restore point you wish to revert to and click on Next.
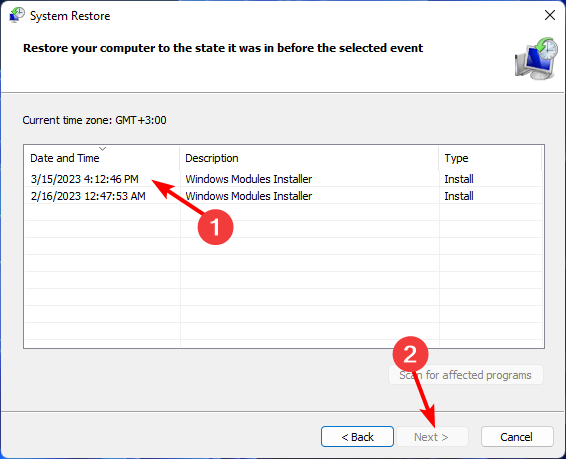
- Now click on Finish.
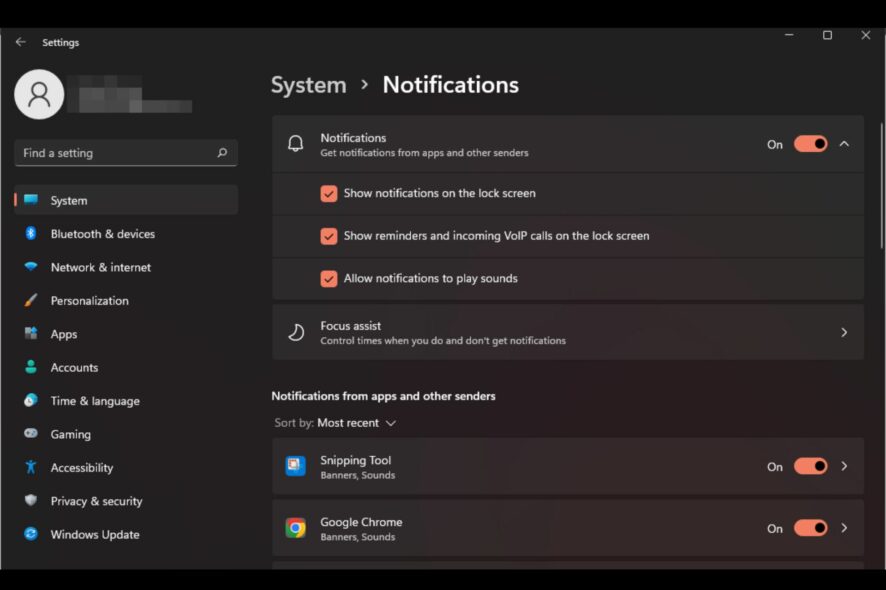
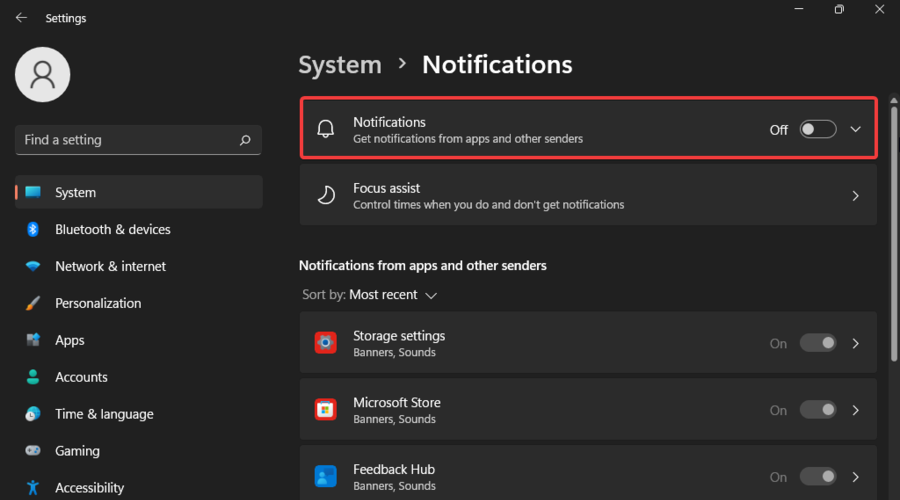
How do I permanently turn off all notification sounds on Windows 11?
- Hit the Windows key and click on Settings.
- Click on System then select Notifications.
- Toggle off the Notifications option.
Whenever you’re ready, you can reverse-engineer these steps to turn them back on.
Disabling all your notifications may give you peace of mind, but you may also miss out on important stuff. It is advisable to turn off notifications for that particular app causing problems and keep the rest.
Better yet, if it’s the notification sound that is annoying, you can easily change your notification sound to one that is more subtle to avoid distractions.
Still, in some rare cases, all these steps may prove futile. As a last resort, you may have to perform a clean install of your Windows OS.
We’d love to hear from you so let us know which one of these methods put an end to the chiming in the comment section below.
Read our disclosure page to find out how can you help Windows Report sustain the editorial team. Read more


Improve this guide


User forum
0 messages