How to Change Notification Sound in Windows 11
Customize your notifications with these easy steps
If you don’t like the default notification tone and want to change it, this guide can help! We will explain all the methods to change the notification sounds on Windows 11. Let’s get started!
What can I do to change the notification sound in Windows 11?
1. Use the Settings app
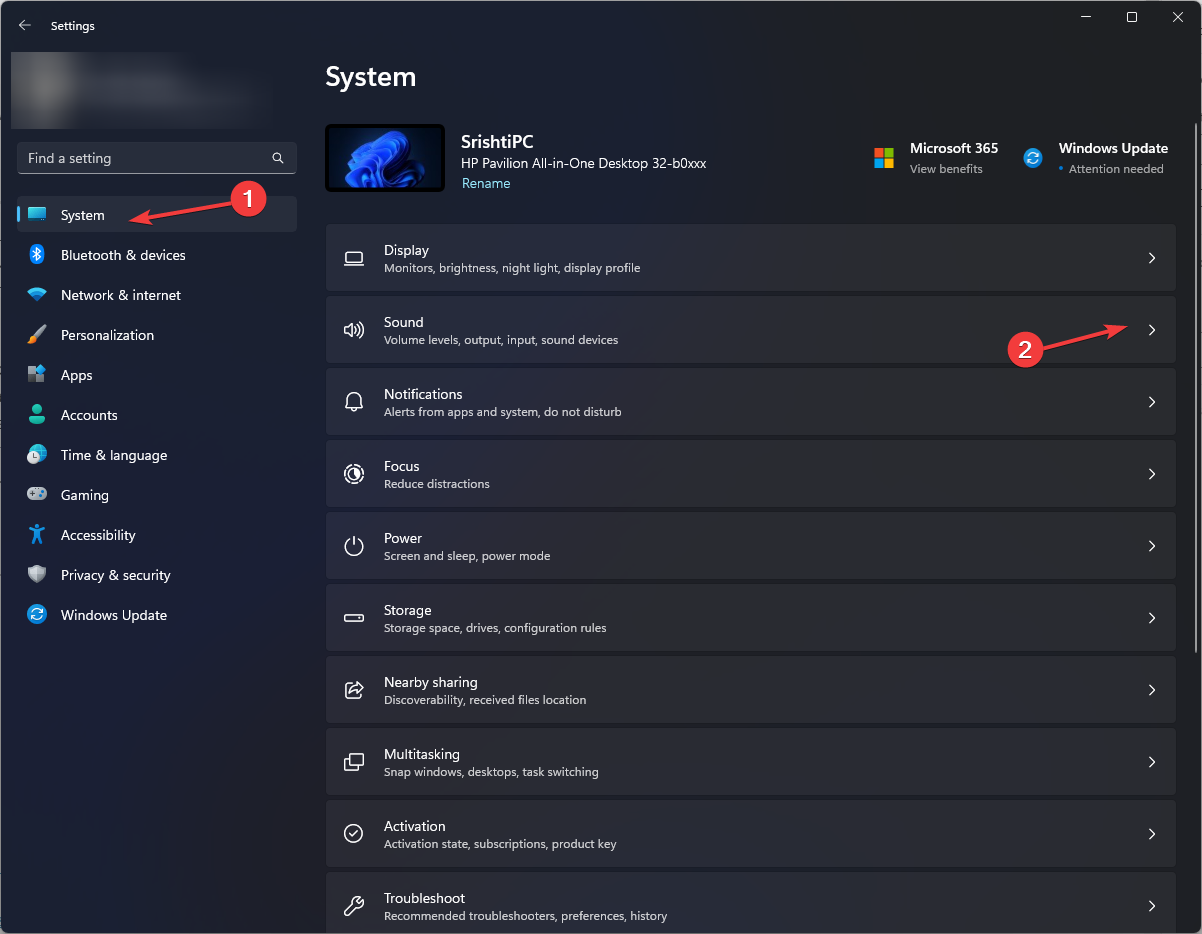
- Press Windows + I to open Settings.
- Go to System, and select Sound.
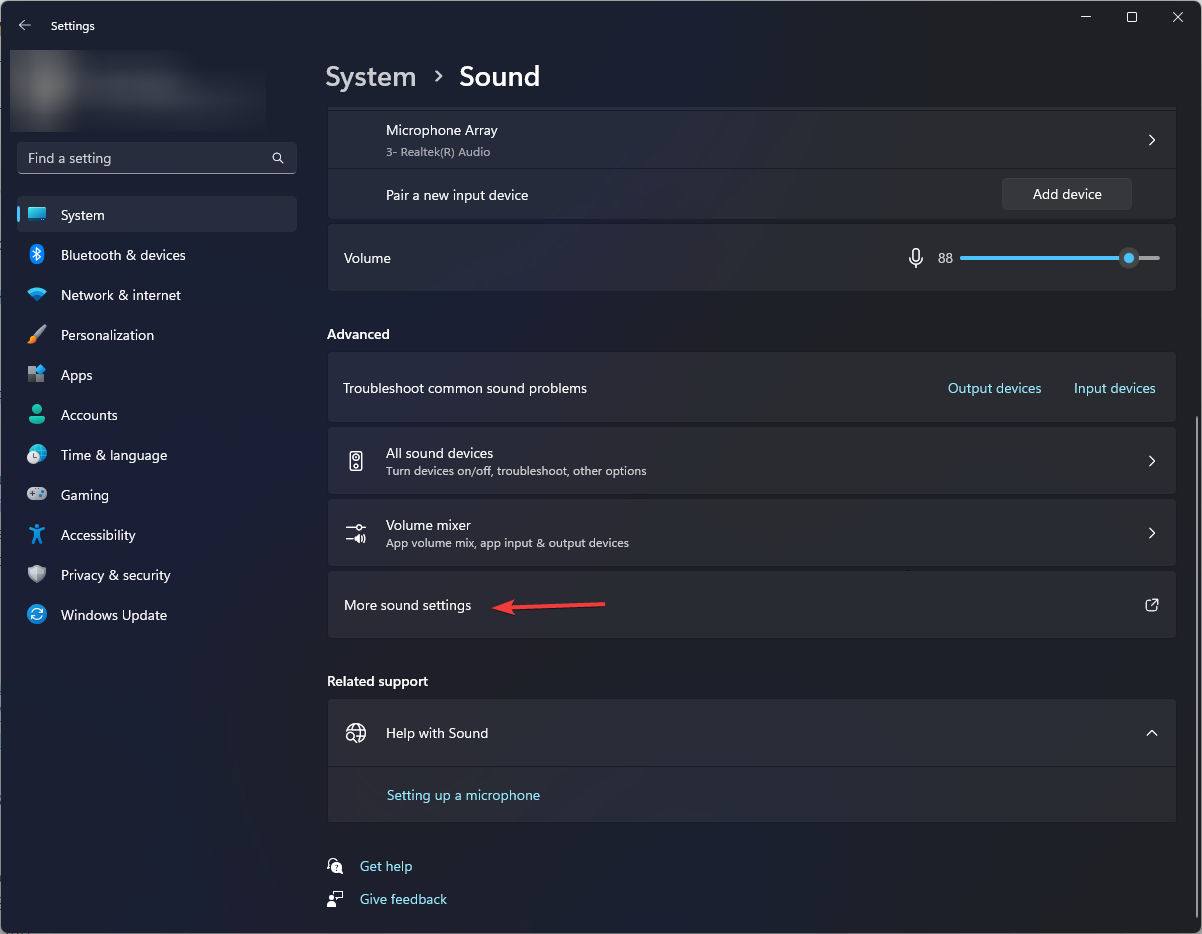
- Now go to the Advanced section and click More sound settings to open the Sound dialog box.
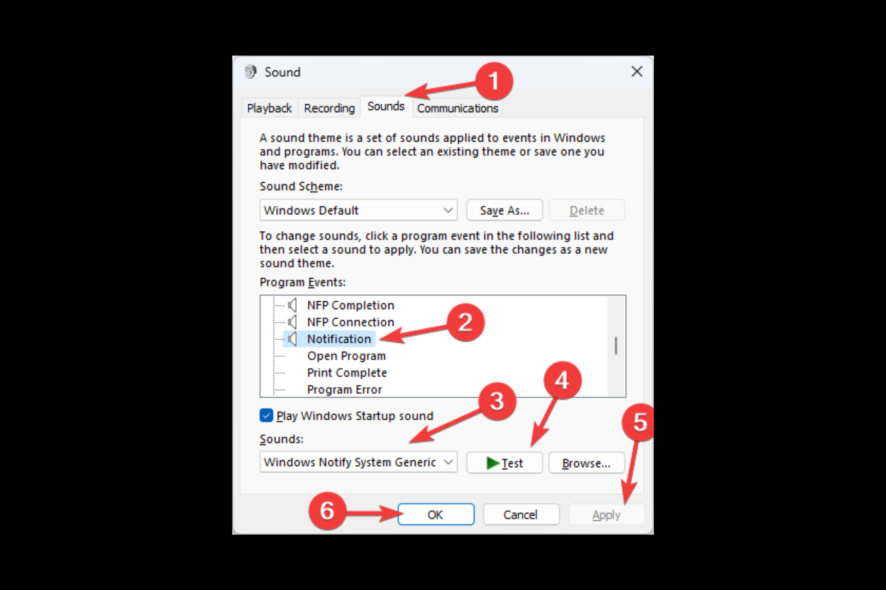
- Switch to the Sounds tab.
- Under Program Events, locate the Notification section.
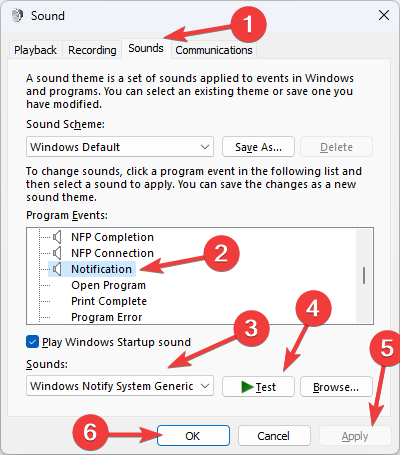
- Under Sounds, choose the sound, and click the Test button to hear a preview.
- Click Apply, then OK to confirm the changes.
2. Use the Control Panel
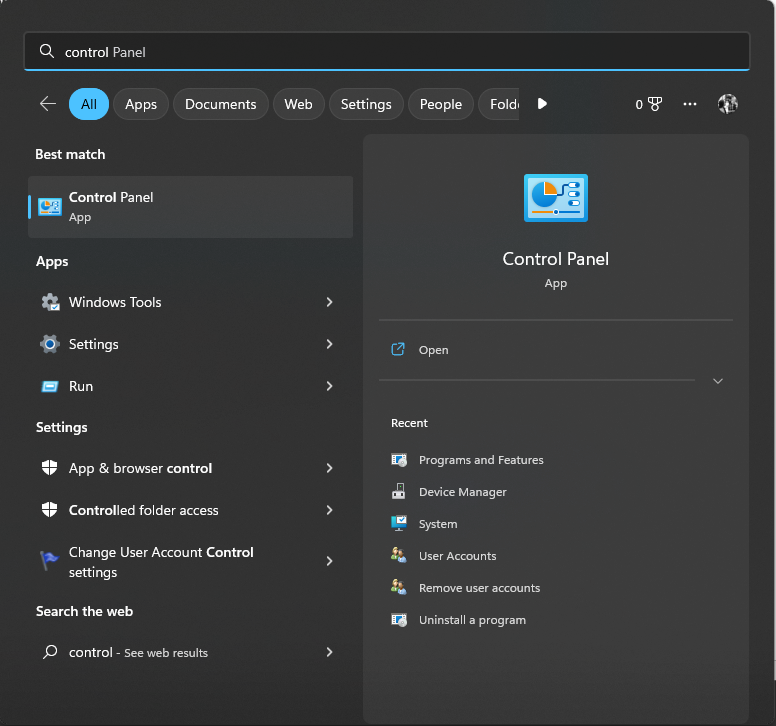
- Press the Windows key, type Control Panel, and click Open.
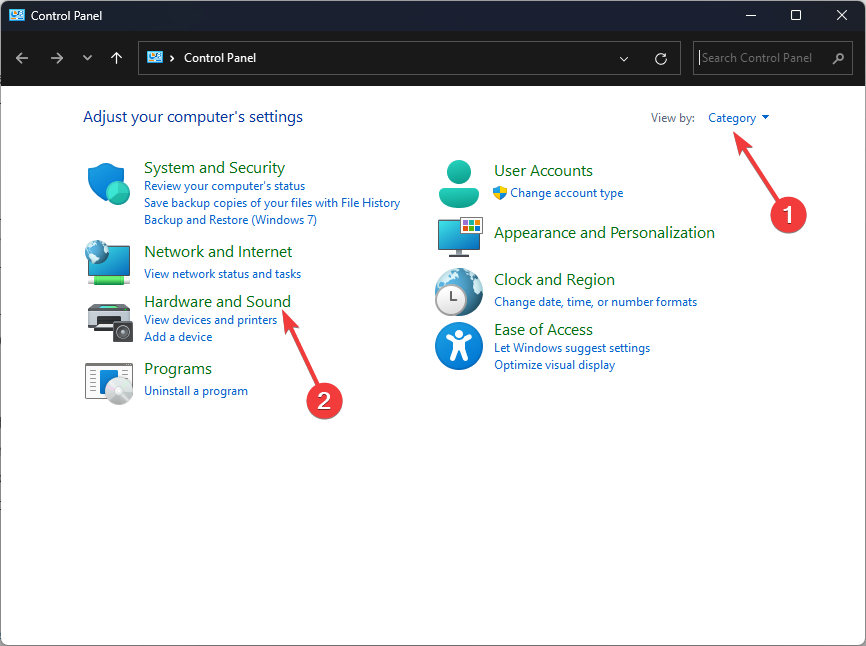
- Select View by as Category, and click Hardware and Sound.
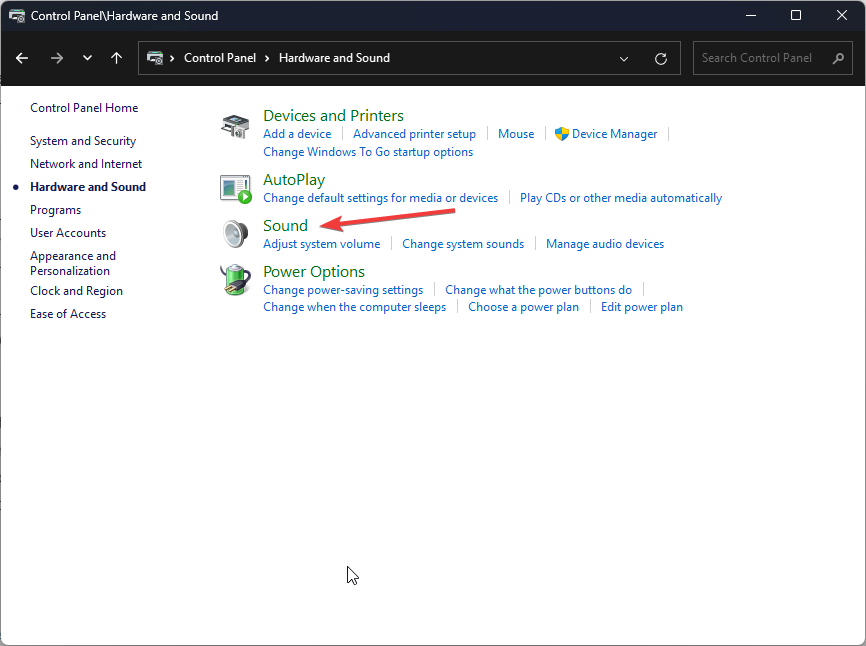
- Now click Sound.
- On the Sound dialog box, switch to the Sounds tab.
- Locate the Notification under Program Events.

- Under Sounds, click the drop-down menu and choose notification sound.
- Once selected, click the Test button to hear.
- Click Apply, then OK to save the changes.
3. Use the Personalization settings
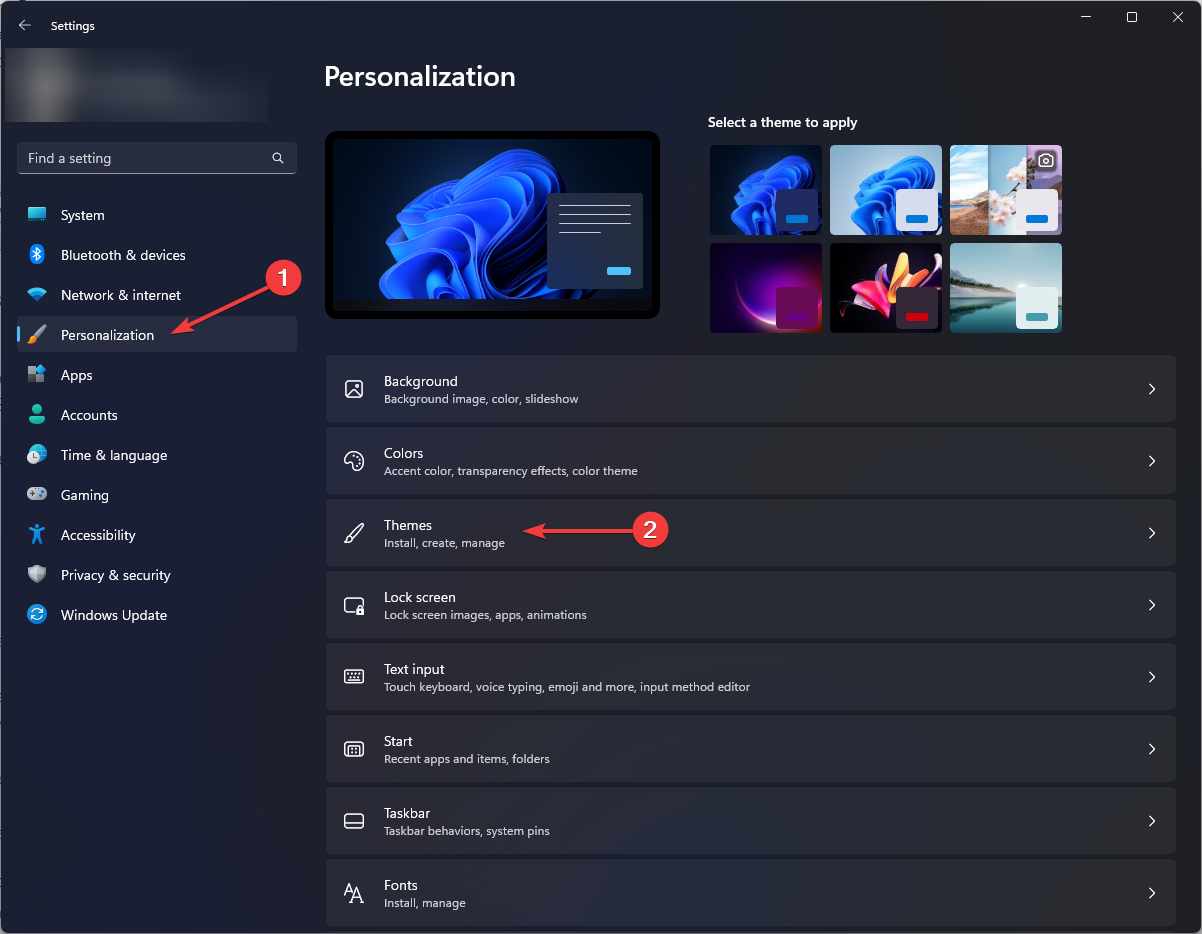
- Press Windows + I to open Settings.
- Go to Personalization, and click Themes.
- Locate Related settings and click the Sounds button.
- In the next window, go to the Sounds tab.
- Navigate to the Notification section under Program Events.
- Under Sounds, click the drop-down menu and choose a new sound.

- Click Test to hear the preview.
- Click Apply, then OK to apply the changes.
For broader customization beyond notification alerts, check this guide to change Windows sounds in Windows 11 for system events, themes, and more.
4. Use the Registry Editor
- Save the sound that you want to use and copy the path.
- Press Windows + R to open the Run dialog box.
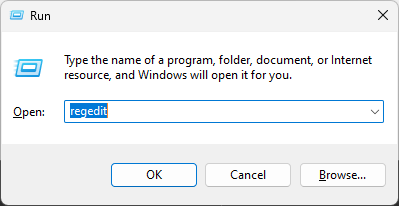
- Type regedit and click OK to open the Registry Editor.
- Navigate to this path:
Computer\HKEY_CURRENT_USER\AppEvents\Schemes\Apps.Default\Notification.Default.Current - Locate and double-click the Default to open the Properties.
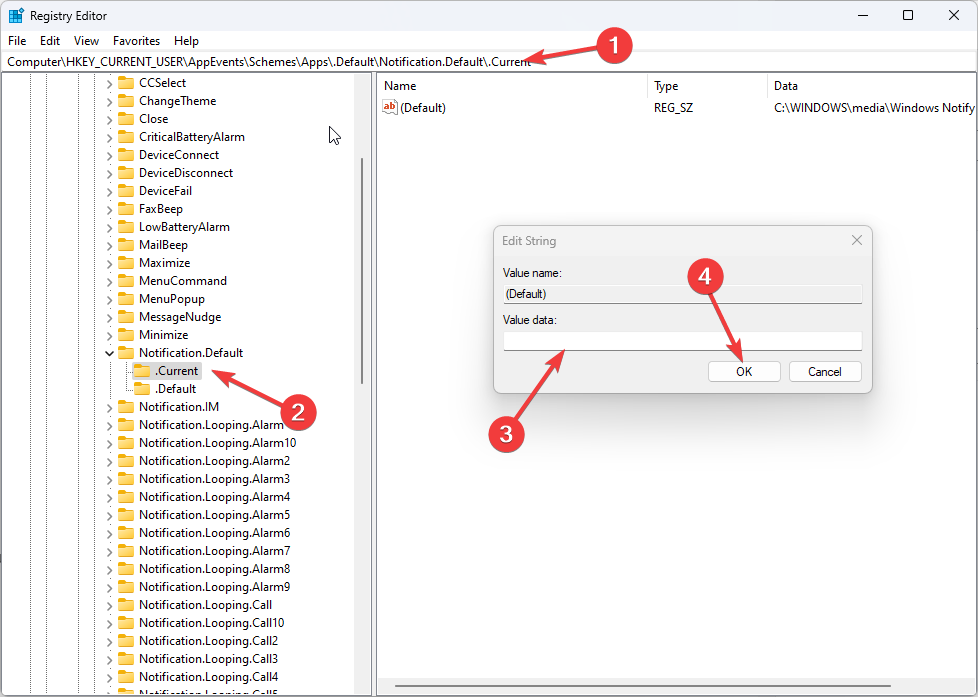
- In the Value data field, paste the path of the sound file and click OK.
- Restart your computer to save the changes.
And if your Windows 11 keeps chiming, we have an answer in our detailed article, but make sure you don’t end up with a situation where the notification sounds are not working at all. But if it happens, the highlighted guide will help you fix the problem.
If its push notifications not working, we also got you covered on that front. Before you go, we also have a guide on Windows 7 startup sound, so you might want to check it out for more information.
So, these are ways to change the notification sound on Windows 11. Try them and let us know what worked in the comments section below.
Read our disclosure page to find out how can you help Windows Report sustain the editorial team. Read more


Improve this guide


User forum
0 messages